Xerox 2006NPC DocuColor 2006 Performing Setup from WebSetup
Xerox 2006NPC - DocuColor Color Laser Manual
 |
UPC - 042215475440
View all Xerox 2006NPC manuals
Add to My Manuals
Save this manual to your list of manuals |
Xerox 2006NPC manual content summary:
- Xerox 2006NPC | DocuColor 2006 Performing Setup from WebSetup - Page 1
. To use Fiery WebSetup, you must enter the Administrator password. This is set either from the Printer Control Panel or Fiery WebSetup. Fiery WebSetup is supported for Windows 95/98, Windows 2000, and Windows NT4.0 workstations only. Xerox DocuColor 2006 19-1 - Xerox 2006NPC | DocuColor 2006 Performing Setup from WebSetup - Page 2
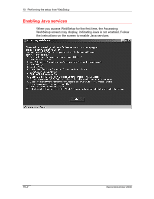
19. Performing the setup from WebSetup Enabling Java services When you access WebSetup for the first time, the Accessing WebSetup screen may display, indicating Java is not enabled. Follow the instructions on the screen to enable Java services. 19-2 Xerox DocuColor 2006 - Xerox 2006NPC | DocuColor 2006 Performing Setup from WebSetup - Page 3
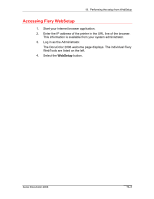
19. Performing the setup from WebSetup Accessing Fiery WebSetup 1. Start your Internet browser application. 2. Enter the IP address of the printer in the URL line of the browser. This information is available from your system administrator. 3. Log in as the Administrator. The DocuColor 2006 welcome - Xerox 2006NPC | DocuColor 2006 Performing Setup from WebSetup - Page 4
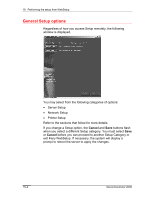
19. Performing the setup from WebSetup General Setup options Regardless of how you access Setup remotely, the following window is displayed. You may select from the following categories of options: • Server Setup • Network Setup • Printer Setup Refer to the sections that follow for more details. If - Xerox 2006NPC | DocuColor 2006 Performing Setup from WebSetup - Page 5
or remove server passwords; and specify job log page size and support options. 1. Select the Server Setup button from the WebSetup screen to one server, be sure to assign them different names. Windows NT 4.0 does not support two computers with the same name in the same workgroup or domain. b. Select - Xerox 2006NPC | DocuColor 2006 Performing Setup from WebSetup - Page 6
19. Performing the setup from WebSetup c. Select the Enable Printed Queue check box to create a storage location on the hard drive of the printer for the most recent print jobs. When this option is enabled (default), users with Administrator privileges can use the WebSpooler to reprint jobs in the - Xerox 2006NPC | DocuColor 2006 Performing Setup from WebSetup - Page 7
will have to be reinstalled. To remove a password, delete the asterisks (*) in both the Enter New Password and the Verify New Password fields. 3. Select the Support tab from the Server Setup tab and type in the relevant names, phone numbers, and e-mail addresses for your internal - Xerox 2006NPC | DocuColor 2006 Performing Setup from WebSetup - Page 8
, regardless of the network type you use. Protocols-including AppleTalk, IPX/SPX and TCP/IP. Print Services-including LPD printing (TCP/IP), NetWare printing (PServer), Windows print sharing (SMB), HTTP support (WWW), and Port 9100 printing. Once you enter IP addresses, the server will store them - Xerox 2006NPC | DocuColor 2006 Performing Setup from WebSetup - Page 9
19. Performing the setup from WebSetup 1. Select the Network Setup button from the WebSetup screen to display the Network Setup tabs. 2. If it is not already displayed, select the Port tab and perform the following: a. Select the Enable Ethernet check box if the printer is to be connected to an - Xerox 2006NPC | DocuColor 2006 Performing Setup from WebSetup - Page 10
19. Performing the setup from WebSetup b. Select the Enable Parallel Port check box if you want to print though the parallel port. This option enables you to connect a single Windows workstation to the parallel port and print directly to the printer. Enabling this option does not conflict with - Xerox 2006NPC | DocuColor 2006 Performing Setup from WebSetup - Page 11
19. Performing the setup from WebSetup 3. If you have an Ethernet or Token Ring network, select the Protocol1 tab from the Network Setup tabs. In this tab, you can specify the protocols used to send jobs to the printer. Unlike remote Setup, local Setup does not provide separate settings to enable a - Xerox 2006NPC | DocuColor 2006 Performing Setup from WebSetup - Page 12
19. Performing the setup from WebSetup 4. Select the Enable on Ethernet check box if you have a TCP/IP network connected to the printer over Ethernet cabling. If the check box is selected, the IP Auto and IP Static radio buttons and the Gateway address fields are enabled. a. Select the IP Auto - Xerox 2006NPC | DocuColor 2006 Performing Setup from WebSetup - Page 13
19. Performing the setup from WebSetup Enter one of the following values in the Subnet Mask text boxes: • 255.0.0.0 if the IP address starts with a number less than 128 • 255.255.0.0 if the IP address starts with a number in the range of 128-191 • 255.255.255.0 if the IP address starts with a number - Xerox 2006NPC | DocuColor 2006 Performing Setup from WebSetup - Page 14
19. Performing the setup from WebSetup 5. Select the Enable on Token Ring check box if you have a Token Ring network connected to the printer over Ethernet cabling. If the check box is selected, the IP Auto and IP Static radio buttons are enabled. a. Select the IP Auto radio button to enable the - Xerox 2006NPC | DocuColor 2006 Performing Setup from WebSetup - Page 15
19. Performing the setup from WebSetup 6. If you have an AppleTalk network, select the Protocol2 tab from the Network Setup tabs. In this tab, you can specify the AppleTalk protocols used to send jobs to the printer. a. In the AppleTalk box, select the Enable AppleTalk check box. b. From the Select - Xerox 2006NPC | DocuColor 2006 Performing Setup from WebSetup - Page 16
one of the following: a. Select the Auto Frames radio button to enable the server to select the appropriate frame to use with NetWare. b. Select the Manual Select radio button to add an IPX frame type. From the Select Frames drop down list, select the frame type and the Add button. The - Xerox 2006NPC | DocuColor 2006 Performing Setup from WebSetup - Page 17
enable the options on this tab. To enable PServer mode, an IPX frame type must be selected using the Select Frames button on the Network Services Protocol 2 tab. b. From the PServer Poll Interval drop down box, select how often (in seconds) the Novell Print server should poll the network for new - Xerox 2006NPC | DocuColor 2006 Performing Setup from WebSetup - Page 18
server name, and print queue root listed in both the NDS Configuration section of the dialog and the in the NDS Configuration section under the Service tab. To remove a tree, select the tree and the Remove button. 19-18 Xerox DocuColor 2006 - Xerox 2006NPC | DocuColor 2006 Performing Setup from WebSetup - Page 19
uppercase letters in the following fields. a. To enable Windows clients to print to the Hold, Print, and Direct queues, select the Enable Windows Printing Service check box to enable the options on this tab. TCP/IP must be configured on the Windows client workstation and the print server. b. Type - Xerox 2006NPC | DocuColor 2006 Performing Setup from WebSetup - Page 20
19. Performing the setup from WebSetup c. Type relevant information (up to 15 characters) about the server in the Comment text box. d. Type the network domain or workgroup (up to 15 characters) of the server in the Domain or Workgroup text box. e. Perform one of the following: • If you are using - Xerox 2006NPC | DocuColor 2006 Performing Setup from WebSetup - Page 21
19. Performing the setup from WebSetup Printer Setup Use the Printer Setup to specify the printer default page description language (pdl), paper size, and ability to print when Dry Ink is low. You can also set options for PostScript and PCL printing. 1. Select the Printer Setup button from the - Xerox 2006NPC | DocuColor 2006 Performing Setup from WebSetup - Page 22
along with the error message or the PostScript code if no image data was processed to that point. This information can be useful in troubleshooting PostScript files that will not print. Select No to cancel the job entirely whenever a PostScript error is encountered. The processed portion of the job - Xerox 2006NPC | DocuColor 2006 Performing Setup from WebSetup - Page 23
19. Performing the setup from WebSetup The following option available only when printing from Windows computers; it is not available in Remote Setup. 3. Select the Printer Setup tab to specify PCL printing options. Find PCL Setup under the printer name in the directory tree. For each of the - Xerox 2006NPC | DocuColor 2006 Performing Setup from WebSetup - Page 24
19. Performing the setup from WebSetup g. Select Internal or Softfont (Internal) from the Font Source drop down box. Internal fonts are built into printer memory and are listed on the PCL font list. Soft fonts are fonts that have been downloaded to the printer. h. Use the scroll box to specify the
-
 1
1 -
 2
2 -
 3
3 -
 4
4 -
 5
5 -
 6
6 -
 7
7 -
8
-
9
-
10
-
11
-
12
-
13
-
14
-
15
-
16
-
17
-
18
-
19
-
20
-
21
-
22
-
23
-
24
 |
 |

Xerox DocuColor 2006
19–1
Performing the setup from WebSetup
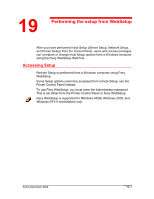
After you have performed initial Setup (Server Setup, Network Setup,
and Printer Setup) from the Control Panel, users with access privileges
can complete or change most Setup options from a Windows computer
using the Fiery WebSetup WebTool.
Accessing Setup
Remote Setup is performed from a Windows computer using Fiery
WebSetup.
Some Setup options cannot be accessed from remote Setup; use the
Printer Control Panel instead.
To use Fiery WebSetup, you must enter the Administrator password.
This is set either from the Printer Control Panel or Fiery WebSetup.
Fiery WebSetup is supported for Windows 95/98, Windows 2000, and
Windows NT4.0 workstations only.
19