Xerox 6400S WorkCentre 6400 System Administrator Guide - Page 104
Scanning to an Email Address, Editing Default Scan Settings, Managing the Email Address Book, - scanning issues
 |
UPC - 095205743579
View all Xerox 6400S manuals
Add to My Manuals
Save this manual to your list of manuals |
Page 104 highlights
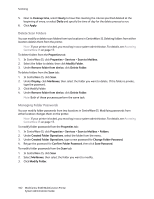
Scanning Scanning to an Email Address The Email feature allows users to scan a document and send it to an Email address as an attachment. Note: For instructions explaining how to use this feature, see the User Guide at www.xerox.com/office/WC6400docs. The Email feature allows users to scan a document and send it as an Email attachment to one or more Email addresses. Before you begin: • Configure SMTP settings. For details, see Configuring SMTP Server Settings on page 35. Note the IP Address or host name of your SMTP server. • Create an email account for the printer. The printer uses this address as the default text in the From: field of the email. Editing Default Scan Settings Note: If your printer is locked, you must log in as a system administrator. For details, see Accessing CentreWare IS on page 17. 1. In CentreWare IS, click Properties > Services > Email > Defaults. 2. Next to Scan Defaults, click Edit. Note: You can change default Email message options, scan options, file format options, and others. For details, click the Help link in CentreWare IS. Managing the Email Address Book To manage the email address book, see Internet Fax and Email Address Book on page 161. Troubleshooting Scan to Email Note: Configure your printer on the network or resolve any networking issues before attempting to use the Email feature. 1. Verify the network cable is attached and the printer is on. For details, see Physical Connection on page 14. 2. Verify your printer is installed on the network. For details, see The Installation Wizard on page 15. 3. Verify that TCP/IP is enabled. For details, see Enabling TCP/IP on page 22. 4. Ensure SMTP is enabled on the printer and verify the SMTP IP address or host name is correct. For details, see SMTP on page 35. 5. Verify the mail server is configured to accept SMTP mail. 6. Verify the printer's TCP/IP Domain Name, host name, and DNS settings are properly configured. For details, see Configuring SMTP Server Settings on page 35. 104 WorkCentre 6400 Multifunction Printer System Administrator Guide
-
 1
1 -
2
-
3
-
4
-
5
-
6
-
7
-
8
-
9
-
10
-
11
-
12
-
13
-
14
-
15
-
16
-
17
-
18
-
19
-
20
-
21
-
22
-
23
-
24
-
25
-
26
-
27
-
28
-
29
-
30
-
31
-
32
-
33
-
34
-
35
-
36
-
37
-
38
-
39
-
40
-
41
-
42
-
43
-
44
-
45
-
46
-
47
-
48
-
49
-
50
-
51
-
52
-
53
-
54
-
55
-
56
-
57
-
58
-
59
-
60
-
61
-
62
-
63
-
64
-
65
-
66
-
67
-
68
-
69
-
70
-
71
-
72
-
73
-
74
-
75
-
76
-
77
-
78
-
79
-
80
-
81
-
82
-
83
-
84
-
85
-
86
-
87
-
88
-
89
-
90
-
91
-
92
-
93
-
94
-
95
-
96
-
97
-
98
-
 99
99 -
 100
100 -
 101
101 -
 102
102 -
 103
103 -
 104
104 -
 105
105 -
 106
106 -
 107
107 -
 108
108 -
 109
109 -
110
-
111
-
112
-
113
-
114
-
115
-
116
-
117
-
118
-
119
-
120
-
121
-
122
-
123
-
124
-
125
-
126
-
127
-
128
-
129
-
130
-
131
-
132
-
133
-
134
-
135
-
136
-
137
-
138
-
139
-
140
-
141
-
142
-
143
-
144
-
145
-
146
-
147
-
148
-
149
-
150
-
151
-
152
-
153
-
154
-
155
-
156
-
157
-
158
-
159
-
160
-
161
-
162
-
163
-
164
-
165
-
166
-
167
-
168
-
169
-
170
-
171
-
172
-
173
-
174
-
175
-
176
-
177
-
178
-
179
-
180
-
181
-
182
-
183
-
184
 |
 |