Xerox 6400S WorkCentre 6400 User Guide
Xerox 6400S - WorkCentre Color Laser Manual
 |
UPC - 095205743579
View all Xerox 6400S manuals
Add to My Manuals
Save this manual to your list of manuals |
Xerox 6400S manual content summary:
- Xerox 6400S | WorkCentre 6400 User Guide - Page 1
WorkCentre® 6400 Color Multifunction Printer WorkCentre® 6400 User Guide English Français Guide d'utilisation Svenska Italiano Guida dell'utente Dansk Deutsch Benutzerhandbuch Norsk Español Guía del usuario Suomi Português Guia do usuário Čeština Nederlands Gebruikershandleiding Anvä - Xerox 6400S | WorkCentre 6400 User Guide - Page 2
CentreDirect®, CentreWare®, FinePoint™, Phaser®, PhaserSMART®, PrintingScout®, Walk-Up®, WorkCentre®, Global Print Driver™, X-GPD™, and the sphere of connectivity design, are trademarks of Xerox Corporation in the United States and/or other countries. Adobe Reader®, Adobe Type Manager®, ATM™, Flash - Xerox 6400S | WorkCentre 6400 User Guide - Page 3
3 Network Basics Choosing a Connection Method 30 Operating System Requirements 30 Connecting to a Printer on a Network 30 Connecting with USB 30 Assigning the Printer an IP Address 31 Accessing Quick Setup Home 31 IP Address Setup Wizard 31 WorkCentre 6400 Multifunction Printer 3 User Guide - Xerox 6400S | WorkCentre 6400 User Guide - Page 4
Sheet (N-Up 63 Printing Booklets 64 Using Color Corrections 65 Selecting Color Correction 65 Making Color Adjustments 65 Advanced Color Options - Press Match 66 Adjusting the Automatic Color Correction 67 Printing in Black and White 68 4 WorkCentre 6400 Multifunction Printer User Guide - Xerox 6400S | WorkCentre 6400 User Guide - Page 5
the Printer to Send a Server Fax 109 Configuring a Fax Repository 109 Sending a Server Fax 110 Sending an Internet Fax 111 Receiving Faxes 112 Configuring the Printer to Receive a Fax 112 Configuring the Printer to Receive an Internet Fax 112 WorkCentre 6400 Multifunction Printer 5 User Guide - Xerox 6400S | WorkCentre 6400 User Guide - Page 6
135 Managing Xerox Scan Utility Folder and Email Profiles 136 Using the Scan to Email and Copy to Folder Tools 138 Importing Scanned Files into an Application 142 Scan to File 145 Scan to E-mail 146 Setting E-mail Options 147 Scan to Home 148 6 WorkCentre 6400 Multifunction Printer User Guide - Xerox 6400S | WorkCentre 6400 User Guide - Page 7
179 Duplex Problems 179 Scanner Error 179 Front Door Will Not Close 179 Right Side Door Will Not Close 180 Paper Feed Problems 181 Clearing Paper Jams or Misfeeds 181 Minimizing Paper Jams 197 Troubleshooting Paper Feed Problems 198 WorkCentre 6400 Multifunction Printer 7 User Guide - Xerox 6400S | WorkCentre 6400 User Guide - Page 8
Memory 226 Interfaces 226 A Regulatory Information Basic Regulations 228 United States (FCC Regulations 228 Canada (Regulations 228 European Union 229 Ozone Release 229 Copy Regulations 230 United States 230 Canada 231 Other Countries 232 8 WorkCentre 6400 Multifunction Printer User Guide - Xerox 6400S | WorkCentre 6400 User Guide - Page 9
234 Europe 235 South Africa 235 New Zealand Telecom Warning Notice 236 Material Safety Data Sheets 237 B Recycling and Disposal Guidelines and Information 240 All Countries 240 European Union 240 North America 242 Other Countries 242 Index WorkCentre 6400 Multifunction Printer 9 User Guide - Xerox 6400S | WorkCentre 6400 User Guide - Page 10
10 WorkCentre 6400 Multifunction Printer User Guide - Xerox 6400S | WorkCentre 6400 User Guide - Page 11
Safety on page 15 • Product Symbols on page 16 Your printer and the recommended supplies have been designed and tested to meet strict safety requirements. Attention to the following information ensures the continued safe operation of your printer. WorkCentre 6400 Multifunction Printer 11 User Guide - Xerox 6400S | WorkCentre 6400 User Guide - Page 12
misused. • Do not use an extension cord or power strip. • Verify that the product is plugged into an outlet that is capable of providing the correct voltage and power. Review the product's electrical specification with an electrician if necessary. 12 WorkCentre 6400 Multifunction Printer User Guide - Xerox 6400S | WorkCentre 6400 User Guide - Page 13
to disconnect all electrical power from the product, disconnect the power cord from the electrical outlet. Telephone Line Cord Caution: To reduce the risk of fire, use only No. 26 American Wire Gauge (AWG) or larger telecommunication line cord. WorkCentre 6400 Multifunction Printer 13 User Guide - Xerox 6400S | WorkCentre 6400 User Guide - Page 14
Xerox supplies, or the use of Xerox supplies not specified for this product. The Total Satisfaction Guarantee is available in the United States and Canada. Coverage may vary outside these areas; please contact your local representative for details. 14 WorkCentre 6400 Multifunction Printer User Guide - Xerox 6400S | WorkCentre 6400 User Guide - Page 15
supplied with your product. • Do not use aerosol cleaners. Clean with a dry lint-free cloth only. • Do not burn any consumables or routine maintenance items. For information on Xerox supplies recycling programs, go to www.xerox.com/gwa. WorkCentre 6400 Multifunction Printer 15 User Guide - Xerox 6400S | WorkCentre 6400 User Guide - Page 16
this symbol as personal injury could result. Do not burn the item. Hot surface. Wait 45 minutes (do not print) before handling. Do not apply weight to surface. 16 WorkCentre 6400 Multifunction Printer User Guide - Xerox 6400S | WorkCentre 6400 User Guide - Page 17
Features This chapter includes: • Parts of the Printer on page 18 • Printer Configurations on page 20 • Control Panel on page 22 • Administrator Access on page 26 • More Information on page 27 2 WorkCentre 6400 Multifunction Printer 17 User Guide - Xerox 6400S | WorkCentre 6400 User Guide - Page 18
7 7. Tray 1 6400-005 6 1. Tray 4 (option) 5 2. Tray 3 (option) 4 3. Stapler cover (finisher right door) 4. Finisher (option) 3 5. Lower (main) output tray (in optional finisher) 6. Upper (sub) output tray (in optional finisher) 2 1 6400-004 18 WorkCentre 6400 Multifunction Printer User Guide - Xerox 6400S | WorkCentre 6400 User Guide - Page 19
Components 1 2 6400-008 4. Foreign device interface connection 5. USB connection 6. Ethernet connection 1 2 Y 3 1. Toner cartridge x4 2. Imaging unit x4 3. Waste cartridge 4 5 6 4. Fuser 5. Transfer Roller 6. Transfer Belt 6400-151 WorkCentre 6400 Multifunction Printer 19 User Guide - Xerox 6400S | WorkCentre 6400 User Guide - Page 20
DADF) • Legal size Document Glass • 1GB RAM memory • Hard drive that provides feature support for special job types and additional forms and macros • PostScript and PCL fonts • USB and Ethernet 10/100/1000Base-TX connections Available Configurations The WorkCentre 6400 printer is available in three - Xerox 6400S | WorkCentre 6400 User Guide - Page 21
. Use with the base printer model (6400S) or with one or two optional 500-Sheet Feeders. • Wireless Network Adapter: Enables the printer to connect to a wireless network For more information on options, go to www.xerox.com/office/WC6400supplies. WorkCentre 6400 Multifunction Printer 21 User Guide - Xerox 6400S | WorkCentre 6400 User Guide - Page 22
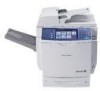
# Stop Start Left side • Services Home • Features • Job Status • Machine Status • Language Middle • Touch screen controls/display Right side 6400-010 • Alphanumeric Keypad • Log In/Out • Help • Clear All • Interrupt Printing • Stop • Start 22 WorkCentre 6400 Multifunction Printer User Guide - Xerox 6400S | WorkCentre 6400 User Guide - Page 23
you to load paper, replace supplies, and clear jams. • Displays any errors or warnings. When you press the Features button on the left side of the control panel, the control panel screen displays the currently enabled copy, scan and fax features. WorkCentre 6400 Multifunction Printer 23 User Guide - Xerox 6400S | WorkCentre 6400 User Guide - Page 24
when the printer is in energy saving mode. 5. Clear All Press once to return to the default main menu. All job settings are reset to default. 6400-013 6. Interrupt Printing Press to pause a print job. Press this button again to resume printing. This button does not pause copy, scan or fax - Xerox 6400S | WorkCentre 6400 User Guide - Page 25
and setting names of your printer. Configuration Report An information page called the Configuration Report lists information about the current configuration of your printer, and is useful for network analysis and general troubleshooting. WorkCentre 6400 Multifunction Printer 25 User Guide - Xerox 6400S | WorkCentre 6400 User Guide - Page 26
1111) (default) and click Login. 4. From the Security menu on the left, select Setup. 5. Select Edit... next to the admin account. 6. Enter a New Password and enter it again in the Retype Password field. 7. Click Edit User to save the new password. 26 WorkCentre 6400 Multifunction Printer User Guide - Xerox 6400S | WorkCentre 6400 User Guide - Page 27
.com/paper (United States) www.xerox.com/europaper (Europe) www.xerox.com/office/WC6400drivers www.xerox.com/office/WC6400support www.xerox.com/office/support Control panel Help button Print from the control panel www.xerox.com/office/WC6400docs WorkCentre 6400 Multifunction Printer 27 User Guide - Xerox 6400S | WorkCentre 6400 User Guide - Page 28
manuals and video tutorials • Solutions to troubleshooting problems • Printer and supplies status • Supplies ordering and recycling • Answers to frequently asked questions • Default printer driver settings Note: You can install the Xerox Support Centre utility from the Xerox Drivers and Downloads - Xerox 6400S | WorkCentre 6400 User Guide - Page 29
Network Basics This chapter includes: • Choosing a Connection Method on page 30 • Assigning the Printer an IP Address on page 31 • Installing the Printer Drivers on page 33 See also: Online Support Assistant at www.xerox.com/office/WC6400support 3 WorkCentre 6400 Multifunction Printer 29 User - Xerox 6400S | WorkCentre 6400 User Guide - Page 30
end to the printer's USB port. Note: Cables are not included with your printer and must be purchased separately. See also: System Administrator Guide at www.xerox.com/office/WC6400docs Online Support Assistant at www.xerox.com/office/WC6400support 30 WorkCentre 6400 Multifunction Printer User Guide - Xerox 6400S | WorkCentre 6400 User Guide - Page 31
TCP/IP settings. c. If the DHCP server was unable to assign an IP address automatically, contact your system administrator. d. Select Next to continue. To manually assign the IP address: a. Select Use a Static IP Address, and then select Next. WorkCentre 6400 Multifunction Printer 31 User Guide - Xerox 6400S | WorkCentre 6400 User Guide - Page 32
to Quick Setup Home. 5. Select Close to exit Quick Setup Home. If your computer is on a large network or you are unsure of the appropriate network configuration settings, contact your network administrator, or see the System Administrator Guide. 32 WorkCentre 6400 Multifunction Printer User Guide - Xerox 6400S | WorkCentre 6400 User Guide - Page 33
allows you to access all of the printing options of your printer from a Macintosh. This driver enables printing from a UNIX or Linux operating system. Go to www.xerox.com/office/WC6400drivers for the latest print driver information and downloads. WorkCentre 6400 Multifunction Printer 33 User Guide - Xerox 6400S | WorkCentre 6400 User Guide - Page 34
installation is complete, the Installation Complete window will appear. Set the printer as the default printer and print a test page if desired. 9. Click Finish. 10. If you do not have the Software and Documentation CD-ROM, you can download the driver at www.xerox.com/office/WC6400drivers, and use - Xerox 6400S | WorkCentre 6400 User Guide - Page 35
. Installing the Drivers - USB Connection 1. Click Start > Settings > Printer and Faxes. 2. Double click Add Printer. 3. Follow the instructions in the Add Printer Wizard. See also: Online Support Assistant at www.xerox.com/office/WC6400support WorkCentre 6400 Multifunction Printer 35 User Guide - Xerox 6400S | WorkCentre 6400 User Guide - Page 36
) Your printer supports connection to a variety of UNIX platforms through the network interface. The workstations currently supported by CentreWare for UNIX/Linux to a network-connected printer are: • Sun Solaris • IBM AIX • Hewlett-Packard HP-UX 36 WorkCentre 6400 Multifunction Printer User Guide - Xerox 6400S | WorkCentre 6400 User Guide - Page 37
• Linux (i386) • Linux (PPC) See also: System Administrator Guide at www.xerox.com/office/WC6400docs Network Basics WorkCentre 6400 Multifunction Printer 37 User Guide - Xerox 6400S | WorkCentre 6400 User Guide - Page 38
network (in Windows, Macintosh, or UNIX environments). TCP/IP and HTTP must be enabled in the printer, and a browser that supports JavaScript is required. If JavaScript is disabled, a warning message appears and CentreWare IS may not function properly. 38 WorkCentre 6400 Multifunction Printer User - Xerox 6400S | WorkCentre 6400 User Guide - Page 39
page 75 • Printing Mirror Images on page 77 • Creating and Saving Custom Sizes on page 78 • Job Completion Notification on page 79 • Printing Special Job Types on page 80 See also: Paper Trays video tutorials at www.xerox.com/office/WC6400docs 4 WorkCentre 6400 Multifunction Printer 39 User Guide - Xerox 6400S | WorkCentre 6400 User Guide - Page 40
settings in your software application (CTRL+P in Windows, CMD+P on a Macintosh for most software applications). 4. Select your printer from the list. 5. Access the printer driver settings by selecting Properties or Preferences (Windows), Xerox Features for Macintosh. The title of the button may vary - Xerox 6400S | WorkCentre 6400 User Guide - Page 41
for your WorkCentre 6400 printer. Recommended Media A complete regularly updated list of recommended media types is available: • www.xerox.com/paper Recommended Media List (United States) • www.xerox.com/europaper Recommended Media List (Europe) You can also print a summary of supported media (the - Xerox 6400S | WorkCentre 6400 User Guide - Page 42
perforations • Stapled paper • Envelopes with windows, metal clasps, side seams, or adhesives with release strips • Padded envelopes • Plastic media other than supported transparencies Paper unused media in the bag and reseal it for protection. 42 WorkCentre 6400 Multifunction Printer User Guide - Xerox 6400S | WorkCentre 6400 User Guide - Page 43
Tray 1 accepts a maximum of: • 100 sheets of plain paper (20 lb. Bond) • 20 transparencies, postcards, sheets of labels, or sheets of glossy paper • 10 envelopes WorkCentre 6400 Multifunction Printer 43 User Guide - Xerox 6400S | WorkCentre 6400 User Guide - Page 44
Printing To load paper or other media in Tray 1: 1. Open Tray 1 by pulling it outward and opening the tray extension. 2. Adjust the paper guides. 1 2 6400-020 6400-021 44 WorkCentre 6400 Multifunction Printer User Guide - Xerox 6400S | WorkCentre 6400 User Guide - Page 45
the fill line indicated on the tray. Overloading the tray may cause jams. 5. Adjust the paper guides to fit the paper loaded in the tray. 6400-025 6. On the printer's control panel, select the paper size, type, and color, and then select Confirm. WorkCentre 6400 Multifunction Printer 45 User Guide - Xerox 6400S | WorkCentre 6400 User Guide - Page 46
only be loaded in Tray 1. To load envelopes in Tray 1: 1. Make sure Tray 1 is closed. 2. Lift the lever on the printer's right side to open the right side door. 6400-027 Warning: The area around the fuser may be hot. Use caution to avoid injury. 46 WorkCentre 6400 Multifunction Printer User Guide - Xerox 6400S | WorkCentre 6400 User Guide - Page 47
Printing 3. On both the left and right sides of the fuser, turn the fuser setting (grey dials) from Plain Paper to Envelope. 4. Close the right side door. 6400-028 6400-030 WorkCentre 6400 Multifunction Printer 47 User Guide - Xerox 6400S | WorkCentre 6400 User Guide - Page 48
10 envelopes in Tray 1 with the flap side up. For envelopes with the flap along the long edge, load the envelopes with the flap toward the right side of Tray 1. Note: To minimize flaps are firmly pressed. Some wrinkling or embossing may still occur. 48 WorkCentre 6400 Multifunction Printer User Guide - Xerox 6400S | WorkCentre 6400 User Guide - Page 49
8. Adjust the paper guides to fit the envelope. 6400-031 6400-032 9. On the printer's control panel display, select the envelope size, type, and color, and then select Confirm. Note: Make sure to turn the grey dials on the fuser back to the plain paper setting when finished printing envelopes to - Xerox 6400S | WorkCentre 6400 User Guide - Page 50
Width guides: Press the green lever on the side of the guide, and move the guide so that it is aligned with the appropriate paper size imprinted on the paper lifting plate. 3. Press down on the paper-lifting plate until it locks into place. 50 WorkCentre 6400 Multifunction Printer User Guide 6400 - Xerox 6400S | WorkCentre 6400 User Guide - Page 51
left of the tray. • 2-sided printing: Insert side one facedown with the top of the page toward the right of the tray. 6400-039 6400-040 Note: Do not load paper or media above the fill line indicated on the tray. Overloading the tray may cause jams. WorkCentre 6400 Multifunction Printer 51 User Guide - Xerox 6400S | WorkCentre 6400 User Guide - Page 52
Printing 5. Push the tray completely into the printer. 6400-041 6. On the printer's control panel display, select the paper size, color, and type in the tray, and then select Confirm. 52 WorkCentre 6400 Multifunction Printer User Guide - Xerox 6400S | WorkCentre 6400 User Guide - Page 53
with stripes on the side. • Do not fan transparencies. • After loading transparencies, change the paper type at the printer's control panel. • In the printer driver, select either Transparency as the paper type or Tray 1 as the paper source. WorkCentre 6400 Multifunction Printer 53 User Guide - Xerox 6400S | WorkCentre 6400 User Guide - Page 54
or cold conditions. Storing them in extreme conditions may cause print quality problems or cause them to jam in the printer. • Rotate stock frequently. Long periods of storage in extreme conditions can cause labels to curl and jam in the printer. 54 WorkCentre 6400 Multifunction Printer User Guide - Xerox 6400S | WorkCentre 6400 User Guide - Page 55
mm (7.0-8.5 in.) 257-300 mm (10.1-11.8 in.) 60-150 g/m2 Note: Print custom size paper from Tray 1 only. If inserted one page at a time, long edge 2-sided paper can be up to 356 mm (14.0 in.) WorkCentre 6400 Multifunction Printer 55 User Guide - Xerox 6400S | WorkCentre 6400 User Guide - Page 56
a Set of Commonly Used Printing Options in Windows on page 58 • Printing Options for Macintosh on page 59 • Selecting Options for an Individual Job for Macintosh on page 59 • Saving a Set of Commonly Used Printing Options for Macintosh on page 59 56 WorkCentre 6400 Multifunction Printer User Guide - Xerox 6400S | WorkCentre 6400 User Guide - Page 57
reports, toner and paper tray gauges are available in all tabs. Note: For more information about Windows printer driver options, click the Help button in the lower right-hand corner of any tab in the Properties or Printing Preferences window. WorkCentre 6400 Multifunction Printer 57 User Guide - Xerox 6400S | WorkCentre 6400 User Guide - Page 58
Default Printing Options for Windows When you print from any software application, the printer uses the print job settings specified in the Printing Preferences window Select the WorkCentre 6400 printer and click the Properties button to open the Printing Preferences window. This button is labeled - Xerox 6400S | WorkCentre 6400 User Guide - Page 59
PostScript printer driver. Tab Paper/Output Special Pages Layout/Watermark Color Options Advanced Printing Options Job type Paper size, paper color, paper type, and tray selection Transparency separators 2-sided printing Print quality Stapling and output destination (if finisher installed - Xerox 6400S | WorkCentre 6400 User Guide - Page 60
complete list of supported media sizes System Steps Windows Vista, Windows 2000, Windows XP, or Windows Server 2003 1. Select the Paper/Output tab. 2. Select an option under 2-Sided Printing: • 2-Sided Print • 2-Sided Print, Flip on Short Edge 60 WorkCentre 6400 Multifunction Printer User Guide - Xerox 6400S | WorkCentre 6400 User Guide - Page 61
Printing Operating System Steps Mac OS X, version page layout which determines how the pages turn. Windows and Macintosh 1. Select the Layout/Watermark tab (Windows) or the Layout section (Macintosh). 2. Select page 49 Landscape 2-Sided Print WorkCentre 6400 Multifunction Printer 61 User Guide - Xerox 6400S | WorkCentre 6400 User Guide - Page 62
type you select, or you can force the printer to use paper from a specific tray. To select the paper type: Windows 1. In the printer driver, select the Paper/Output tab. 2. To your application settings, or select a specific paper type or tray. 62 WorkCentre 6400 Multifunction Printer User Guide - Xerox 6400S | WorkCentre 6400 User Guide - Page 63
Select the Pages Per Sheet (N-Up) option. 3. Click the button for the number of pages you want to appear on each side of the sheet. Macintosh 1. In the Print dialog box, select Layout. 2. Select the number of Pages per Sheet and Layout Direction. WorkCentre 6400 Multifunction Printer 63 User Guide - Xerox 6400S | WorkCentre 6400 User Guide - Page 64
, and then the Layout/Watermark drop-down list. 2. Select Enable for Booklet Printing. 3. If desired, specify the creep and gutter with the Booklet Options button. 4. If desired, specify the paper size from the Target Paper Size drop-down list. 64 WorkCentre 6400 Multifunction Printer User Guide - Xerox 6400S | WorkCentre 6400 User Guide - Page 65
Windows 1. Select the Color Options tab. 2. Select Color Adjustments. 3. Click the Color Adjustments button. 4. Make the desired adjustments to the sliders in the Color Adjustments dialog box. 5. Click the OK button to save your changes. WorkCentre 6400 Multifunction Printer 65 User Guide - Xerox 6400S | WorkCentre 6400 User Guide - Page 66
button. If required in specific circumstances, you can make additional color adjustments to the lightness, saturation, contrast, cyan/red color variation, magenta/green color variation, and yellow/blue color variation used for a particular element. 66 WorkCentre 6400 Multifunction Printer User - Xerox 6400S | WorkCentre 6400 User Guide - Page 67
Windows 1. Select the Advanced tab. 2. Select Image Options, and select Color Configuration. 3. From the Color Configuration drop-down menu, select Custom. 4. Make adjustments to the Custom Color Adjustments settings, and click OK to save your changes. WorkCentre 6400 Multifunction Printer 67 User - Xerox 6400S | WorkCentre 6400 User Guide - Page 68
and White To print in black and white: Windows 1. Select the Color Options tab. 2. Select the Black and White option. Macintosh 1. In the Print dialog box, select Xerox Features, and then the Color Options drop-down list. 2. Select Black and White. 68 WorkCentre 6400 Multifunction Printer User Guide - Xerox 6400S | WorkCentre 6400 User Guide - Page 69
print insert pages: Windows 1. Select the Xerox Features from the drop-down list. 2. Select the Special Pages drop-down list. 3. Click Add Inserts... 4. Select the desired settings for the Insert Options, Insert Quantity, Pages, and Paper options. WorkCentre 6400 Multifunction Printer 69 User Guide - Xerox 6400S | WorkCentre 6400 User Guide - Page 70
size as the paper used for the rest of your document. If you specify a different size in the driver than the tray you select as a cover pages source, your cover(s) print on the same paper as the Pages Add one blank page at the end of the document. 70 WorkCentre 6400 Multifunction Printer User Guide - Xerox 6400S | WorkCentre 6400 User Guide - Page 71
blank page at the end of the document. To print a cover page: Windows 1. Select the Special Pages tab. 2. Click the Add Covers button. 3. Select the cover option and tray to use from the Add Covers to be selected as the Last Page Paper Source. WorkCentre 6400 Multifunction Printer 71 User Guide - Xerox 6400S | WorkCentre 6400 User Guide - Page 72
sheet. • Job Settings: Displays the attributes of the paper for the majority of the document. If you select Use Job Setting for any paper attribute (size, color, or type), the setting displayed here is used for that attribute of the exception page. 72 WorkCentre 6400 Multifunction Printer User Guide - Xerox 6400S | WorkCentre 6400 User Guide - Page 73
1. In the Print dialog box, select Xerox Features from the drop-down list. 2. Select the Special Pages drop-down list. 3. Click Add Exceptions.... 4. Select the desired settings for the Pages, Paper, and 2-Sided Printing options. Printing WorkCentre 6400 Multifunction Printer 73 User Guide - Xerox 6400S | WorkCentre 6400 User Guide - Page 74
Other Size. 3. Select an option from the Scale Options drop-down list. 4. If you select Manually Scale, enter a percentage in the percentage box. Macintosh 1. Select File. 2. Select Page Setup. 3. Specify the percentage in the box for Scale. 74 WorkCentre 6400 Multifunction Printer User Guide - Xerox 6400S | WorkCentre 6400 User Guide - Page 75
distribution, can be inserted with a watermark. Some Windows Print Drivers allow you to: • Create a watermark. • Edit an existing watermark's text, color, location, and angle. • Place a watermark on watermark on all pages or only the first page. WorkCentre 6400 Multifunction Printer 75 User Guide - Xerox 6400S | WorkCentre 6400 User Guide - Page 76
or background or to blend it with the job. • Select an option to print the watermark on all pages or only the first page. 76 WorkCentre 6400 Multifunction Printer User Guide - Xerox 6400S | WorkCentre 6400 User Guide - Page 77
tab. 2. Select Yes for Mirrored Output under Image Options. Macintosh 1. In the Print dialog box, select Xerox Features from the drop-down list. 2. Select the Advanced drop-down list. 3. Select Enabled in the Mirrored Output drop-down list. WorkCentre 6400 Multifunction Printer 77 User Guide - Xerox 6400S | WorkCentre 6400 User Guide - Page 78
Setup from the File menu. 2. In the Paper Size drop-down list select Manage Custom Sizes. 3. Click the + button to add a new custom page size. 4. Provide a descriptive name for the custom page size and enter the page size and margin information. 78 WorkCentre 6400 Multifunction Printer User Guide - Xerox 6400S | WorkCentre 6400 User Guide - Page 79
. Note: This feature is only available when your printer is connected to your computer over a network. To enable job completion notification: Windows 1. At the bottom of any tab, click the More Status button. 2. Select an option in the Notify menu. WorkCentre 6400 Multifunction Printer 79 User Guide - Xerox 6400S | WorkCentre 6400 User Guide - Page 80
at the Printer 1. Press the Job Status button on printer. After you review the sample copy, you can release or delete the remaining copies. Printing a Sample Set 1. Select Sample Set from the Job Type drop-down menu. 2. Select OK and print the job. 80 WorkCentre 6400 Multifunction Printer User Guide - Xerox 6400S | WorkCentre 6400 User Guide - Page 81
OK and print the job. The job will be saved to the printer. To print or delete the job at the printer: 1. Press the Job Status button on the control panel. 2. Find your document in the list of dialog box and select OK. 3. Select OK to send the fax. WorkCentre 6400 Multifunction Printer 81 User Guide - Xerox 6400S | WorkCentre 6400 User Guide - Page 82
Printing 82 WorkCentre 6400 Multifunction Printer User Guide - Xerox 6400S | WorkCentre 6400 User Guide - Page 83
Copying This chapter includes: • Basic Copying on page 84 • Adjusting Copy Options on page 85 • Managing Copy Functions on page 102 5 WorkCentre 6400 Multifunction Printer 83 User Guide - Xerox 6400S | WorkCentre 6400 User Guide - Page 84
appears on the top of the touch screen when it is time to place the next original on the glass. Press the Start button to scan the next original. • To cancel printing of the copies, press the Stop button on the right side of the control panel. 84 WorkCentre 6400 Multifunction Printer User Guide - Xerox 6400S | WorkCentre 6400 User Guide - Page 85
of the window. If you want the copies printed in shades of a single color: a. Select More. b. Select Single Color on the Output Color window. c. Select one of the six color choices. d. Press the Save button in the upper-right corner of the window. WorkCentre 6400 Multifunction Printer 85 User Guide - Xerox 6400S | WorkCentre 6400 User Guide - Page 86
Supply. 3. If you want to use another tray: a. Select More. b. Select the tray. c. Press the Save button in the upper-right corner of the window. Note: Select Auto Select to have the printer automatically use trays containing the correct paper size. 86 WorkCentre 6400 Multifunction Printer User - Xerox 6400S | WorkCentre 6400 User Guide - Page 87
Press the More button under Copy Output. b. Select Uncollated under Collation on the left side of the window. c. If you also want your copies stapled, see Stapling Copies on page 88. d. Press the Save button in the upper-right corner of the window. WorkCentre 6400 Multifunction Printer 87 User Guide - Xerox 6400S | WorkCentre 6400 User Guide - Page 88
the image quality of the copies. You can also adjust the sharpness and saturation of the copies. To adjust these image options: 1. Access the Copy tab on the touch screen, and then press the Image Quality tab. 2. Press the Image Options button. 88 WorkCentre 6400 Multifunction Printer User Guide - Xerox 6400S | WorkCentre 6400 User Guide - Page 89
window: a. On the left side of the window, select the desired color preset. The sample images show how the colors are adjusted. b. If you do not want the color adjusted, select Off. c. Press the Save button in the upper-right corner of the window. WorkCentre 6400 Multifunction Printer 89 User Guide - Xerox 6400S | WorkCentre 6400 User Guide - Page 90
upper-right corner of the window. Specifying the Original Size To specify the original size so that the correct area is copied: 1. Access the Copy tab on the touch screen, and then press the Layout Adjustment tab. 2. Press the Original Size button. 90 WorkCentre 6400 Multifunction Printer User Guide - Xerox 6400S | WorkCentre 6400 User Guide - Page 91
page of an open book: a. Select Right Page Only on the left side of the Book Copying window. b. If desired, use the arrow buttons to specify the binding edge amount to be erased. 7. Press the Save button in the upper-right corner of the window. WorkCentre 6400 Multifunction Printer 91 User Guide - Xerox 6400S | WorkCentre 6400 User Guide - Page 92
Image Shift window. 4. If you want to specify the position of the image: a. Select Margin Shift on the left side of the Image Shift window. b. Use the arrow buttons of the window. 5. Press the Save button in the upper-right corner of the window. 92 WorkCentre 6400 Multifunction Printer User Guide - Xerox 6400S | WorkCentre 6400 User Guide - Page 93
until it has scanned all of the originals. To create booklets: 1. Access the Copy tab on the touch screen, and then press the Output Format tab. 2. Press the Booklet Creation button. 3. On the left side of the Booklet Creation window, select On. WorkCentre 6400 Multifunction Printer 93 User Guide - Xerox 6400S | WorkCentre 6400 User Guide - Page 94
window, select a printing option for the back cover: Blank Cover, Print on Side 1, Print on Side 2, or Print on Both Sides. f. If you selected Print on Both Sides and you want the images on side 2 to be rotated 180 degrees, select Rotate Side 2. 94 WorkCentre 6400 Multifunction Printer User Guide - Xerox 6400S | WorkCentre 6400 User Guide - Page 95
on the touch screen, and then press the Output Format tab. 2. Press the Special Pages button. 3. Press the Inserts button. 4. In the upper-left corner of the Inserts window, enter the number of the page after which you want the blank page inserted. WorkCentre 6400 Multifunction Printer 95 User Guide - Xerox 6400S | WorkCentre 6400 User Guide - Page 96
Save button in the upper-right corner of the Paper Supply window. 6. Press the Add button in the middle of the window. The exception pages are added to the list on the right of the window. 7. Repeat steps 4 - 6 to add additional exception pages. 96 WorkCentre 6400 Multifunction Printer User Guide - Xerox 6400S | WorkCentre 6400 User Guide - Page 97
button on the left side of the Annotations window. b. On the left side of the Date window, select On. c. In the lower-left corner of the window, select Apply To to include the date on all pages, all pages except the first page, or the first page only. WorkCentre 6400 Multifunction Printer 97 User - Xerox 6400S | WorkCentre 6400 User Guide - Page 98
sheet of paper. The size of the images are reduced proportionally to fit on the selected paper. To print multiple images on a sheet: 1. Access the Copy tab on the touch screen, and then press the Output Format tab. 2. Press the Page Layout button. 98 WorkCentre 6400 Multifunction Printer User Guide - Xerox 6400S | WorkCentre 6400 User Guide - Page 99
of the window. Advanced Copying Use the Job Assembly tab to change the following settings: • Building a Job on page 100 • Printing a Sample Copy on page 100 • Saving the Current Copy Settings on page 101 • Retrieving Saved Copy Settings on page 101 WorkCentre 6400 Multifunction Printer 99 User Guide - Xerox 6400S | WorkCentre 6400 User Guide - Page 100
scanned, the printer prints the part of the total quantity selected. For example, if you are making copies of a book, and enter 3 as the number of total copies, one copy of the book button. 4. On the left side of the Sample Job window, select On. 100 WorkCentre 6400 Multifunction Printer User Guide - Xerox 6400S | WorkCentre 6400 User Guide - Page 101
want to retrieve. Note: If you want to delete a saved setting, select it and press the Delete Settings button. 5. Press the Load Settings button in the upper-right corner of the Retrieve Saved Settings window. The saved settings are then loaded. WorkCentre 6400 Multifunction Printer 101 User Guide - Xerox 6400S | WorkCentre 6400 User Guide - Page 102
button on the left side of the control panel. 3. Select the Tools tab. 4. In the list on the left side of the tab, select Service Settings. 5. In the list in the right side of the tab, select Copy Service Settings. 6. Select Reading Order Options. 102 WorkCentre 6400 Multifunction Printer User Guide - Xerox 6400S | WorkCentre 6400 User Guide - Page 103
for reducing or enlarging images: a. Select Reduce/Enlarge Presets. b. To create or change a proportional preset, select Proportional % on the left side of the window, select the number of the preset, and enter the percentage using the keypad. WorkCentre 6400 Multifunction Printer 103 User Guide - Xerox 6400S | WorkCentre 6400 User Guide - Page 104
image, select Independent X-Y% on the left side of the window, enter the percentage to scale the width (X value) for the preset, and enter the percentage to scale the length (Y value). d. Press the Save button in the upper-right corner of the window. 104 WorkCentre 6400 Multifunction Printer User - Xerox 6400S | WorkCentre 6400 User Guide - Page 105
an Internet Fax on page 111 • Receiving Faxes on page 112 • Selecting Fax Options on page 113 • Managing Fax Functions on page 118 • Adding Speed Dial Entries on page 122 See also: Using the Fax tutorial at www.xerox.com/office/WC6400docs 6 WorkCentre 6400 Multifunction Printer 105 User Guide - Xerox 6400S | WorkCentre 6400 User Guide - Page 106
can send a fax from a WorkCentre 6400X or 6400XF printer, you must enable fax services and provide information about your fax server and email server in CentreWare IS. For more information see the System Administrator Guide and CentreWare IS help. 106 WorkCentre 6400 Multifunction Printer User Guide - Xerox 6400S | WorkCentre 6400 User Guide - Page 107
the list of Individual contacts in the Address Book. See the System Administrator Guide for more information on chain dialing. 4. Adjust fax options. For more information, see Selecting Fax Options on page 113. 5. Press the Start button. The printer scans the pages and transmits the document when - Xerox 6400S | WorkCentre 6400 User Guide - Page 108
Faxing See also: Selecting Fax Options on page 113 Managing Fax Functions on page 118 108 WorkCentre 6400 Multifunction Printer User Guide - Xerox 6400S | WorkCentre 6400 User Guide - Page 109
Fax Repository Setup. The printer can transfer scanned files to the repository using one of the following protocols: • FTP • SMPB • HTTP • HTTPS • STMP Note: For more information on configuring a fax repository, see the System Administrator Guide. WorkCentre 6400 Multifunction Printer 109 User Guide - Xerox 6400S | WorkCentre 6400 User Guide - Page 110
pages and transmits the document when all pages have been scanned. 7. To print a confirmation page displaying the fax transmission status, turn on the confirmation report option. For more information see Printing a Confirmation Report on page 118. 110 WorkCentre 6400 Multifunction Printer User Guide - Xerox 6400S | WorkCentre 6400 User Guide - Page 111
an internet fax, the document is scanned and sent to an email address. Note: Before you can send an Internet Fax, the Internet Fax service must be enabled in CentreWare IS, and an SMTP server must be configured. For more information see the System Administrator Guide and CentreWare IS help. To send - Xerox 6400S | WorkCentre 6400 User Guide - Page 112
emails, the printer must be assigned an email account, the Internet Fax service must be enabled, and POP3 (email) server settings must be configured in CentreWare IS. For more information see the System Administrator Guide and CentreWare IS help. 112 WorkCentre 6400 Multifunction Printer User Guide - Xerox 6400S | WorkCentre 6400 User Guide - Page 113
or Sharpness to one of the available levels. 4. Select Save. Image Enhancement - Auto Suppression When you are using originals printed on thin paper, images printed on one side of the paper can sometimes be seen on the other side of the paper. WorkCentre 6400 Multifunction Printer 113 User Guide - Xerox 6400S | WorkCentre 6400 User Guide - Page 114
Pages. 5. Select Save when the changes are complete. Book Faxing 1. On the control panel, press the Fax button. 2. Select the Layout Adjustment tab. 3. Select Book Faxing. 4. Select one of the following options: • Off (Default). • Both Pages. 114 WorkCentre 6400 Multifunction Printer User Guide - Xerox 6400S | WorkCentre 6400 User Guide - Page 115
Delay Send button to open the Delay Send dialog box. 4. Select Specified Time: • Hour: Select a number from 0 to 12. • Minute: Select a number from 0 to 59. • Select AM or PM. 5. Press the Save button. 6. Specify the fax number of the recipient. WorkCentre 6400 Multifunction Printer 115 User Guide - Xerox 6400S | WorkCentre 6400 User Guide - Page 116
following options: • Off (default). • On. 5. Select Save when the changes are complete. Faxing to a Mailbox Note: A Mailbox needs to be setup prior to using this feature. For instructions on setting up a mailbox, see Scan to Mailbox on page 127, or the System Administrator Guide. After a mailbox has - Xerox 6400S | WorkCentre 6400 User Guide - Page 117
to the System Administrator Guide for more information on Local Polling. Remote Polling 1. On the control panel, press the Fax button. 2. scanned on the document glass. Refer to the System Administrator Guide for more information on Build Job. WorkCentre 6400 Multifunction Printer 117 User Guide - Xerox 6400S | WorkCentre 6400 User Guide - Page 118
Secure Fax option is enabled, a password is required before faxes can be printed or removed. To enable or disable a Secure Receive fax: 1. Log in as a system administrator. Press the Log In/Out button (user name: admin, default password: 1111). 118 WorkCentre 6400 Multifunction Printer User Guide - Xerox 6400S | WorkCentre 6400 User Guide - Page 119
a system administrator. Press the Log In/Out button (user name: admin, default password: 1111). 2. Press the Machine Status button on the control panel. 3. Select the Tools tab, select Service Settings, in the individual speed dial directory. WorkCentre 6400 Multifunction Printer 119 User Guide - Xerox 6400S | WorkCentre 6400 User Guide - Page 120
Report To print a fax report: 1. Log in as a system administrator. Press the Log In/Out button (user name: admin, default password: 1111). 2. Press the Machine Status button on the control panel. 3. Select the Tools tab, select Service Settings, and then select Embedded Fax Settings. 4. Select Print - Xerox 6400S | WorkCentre 6400 User Guide - Page 121
an aid in determining fax protocol problems. To print the report: 1. Log in as a system administrator. Press the Log In/Out button (user name: admin, default password: 1111). 2. Press the Machine Status button on the control panel. 3. Select the Tools tab, select Troubleshooting, and then select Fax - Xerox 6400S | WorkCentre 6400 User Guide - Page 122
when you are done. Editing or Clearing Speed Dial Entries 1. On the control panel, select Fax. 2. Select Address Book. 3. Select Individuals or Groups from the drop-down menu. 4. Select a Speed Dial entry, then select Edit Details or Clear Entry. 122 WorkCentre 6400 Multifunction Printer User Guide - Xerox 6400S | WorkCentre 6400 User Guide - Page 123
• Scan to E-mail on page 146 • Scan to Home on page 148 • Setting Scan Options on page 149 See also: Using the Scanner (Windows) tutorial at www.xerox.com/office/WC6400docs Using the Scanner (Macintosh) tutorial at www.xerox.com/office/WC6400docs WorkCentre 6400 Multifunction Printer 123 User Guide - Xerox 6400S | WorkCentre 6400 User Guide - Page 124
a network to retrieve a scan. The WorkCentre 6400 printer supports the following scanning services: • Scan to mailbox: scans a document and stores the image on the printer's hard drive • Creating scan templates and downloading images to your computer using Xerox Scan Utility • Importing scan images - Xerox 6400S | WorkCentre 6400 User Guide - Page 125
Explorer, Firefox, etc.). Using CentreWare IS, you can enable scanning, and view, download, or delete images from the printer's internal hard drive. To use CentreWare IS, you will need your printer's IP address. Your system administrator can provide you with this information, or you can print - Xerox 6400S | WorkCentre 6400 User Guide - Page 126
, towards the back, left corner of the document glass as shown. 6400-065 Using the Document Feeder Insert originals face up with the top of the page entering the feeder first. Adjust the paper guides so they fit against the originals. 126 WorkCentre 6400 Multifunction Printer User Guide 6400-067 - Xerox 6400S | WorkCentre 6400 User Guide - Page 127
Services (CentreWare IS) or contact your system administrator. You can scan a document, store the image on the printer's internal hard drive and then download it to your computer. The WorkCentre 6400 printer provides a Public folder ("mailbox") to store scanned images. You can also create a password - Xerox 6400S | WorkCentre 6400 User Guide - Page 128
is required each time you scan to your folder if a password is required in the scan policies. Note: If scanning fails, a confirmation page will print. For more information on managing confirmation page settings, see the System Administrator Guide. 128 WorkCentre 6400 Multifunction Printer User Guide - Xerox 6400S | WorkCentre 6400 User Guide - Page 129
printer's IP address, see Printing a Configuration Report on page 125. 3. Click the Scan tab. 4. In the Display section, click the Mailboxes button. 5. To download images from the Default Public Folder: a. In the Scan to Mailbox section, click on Default Public Folder. The Folder Contents window - Xerox 6400S | WorkCentre 6400 User Guide - Page 130
allows space for new images. You can delete files at your computer using CentreWare IS. Note: A low memory warning can be enabled using CentreWare IS. Refer to the System Administrator Guide for more information. You will need your printer's IP address. Your system administrator can provide you - Xerox 6400S | WorkCentre 6400 User Guide - Page 131
to the System Administrator Guide for more information. To save space on the printer's hard drive, periodically delete your scanned images that are no longer needed. You can delete files at your computer using CentreWare IS. You will need your printer's IP address. Your system administrator can - Xerox 6400S | WorkCentre 6400 User Guide - Page 132
and copy images to email. Note: You must install the scan drivers to use the Xerox Scan Utility. For more information, see the System Administrator Guide. Scanning Using the Xerox Scan Utility Load your original on the document glass or in the document feeder. 1. Press the Services Home button - Xerox 6400S | WorkCentre 6400 User Guide - Page 133
: 1. Access the Xerox Scan Utility on your computer: • Windows: Right-click the Xerox Scan Utility icon on the taskbar, and then select Open Xerox Scan Utility. If the icon does not appear in the taskbar, click Start, select All Programs (or WorkCentre 6400 Multifunction Printer 133 User Guide - Xerox 6400S | WorkCentre 6400 User Guide - Page 134
in the Saved Template Settings drop-down list. 5. Click the Save button to save the settings for the new or revised template. The template will now appear in the list of templates on the Workflow Scanning tab on the printer's control panel. 134 WorkCentre 6400 Multifunction Printer User Guide - Xerox 6400S | WorkCentre 6400 User Guide - Page 135
: Click the Xerox Scan Utility icon in the dock (or Applications > Xerox > Xerox Scan Utility). 2. Select the Scan Settings tab. 3. Select the template you want to delete in the Saved Template Settings drop-down list. 4. Click the Delete button. WorkCentre 6400 Multifunction Printer 135 User Guide - Xerox 6400S | WorkCentre 6400 User Guide - Page 136
. Note: When you enter a name for images in the Base Attachment Name field, and save the profile, the file name is the name you entered and the unique date and time each image was scanned. See also: Creating Unique Image File Names on page 135 136 WorkCentre 6400 Multifunction Printer User Guide - Xerox 6400S | WorkCentre 6400 User Guide - Page 137
you enter a new file name for images in the Base File Name field, and the profile is saved, the new file name displays the name you entered and the unique date and time each image was scanned. See also: Creating Unique Image File Names on page 135 WorkCentre 6400 Multifunction Printer 137 User Guide - Xerox 6400S | WorkCentre 6400 User Guide - Page 138
select Open Xerox Scan Utility. If the icon does not appear in the taskbar, click Start, select All Programs (or Programs if you are using Windows Classic View), select Xerox Office Printing, select Scanning, and then select Xerox Scan Utility. 138 WorkCentre 6400 Multifunction Printer User Guide - Xerox 6400S | WorkCentre 6400 User Guide - Page 139
the To, CC, Subject, and Message fields. 6. Click the Copy to Email button to open your email application. The selected images are attached to the email message. 7. If desired, make additional changes to the email message, and then send the email. WorkCentre 6400 Multifunction Printer 139 User Guide - Xerox 6400S | WorkCentre 6400 User Guide - Page 140
27, 2008, select PDF as the file extension, and enter the new file name report in the Base File Name field, the actual file name becomes: report_2008-04-27_10.15.07.pdf. 6. Click the Copy to Folder button to copy the selected images to the folder. 140 WorkCentre 6400 Multifunction Printer User Guide - Xerox 6400S | WorkCentre 6400 User Guide - Page 141
. • Macintosh: Click the Xerox Scan Utility icon in the dock (or Applications > Xerox > Xerox Scan Utility). 2. Select the Scan to Email or Copy to Folder tab. 3. Select the images you want to delete. 4. Click the Delete Scanned Image button. WorkCentre 6400 Multifunction Printer 141 User Guide - Xerox 6400S | WorkCentre 6400 User Guide - Page 142
All. 6. Click the Retrieve button. A copy of the image is transferred to the location in your application. If you want to delete the images you selected, click the Delete button. Note: For more information, click the Help menu to view online help. 142 WorkCentre 6400 Multifunction Printer User Guide - Xerox 6400S | WorkCentre 6400 User Guide - Page 143
example, if you are using Microsoft Word 2003 to place an image in a document: a. Select Insert. b. Select Picture. c. Select From Scanner or Camera. d. Select the scanner, and then click the OK button. 3. In the Get Pictures from WIA Xerox printer window, open the folder to view thumbnails of the - Xerox 6400S | WorkCentre 6400 User Guide - Page 144
All check box. 4. Click the Import button. A copy of the image is transferred to the location selected in your application. If you want to delete the images you selected, click the Delete button. Note: For more information, click the Help button. 144 WorkCentre 6400 Multifunction Printer User Guide - Xerox 6400S | WorkCentre 6400 User Guide - Page 145
or on the document glass, and then press the Start button. Note: If Scan to File is not enabled, contact your system administrator. Additional templates can be created using CentreWare IS. For more information, see the System Administrator Guide. WorkCentre 6400 Multifunction Printer 145 User Guide - Xerox 6400S | WorkCentre 6400 User Guide - Page 146
. When finished, select Save. 8. Place the document original in the document feeder or on the document glass, and then press the Start button. To send a scanned image to an email address in the Address Book: 1. On the printer's control panel, press the Services Home button. 2. Select the Email icon - Xerox 6400S | WorkCentre 6400 User Guide - Page 147
button. 2. Select E-Mail, then select the E-mail Options tab. 3. Select File Format, then select the desired file type using the buttons on the left of the printer's control panel, then select Save. Each file format is described when selected. WorkCentre 6400 Multifunction Printer 147 User Guide - Xerox 6400S | WorkCentre 6400 User Guide - Page 148
. 4. Place the document original in the document feeder or on the document glass, and then press the Start button. Note: If Scan to Home is not enabled, contact your system administrator. For more information, see the System Administrator Guide. 148 WorkCentre 6400 Multifunction Printer User Guide - Xerox 6400S | WorkCentre 6400 User Guide - Page 149
settings override the automatic settings. They are selected using the printer's control panel. Advanced Settings Advanced settings allow you to control image options, image enhancements, scan resolution, files size and updating of templates. WorkCentre 6400 Multifunction Printer 149 User Guide - Xerox 6400S | WorkCentre 6400 User Guide - Page 150
Images, Portrait Originals or Landscape Originals Choose from: Auto Detect, Preset Scan Area, Custom Scan Area, Mixed Size Originals Choose from: Individual Edges, All Edges or Presets (None Selected, Hole Punch Erase, or Header/Footer Erase) 150 WorkCentre 6400 Multifunction Printer User Guide - Xerox 6400S | WorkCentre 6400 User Guide - Page 151
On the printer's control panel, press the Services Home button. 2. Select Workflow Scanning, and then select the Job Assembly tab. Then select Build Job, and then select On. Help is available for Build Job by pressing the printer's Help button. WorkCentre 6400 Multifunction Printer 151 User Guide - Xerox 6400S | WorkCentre 6400 User Guide - Page 152
Scanning 152 WorkCentre 6400 Multifunction Printer User Guide - Xerox 6400S | WorkCentre 6400 User Guide - Page 153
Maintenance This chapter includes: • Maintenance and Cleaning on page 154 • Ordering Supplies on page 166 • Calibrating the Scanner on page 171 • Moving the Printer on page 173 8 WorkCentre 6400 Multifunction Printer 153 User Guide - Xerox 6400S | WorkCentre 6400 User Guide - Page 154
while in use. • Do not touch the electrical contacts, gears, or laser devices. Doing so may damage the printer and cause the print quality to deteriorate. • Make sure any parts removed during cleaning are replaced before you plug in the printer. 154 WorkCentre 6400 Multifunction Printer User Guide - Xerox 6400S | WorkCentre 6400 User Guide - Page 155
. 5. In the list on the right side of the tab, select General, then select Supply Counter Reset. 6. Select the Routine Maintenance Item that was replaced from the list. 7. Select Reset. 8. In the pop-up window, select Reset. 9. Select Close. WorkCentre 6400 Multifunction Printer 155 User Guide - Xerox 6400S | WorkCentre 6400 User Guide - Page 156
, smears, and other marks that transfer from the glass area while scanning documents. Use a lint-free cloth to clean the glass area. 6400-076 Use a lint-free cloth to clean the under side of the document cover and the document feeder. 156 WorkCentre 6400 Multifunction Printer User Guide 6400-077 - Xerox 6400S | WorkCentre 6400 User Guide - Page 157
free cloth. Services Home Features 6400-072 Use a cloth to clean the document feeder, output trays, paper trays and outside areas of your printer. 6400-074 Keep the vents clear of dust and debris. Use a cotton swab to clean the vents. 6400-073 WorkCentre 6400 Multifunction Printer 157 User Guide - Xerox 6400S | WorkCentre 6400 User Guide - Page 158
Roller (Tray 1) 1. Open Tray 1. 1 2 6400-050 2. Press down on the center of the paper lifting plate until the left and right locking tabs lock into place. 6400-052 3. Clean the media feed roller by wiping it with a soft, dry cloth. 158 WorkCentre 6400 Multifunction Printer User Guide 6400-078 - Xerox 6400S | WorkCentre 6400 User Guide - Page 159
4. Close the tray. 2 1 6400-026 Cleaning the Media Feed Roller (Trays 2, 3, 4) 1. Pull out the tray. Maintenance 6400-037 2. Clean the media feed roller by wiping it with a soft, dry cloth. 6400-080 WorkCentre 6400 Multifunction Printer 159 User Guide - Xerox 6400S | WorkCentre 6400 User Guide - Page 160
Maintenance 3. Close the tray. 6400-125 Cleaning the Document Feeder Rollers and Pad 1. Open the document feeder cover. 6400-154 2. Clean both feeder rollers and pad with a dry, lint-free cloth. 160 WorkCentre 6400 Multifunction Printer User Guide 6400-155 - Xerox 6400S | WorkCentre 6400 User Guide - Page 161
cover. Maintenance 6400-156 Cleaning the Duplex Feed Rollers 1. With Tray 1 open, open the duplex cover. 6400-081 2. Clean the feed roller (four rollers on the top, four rollers on the bottom) by wiping them with a soft, dry cloth. 6400-082 WorkCentre 6400 Multifunction Printer 161 User Guide - Xerox 6400S | WorkCentre 6400 User Guide - Page 162
Tray 4 Note: Before opening the Tray 3 or Tray 4 right side door, fold up Tray 1. 1. Open the Tray 3 right side door or Tray 4 right side door. 6400-084 2. Clean the three media transfer rollers by wiping them with a soft, dry cloth. . 162 WorkCentre 6400 Multifunction Printer User Guide 6400-085 - Xerox 6400S | WorkCentre 6400 User Guide - Page 163
3. Close the right side cover of Tray 3 or Tray 4. . Maintenance 6400-086 WorkCentre 6400 Multifunction Printer 163 User Guide - Xerox 6400S | WorkCentre 6400 User Guide - Page 164
into the cleaning port (identified with a color triangle label for each of the 4 colors) until it reaches the beginning of the handle. 6400-088 4. Pull out the tool and then cleaning tool in the printer's front door keeps it from getting lost. 164 WorkCentre 6400 Multifunction Printer User Guide - Xerox 6400S | WorkCentre 6400 User Guide - Page 165
6. Close the front door. Maintenance 6400-089 WorkCentre 6400 Multifunction Printer 165 User Guide - Xerox 6400S | WorkCentre 6400 User Guide - Page 166
• Imaging Units • Waste Cartridge • Fuser • Transfer Roller • Transfer Belt • Ozone Filter • ADF Roller Kit Customer Replaceable Parts Customer replaceable parts are long life items that may require occasional replacement based on customer usage and print volumes. • Tray 2 Feed Roller 166 WorkCentre - Xerox 6400S | WorkCentre 6400 User Guide - Page 167
Guarantee is available in the United States and Canada. Coverage may vary outside these areas; please contact your local representative for details. Recycling Supplies For information on Xerox supplies recycling programs, go to www.xerox.com/gwa. WorkCentre 6400 Multifunction Printer 167 User Guide - Xerox 6400S | WorkCentre 6400 User Guide - Page 168
Staple Cartridge message will appear on the printer's control panel. Replace the staple cartridge. 1. Open the finisher front door. 6400-113 2. Extend the stapling assembly. 3. The stapling assembly cannot be removed from the printer. 6400-114 168 WorkCentre 6400 Multifunction Printer User Guide - Xerox 6400S | WorkCentre 6400 User Guide - Page 169
4. Pull out and remove the stapling unit. 1 2 5. Remove the staple cartridge. Discard or recycle it. 6400-115 Maintenance 6. Insert the new staple cartridge. 1 6400-166 2 6400-167 WorkCentre 6400 Multifunction Printer 169 User Guide - Xerox 6400S | WorkCentre 6400 User Guide - Page 170
Maintenance 7. Replace the stapling unit. 8. Push the stapling assembly back into the printer. 6400-117 9. Close the finisher front door. 6400-118 6400-119 170 WorkCentre 6400 Multifunction Printer User Guide - Xerox 6400S | WorkCentre 6400 User Guide - Page 171
the document glass and the document feeder. To calibrate the scanner: 1. Start the calibration procedure from the printer's control panel. 2. Log in as a system administrator. Press the Log In/Out button (user name: admin, default password: 1111). 3. On the control panel, press the Machine Status - Xerox 6400S | WorkCentre 6400 User Guide - Page 172
calibrating the scanner, please return the calibration page to Xerox with the defective scanner or document feeder. For more information about calibrating the scanner, see the Online Support Assistant at www.xerox.com/office/WC6400support. 172 WorkCentre 6400 Multifunction Printer User Guide - Xerox 6400S | WorkCentre 6400 User Guide - Page 173
agreement, or Total Satisfaction Guarantee. 59 kg 130 lb. 6400-071 Note: The Total Satisfaction Guarantee is available in the United States and Canada. Coverage may vary outside these areas; please contact your local representative for details. WorkCentre 6400 Multifunction Printer 173 User Guide - Xerox 6400S | WorkCentre 6400 User Guide - Page 174
Maintenance 174 WorkCentre 6400 Multifunction Printer User Guide - Xerox 6400S | WorkCentre 6400 User Guide - Page 175
177 • Paper Feed Problems on page 181 • Print-Quality Problems on page 201 • Copy and Scan Problems on page 214 • Fax Problems on page 215 • Getting Help on page 219 See also: Troubleshooting video tutorials at www.xerox.com/office/WC6400docs WorkCentre 6400 Multifunction Printer 175 User Guide - Xerox 6400S | WorkCentre 6400 User Guide - Page 176
History. To print a list of the fault messages that have been displayed on your printer: 1. Press the Machine Status button. 2. Select the Tools tab. 3. Select Troubleshooting. 4. Select Support Pages. 5. Select System Status Page. 6. Press Print. 176 WorkCentre 6400 Multifunction Printer User Guide - Xerox 6400S | WorkCentre 6400 User Guide - Page 177
Specifications on page 224. Caution: Plug the three-wire cord (with grounding prong) directly into a grounded AC outlet only. Do not use a power strip. If necessary, contact a licensed electrician to install a properly grounded outlet. WorkCentre 6400 Multifunction Printer 177 User Guide - Xerox 6400S | WorkCentre 6400 User Guide - Page 178
cord is correctly plugged into the printer and the outlet, and then turn on the printer. Contact your local Xerox service representative with the fault information. Check the fault history. For more information see Control Panel Messages on page 219. 178 WorkCentre 6400 Multifunction Printer User - Xerox 6400S | WorkCentre 6400 User Guide - Page 179
your local Xerox service representative. Front Door Will Not Close Probable Causes One or more of the consumables are missing or installed incorrectly. Solutions Check the toners, imaging units and waste cartridge for correct installation. WorkCentre 6400 Multifunction Printer 179 User Guide - Xerox 6400S | WorkCentre 6400 User Guide - Page 180
Troubleshooting Right Side Door Will Not Close Probable Causes Solutions The fuser is missing or the green levers on the fuser are belt is not properly installed. One or both Tighten the two mounting screws. of the mounting screws is not tight. 180 WorkCentre 6400 Multifunction Printer User Guide - Xerox 6400S | WorkCentre 6400 User Guide - Page 181
your skin, wash it off with cool water and a mild soap. If you get toner in your eyes, wash it out immediately with cool water and consult a doctor. Clearing Paper Jams or Misfeeds from Tray 1 1. Remove the media from Tray 1. 2. Fold up Tray 1. WorkCentre 6400 Multifunction Printer 181 User Guide - Xerox 6400S | WorkCentre 6400 User Guide - Page 182
3. Pull the lever on the right side of the printer, and open the right side door. 6400-104 Warning: The area around the fuser may be hot. Use surfaces may degrade print quality. 4. Carefully pull out the jammed media. 6400-171 182 WorkCentre 6400 Multifunction Printer User Guide 6400-105 - Xerox 6400S | WorkCentre 6400 User Guide - Page 183
5. Close the right side door. Troubleshooting 6. Open Tray 1 and reload the media. Clearing Paper Jams or Misfeeds from Tray 2 1. Fold up Tray 1. 6400-106 WorkCentre 6400 Multifunction Printer 183 User Guide - Xerox 6400S | WorkCentre 6400 User Guide - Page 184
the right side door. 6400-104 Warning: The area around the fuser may be hot. Use caution to avoid injury. Note: Be careful to not touch the transfer belt or the transfer roller. Fingerprints on these surfaces may degrade print quality. 6400-171 184 WorkCentre 6400 Multifunction Printer User Guide - Xerox 6400S | WorkCentre 6400 User Guide - Page 185
remove any jammed or misfed media. 5. Reload the media and close Tray 2. 6400-105 6. Close the right side door. 6400-039 Clearing Paper Jams or Misfeeds in Tray 3 or 4 1. Fold up Tray 1. 2. Open the Tray 3 or Tray 4 right side door. 6400-106 WorkCentre 6400 Multifunction Printer 185 User Guide - Xerox 6400S | WorkCentre 6400 User Guide - Page 186
Flip open the inner guide, and carefully pull out the jammed media. 6400-127 5. Open Tray 3 or 4. Remove misfed or damaged media, and close the tray. 6. Close the right side door. Clearing Paper Jams in the Duplex Unit 1. Open Tray 1. 186 WorkCentre 6400 Multifunction Printer User Guide 6400-128 - Xerox 6400S | WorkCentre 6400 User Guide - Page 187
2. Open the duplex cover. Troubleshooting 3. Carefully pull out the jammed media. 6400-131 4. Close the duplex cover. 6400-132 5. Close Tray 1. Clearing Paper Jams in the Fuser 1. Fold up Tray 1. 6400-133 WorkCentre 6400 Multifunction Printer 187 User Guide - Xerox 6400S | WorkCentre 6400 User Guide - Page 188
roller. Fingerprints on these surfaces may degrade print quality. 4. Push the green levers up, and open the fuser cover. 1 1 2 5. Carefully pull out the jammed media. 6400-159 188 WorkCentre 6400 Multifunction Printer User Guide 6400-160 - Xerox 6400S | WorkCentre 6400 User Guide - Page 189
6. Lower the control panel and close the front door. 7. Push the green levers down. Troubleshooting 8. Close the right side door. Note: The door will not close if the green levers are not pressed down. 6400-136 6400-106 WorkCentre 6400 Multifunction Printer 189 User Guide - Xerox 6400S | WorkCentre 6400 User Guide - Page 190
access door on the document feeder. 4. Lift the document feeder. 6400-146 6400-147 5. Remove any jammed media from under the document feeder or from the document glass. 6. Close the document feeder. 7. Reinsert originals in the document feeder. 190 WorkCentre 6400 Multifunction Printer User Guide - Xerox 6400S | WorkCentre 6400 User Guide - Page 191
: Be careful to not touch the transfer belt or the transfer roller. Fingerprints on these surfaces may degrade print quality. 6400-171 1. Fold up Tray 1. 2. Pull the lever on the right side of the printer, and open the right side door. 6400-104 WorkCentre 6400 Multifunction Printer 191 User Guide - Xerox 6400S | WorkCentre 6400 User Guide - Page 192
Close the right side door. 6400-105 6400-106 Clearing a Paper Jam Behind the Control Panel 1. Open the front door and raise the control panel. 2. Carefully remove any jammed media. 3. Lower the control panel and close the front door. 192 WorkCentre 6400 Multifunction Printer User Guide 6400-170 - Xerox 6400S | WorkCentre 6400 User Guide - Page 193
Clearing Paper Jams in the Finisher Jam in Finisher Transport Area or Sub Tray 1. Open the finisher top cover. Troubleshooting 2. Carefully pull out the jammed media. 6400-109 3. Close the finisher top cover. 6400-110 WorkCentre 6400 Multifunction Printer 193 User Guide - Xerox 6400S | WorkCentre 6400 User Guide - Page 194
2. Turn the knob inside clockwise to feed the paper into the main output tray. 6400-111 3. When the media is in the main output tray, lift up the sub output tray, and then slowly pull out the media. 1 2 4. Close the finisher top cover. 194 WorkCentre 6400 Multifunction Printer User Guide 6400-112 - Xerox 6400S | WorkCentre 6400 User Guide - Page 195
described below: 1. Open the finisher front door. Troubleshooting 6400-113 2. Extend the stapling assembly. Note: The stapling assembly cannot be removed from the printer. 3. Pull out and remove the stapling unit. 6400-114 1 2 6400-115 WorkCentre 6400 Multifunction Printer 195 User Guide - Xerox 6400S | WorkCentre 6400 User Guide - Page 196
the guide for the staple cartridge up, and then remove any jammed staples. 1 2 6400-116 5. Return the guide to its original position, and then install the stapling unit. 6. Slide the stapling assembly back into the printer. 6400-117 7. Close the finisher front door. 6400-118 196 WorkCentre 6400 - Xerox 6400S | WorkCentre 6400 User Guide - Page 197
tray at the same time. • Loading dog-eared (folded corners), stapled, or punched media in the document feeder. • Overfilling the trays. • Allowing the output tray to overfill. • Allowing the output tray to fill with more than a few transparencies. WorkCentre 6400 Multifunction Printer 197 User Guide - Xerox 6400S | WorkCentre 6400 User Guide - Page 198
Tray 3 (Option) 8. Tray 2 9. Waste Cartridge 10. Imaging Units 11. Transfer Belt 12. Main Output Tray 13. Sub Output Tray 14. Finisher (Option) 15. Stapler Troubleshooting Paper Feed Problems The printer is designed to function with minimal paper jams using Xerox supported media. Other media types - Xerox 6400S | WorkCentre 6400 User Guide - Page 199
is being used. Use only Xerox-approved media. For more information see Supported Media on page 41. Recheck the media path inside the duplex unit and make sure that you is too thick. Use only Xerox-approved media. See Supported Media on page 41. WorkCentre 6400 Multifunction Printer 199 User Guide - Xerox 6400S | WorkCentre 6400 User Guide - Page 200
Tray 1 with the flaps facing up. If the flaps are on the long edge, load the envelopes with the flap toward the left of the printer with the flaps facing up. Clean the media feed roller. For more details, see Maintenance and Cleaning on page 154. 200 WorkCentre 6400 Multifunction Printer User Guide - Xerox 6400S | WorkCentre 6400 User Guide - Page 201
on page 203 Your WorkCentre 6400 printer is designed to produce consistently high-quality prints. If you observe print-quality problems, use the information on these pages to troubleshoot the problem. For more information, go online to Xerox Support & Drivers at www.xerox.com/office/WC6400support - Xerox 6400S | WorkCentre 6400 User Guide - Page 202
. Selecting Paper Type For information on supported paper type and weight: 1. Select Machine Status on the control panel. 2. Select Machine Info. 3. Select Information Pages, then select Paper Tips Page, and then press the OK button to print. 202 WorkCentre 6400 Multifunction Printer User Guide - Xerox 6400S | WorkCentre 6400 User Guide - Page 203
(United States) www.xerox.com/europaper Recommended Media List (Europe) www.xerox.com/office/WC6400supplies to order Xerox printing media Troubleshooting Print-Quality Problems • Nothing Prints or Black Spots Print on Page on page 203 • Entire Page Prints Black or Color on page 204 • Image Prints - Xerox 6400S | WorkCentre 6400 User Guide - Page 204
toner cartridges may be defective. Remove the toner cartridges and check for damage. Media type is set incorrectly. When printing envelopes, labels, heavyweight stock, or transparencies, specify the appropriate media type in the printer driver. 204 WorkCentre 6400 Multifunction Printer User Guide - Xerox 6400S | WorkCentre 6400 User Guide - Page 205
. Remove the toner cartridges and check each for damage. If one or more is damaged, replace it. The printer needs to be calibrated. Perform the color calibration procedure. For more information see Setting Color Calibration on page 202. WorkCentre 6400 Multifunction Printer 205 User Guide - Xerox 6400S | WorkCentre 6400 User Guide - Page 206
more of the toner cartridges may be defective Remove the toner cartridges and check for damage. or low. If it is damaged, replace it. One or more of the imaging units may be defective. Remove the imaging units one at a time, and check for damage. If it is damaged, replace it. The printer is not - Xerox 6400S | WorkCentre 6400 User Guide - Page 207
units may be defective. Remove the imaging units one at a time, and check for damage. If it is damaged, replace it. The two grey dials on the fuser are adjusted for envelope printing. Rotate both grey dials on the fuser to the paper setting. WorkCentre 6400 Multifunction Printer 207 User Guide - Xerox 6400S | WorkCentre 6400 User Guide - Page 208
type, etc.) is being used. Media type is set incorrectly. Use Xerox-approved media. See Supported Media on page 41. When printing envelopes, labels, heavyweight stock, or transparencies, specify the appropriate media type in the printer driver. 208 WorkCentre 6400 Multifunction Printer User Guide - Xerox 6400S | WorkCentre 6400 User Guide - Page 209
Supported Media on page 41. When printing envelopes, labels, heavyweight stock, or transparencies, specify the appropriate media type in the printer driver. Laser lens is dirty. Clean the laser lens. See Cleaning the Laser Lenses on page 164. WorkCentre 6400 Multifunction Printer 209 User Guide - Xerox 6400S | WorkCentre 6400 User Guide - Page 210
several blank sheets and the excess toner should disappear. Check the transfer belt for foreign material or damage. Check the fuser for foreign material. Remove the imaging units one at a time, and check for damage. If it is damaged, replace it. 210 WorkCentre 6400 Multifunction Printer User Guide - Xerox 6400S | WorkCentre 6400 User Guide - Page 211
The imaging unit may be defective. Solutions Remove the toner cartridge with the color causing the abnormal image. Replace it with a new toner cartridge. Remove the imaging units one at a time, and check for damage. If it is damaged, replace it. WorkCentre 6400 Multifunction Printer 211 User Guide - Xerox 6400S | WorkCentre 6400 User Guide - Page 212
in the printer driver or your application. Check the Control Panel for a Toner Status message. If necessary, replace the specified toner cartridge. Perform the Image Quality calibration - Tools > Troubleshooting > Image Quality Calibration. 212 WorkCentre 6400 Multifunction Printer User Guide - Xerox 6400S | WorkCentre 6400 User Guide - Page 213
units one at a time, and check for damage. If it is damaged, replace it. Check the Color Matching settings in the printer driver or your application. Perform the Image Quality calibration - Tools > Troubleshooting > Image Quality Calibration. WorkCentre 6400 Multifunction Printer 213 User Guide - Xerox 6400S | WorkCentre 6400 User Guide - Page 214
Suppressing Background Variations. Copy: Use the Image Quality settings on the Copy menu. Scan: Use the Advanced Settings Tab. Colors are off Copy: Use the Image Quality settings on the Copy menu. Scan: Use the Advanced Settings Tab. 214 WorkCentre 6400 Multifunction Printer User Guide - Xerox 6400S | WorkCentre 6400 User Guide - Page 215
received correctly, even after performing the described operations, contact your service representative. This section includes: • Problems Sending Faxes on page 216 • Problems Receiving Faxes on page 217 • Printing the Protocol Report on page 218 WorkCentre 6400 Multifunction Printer 215 User Guide - Xerox 6400S | WorkCentre 6400 User Guide - Page 216
Troubleshooting Problems Sending Faxes Symptom Cause The document is not scanned. The document is scanned at an angle. The document is too thick, too thin, or too small. The document feeder guides , connect it. Contact the recipient. 216 WorkCentre 6400 Multifunction Printer User Guide - Xerox 6400S | WorkCentre 6400 User Guide - Page 217
. Faxes cannot be received automatically. The paper supply at the receiving fax may not match the original size sent. The printer is set to receive faxes manually. The memory is full. The telephone line is incorrectly connected. There may be a problem with the sender's fax machine. Solution Check - Xerox 6400S | WorkCentre 6400 User Guide - Page 218
Troubleshooting Printing the Protocol Report The Protocol Report provides information about the previous fax job as an aid in determining fax protocol problems. To print the report: 1. Log in as a system administrator. Press the Log In/Out button (user name: admin, default password: 1111). 2. Press - Xerox 6400S | WorkCentre 6400 User Guide - Page 219
panel, under the Machine Information Tab, select Maintenance Assistant. 3. Select Send Diagnostic Information. The diagnostic information will be sent to Xerox. This information can be used by the Xerox Call Center to help you solve the problem. WorkCentre 6400 Multifunction Printer 219 User Guide - Xerox 6400S | WorkCentre 6400 User Guide - Page 220
help on your WorkCentre 6400 printer. Resource Technical support information for your printer, includes online Technical Support, Recommended Media List, Online Support Assistant, driver downloads, documentation, video tutorials, and much more Supplies for your printer A resource for tools - Xerox 6400S | WorkCentre 6400 User Guide - Page 221
page 222 • Environmental Specifications on page 223 • Electrical Specifications on page 224 • Performance Specifications on page 225 • Controller Specifications on page 226 For media specifications and capacities, see Supported Media on page 41. WorkCentre 6400 Multifunction Printer 221 User Guide - Xerox 6400S | WorkCentre 6400 User Guide - Page 222
: 355.6 mm (14.0 in.) • Weight: 9.8 kg (21.6 lb.) Clearance Requirements 38 cm (15 in.) 96.5 cm (38 in.) 10.2 cm (4 in.) 38 cm (15 in.) 43.3 cm (19 in.) 32.3 cm (12.7 in.) 129.5 cm (51 in.) 68.6 cm (27 in.) 129.5 cm (51 in.) 222 WorkCentre 6400 Multifunction Printer User Guide 150 cm (59 in - Xerox 6400S | WorkCentre 6400 User Guide - Page 223
Environmental Specifications Temperature • Storage: -20° to 40° C / -4° to 104° F • Operating: 10° to 32° C / 50° to 90° F • ) • Operating: 10% to 95% (non-condensing) • Optimum Performance: 35% and 70% (non-condensing) Product Specifications WorkCentre 6400 Multifunction Printer 223 User Guide - Xerox 6400S | WorkCentre 6400 User Guide - Page 224
Product Specifications Electrical Specifications • 110-120 VAC, 50-60 Hz • 220-240 VAC, 50-60 Hz • Inrush Current - maximum of 100A and 10ms (half cycle) • ENERGY STAR qualified product 224 WorkCentre 6400 Multifunction Printer User Guide - Xerox 6400S | WorkCentre 6400 User Guide - Page 225
ppm (duplex: 19.4 ppm) Monochrome: 37 ppm (duplex: 22.5 ppm) Copy Speed Color: 30 cpm (600 x 300 dpi) Black and White: 35 cpm (600 x 300 dpi) Scan Speed Color: 30 ipm (600 x 300 dpi) Black and White: 35 ipm (600 x 300 dpi) Product Specifications WorkCentre 6400 Multifunction Printer 225 User Guide - Xerox 6400S | WorkCentre 6400 User Guide - Page 226
Product Specifications Controller Specifications Processor • RISC CPU (800 MHz) Memory • 1 GB (DDR SDRAM) Interfaces • Ethernet 10/100/1000Base-TX • Universal Serial Bus (USB 2.0) 226 WorkCentre 6400 Multifunction Printer User Guide - Xerox 6400S | WorkCentre 6400 User Guide - Page 227
Regulatory Information This chapter includes: • Basic Regulations on page 228 • Copy Regulations on page 230 • Fax Regulations on page 233 • Material Safety Data Sheets on page 237 A WorkCentre 6400 Multifunction Printer 227 User Guide - Xerox 6400S | WorkCentre 6400 User Guide - Page 228
ensure compliance with Part 15 of the FCC rules, use shielded interface cables. Canada (Regulations) This Class A digital apparatus complies with Canadian ICES-003. Cet appareil numérique de la classe A est conforme à la norme NMB-003 du Canada. 228 WorkCentre 6400 Multifunction Printer User Guide - Xerox 6400S | WorkCentre 6400 User Guide - Page 229
product is being used has adequate ventilation, especially if you are printing a high volume of materials, or if the product is being used continuously over a long period. WorkCentre 6400 Multifunction Printer 229 User Guide - Xerox 6400S | WorkCentre 6400 User Guide - Page 230
the reproduction is in black and white and is less than 75% or more than 150% of the linear dimensions of the original. • the United States. • Stamps and other representatives of value, of whatever denomination, which have been or may be issued under WorkCentre 6400 Multifunction Printer User Guide - Xerox 6400S | WorkCentre 6400 User Guide - Page 231
• Previous military service Exception: United States military discharge states: • Automobile Licenses • Drivers' Licenses • Automobile Certificates of issuing certified copies thereof, where the copy falsely purports to be a certified copy thereof. WorkCentre 6400 Multifunction Printer 231 User Guide - Xerox 6400S | WorkCentre 6400 User Guide - Page 232
This list is not inclusive and no liability is assumed for either its completeness or accuracy. In case of doubt, contact your legal counsel. 232 WorkCentre 6400 Multifunction Printer User Guide - Xerox 6400S | WorkCentre 6400 User Guide - Page 233
(e.g., 03 is a REN of 0.3). For earlier products, the REN is separately shown on the label. To order the correct service from the local telephone company, you may also have to quote the codes listed below: • Facility Interface Code (FIC) = 02LS2 WorkCentre 6400 Multifunction Printer 233 User Guide - Xerox 6400S | WorkCentre 6400 User Guide - Page 234
within the User Guide. If the equipment is causing harm to the telephone network, the Telephone Company may request that you disconnect the equipment until the problem is resolved. Repairs to the machine should be made only by a Xerox Service Representative or an authorized Xerox Service provider - Xerox 6400S | WorkCentre 6400 User Guide - Page 235
of this product, connection to external control software or to external control apparatus not authorized by Xerox, will invalidate its certification. South Africa This modem must be used in conjunction with an approved surge protection device. WorkCentre 6400 Multifunction Printer 235 User Guide - Xerox 6400S | WorkCentre 6400 User Guide - Page 236
to support pulse dialing. 5. Use of pulse dialing, when this equipment is connected to the same line as other equipment, may give rise to 'bell tinkle' or noise and may also cause a false answer condition. Should such problems occur, the user should NOT contact the Telecom Faults Service. 6. The - Xerox 6400S | WorkCentre 6400 User Guide - Page 237
Safety Data information regarding your WorkCentre 6400 printer, go to: North America: www.xerox.com/msds European Union: www.xerox.com/environment_europe For the Customer Support Center phone numbers, go to www.xerox.com/office/worldcontacts. WorkCentre 6400 Multifunction Printer 237 User Guide - Xerox 6400S | WorkCentre 6400 User Guide - Page 238
Regulatory Information 238 WorkCentre 6400 Multifunction Printer User Guide - Xerox 6400S | WorkCentre 6400 User Guide - Page 239
Recycling and Disposal This chapter includes recyling and disposal guidelines and information for: • All Countries on page 240 • European Union on page 240 • North America on page 242 • Other Countries on page 242 B WorkCentre 6400 Multifunction Printer 239 User Guide - Xerox 6400S | WorkCentre 6400 User Guide - Page 240
your local authorities. In the United States, you may also refer in the normal household waste stream. In new equipment, your local retailer may be required to take back your old equipment free of charge. Please ask you retailer for information. 240 WorkCentre 6400 Multifunction Printer User Guide - Xerox 6400S | WorkCentre 6400 User Guide - Page 241
for incorrect disposal of this waste, in accordance with national legislation. For Business Users in the European Union If you wish to discard electrical and electronic equipment, please contact your dealer or supplier for further information. WorkCentre 6400 Multifunction Printer 241 User Guide - Xerox 6400S | WorkCentre 6400 User Guide - Page 242
information about Xerox environmental programs, visit www.xerox.com/environment or for recycling and disposal information, contact your local authorities. Other Countries Please contact your local waste authorities and request disposal guidance. 242 WorkCentre 6400 Multifunction Printer User Guide - Xerox 6400S | WorkCentre 6400 User Guide - Page 243
, 224 email, 146 scanning an image into an email, 146 envelopes loading, 46 printing, 54 environmental specifications, 223 Ethernet connection, 30 exception pages, 72 printing, 72 extension cord, 12 exterior cleaning, 157 F fax problems, 215 WorkCentre 6400 Multifunction Printer 243 User Guide - Xerox 6400S | WorkCentre 6400 User Guide - Page 244
pages printing, 69 installing printer drivers Windows 2000 or newer, 34 244 WorkCentre 6400 Multifunction Printer User Guide J jams staples, 195 job completion notification, 79 L labels printing, 54 laser lenses cleaning, 164 lifting the printer, 173 load scan documents, 126 loading envelopes - Xerox 6400S | WorkCentre 6400 User Guide - Page 245
N network choosing a network connection, 30 IP addresses, 31 network connection Ethernet, 30 non-Xerox supplies, 167 O options, 21 original size scanning template setup, 132 setting up a scan template, 132 P pages per minute (ppm), 20 paper jams, 181 document feeder, 190 duplex unit, 186 finisher, - Xerox 6400S | WorkCentre 6400 User Guide - Page 246
Guarantee, 173 transparencies printing, 53 tray 1 loading paper, 43 Trays 2, 3, 4 feed roller cleaning, 159 troubleshooting, 177 paper jams, 181 PhaserSMART, 27 print-quality problems, 201 technical support, 27 U USB, 30 W watermarks, 75 246 WorkCentre 6400 Multifunction Printer User Guide - Xerox 6400S | WorkCentre 6400 User Guide - Page 247
or newer USB Connection, 34, 35 X Xerox warranty, 173 Xerox Scan Utility scan template setup feature, 132 scan to email feature, 146 scan to file feature, 145 scan to home feature, 148 setting up a template, 132 Xerox Support Centre, 28 Index WorkCentre 6400 Multifunction Printer 247 User Guide - Xerox 6400S | WorkCentre 6400 User Guide - Page 248
Index 248 WorkCentre 6400 Multifunction Printer User Guide
-
 1
1 -
 2
2 -
 3
3 -
 4
4 -
 5
5 -
 6
6 -
 7
7 -
8
-
9
-
10
-
11
-
12
-
13
-
14
-
15
-
16
-
17
-
18
-
19
-
20
-
21
-
22
-
23
-
24
-
25
-
26
-
27
-
28
-
29
-
30
-
31
-
32
-
33
-
34
-
35
-
36
-
37
-
38
-
39
-
40
-
41
-
42
-
43
-
44
-
45
-
46
-
47
-
48
-
49
-
50
-
51
-
52
-
53
-
54
-
55
-
56
-
57
-
58
-
59
-
60
-
61
-
62
-
63
-
64
-
65
-
66
-
67
-
68
-
69
-
70
-
71
-
72
-
73
-
74
-
75
-
76
-
77
-
78
-
79
-
80
-
81
-
82
-
83
-
84
-
85
-
86
-
87
-
88
-
89
-
90
-
91
-
92
-
93
-
94
-
95
-
96
-
97
-
98
-
99
-
100
-
101
-
102
-
103
-
104
-
105
-
106
-
107
-
108
-
109
-
110
-
111
-
112
-
113
-
114
-
115
-
116
-
117
-
118
-
119
-
120
-
121
-
122
-
123
-
124
-
125
-
126
-
127
-
128
-
129
-
130
-
131
-
132
-
133
-
134
-
135
-
136
-
137
-
138
-
139
-
140
-
141
-
142
-
143
-
144
-
145
-
146
-
147
-
148
-
149
-
150
-
151
-
152
-
153
-
154
-
155
-
156
-
157
-
158
-
159
-
160
-
161
-
162
-
163
-
164
-
165
-
166
-
167
-
168
-
169
-
170
-
171
-
172
-
173
-
174
-
175
-
176
-
177
-
178
-
179
-
180
-
181
-
182
-
183
-
184
-
185
-
186
-
187
-
188
-
189
-
190
-
191
-
192
-
193
-
194
-
195
-
196
-
197
-
198
-
199
-
200
-
201
-
202
-
203
-
204
-
205
-
206
-
207
-
208
-
209
-
210
-
211
-
212
-
213
-
214
-
215
-
216
-
217
-
218
-
219
-
220
-
221
-
222
-
223
-
224
-
225
-
226
-
227
-
228
-
229
-
230
-
231
-
232
-
233
-
234
-
235
-
236
-
237
-
238
-
239
-
240
-
241
-
242
-
243
-
244
-
245
-
246
-
247
-
248
 |
 |

WorkCentre
®
6400
User Guide
English
Français
Guide d'utilisation
Italiano
Guida dell'utente
Deutsch
Benutzerhandbuch
Español
Guía del usuario
Português
Guia do usuário
Nederlands
Gebruikershandleiding
Svenska
Användarhandbok
Dansk
Betjeningsvejledning
Norsk
Brukerhåndbok
Suomi
Käyttöopas
Čeština
Uživatelská příručka
Polski
Przewodnik użytkownika
Magyar
Felhasználói útmutató
Русский
Руководство пользователя
Türkçe
Kullanıcı Kılavuzu
Ελληνικά
Εγχειρίδιο χρήστη
WorkCentre
®
6400
Color Multifunction Printer