Xerox C2424 PaperPort Professional 10 Getting Started Guide - Page 14
Right-click a thumbnail to display the item's shortcut menu.
 |
UPC - 095205676532
View all Xerox C2424 manuals
Add to My Manuals
Save this manual to your list of manuals |
Page 14 highlights
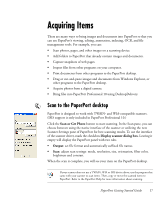
Each item thumbnail appears with an icon that identifies the program in which it was created or is currently associated. This makes it easy and convenient to quickly see and find all different types of items on your computer. Click on a thumbnail to see image attributes. A small icon indicates that the Read-only attribute is set for that item. A small icon indicates that the image has annotations. Multi-page image items show to let you scroll through the pages even with the Page Thumbnails pane closed. Before you can work with an item, you must first select its thumbnail on the PaperPort desktop. A red line appears around an item to indicate that it is selected. While working with item thumbnails, you can: • Drag a thumbnail to reposition it on the PaperPort desktop. • Drag a thumbnail to a folder to move the item to that folder. • Drag a thumbnail to another open Workspace to move the item to that open folder. • Double-click a thumbnail to view the item. • Press the Ctrl key and double-click a thumbnail to open the item in its source program. • Right-click a thumbnail to display the item's shortcut menu. • Drag a thumbnail to the Send To bar to send a copy of the item to another program. Just as you can organize and arrange documents on your physical desktop, you can quickly rearrange the items on the PaperPort desktop. For example, after selecting a thumbnail, you can reposition it or rotate it. Using item thumbnails on the PaperPort desktop, you can also easily combine individual PaperPort Image items or PDF Image items into multi-page items. This feature is useful as an organizational tool if you are using a scanner that can only scan a page as a separate item. 14 Getting to Know PaperPort
-
 1
1 -
2
-
3
-
4
-
5
-
6
-
7
-
8
-
 9
9 -
 10
10 -
 11
11 -
 12
12 -
 13
13 -
 14
14 -
 15
15 -
 16
16 -
 17
17 -
 18
18 -
 19
19 -
20
-
21
-
22
-
23
-
24
-
25
-
26
-
27
-
28
-
29
-
30
-
31
-
32
-
33
-
34
-
35
-
36
 |
 |