Yamaha 800 Owner's Manual - Page 5
How to install
 |
View all Yamaha 800 manuals
Add to My Manuals
Save this manual to your list of manuals |
Page 5 highlights
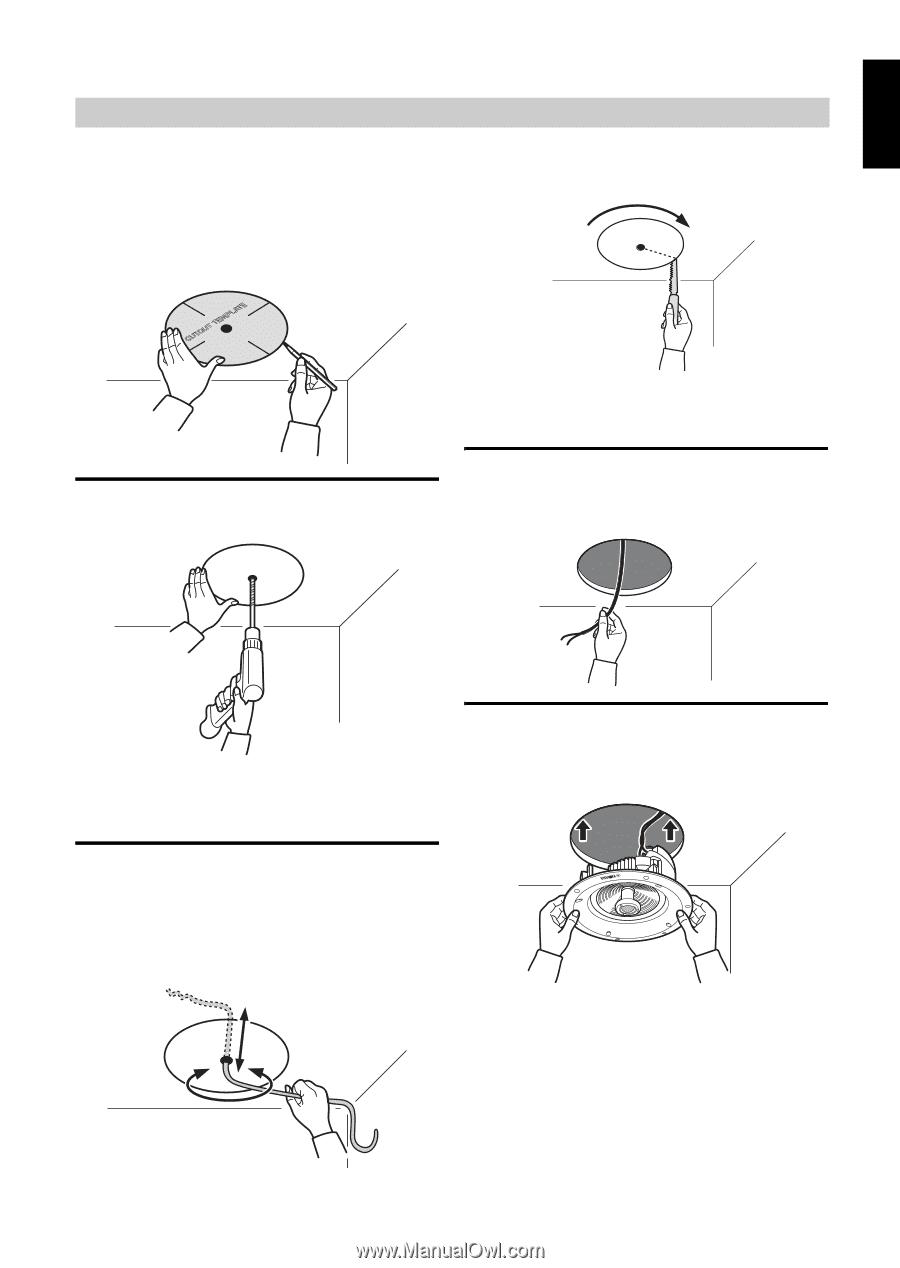
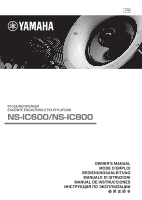
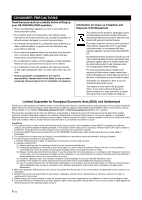
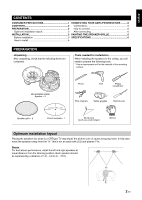
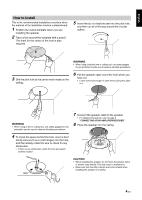
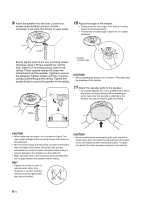
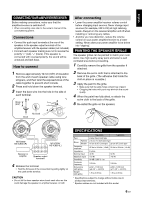
English How to install This is the recommended installation procedure when the material of the installation location is plasterboard. 1 Position the cutout template where you are installing the speaker. 2 Trace a line around the template with a pencil. The mark for the center of the hole is also required. 5 Insert the tip of a keyhole saw into the pilot hole, and then cut all of the way around the circular outline. WARNING • When using a keyhole saw or cutting tool, use safety goggles for eye protection and be sure to observe all safety precautions. 3 Drill the pilot hole at the center mark made on the ceiling. 6 Pull the speaker cable out of the hole which you have cut. • Leave some extra length of cable when pulling the cable out. WARNING • When using a drill or cutting tool, use safety goggles for eye protection and be sure to observe all safety precautions. 7 Connect the speaker cable to the speaker. • For detailed instructions, refer to page 6 "CONNECTING YOUR AMPLIFIER/RECEIVER". 8 Place the speaker into the ceiling. 4 To check the space behind the hole, insert a bent sturdy wire (such as a coat hanger) into the hole, and then slowly rotate the wire to check for any obstruction. • If there is any obstruction, patch the hole and select another location. 360° CAUTION • When installing the speaker, do not touch the tweeter dome or woofer cone directly. This may cause a malfunction. • Make sure that mounting clamps are turned inward when installing the speaker in a ceiling. 4 En
-
 1
1 -
 2
2 -
 3
3 -
 4
4 -
 5
5 -
 6
6 -
 7
7 -
 8
8
 |
 |