Yamaha AVS-700 AVS-700 OWNERS MANUAL - Page 7
Supplied, Accessories, Controls, Their, Functions
 |
View all Yamaha AVS-700 manuals
Add to My Manuals
Save this manual to your list of manuals |
Page 7 highlights
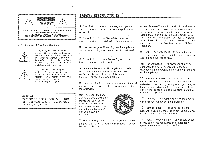
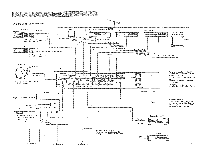
SUPPLIED ACCESSORIES (See Fig. W .) After unpacking, check that the following parts are contained. • Remote control transmitter x 1 • Batteries (si2:e "AAA") x 2 • Video cord x 1 • Audio cord )4 1 CONTROLS AND THEIR FUNCTIONS in FRONT PANEL (See Fig, F2- 1 . ) 0 POWER switch and indicator This switch is used to turn the power to the unit on and off. Press it to supply power and light the POWER indicator. Press the switch again to turn the power off. Notes on Stand-by mode When the POWER key on the remote control transmitter is pressed to turn off the power instead of the POWER switch on the front panel, the POWER STANDBY indicator remains dimly lit. In this state, pressing the POWER key turns the power on and the POWER STANDBY indicator goes off. To completely turn off the power, press the POWER switch on the front panel. O AUX jacks These jacks are used to connect an auxiliary video or audio input source, such as a video camera, to this unit. To obtain a high resolution picture, connect S input connector on a video camera, etc. to the S VIDEO connector. REMOTE CONTROL sensor This sensor is used to receive signals from the remote control unit. O INPUT indicators When an input source is selected, the corresponding indicator lights. 0 Audio MUTING indicator This indicator lights when Muting is engaged (from the remote control unit). By pressing the MUTE button on the front panel or the MUTE -20 dB key of the remote control transmitter, the sound level will be muted by 20 dB. © REC OUT selector and REC OUT ON/OFF button The REC OUT selector is used to select the source to be recorded. The REC OUT ON/OFF button Is used to turn on/off the output of the source signal selected with the REC OUT selector through the REC OUT jacks. They enable video/audio recording of any source, even while monitoring another. For details, see the "RECORDING" section described later. 0 INPUT SELECTOR buttons This button is used to select the source you wish to monitor (Auxiliary, Video Cassette Recorder 1, Video Cassette Recorder 2, Laser Disc player/CD Video player, Television, Tape deck 2, Tape deck 1, Tuner, CD player or Turntable). When one of these sources is selected, the corresponding indicator lights. 6
-
 1
1 -
 2
2 -
 3
3 -
 4
4 -
 5
5 -
 6
6 -
 7
7 -
 8
8 -
 9
9 -
 10
10 -
 11
11 -
 12
12 -
13
-
14
-
15
-
16
 |
 |
