Yamaha CDX-396 Owner's Manual
Yamaha CDX-396 Manual
 |
View all Yamaha CDX-396 manuals
Add to My Manuals
Save this manual to your list of manuals |
Yamaha CDX-396 manual content summary:
- Yamaha CDX-396 | Owner's Manual - Page 1
U C A CDX-596/496/396 Compact Disc Player Lecteur Compact Disque OWNER'S MANUAL MODE D'EMPLOI - Yamaha CDX-396 | Owner's Manual - Page 2
The unit has been dropped, or the cabinet damaged. 16 Servicing - The user should not attempt to service the unit beyond those means described in the operating instructions. All other servicing should be referred to qualified service personnel. 17 Power Lines - An outdoor antenna should be located - Yamaha CDX-396 | Owner's Manual - Page 3
"OFF" and "ON", please try to eliminate the problem by using one of the following measures: Relocate either instructions found in the users manual, may cause interference harmful to the operation of other electronic devices. The above statements apply ONLY to those products distributed by Yamaha - Yamaha CDX-396 | Owner's Manual - Page 4
CAUTION 1 NOTES ABOUT DISCS 2 FEATURES 3 UNPACKING 3 NOTES ABOUT THE REMOTE CONTROL 4 CONNECTIONS 5 IDENTIFICATION OF COMPONENTS Manual tape-programming 18 Random sequential tapeprogramming 19 Automatic searching for the peak level on a disc 20 CD SYNCHRONIZED RECORDING 21 TROUBLESHOOTING - Yamaha CDX-396 | Owner's Manual - Page 5
please read this manual carefully. Keep it Be sure to read the "Troubleshooting" section on common operating errors before of accident causing damage. YAMAHA will not be held laser beam used in this compact disc player is harmful to the eyes, do not attempt to disassemble the cabinet. Refer servicing - Yamaha CDX-396 | Owner's Manual - Page 6
discs can be played with ordinary CD players, however, the text data can be displayed only with CD players which have the ability to display such data. CDX-596 can display text data recorded on CD-TEXT discs. Note This compact disc player may not be able to play some CD-RW discs or discs on which - Yamaha CDX-396 | Owner's Manual - Page 7
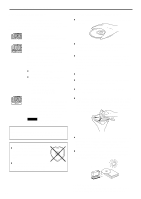
ⅷ Remote Control Capability ⅷ Optical Digital Output CDX-596 only ⅷ Coaxial Digital Output ⅷ CD-TEXT Data Display Capability UNPACKING Carefully remove this unit and accessories from the box. You should find the unit itself and the following accessories. Remote control CDX-596 CDX-496 CDX-396 - Yamaha CDX-396 | Owner's Manual - Page 8
) according to the polarity markings on the inside of the battery compartment. 3. Close the battery compartment cover. 1 3 2 Remote control operation range CDX-596, CDX-496 CDX-396 Remote control sensor Within approximately 6 m (19.7 feet) 30° 30° Battery replacement If you notice that the - Yamaha CDX-396 | Owner's Manual - Page 9
terminals to the "CD" (or "AUX") terminals of the amplifier. For additional details concerning these connections, refer to the operation instructions of the amplifier etc. to record CD onto MD directly. When the DIGITAL AUDIO OUT (COAXIAL) terminal of this unit is used ( 3 ) CDX-596 only Make the - Yamaha CDX-396 | Owner's Manual - Page 10
OUTPUT LEVEL PHONES Disc tray (p. 8) CDX-396 POWER (p. 8) Remote control sensor (p. 4) PHONES jack (p. 12) The shaded part ( ) is provided for CDX-596 only. Remote control sensor (p. 4) Display panel NATURAL SOUND COMPACT DISC PLAYER POWER OPEN/CLOSE 10 1 2 3 4 5 6 7 8 9 0 SKIP - Yamaha CDX-396 | Owner's Manual - Page 11
on which the controls are best described. REMOTE CONTROL TEXT/TIME (p. 11) TIME (p. 11) CDX-596 TEXT/ TIME CDX-496, 396 TIME SYNCHRO (p. OPEN/CLOSE (p. 8) PEAK (p. 20) PROG (p. 14) CLEAR (p. 15) INDEX (p. 15) CDX-596 and CDX-496 only OUTPUT LEVEL (p. 12) RANDOM (p. 13) "play" (p. 8) / "skip" (p. - Yamaha CDX-396 | Owner's Manual - Page 12
manual describes how to operate this unit by using the remote control. To operate this unit from the front panel, use the corresponding buttons on the front panel. BASIC OPERATION 1 NATURAL SOUND COMPACT DISC PLAYER Display information CDX-596 1 2 3 3 4 5 6 7 8 9 10 11 12 CDX-496, CDX-396 1 4 - Yamaha CDX-396 | Owner's Manual - Page 13
automatically from the first track. 5 The selected track number is displayed CDX-496, CDX-396 To select track number 10 or higher Press +10 to select the tracks nor the total recorded time of the disc. ● CDX-596 only If you load a CD-TEXT disc, the display also shows the disc title after - Yamaha CDX-396 | Owner's Manual - Page 14
when the unit is paused or stopped. ● When using or on the remote control: If (or ) is pressed and held, the track number is continuously locating a precise position within a track, or for reviewing the contents quickly. ● Manual search can also be performed while disc play is paused - Yamaha CDX-396 | Owner's Manual - Page 15
title, artist name, or track name may not be displayed with some CD-TEXT discs. In that case, "(NO ENTRY)" appears on the display. ● When playing a CD-TEXT disc, "CD-TEXT" also lights up on displays 1 - 4. CDX-496 and CDX-396 You can select any of the four time displays by pressing TIME. 1 Elapsed - Yamaha CDX-396 | Owner's Manual - Page 16
OFF Dim* * The AUTO DISPLAY OFF indicator lights up. If a disc is played in this state, the display illumination will be turned off. CDX-496, CDX-396 If desired, you can change brightness of the display in three degrees by pressing DIMMER. DIMMER Normal illumination Slightly dim Dim Automatic - Yamaha CDX-396 | Owner's Manual - Page 17
RANDOM. or RANDOM Notes ● This feature will not function while programming, or during random-sequence play. ● CDX-596 and CDX-496 only If the power is mode will change whenever you press REPEAT. CDX-596 (off) SINGLE REPEAT (S) A single in the same order. * CDX-596 and CDX-496 only If the power - Yamaha CDX-396 | Owner's Manual - Page 18
+I0 INDEX 1 1 Press to stop the unit. 3 Program a desired track by pressing the corresponding 6 numeric button. 2 Press PROG. PROG CDX-596 PROGRAM Blinks. CDX-496, CDX-396 PROGRAM TOTAL Blinks. Repeat this operation to program more tracks. You can select the same track again. 4 When - Yamaha CDX-396 | Owner's Manual - Page 19
started from any desired index number. 1 Press a numeric button to select a track which has index numbers. 5 2 Press INDEX. INDEX CDX-596 11 12 5 6 7 8 9 10 CDX-496, CDX-396 INDEX To cancel the index search function Press INDEX. Notes ● Not all discs have index numbers. In addition, among - Yamaha CDX-396 | Owner's Manual - Page 20
TAPE "TAPE 46" turns on. CDX-496, CDX-396 "C-46" turns on. You can select any of the four tape lengths by pressing TAPE. 46 54 (off) 60 90 E-16 If desired, you can also enter the tape's total possible recording time manually. Example: For a C-64 tape (32 minutes on each side), press "6" and - Yamaha CDX-396 | Owner's Manual - Page 21
program data for side A and side B. CDX-596 1 234 PROGRAM 12345 A CDX-496, CDX-396 1 3 PROGRAM A TOTAL ● All tracks CD synchronized recording function can be used if your tape deck is compatible with it. If so, in step 5 and 6, press SYNCHRO and then press on this unit's remote control - Yamaha CDX-396 | Owner's Manual - Page 22
2 Press PROG. PROG CDX-596 PROGRAM Blinks. 1 2 3 4 5 6 7 8 9 10 A 11 12 Blinks. CDX-496, CDX-396 PROGRAM A TOTAL REMAIN CD synchronized recording function can be used if your tape deck is compatible with it. If so, in step 6 and 7, press SYNCHRO and then press on this unit's remote control - Yamaha CDX-396 | Owner's Manual - Page 23
the program data for side A and side B. CDX-596 1 23 4 PROGRAM 2468 A 12 CDX-496, CDX-396 1 3 PROGRAM A TOTAL 4 2 1 CD synchronized recording function can be used if your tape deck is compatible with it. If so, in step 3 and 4, press SYNCHRO and then press on this unit's remote control - Yamaha CDX-396 | Owner's Manual - Page 24
the source level peaks and next plays that part repeatedly. When recording to tape, this feature is very helpful for adjusting the recording level on the tape deck. 1 Press to to this sound. CDX-596 REPEAT 11 12 8 9 10 REPEAT 11 12 8 9 10 CDX-496, CDX-396 PEAK REPEAT PEAK REPEAT E-20 - Yamaha CDX-396 | Owner's Manual - Page 25
YAMAHA tape deck compatible with this function. (Refer to the tape deck's operation manual to find out whether it is compatible or not.) * This unit and the tape deck must be placed close to each other so that both of them can simultaneously receive the signals from this unit's remote control CD- - Yamaha CDX-396 | Owner's Manual - Page 26
TROUBLESHOOTING authorized YAMAHA dealer or service center the laser pickup. Play is dirty. The CD-RW (ReWritable) CDX-596 and CDX-496 only) The remote control does not work. TV functions strangely when the remote control problem persists, the cables may be defective. Set the amplifier controls - Yamaha CDX-396 | Owner's Manual - Page 27
50 Hz Europe and U.K. models 230V, 50 Hz General model 110/120/220/240V, 50/60 Hz Power consumption - Yamaha CDX-396 | Owner's Manual - Page 28
ELECTRONIQUE FRANCE S.A. RUE AMBROISE CROIZAT BP70 CROISSY-BEAUBOURG 77312 MARNE-LA-VALLEE CEDEX02, FRANCE YAMAHA ELECTRONICS (UK) LTD. YAMAHA HOUSE, 200 RICKMANSWORTH ROAD WATFORD, HERTS WD1 7JS, ENGLAND YAMAHA SCANDINAVIA A.B. J A WETTERGRENS GATA 1, BOX 30053, 400 43 VASTRA FRÖLUNDA, SWEDEN
-
 1
1 -
 2
2 -
 3
3 -
 4
4 -
 5
5 -
 6
6 -
 7
7 -
8
-
9
-
10
-
11
-
12
-
13
-
14
-
15
-
16
-
17
-
18
-
19
-
20
-
21
-
22
-
23
-
24
-
25
-
26
-
27
-
28
 |
 |

Compact Disc Player
Lecteur Compact Disque
CD
X-
596
/4
96/396
OWNER’S MANUAL
MODE D’EMPLOI
U C A