Yamaha CLP-110 Owner's Manual
Yamaha CLP-110 Manual
 |
View all Yamaha CLP-110 manuals
Add to My Manuals
Save this manual to your list of manuals |
Yamaha CLP-110 manual content summary:
- Yamaha CLP-110 | Owner's Manual - Page 1
Manual Bedienungsanleitung Mode d'emploi Manual de instrucciones Before using the Clavinova, be sure to read "PRECAUTIONS„ on pages 6 -7. Achten Sie darauf, vor Einsatz des Clavinova die "VORSICHTSMASSNAHMEN„ auf Seite 6-7 durchzulesen. Avant d'utiliser le Clavinova keyboard la unidad sale de fábrica - Yamaha CLP-110 | Owner's Manual - Page 2
indicated in the safety instruction section. CAUTION RISK OF ELECTRIC SHOCK DO NOT OPEN CAUTION: TO REDUCE THE RISK OF ELECTRIC SHOCK. DO NOT REMOVE COVER (OR BACK). NO USER-SERVICEABLE PARTS INSIDE. REFER SERVICING TO QUALIFIED SERVICE PERSONNEL. See bottom of Keyboard enclosure for graphic symbol - Yamaha CLP-110 | Owner's Manual - Page 3
functions. Appendix (page 33): This section introduces reference material. * The model CLP-110 will be referred to as the CLP/Clavinova in this Owner's Manual. * The illustrations of the controls in this owner's manual are for instructional purposes only and actual appearance of the controls may be - Yamaha CLP-110 | Owner's Manual - Page 4
27 Troubleshooting 28 Options 28 Keyboard Stand Assembly 29 Index 31 Appendix MIDI Data Format / MIDI-Datenformat / Format des données MIDI / Formato de datos MIDI 34 MIDI Implementation Chart 38 Specifications / Technische Daten / Caractéristiques techniques / Especificaciones 39 4 CLP-110 - Yamaha CLP-110 | Owner's Manual - Page 5
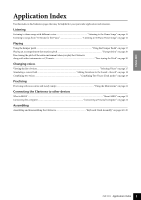
the Metronome" on page 21 Connecting the Clavinova to other devices What is MIDI? ..."About MIDI" on page 23 Connecting the computer Connecting a Personal Computer" on page 24 Assembling Assembling and disassembling the Clavinova Keyboard Stand Assembly" on pages 29-30 CLP-110 Application Index 5 - Yamaha CLP-110 | Owner's Manual - Page 6
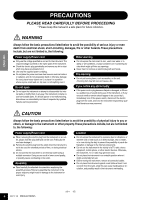
user-serviceable parts. If it should appear to be malfunctioning, discontinue use immediately and have it inspected by qualified Yamaha service disconnect the electric plug from the outlet, and have the instrument inspected by qualified Yamaha service personnel. 6 CLP-110 PRECAUTIONS (1)B-7 1/2 - Yamaha CLP-110 | Owner's Manual - Page 7
qualified Yamaha service personnel. G Do not place vinyl, plastic or rubber objects on the instrument, since this might discolor the panel or keyboard. G Do long-term use, tighten them periodically using the included tool. Yamaha cannot be held responsible for damage caused by improper use or modi - Yamaha CLP-110 | Owner's Manual - Page 8
for the Piano" (Music Book) • Owner's Manual This manual contains complete instructions for operating your Clavinova. • Quick Operation Guide • keyboard horizontally. Do not lean it up against a wall or stand it up on its side. Do not subject the instrument to excessive vibration or shock. 8 CLP-110 - Yamaha CLP-110 | Owner's Manual - Page 9
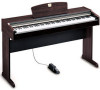
Features The Yamaha Clavinova CLP-110 digital piano offers unmatched sonic realism and natural grand-piano type playability as well as Yamaha's original "AWM Stereo Sampling" tone-generation technology for rich, musical voices, and a special "Graded Hammer" keyboard that provides graded key weight - Yamaha CLP-110 | Owner's Manual - Page 10
the music rest). 3. Gently lower the music rest backward until it is all the way down. CAUTION Do not try to use the music rest in a half-raised position. When lowering the music rest, do not release your hands from the music rest until it is all the way down. 10 CLP-110 Before Using the Clavinova - Yamaha CLP-110 | Owner's Manual - Page 11
Do not use the Clavinova at a high volume level for a long period of time, or your hearing may be damaged. TERMINOLOGY MASTER VOLUME: The volume level of the entire keyboard sound TIP You can also adjust the [PHONES] output level using the [MASTER VOLUME] control. CLP-110 Before Using the - Yamaha CLP-110 | Owner's Manual - Page 12
VOICE bottom surface PHONES standard stereo phone plug Using the Headphone Hanger A headphone hanger is included in the CLP-110 package so that you can hang the headphones on the Clavinova. Install the headphone hanger using the included two screws (4 × 10mm) as shown in the figure. CAUTION Do not - Yamaha CLP-110 | Owner's Manual - Page 13
how to make detailed settings for the Clavinova's various functions. Part Names 14 Listening to the Demo Songs 15 Listening to 50 Piano Preset Songs 16 Selecting & Playing Voices ON/OFF 27 Control Change ON/OFF 27 Troubleshooting 28 Options 28 Keyboard Stand Assembly 29 Index 31 CLP-110 13 - Yamaha CLP-110 | Owner's Manual - Page 14
ENGLISH Part Names Top panel (CLP-110) 6 PHONES 7 DAMPER PEDAL 8 MIDI THRU OUT IN MASTER VOLUME MIN MAX DEMO POWER METRONOME VOICE 1 A-1 B-1 C0 D0 P21 5 [VOICE P17-19 6 [PHONES P12 7 [DAMPER PEDAL P17, 30 8 MIDI [IN] [OUT] [THRU P23 9 Damper pedal P17, 30 14 CLP-110 Part Names - Yamaha CLP-110 | Owner's Manual - Page 15
Demo Songs Demo songs are provided that effectively demonstrate each of the CLP-110's voices. Procedure 1. Turn on the power. (In case songs. The lowest key C1 A1 Demo Song List Demo songs are original (©2002 Yamaha Corporation) except for the three songs listed below. Refer to the voice list - Yamaha CLP-110 | Owner's Manual - Page 16
the [DEMO] button. • To continue playing other songs, see procedure 2 above. TERMINOLOGY Song: On the CLP-110, performance data is called a "Song." This includes demo songs and piano preset tunes. TIP You can play the keyboard along with the preset song. You can change the voice playing on the - Yamaha CLP-110 | Owner's Manual - Page 17
piano. C 1 Grand Piano 2 Spacious and clear piano with bright reverb. Good for popular music. D1 E.Piano 1 An electronic piano sound created by FM synthesis. Good for popular music. D 1 E.Piano 2 The sound of an electric piano : On the Clavinova, a voice CLP-110 Selecting & Playing Voices 17 - Yamaha CLP-110 | Owner's Manual - Page 18
ENGLISH Adding Variations to the Sound - Reverb This control enables you to select various digital reverb effects that add extra depth and expression to the sound to create a realistic for each voice. depth 0: depth 20: TIP no effect maximum reverb depth 18 CLP-110 Selecting & Playing Voices - Yamaha CLP-110 | Owner's Manual - Page 19
to the voice priority shown in the voice list (page 17), the voice assigned to the lower keyboard will be designated as Voice 1 (the other voice will be designated as Voice 2). You can make While holding down the [VOICE] button, press one of the C1-A1 keys. CLP-110 Selecting & Playing Voices 19 - Yamaha CLP-110 | Owner's Manual - Page 20
entire keyboard. TIP Notes below and above the A-1 .... C7 range of the CLP-110 sound one octave higher and lower, respectively. Fine-tuning the Pitch You can fine-tune the pitch of the entire instrument. This function is useful when you play the Clavinova along with other instruments or CD music - Yamaha CLP-110 | Owner's Manual - Page 21
ENGLISH Using the Metronome The Clavinova features a built-in metronome button, press a sequence of C4-A4 keys to specify a three-digit number. Select a number starting from the left-most digit. For example, to set the tempo "95," press the C4 (0), highest key CLP-110 Selecting & Playing Voices 21 - Yamaha CLP-110 | Owner's Manual - Page 22
C1 G2 The volume level increases as you press higher keys. 2. Stop the metronome. Turn off the metronome by pressing the [METRONOME] button. ENGLISH 22 CLP-110 Selecting & Playing Voices - Yamaha CLP-110 | Owner's Manual - Page 23
] connector, passing it through the unit unmodified. MIDI cables Prepare dedicated MIDI cables. TIP You can also obtain detailed information about MIDI from various music books and other publications. CLP-110 About MIDI 23 - Yamaha CLP-110 | Owner's Manual - Page 24
model UX256, UX96, or UX16) (page 25). NOTE Before you connect the Clavinova to a personal computer, first turn off the power to both the Clavinova and the computer. After you make the connections, turn on the power to the computer first, then turn on the power to the Clavinova. ENGLISH 24 CLP-110 - Yamaha CLP-110 | Owner's Manual - Page 25
refer to the instruction manual for the USB interface. An example of connecting the USB interface to the Clavinova using MIDI cables MIDI computer USB cable THRU OUT IN MIDI cables USB interface MASTER VOLUME MIN MAX DEMO METRONOME VOICE Clavinova POWER CLP-110 Connecting a Personal - Yamaha CLP-110 | Owner's Manual - Page 26
to play 1 and 2 channel song data received from a music computer or sequencer. TIP Program change and other like channel messages received will not affect the CLP-110's panel settings or the notes you play on the keyboard. NOTE The Clavinova does not receive MIDI data when it is in Demo or Preset - Yamaha CLP-110 | Owner's Manual - Page 27
on the corresponding channel to be affected by pedal and other "control" settings received from the controlling device (the keyboard voice is not affected). The CLP-110 also transmits MIDI control change information when the pedal or other appropriate controls are operated. This function makes it - Yamaha CLP-110 | Owner's Manual - Page 28
when the damper cord into the [DAMPER PEDAL] jack (page 30). pedal is not pressed. Options BC-100 Bench A comfortable bench styled to match your Yamaha Clavinova. HPE-160 Stereo Headphones High-performance lightweight dynamic headphones with extra-soft ear pads. 28 CLP-110 Troubleshooting/Options - Yamaha CLP-110 | Owner's Manual - Page 29
or side panels, be extra careful so as not to drop the main unit. • Do not hold the keyboard in any position other than the position shown in the illustration. Place the main unit (A) on the side panels parallel with the side of the unit. 6 x 16 mm flat-head screw CLP-110 Keyboard Stand Assembly 29 - Yamaha CLP-110 | Owner's Manual - Page 30
left over? ➝ Review the assembly procedure and correct any errors. • Is the Clavinova clear of doors and other movable fixtures? ➝ Move the Clavinova to an appropriate location. • Does the Clavinova make a rattling in damage to the instrument or personal injury. 30 CLP-110 Keyboard Stand Assembly - Yamaha CLP-110 | Owner's Manual - Page 31
38 Music Rest 10 P PHONES 12, 14 POWER 11, 14 Precautions 6-7 Preset songs ➝ 50 Piano Preset Songs 16 R Reverb 18 S Song 16 Specifications 39 Start/Stop playback 50 Piano Preset Songs 16 Demo Songs 15 T Transporting 8 Transposition 20 Troubleshooting 28 V VOICE 14, 17-19 CLP-110 - Yamaha CLP-110 | Owner's Manual - Page 32
ENGLISH MEMO 32 CLP-110 Index - Yamaha CLP-110 | Owner's Manual - Page 33
MIDI Implementation Chart / MIDI Implementierung stabelle / Feuille d'implantation MIDI / Gráfica de implementación MIDI 38 Specifications / Technische Daten / Caractéristiques techniques / Especificaciones 39 CLP-110 33 - Yamaha CLP-110 | Owner's Manual - Page 34
your music hardware with computergener-ated MIDI messages, the data provided in this section can help you to control the CLP-110. : 00H ~ 7FH = C-2 ~ G8 vv = Velocity * If received value exceeds the supported range for the selected voice, the note is adjusted by the necessary number of octaves. 2. - Yamaha CLP-110 | Owner's Manual - Page 35
format: [CnH] -> [ppH] CnH = Program event (n = channel number) ppH = Program change number P.C.#=Program Change number CLP-110 Grand Piano 1 Grand Piano 2 E.Piano 1 E.Piano 2 Harpsichord 1 Harpsichord 2 Vibraphone Church Organ 1 Church Organ 2 Strings MSB 0 0 0 0 0 0 0 0 0 0 LSB 122 112 122 122 - Yamaha CLP-110 | Owner's Manual - Page 36
[ddH] -> [F7H] F0H = Exclusive status 43H = YAMAHA ID 1nH = When received, n=0~F. When transmitted, n=0. 4CH = Model ID of XG hhH = Address High mmH = Address Mid status 43H = Yamaha ID 73H = Clavinova ID 01H = Product ID (CLP common) or 7F= Extended Product ID xxH = Product ID (CLP-110: 24H) nnH - Yamaha CLP-110 | Owner's Manual - Page 37
MSB REVERB TYPE LSB Description Refer to Effect MIDI Map 00 : basic type Default value (H) 01(=HALL1) 00 02 01 40 2 00-7F VARIATION TYPE MSB 00-7F VARIATION TYPE LSB • "VARIATION" refers to the EFFECT on CHORUS 42H 10H PHASER 48H 10H TREMOLO 46H 10H DELAY 05H 10H CLP-110 Appendix 37 - Yamaha CLP-110 | Owner's Manual - Page 38
YAMAHA [ Clavinova ] Model CLP-110 MIDI Implementation Chart Date : 18,Jun 2002 Version : 1.00 Function... Transmitted Basic Channel Default 1 Changed 1 - 16 Mode Default 3 Messages ˛ Altered Note 9 - 120 Number : True voice Velocity Note ON Ø 9nH,v=1-127 Note OFF Ø 9nH,v=0 After - Yamaha CLP-110 | Owner's Manual - Page 39
/ Especificaciones Item CLP-110 Keyboard 88 keys (A-1 - Manual, "50 greats for the Piano" (Music Book), Bench (included or optional depending on locale), Quick Operation Guide, Damper pedal * Specifications and descriptions in this owner's manual are for information purposes only. Yamaha - Yamaha CLP-110 | Owner's Manual - Page 40
MEMO 40 CLP-110 Appendix - Yamaha CLP-110 | Owner's Manual - Page 41
MEMO CLP-110 ApCpLePn-1d1ix0 41 - Yamaha CLP-110 | Owner's Manual - Page 42
MEMO 42 CLP-110 Appendix - Yamaha CLP-110 | Owner's Manual - Page 43
of lightning and/or electrical storm activity. 3. try again. If the problem persists, contact an manual, on the name plate, or specifically recommended by Yamaha service this product beyond that described in the user-maintenance instructions. All other servicing should be referred to qualified service - Yamaha CLP-110 | Owner's Manual - Page 44
the instructions found in the users manual, and "ON", please try to eliminate the problem by using one of the following measures: Yamaha Corporation of America, Electronic Service Division to products distributed by Yamaha-Kemble Music (U.K.) Ltd. CAUTION: TO PREVENT ELECTRIC SHOCK, MATCH WIDE - Yamaha CLP-110 | Owner's Manual - Page 45
Ltd. 11 Ubi Road #06-00, Meiban Industrial Building, Singapore Tel: 65-747-4374 TAIWAN Yamaha KHS Music Co., Ltd. 3F, #6, Sec.2 Nan Jing E. Rd. Taipei. Taiwan 104, R.O.C. Tel: 02-2511-8688 THAILAND Siam Music Yamaha Co., Ltd. 121/60-61 RS Tower 17th Floor, Ratchadaphisek RD., Dindaeng, Bangkok 10320 - Yamaha CLP-110 | Owner's Manual - Page 46
Clavinova Web site (English only) http://www.yamahaclavinova.com/ Yamaha Manual Library http://www2.yamaha.co.jp/manual/english/ M.D.G., Pro Audio & Digital Musical Instrument Division, Yamaha Corporation C 2002 Yamaha Corporation V860360 301APAP8.3-03B0 Printed in Singapore
-
 1
1 -
 2
2 -
 3
3 -
 4
4 -
 5
5 -
 6
6 -
 7
7 -
8
-
9
-
10
-
11
-
12
-
13
-
14
-
15
-
16
-
17
-
18
-
19
-
20
-
21
-
22
-
23
-
24
-
25
-
26
-
27
-
28
-
29
-
30
-
31
-
32
-
33
-
34
-
35
-
36
-
37
-
38
-
39
-
40
-
41
-
42
-
43
-
44
-
45
-
46
 |
 |
Owner's Manual
Bedienungsanleitung
Mode d'emploi
Manual de instrucciones
Before using the Clavinova, be sure to read
“
PRECAUTIONS
„
on pages 6-7.
Achten Sie darauf, vor Einsatz des Clavinova die
“
VORSICHTSMASSNAHMEN
„
auf Seite 6-7
durchzulesen.
Avant d'utiliser le Clavinova, lire attentivement la section
«
PRECAUTIONS D'USAGE
»
aux
pages 6-7.
Antes de utilizar el Clavinova, lea las
“
PRECAUCIONES
„
que debe tener en cuenta en las páginas
6 -7.
IMPORTANT
Check your power supply
Make sure that your local AC mains voltage matches the voltage specified on the name plate
on the bottom panel. In some areas a voltage selector may be provided on the bottom panel of
the main keyboard unit near the power cord. Make sure that the voltage selector is set for the
voltage in your area. The voltage selector is set at 240V when the unit is initially shipped. To
change the setting use a "minus" screwdriver to rotate the selector dial so that the correct voltage
appears next to the pointer on the panel.
WICHTIG
Überprüfung der Stromversorgung
Vergewissern Sie sich vor dem Anschließen an das Stromnetz, daß die örtliche Netzspannung den
Betriebsspannungswerten auf dem Typenschild an der Unterseite des Instruments entspricht. In
bestimmten Verkaufsgebieten ist das Instrument mit einem Spannungswähler an der Unterseite
neben der Netzkabeldurchführung ausgestattet. Falls vorhanden, muß der Spannungswähler auf
die örtliche Netzspannung eingestellt werden. Der Spannungswähler wurde werkseitig auf 240 V
voreingestellt. Zum Verstellen drehen Sie den Spannungsregler mit einem Schlitzschraubendreher,
bis der Zeiger auf den korrekten Spannungswert weist.
IMPORTANT
Contrô
ler la source d'alimentation
Vé
rifiez que la tension sp
é
cifi
é
e sur le panneau inf
é
rieur correspond
à
la tension du secteur. Dans
certaines r
é
gions, l'instrument peut
ê
tre
é
quip
é
d'un s
é
lecteur de tension situ
é
sur le panneau
inf
é
rieur du clavier
à
proximit
é
du cordon d'alimentation.
V
é
rifiez que ce s
é
lecteur est bien r
é
gl
é
en fonction de la tension secteur de votre r
é
gion. Le
s
é
lecteur de tension est r
é
gl
é
sur 240 V au d
é
part d'usine. Pour modifier ce r
é
glage, utilisez un
tournevis
à
lame plate pour tourner le s
é
lecteur afin de mettre l'indication correspondant
à
la
tension de votre r
é
gion vis
à
vis du rep
è
re triangulaire situ
é
sur le panneau.
IMPORTANTE
Verifique la alimentaci
ó
n de corriente
Aseg
ú
rese de que tensi
ó
n de alimentaci
ó
n de CA de su
á
rea corresponde con la tensi
ó
n
especificada en la placa de caracter
í
sticas del panel inferior. En algunas zonas puede haberse
incorporado un selector de tensi
ó
n en el panel inferior de la unidad del teclado principal, cerca del
cable de alimentaci
ó
n. Aseg
ú
rese de que el selector de tensi
ó
n est
é
ajustado a la tensi
ó
n de su
á
rea. El selector de tensi
ó
n se ajusta a 240V cuando la unidad sale de f
á
brica. Para cambiar el
ajuste, emplee un destornillador de cabeza "recta" para girar el selector de modo que aparezca la
tensi
ó
n correcta al lado del indicador del panel.