Yamaha CVP-96 Reference Manual - Page 72
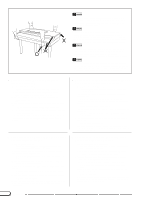
Voltage Selector
 |
View all Yamaha CVP-96 manuals
Add to My Manuals
Save this manual to your list of manuals |
Page 72 highlights
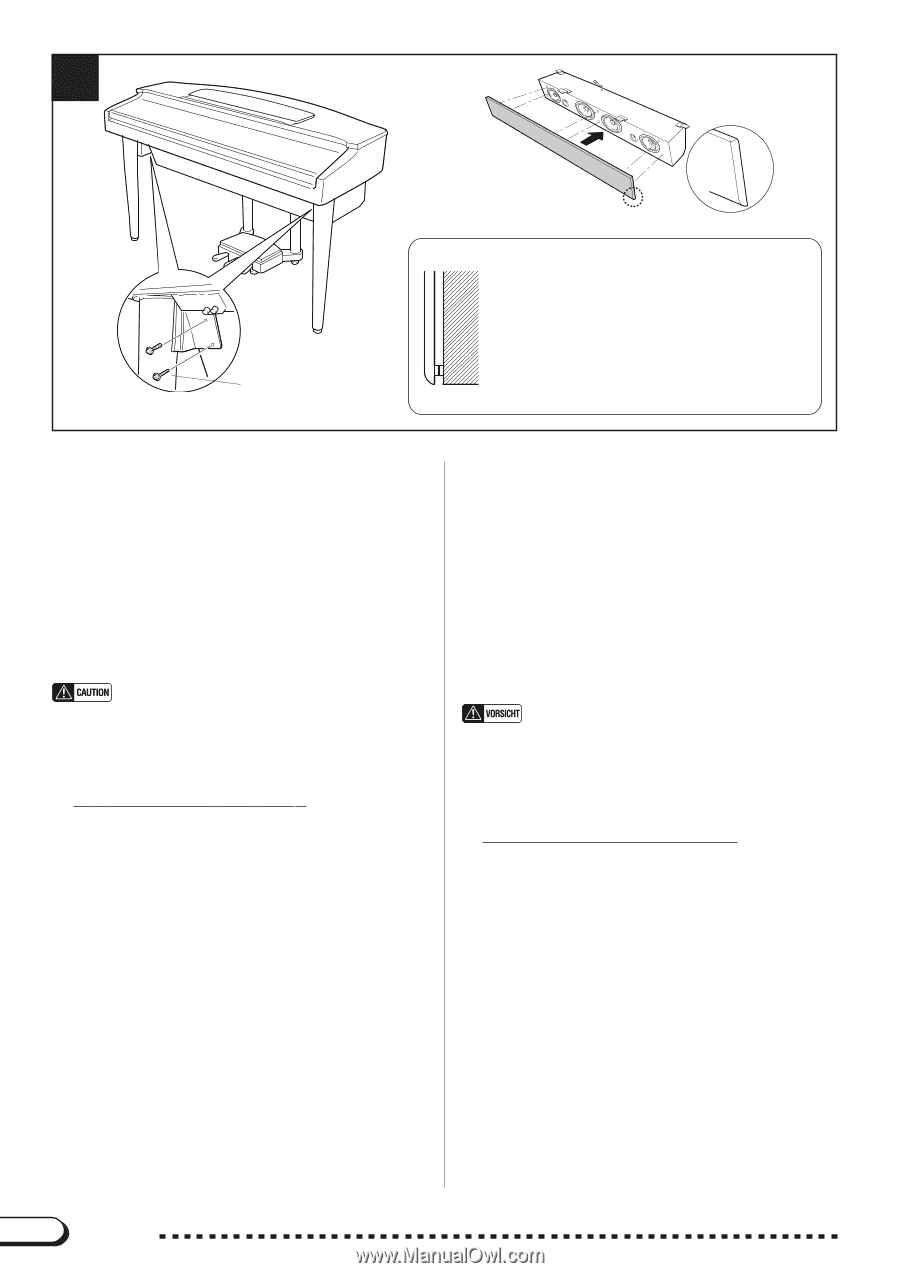
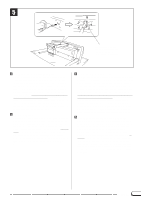
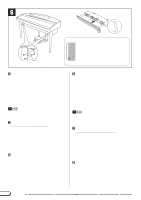
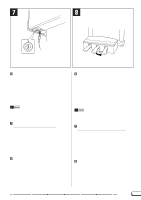
6 CVP-98 • Two screws on each side • Jeweils zwei Schrauben links und rechts • Deux vis de chaque côté • Dos tornillos en cada lado • Make sure the plugs are fully inserted and there is no space left around the plugs and holes. • Vergewissern Sie sich, daß die Dübel bis zum Anschlag in den Löchern sitzen und kein Zwischenraum verbleibt. • Vérifiez que les chevilles sont complètement insérées et qu'il n'y a pas d'espace entre la cheville et le matériau. • Asegúrese de que los tapones estén insertados a fondo y que no quede espacio en torno a los tapones y los orificios. NSecure the speaker box. Stand the main unit on its legs and securely attach the speaker box to the bracket on the front legs using two screws for each bracket. If it is impossible to align the bracket holes with the speaker box holes, slightly loosen the three screws on each of the front legs, align the holes, and secure the speaker box. After the speaker box is firmly attached, retighten the screws on the front legs firmly. Put the speaker box cover back in place with the rounded edge of the cover at the bottom, insert the plugs on the cover into their corresponding holes on the speaker box. • When attaching the cover, make sure you push where the plugs are. The speaker cover is made of a soft material so pushing in a place where there are no plugs may cause damage to the speaker. MVoltage Selector Before connecting the AC power cord, check the setting of the voltage selector which is provided in some areas. To set the selector for 110V, 127V, 220V or 240V main voltages, use a "minus" screwdriver to rotate the selector dial so that the correct voltage for your region appears next to the pointer on the panel. The voltage selector is set at 240V when the unit is initially shipped. After the proper voltage has been selected connect the AC power cord.
-
 1
1 -
2
-
3
-
4
-
5
-
6
-
7
-
8
-
9
-
10
-
11
-
12
-
13
-
14
-
15
-
16
-
17
-
18
-
19
-
20
-
21
-
22
-
23
-
24
-
25
-
26
-
27
-
28
-
29
-
30
-
31
-
32
-
33
-
34
-
35
-
36
-
37
-
38
-
39
-
40
-
41
-
42
-
43
-
44
-
45
-
46
-
47
-
48
-
49
-
50
-
51
-
52
-
53
-
54
-
55
-
56
-
57
-
58
-
59
-
60
-
61
-
62
-
63
-
64
-
65
-
66
-
 67
67 -
 68
68 -
 69
69 -
 70
70 -
 71
71 -
 72
72 -
 73
73 -
 74
74 -
 75
75
 |
 |