Yamaha DGX-650 Owner's Manual
Yamaha DGX-650 Manual
 |
View all Yamaha DGX-650 manuals
Add to My Manuals
Save this manual to your list of manuals |
Yamaha DGX-650 manual content summary:
- Yamaha DGX-650 | Owner's Manual - Page 1
Setting Up Basic Guide Reference Owner's Manual Keyboard Stand Assembly For information on assembling the keyboard stand, refer to the instructions on page 10 of this manual. EN Appendix - Yamaha DGX-650 | Owner's Manual - Page 2
electrician. This product should be used only with the components supplied or; a cart, rack, or stand that is recommended by Yamaha. If a cart, etc., is used, please observe all safety markings and instructions that accompany the accessory product. SPECIFICATIONS SUBJECT TO CHANGE: The information - Yamaha DGX-650 | Owner's Manual - Page 3
(DECLARATION OF CONFORMITY PROCEDURE) Responsible Party : Yamaha Corporation of America Address : 6600 Orangethorpe Ave., Buena Park, Calif. 90620 Telephone : 714-522-9011 Type of Equipment : Digital Piano Model Name : DGX-650 This device complies with Part 15 of the FCC Rules. Operation is subject - Yamaha DGX-650 | Owner's Manual - Page 4
74 Converting a User Song to an Audio file 75 Loading Files from a USB Flash Memory 76 Deleting files from a USB Flash Memory 77 Deleting User Data from the Instrument 77 Appendix Troubleshooting 78 Messages 79 Specifications 80 Index 82 Reference Appendix 4 DGX-650 Owner's Manual - Yamaha DGX-650 | Owner's Manual - Page 5
, such as MIDI files or Style files. Also, Audio files (.wav) stored to USB flash memory can be played back on the instrument. Moreover, you can record your performance as Audio data to a USB flash memory device. For more on Audio playing and recording, see pages 34 and 40. DGX-650 Owner's Manual 5 - Yamaha DGX-650 | Owner's Manual - Page 6
to unplug the power cord from the wall AC outlet. • Use only the stand specified for the instrument. When attaching the stand or rack, use the provided screws only. Failure to do so could cause damage to the internal components or result in the instrument falling over. 6 DGX-650 Owner's Manual DMI - Yamaha DGX-650 | Owner's Manual - Page 7
and bundles computer programs and contents in which Yamaha owns copyrights or with respect to which it has license to use others' copyrights. Such copyrighted materials include, without limitation, all computer software, style files, MIDI files, WAVE data, musical scores and sound recordings - Yamaha DGX-650 | Owner's Manual - Page 8
of Yamaha's high-quality XG tone generation format. Naturally, you can play back any XG song data using an XGlite tone generator. However, keep in mind that some songs may play back differently compared to the original data, due to the reduced set of control parameters and effects. 8 DGX-650 Owner - Yamaha DGX-650 | Owner's Manual - Page 9
User Registration form. Included Accessories • Owner's Manual (this book) • Data List • Keyboard Stand • Footswitch • Music Rest • AC Power Adaptor *1 • Online Member Product Registration *2 *1: May not be included depending on your particular locale. Check with your Yamaha dealer. *2: The PRODUCT - Yamaha DGX-650 | Owner's Manual - Page 10
used. Follow the assembly instructions and select the parts as needed. 1 Assembly Parts Back board L R Side boards Stand bases A (1 pc.) B (1 pc.) C (2 pcs.) q Joint connectors (4 pcs.) w Metal brackets e 3 x 8 mm roundhead screws (12 pcs.) r 6 x 70 mm roundhead screws (4 pcs.) 10 DGX-650 - Yamaha DGX-650 | Owner's Manual - Page 11
, using the screws r. "L" (Left) and "R" (Right) are marked on the upper surfaces of the stand bases. If you have trouble fastening the screws, use a screwdriver to rotate the joint connectors so that the connector holes are aligned with the screw holes on the stand bases. DGX-650 Owner's Manual 11 - Yamaha DGX-650 | Owner's Manual - Page 12
unit, attach the pedal unit before proceeding to the next step. Refer to the instructions provided with your pedal unit. 5 At least 10 cm Be sure to place your hands at least 10 cm from either end of the keyboard when positioning it. At least 10 cm 5 Put the keyboard on the stand. Check the back - Yamaha DGX-650 | Owner's Manual - Page 13
the instrument make a rattling noise when you play it or move it? If so, properly tighten all screws. • Also, if the keyboard makes a creaking noise or seems unsteady when you play it, refer carefully to the assembly instructions and diagrams and retighten all screws. DGX-650 Owner's Manual 13 - Yamaha DGX-650 | Owner's Manual - Page 14
DGX-650 Owner's Manual DATA ENTRY Dial, Number buttons [0]-[9], [+] and [-] buttons page 22 @0 [FILE CONTROL] button page 72 @1 [FUNCTION] button page 66 @2 [PORTABLE GRAND] button page 23 @3 [SONG/AUDIO] button page 35 @4 [STYLE] button page 28 @5 [VOICE] button page 23 @6 [MUSIC DATABASE - Yamaha DGX-650 | Owner's Manual - Page 15
21) Voice category list Music Database category list !9 !6 !7 !8 @2 @3 @4 @5 @6 @0 #1 @1 !5 @7 @8 @9 #0 A-1 C0 C1 C2 C3 C4 C5 C6 C7 Rear Panel #3 #4 #5 #6 Rear Panel #3 CONTRAST knob page 21 #4 USB TO HOST terminal pages 19, 68 #5 SUSTAIN jack page 16 #6 PEDAL UNIT jack - Yamaha DGX-650 | Owner's Manual - Page 16
• Make sure that the footswitch plug is properly connected to the SUSTAIN jack before turning on the power. • Do not press the footswitch while turning the power on. Doing this changes the recognized polarity of the footswitch, resulting in reversed footswitch operation. 16 DGX-650 Owner's Manual - Yamaha DGX-650 | Owner's Manual - Page 17
volume level, since this can cause permanent hearing loss. If you experience any hearing loss or ringing in the ears, consult a physician. NOTICE • When the instrument's sound is output to an external device, first turn on the power on how to switch the value, see page 55. DGX-650 Owner's Manual 17 - Yamaha DGX-650 | Owner's Manual - Page 18
power is off when connecting or disconnect- ing the pedal. • This affects only Main/Dual Voices and Harmony sound (pages 23, 24 and 27). LP-7A/7AWH (optional) Keyboard Stand Pedal Unit functions Damper Pedal (Right) Pressing this pedal will sustain notes longer. Releasing this pedal immediately - Yamaha DGX-650 | Owner's Manual - Page 19
for a second. CAUTION • When using a power adaptor, even when the power is off, a small amount of electricity is still being consumed by the instrument. When you are not using the instrument for a long time, make sure to unplug the AC power adaptor from the wall AC outlet. DGX-650 Owner's Manual 19 - Yamaha DGX-650 | Owner's Manual - Page 20
sure to follow the instructions in the Owner's Manual to turn off the power to the instrument and the connected devices, in order to protect the devices from damage. If you do not want the power to turn off automatically when a device is connected, disable Auto Power Off. 20 DGX-650 Owner's Manual - Yamaha DGX-650 | Owner's Manual - Page 21
Lesson part Shows the current Lesson part Appears when the corresponding function is turned on. Page 51 Page 27 Voice Indicates the current Voices ( Contains data and is muted. Specified as Song recording target. Contains no data. Contains data and can be played back. DGX-650 Owner's Manual 21 - Yamaha DGX-650 | Owner's Manual - Page 22
to decrease the value. Decrease Increase CATEGORY buttons Use these buttons to jump to the first Voice, Style, or Song in the next or previous using the dial can also be selected using the [+] and [-] buttons. Press briefly Press briefly to decrease. to increase. 22 DGX-650 Owner's Manual - Yamaha DGX-650 | Owner's Manual - Page 23
to default and simply play a Piano sound, press the [PORTABLE GRAND] button. The Voice number is set to 001 "Natural! Grand Piano" and all the settings are turned off automatically, so only the Grand Piano Voice will play over the entire keyboard. Select 022 Cool! Organ DGX-650 Owner's Manual 23 - Yamaha DGX-650 | Owner's Manual - Page 24
, refer to page 61. You can confirm whether the Split function is on in the MAIN display (page 21). Split Voice number and name appear when Split is on. 2 Press the [SPLIT ON/OFF] button again to exit from Split. You can easily select a different Split Voice (page 57). 24 DGX-650 Owner's Manual - Yamaha DGX-650 | Owner's Manual - Page 25
Basic Guide Try Playing a Variety of Instrument Voices Using the sound on the first beat of each measure while the other beats will click. 3 Press the CATEGORY [f] button to call up "Time Signature - Denominator." Press the [EXIT] button to return to the MAIN display. DGX-650 Owner's Manual - Yamaha DGX-650 | Owner's Manual - Page 26
. 2 Use the CATEGORY [r] or [f] button repeatedly to select "Bell." 2 Press the CATEGORY [r] or [f] buttons repeatedly to select "Metronome Volume." 3 Rotate the dial to turn the bell sound on or off. Metronome volume 3 Rotate the dial to set the Metronome Volume. 26 DGX-650 Owner's Manual - Yamaha DGX-650 | Owner's Manual - Page 27
(page 68). Hold for longer than a second. Basic Guide Current Harmony Type 3 Rotate the dial to select the desired Harmony Type. For details, refer to the separate Data List. The effect and operation differs depending on the Harmony Type. Refer to the section below. DGX-650 Owner's Manual 27 - Yamaha DGX-650 | Owner's Manual - Page 28
the [START/ STOP] button. When you want to use any of these Styles, always execute step 3 and later so that all accompaniment parts will sound. 28 DGX-650 Owner's Manual ACMP appears when Auto Accompaniment is on. When the Auto Accompaniment is on, the keyboard area left to the Split Point (54 - Yamaha DGX-650 | Owner's Manual - Page 29
the desired Music Database. This operation calls up the panel settings such as Voice and Style that are registered to the selected Music Database. The Music Database List is provided in the separate Data List. 3 Play the keyboard as described in Steps 6 to 7 in this page. DGX-650 Owner's Manual 29 - Yamaha DGX-650 | Owner's Manual - Page 30
the left of it. To play a minor seventh chord Press the root note together with the nearest white and black keys to the left of it (three keys altogether). Changing the Chord Fingering type There are three different Chord Fingering Types. For details, refer to page 61. 30 DGX-650 Owner's Manual - Yamaha DGX-650 | Owner's Manual - Page 31
appears. Indicates the selected Key Signature. Set this to the same as your music score. Since the number of flats or sharps is shown to the right of Key Signature in the display, you can also find the desired Key Signature by counting the number of flats or sharps. DGX-650 Owner's Manual 31 - Yamaha DGX-650 | Owner's Manual - Page 32
back. 6 Press the [SYNC START] button to turn Synchro Start on. A sample score for the Smart Chord function is provided in the separate Data List. F &b c œ œ. C7 œJ œ œ Keyboard Voice Style Key Signature Type No.001 Natural! Grand Piano Chord function. Basic Guide 32 DGX-650 Owner's Manual - Yamaha DGX-650 | Owner's Manual - Page 33
the desired Style in the list, press the [STYLE RECOMMENDER] button, then return to step 2-2. 4 When you've found a Style you're satisfied with, press the [EXIT] button to exit from the Style Recommender display. 5 Play the keyboard along with the Style you just found. DGX-650 Owner's Manual 33 - Yamaha DGX-650 | Owner's Manual - Page 34
repeated when the [DEMO/BGM] button is pressed. This setting can be changed so that all Preset Songs are played, or all Songs and Audio files on a USB flash memory are played. Five playback group settings are provided. Simply select the one that suits your needs (page 63). 34 DGX-650 Owner's Manual - Yamaha DGX-650 | Owner's Manual - Page 35
When this is on, the functions printed above the buttons are available. You can adjust the Song volume (page 64) and Audio volume (page 64). Adjusting the Tempo of a Song Same procedure as with Style tempo. See page 60. NOTE • The tempo of audio playback cannot be changed. DGX-650 Owner's Manual 35 - Yamaha DGX-650 | Owner's Manual - Page 36
Guide , press the [AB REPEAT] button. part yourself. Pressing the desired Track button repeatedly will toggle the on/off status. Track will play back. Track contains no data. Track is muted. NOTE • Up to two Track buttons can be pressed simultaneously for turning on or off. 36 DGX-650 Owner's Manual - Yamaha DGX-650 | Owner's Manual - Page 37
, including XF format files (page 8), are compatible with the Lyrics display features as long as they are standard MIDI file format files containing lyric data. Lyrics display may not be possible with some files. 4 Press the [EXIT] button to return to the MAIN display. DGX-650 Owner's Manual 37 - Yamaha DGX-650 | Owner's Manual - Page 38
your lesson (page 35). NOTE • Audio files cannot be used with the Lesson features. NOTE • The Song Lesson features can be applied also part you have chosen to play. Play along while listening to the Song. : Right-hand lesson : Left-hand lesson : Both-hands lesson Basic Guide 38 DGX-650 Owner's Manual - Yamaha DGX-650 | Owner's Manual - Page 39
back by pressing a number button [1] to [9] during repeat playback. Actual keyboard range (88 keys) To stop Lesson playback, press the [START/ STOP] button. Even during playback, you can change the Lesson number by pressing the [WAITING], [YOUR TEMPO] or [MINUS ONE] button. DGX-650 Owner's Manual - Yamaha DGX-650 | Owner's Manual - Page 40
the dial. 40 DGX-650 Owner's Manual Track 1 (and A) is automatically selected for recording. To cancel recording, press the [REC] button or [EXIT] button. NOTICE • If all User Songs (Song numbers 101-105) contain recorded data, Song 101 will automatically be selected. In this case, you will record - Yamaha DGX-650 | Owner's Manual - Page 41
Point Data that cannot be changed during the Song recording Style Number, ACMP ON/OFF, Smart Chord setting, Style Volume, Chord Fingering, Touch Response, Time Signature NOTICE • The recorded Song will be lost if you turn the power off without executing the save operation. DGX-650 Owner's Manual - Yamaha DGX-650 | Owner's Manual - Page 42
the dial to select the desired Style after specifying the [A] track. NOTE • You can use the Metronome while recording although the metronome sound will not be recorded. After pressing the [REC] button, set the Time Signature and start Metronome before going on to step 3. 42 DGX-650 Owner's Manual - Yamaha DGX-650 | Owner's Manual - Page 43
will be shown in a box border. NOTICE • Never attempt to turn the power off when a "Now Writing..." message is shown in the display. Doing so can damage the flash memory and result in a loss of data. 6 To hear the newly recorded performance, press the [START/STOP] button. DGX-650 Owner's Manual 43 - Yamaha DGX-650 | Owner's Manual - Page 44
display. Hold for longer than a second. 3 Press the [+] (YES) button to clear the track. A clear-in-progress message will appear briefly on the display. Basic Guide 44 DGX-650 Owner's Manual - Yamaha DGX-650 | Owner's Manual - Page 45
" (xxx is 001-100) in a folder labeled "USER FILES" which will automatically be created on the USB flash memory. To delete the User Audio files 001-100, perform "USB Delete" described on page 77. 7 To hear the recorded performance, press the [START/STOP] button. DGX-650 Owner's Manual 45 - Yamaha DGX-650 | Owner's Manual - Page 46
such as those for Voice and Style. 2 Press and release the [BANK] button data, the previous data is deleted and overwritten by the new data. • Do not turn off the power while memorizing settings to the Registration Memory, otherwise the data may be damaged or lost. 46 DGX-650 Owner's Manual - Yamaha DGX-650 | Owner's Manual - Page 47
off and all settings of the related Functions Other settings Transpose, Pitch Bend Range * Style settings are not available for Registration Memory when using the Song/Audio features. You can check the Registration Memory status in the MAIN display (page 21). Basic Guide DGX-650 Owner's Manual 47 - Yamaha DGX-650 | Owner's Manual - Page 48
device then to this instrument. Reverse this order when you turn the power off. 3 Turn on the external audio device, then this instrument. 4 Play back the connected external audio device. The sound of the audio device is output through the speakers of this instrument. 48 DGX-650 Owner's Manual - Yamaha DGX-650 | Owner's Manual - Page 49
top left of the display. Basic Guide NOTICE • Keep in mind that this operation also deletes the data you have purchased. Be sure to save the important data to a computer via Musicsoft Downloader (MSD) software. For details, refer to "Computer-related Operations" (page 9). DGX-650 Owner's Manual 49 - Yamaha DGX-650 | Owner's Manual - Page 50
back, "- - -" is shown on the display. In such a case, you can select Reverb type 01 using the [+] or [-] button. 3 Rotate the dial to select a Reverb type. Play the keyboard to check the sound. For information about the available Reverb types, refer to the Effect Type List in the separate Data List - Yamaha DGX-650 | Owner's Manual - Page 51
available DSP types, refer to the Effect Type List in the separate Data List. Adjusting the DSP Level You can adjust the DSP level applied to the Main and Dual Voices individually via the FUNCTION display. Refer to "** DSP Level" in the Function List (page 67). Reference DGX-650 Owner's Manual 51 - Yamaha DGX-650 | Owner's Manual - Page 52
. 3 Use the dial to turn panel sustain on or off. NOTE • The sustain of some Voices may not be obviously or audi- bly affected when the panel sustain function is turned on. Current Transpose value 3 Use the dial to set the Transpose value between -12 and +12. Reference 52 DGX-650 Owner's Manual - Yamaha DGX-650 | Owner's Manual - Page 53
wheel can be used to add smooth pitch variations to notes you play on the keyboard. Roll the wheel List (page 67). 2 Use the CATEGORY [+] and [-] buttons to call up "Tuning." The current setting is displayed. Current value 3 Use the dial to set the Tuning value. Reference DGX-650 Owner's Manual - Yamaha DGX-650 | Owner's Manual - Page 54
. Lowers the high range for a softer sound. Lowers the mid range for a brighter sound. Features more powerful sound. NOTE • "5 (Powerful)" produces a more punchy sound but may produce distortion depending on the Voice and Style, compared to the other Master EQ types. 54 DGX-650 Owner's Manual - Yamaha DGX-650 | Owner's Manual - Page 55
3 Use the dial to select the desired setting. When "NORMAL" is selected the speakers are automatically shut off when a plug is inserted into the PHONES/OUTPUT jack. When "ALWAYS ON" is selected the speaker sound is always on regardless of whether a plug is inserted or not. Reference DGX-650 Owner - Yamaha DGX-650 | Owner's Manual - Page 56
sound quality according to the overall volume of the instrument. Even when the volume is low, it permits both low sounds and high sounds to appears. Current setting 3 Use the dial to set the desired value. Current setting 3 Use the dial to set the desired value. Reference 56 DGX-650 Owner's Manual - Yamaha DGX-650 | Owner's Manual - Page 57
. 5 If necessary, memorize the settings to the Registration Memory (page 46). The Voice-related settings are reset when a different Voice is selected. If you want to store the created sound for future recall, memorize the settings to the Registration Memory. Reference DGX-650 Owner's Manual 57 - Yamaha DGX-650 | Owner's Manual - Page 58
Intro This is used for the used for playing the main part of sound changes harmonically in response on the chords you play with your left hand. Fill-in This is automatically added before changing to Main A or B. Ending This is used is turned on. 58 DGX-650 Owner's Manual Synchro Start When Synchro - Yamaha DGX-650 | Owner's Manual - Page 59
back. Synchro Stop When you press the [SYNC STOP] button to turn on this function, the Style will only play while pressing chords in the Auto Accompaniment range of the keyboard. Releasing you are playing the keys. Style playback stops instantly when you release the keys. DGX-650 Owner's Manual 59 - Yamaha DGX-650 | Owner's Manual - Page 60
chord in the left hand range of the keyboard (with SYNC START off), the chord sound will be heard without Style playback. This is referred to as "Stop Accompaniment." The specified chord will be shown in the display, and affects the Harmony function (page 27). Reference 60 DGX-650 Owner's Manual - Yamaha DGX-650 | Owner's Manual - Page 61
chord, etc.). Split voice Main voice To restore the value to the default setting, press [+]/[-] buttons simultaneously. NOTE • The Split Point set here is applied to both the Style and Voice. • During the Lesson playback, the Split Point cannot be changed. Reference DGX-650 Owner's Manual 61 - Yamaha DGX-650 | Owner's Manual - Page 62
notation and keyboard diagram in the display, try playing a chord in the "Playing" range. When you've played the chord properly, a bell sound signals your success and the chord name in the display will be highlighted. To exit from this function, press the [EXIT] button. 62 DGX-650 Owner's Manual - Yamaha DGX-650 | Owner's Manual - Page 63
the "Demo Group" is set to "Demo," this parameter cannot be set. 3 Rotate the dial to select "2 (Random)." To return to numerical order, select "1 (Normal)." 4 Press the [DEMO/BGM] button to start playback. To stop playback, press the [DEMO/BGM] button again. Reference DGX-650 Owner's Manual 63 - Yamaha DGX-650 | Owner's Manual - Page 64
CATEGORY [r] or [f] buttons several times to call up "Audio Volume." 2 Press the CATEGORY [r] or [f] buttons several times to call up "Song Volume." Audio Volume 3 Rotate the dial to set the Audio volume. Song Volume 3 Rotate the dial to set the Song volume. Reference 64 DGX-650 Owner's Manual - Yamaha DGX-650 | Owner's Manual - Page 65
different Voices, the Melody Voice of the Song changes while the Song remains the same. 3 Use the CATEGORY [r] and [f] buttons to select the "R-Part" or "L-Part." 4 Use the dial to select the channel you want to play back as the specified rightor left-hand part. Reference DGX-650 Owner's Manual - Yamaha DGX-650 | Owner's Manual - Page 66
to recall the default setting. • Increase value by 1. • ON • Execute Some Function settings are maintained even if you turn off the power, and can be transferred to the computer as Backup Data (page 49). Previous item Next item Reference Current item Value 66 DGX-650 Owner's Manual - Yamaha DGX-650 | Owner's Manual - Page 67
full left; a value of "127" results in the sound being panned full right. 000-127 008 Determines how much of the Split Voice's signal is sent to the Reverb effect. 000-127 000 Determines how much of the Split Voice's signal is sent to the Chorus effect. Reference DGX-650 Owner's Manual 67 - Yamaha DGX-650 | Owner's Manual - Page 68
the time signature of the Metronome. 2/4/8/16 ON/OFF 000-127 ** Determines the length of each metronome beat. ON Determines whether a bell accent will be sounded (ON) or not (OFF). 100 Determines the volume of the Metronome. Reference 68 DGX-650 Owner's Manual - Yamaha DGX-650 | Owner's Manual - Page 69
Musicsoft Downloader. Local External Clock Song Out Style Out Keyboard Out PC1 OFF ON OFF OFF OFF PC2 OFF OFF OFF OFF ON OFF ON OFF OFF OFF ON NOTE • Preset Song data cannot be transmitted from the instrument by the Song Out function, but User Songs can. Reference DGX-650 Owner's Manual 69 - Yamaha DGX-650 | Owner's Manual - Page 70
When turning off the instrument, make sure that the instrument is NOT accessing the USB flash memory by playback/recording or file control (such as during Save, Delete and Format operations). Failure to do so may corrupt the USB flash memory and the data. Reference 70 DGX-650 Owner's Manual - Yamaha DGX-650 | Owner's Manual - Page 71
that the USB flash memory has been properly mounted. Mounting (Flashing) Mounted (Lit) You can access file operations listed below by cases: • During Style, Song or Audio playback. • During Lesson and Style Recommender. • While data is being loaded from a USB flash memory. DGX-650 Owner's Manual - Yamaha DGX-650 | Owner's Manual - Page 72
and the "USER FILES" folder will be created on the root directory in the USB flash memory. NOTICE • The Format operation cannot be cancelled during execution. Never turn off the power or disconnect the USB flash memory during the operation. Doing so may result in data loss. 72 DGX-650 Owner's Manual - Yamaha DGX-650 | Owner's Manual - Page 73
you want to overwrite a file that already exists on the USB flash memory, use the dial or the [+] and [-] buttons to select the Never turn off the power or disconnect the USB flash memory during the operation. Doing so may result in data loss. 7 Press the USB flash memory. DGX-650 Owner's Manual 73 - Yamaha DGX-650 | Owner's Manual - Page 74
the USB flash memory during the operation. Doing so may result in data loss. 9 Press the [EXIT] button to exit from the FILE CONTROL display. NOTE • The amount of time it will take to perform the Save opera- tion will depend on the condition of the USB flash memory. 74 DGX-650 Owner's Manual - Yamaha DGX-650 | Owner's Manual - Page 75
IN jack during conversion, that sound also will be recorded. power or disconnect the USB flash memory during the operation. Doing so may result in data loss. The source User Song name. 3 Use USB flash memory, use the dial to select the file, then go on to the next step. DGX-650 Owner's Manual 75 - Yamaha DGX-650 | Owner's Manual - Page 76
and Song files. Files must be located in the "USER FILES" folder in the USB flash memory. Files located outside of that folder will not be recognized. 4 Press the [EXECUTE] button. A confirmation message will appear. To cancel the operation, press the [-] (NO) button. 76 DGX-650 Owner's Manual - Yamaha DGX-650 | Owner's Manual - Page 77
erase the Preset data. 1 Press the [FILE CONTROL] button to call up the FILE CONTROL display. 2 Use the CATEGORY power or disconnect the USB flash memory during the operation. Doing so may result in data loss. 6 Press the [EXIT] button to exit from the FILE CONTROL display. DGX-650 Owner's Manual - Yamaha DGX-650 | Owner's Manual - Page 78
with the USB device has been shut down because of the overcurrent to the USB device. Disconnect the device from the USB TO DEVICE terminal, then turn on the power of the instrument. Make sure the parameter of "Output Gain Level" is set to "Headphones" (page 55). Appendix 78 DGX-650 Owner's Manual - Yamaha DGX-650 | Owner's Manual - Page 79
function is not available now. Indicates the designated function is not available since the instrument is executing another job. NOTE • Not all the messages are listed in the table; only messages needing explanation are included. Appendix DGX-650 Owner's Manual 79 - Yamaha DGX-650 | Owner's Manual - Page 80
Format Recording Registration Number of Buttons Lesson Yamaha Education Suite (Y.E.S.) Demo Demonstration Metronome Overall Controls Tempo Range Transpose Tuning Miscellaneous PIANO Button 1,397 x 445 x 146 mm (55" x 17-1/2" x 5-3/4") with keyboard stand: 1,399 x 445 x 761 mm (55-1/16 - Yamaha DGX-650 | Owner's Manual - Page 81
locale.) Approx. 1.7 MB USB Flash Memory DC IN 12V x 1 x 1 x 1 Yes Yes Yes 6W x 2 12cm x 2 + 5cm x 2 Adaptor (PA-150 or the equivalent ) 13W • Owner's Manual • Data List • Keyboard Stand • Footswitch • Music Rest • AC Power Adaptor (PA-150 or an equivalent recommended by Yamaha) *1 • Online Member - Yamaha DGX-650 | Owner's Manual - Page 82
79 Metronome 25 MIDI 40, 68 Music Database 29 Music Rest 9 Mute 36 N Number buttons 22 O Output Gain Level 55 Overview Demo 34 P Panel Settings 46 Panel Sustain 52 Pause 36 Pedal Unit 18 Piano Voice 23 Pitch 52, 53 PITCH BEND wheel 53 Power On/Off 19 Power Requirements 16 Practice - Yamaha DGX-650 | Owner's Manual - Page 83
normal use and service during the term of this warranty, without charge for labor or materials. Repairs may be performed using new or refurbished parts that meet or exceed YAMAHA specifications for new parts. If YAMAHA elects to replace the product, the replacement may be a reconditioned unit. You - Yamaha DGX-650 | Owner's Manual - Page 84
- Yamaha DGX-650 | Owner's Manual - Page 85
Sector 47, Gurgaon- Sohna Road, Gurgaon, Haryana, India Tel: 0124-485-3300 INDONESIA PT. Yamaha Musik Indonesia (Distributor) PT. Nusantik Gedung Yamaha Music Center, Jalan Jend. Gatot Subroto Kav. 4, Jakarta 12930, Indonesia Tel: 021-520-2577 KOREA Yamaha Music Korea Ltd. 8F, 9F, Dongsung Bldg. 158 - Yamaha DGX-650 | Owner's Manual - Page 86
Yamaha Global Site http://www.yamaha.com/ Yamaha Downloads http://download.yamaha.com/ U.R.G., Digital Musical Instruments Division © 2013 Yamaha Corporation 302POZC*.*-01A0 Printed in Indonesia ZF49080
-
 1
1 -
 2
2 -
 3
3 -
 4
4 -
 5
5 -
 6
6 -
 7
7 -
8
-
9
-
10
-
11
-
12
-
13
-
14
-
15
-
16
-
17
-
18
-
19
-
20
-
21
-
22
-
23
-
24
-
25
-
26
-
27
-
28
-
29
-
30
-
31
-
32
-
33
-
34
-
35
-
36
-
37
-
38
-
39
-
40
-
41
-
42
-
43
-
44
-
45
-
46
-
47
-
48
-
49
-
50
-
51
-
52
-
53
-
54
-
55
-
56
-
57
-
58
-
59
-
60
-
61
-
62
-
63
-
64
-
65
-
66
-
67
-
68
-
69
-
70
-
71
-
72
-
73
-
74
-
75
-
76
-
77
-
78
-
79
-
80
-
81
-
82
-
83
-
84
-
85
-
86
 |
 |
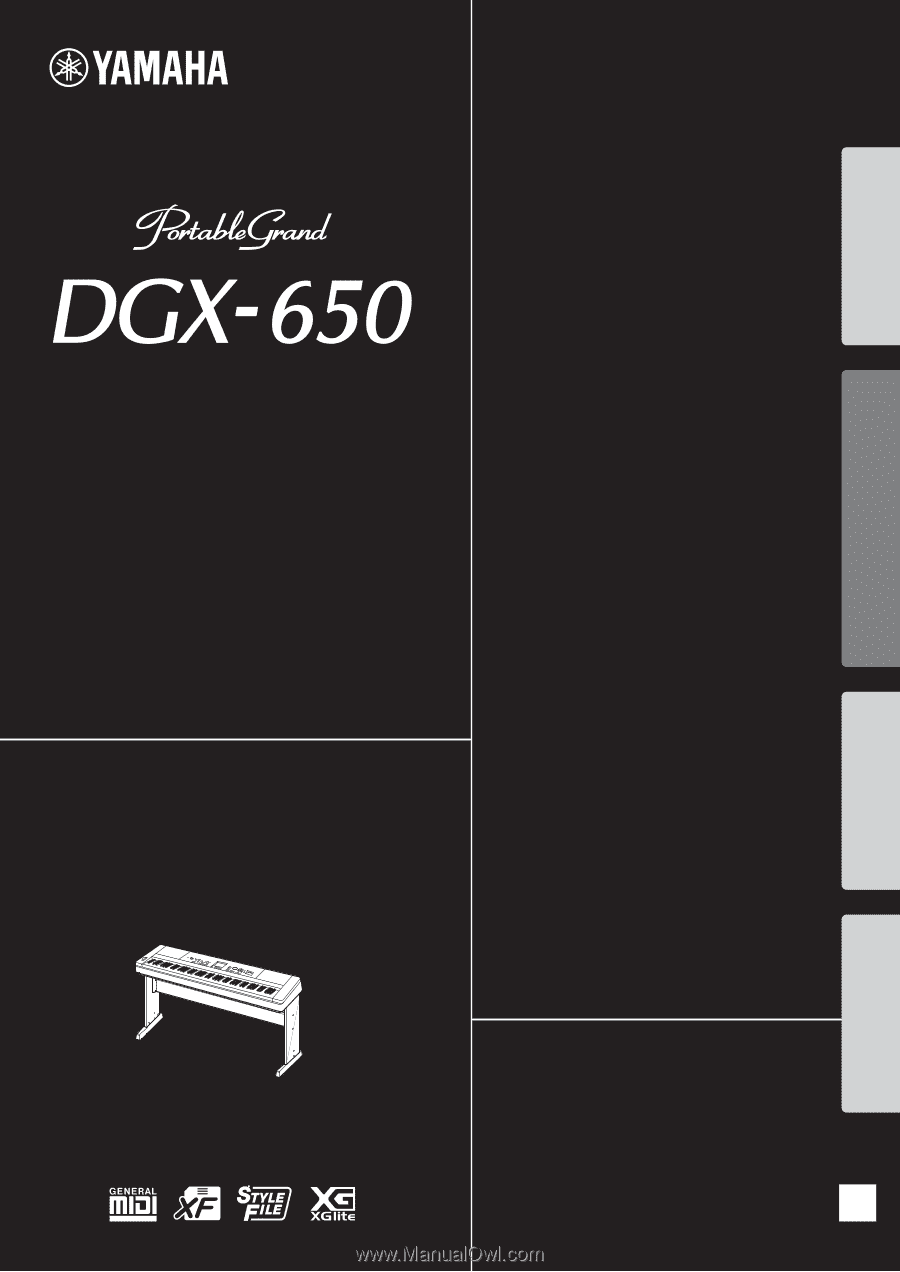
Owner’s Manual
EN
Keyboard Stand Assembly
For information on assembling the keyboard stand, refer to
the instructions on
page 10
of this manual.
Setting Up
Reference
Appendix
Basic Guide