Yamaha NS-AW390W Owners Manual - Page 4
construction.
 |
View all Yamaha NS-AW390W manuals
Add to My Manuals
Save this manual to your list of manuals |
Page 4 highlights
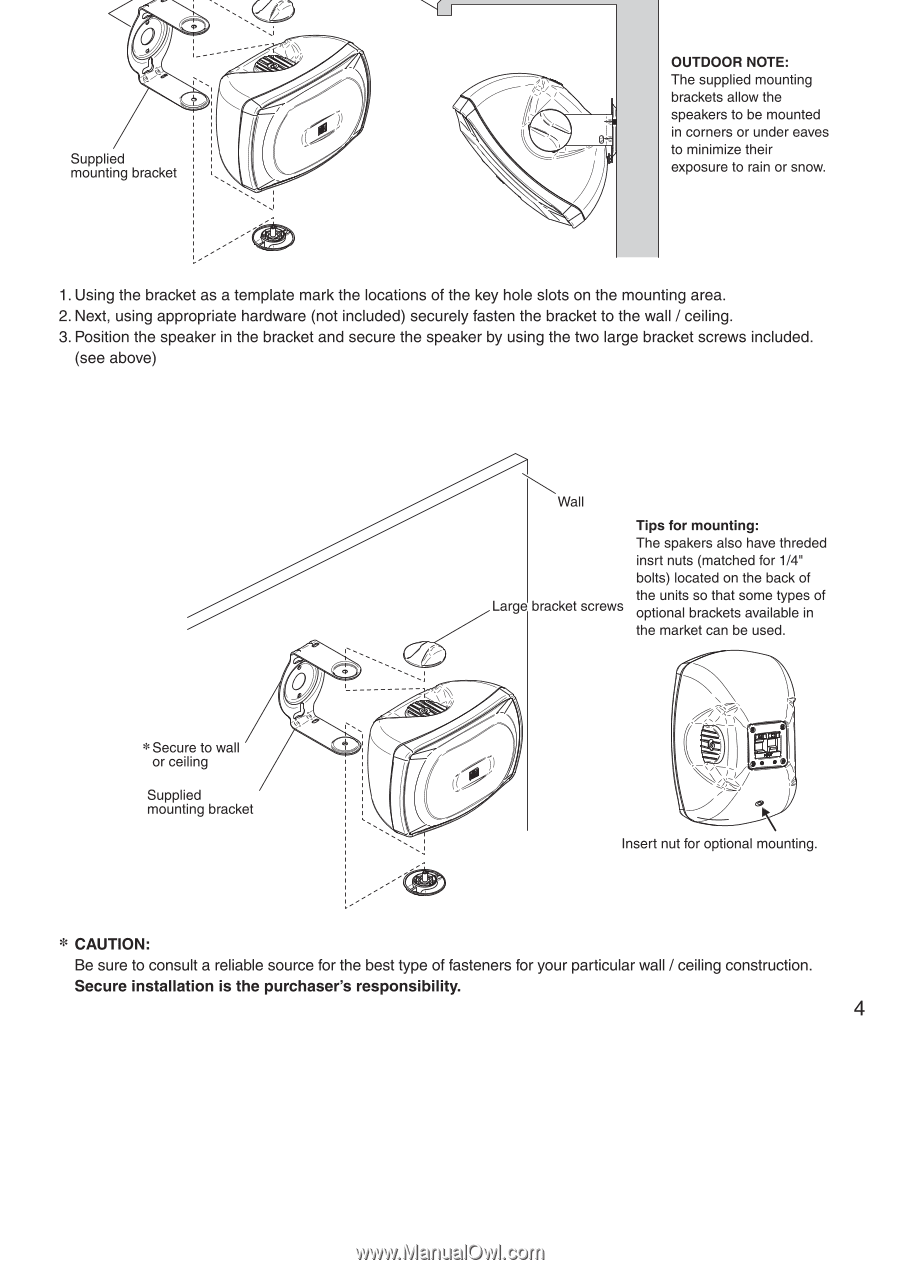
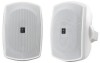
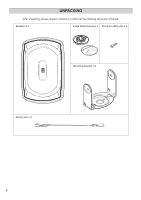
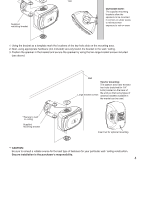
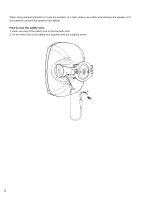
• 0 C Supplied mounting bracket OUTDOOR NOTE: The supplied mounting I brackets allow the speakers to be mounted in corners or under eaves to minimize their exposure to rain or snow. 1. Using the bracket as a template mark the locations of the key hole slots on the mounting area. 2. Next, using appropriate hardware (not included) securely fasten the bracket to the wall / ceiling. 3. Position the speaker in the bracket and secure the speaker by using the two large bracket screws included. (see above) 0 0 * Secure to wall or ceiling Supplied mounting bracket Wall Tips for mounting: The spakers also have threded insrt nuts (matched for 1/4" bolts) located on the back of the units so that some types of Large bracket screws optional brackets available in the market can be used. 114 • • Insert nut for optional mounting. * CAUTION: Be sure to consult a reliable source for the best type of fasteners for your particular wall / ceiling construction. Secure installation is the purchaser's responsibility. 4
-
 1
1 -
 2
2 -
 3
3 -
 4
4 -
 5
5 -
 6
6 -
 7
7 -
 8
8 -
 9
9 -
 10
10
 |
 |