Yamaha NS-P320 Owner's Manual - Page 9
Mounting the rear speakers, To mount the rear speakers on a wall
 |
View all Yamaha NS-P320 manuals
Add to My Manuals
Save this manual to your list of manuals |
Page 9 highlights
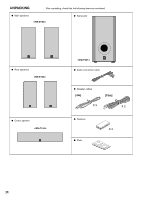
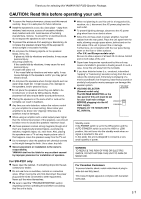
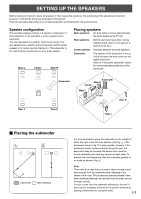
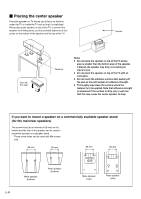
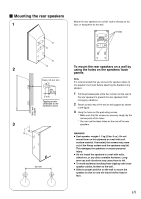
Ⅵ Mounting the rear speakers 1 Mount the rear speakers on a shelf, rack or directly on the floor, or hang them on the wall. Holes To mount the rear speakers on a wall by 2 using the holes on the speakers' back panels Diam. 3.5 to 4 mm Min. 20 mm 6 mm Tapping screw (Available at the hardware store) Note It is recommended that you connect the speaker cables to the speaker's terminals before attaching the bracket to the speaker. 1 Put the provided pads at the four corners on the rear of the rear speakers to prevent the rear speakers from moving by vibrations. 2 Fasten screws into a firm wall or wall support as shown in the figure. Wall/ wall support 3 Hang the holes on the protruding screws. * Make sure that the screws are securely caught by the narrow parts of the holes. * You can use the lower holes on the rear of the rear 3 speakers. 60 mm WARNING ● Each speaker weighs 1.1 kg (2 lbs. 6 oz.). Do not mount them on thin plywood or a wall with soft surface material. If mounted, the screws may come out of the flimsy surface and the speakers may fall. This damages the speakers or causes personal injury. ● Do not install the speakers to a wall with nails, adhesives, or any other unstable hardware. Longterm use and vibrations may cause them to fall. ● To avoid accidents resulting from tripping over loose speaker cables, fix them to the wall. ● Select a proper position on the wall to mount the speaker so that no one will injure his/her head or face. E-5
-
 1
1 -
2
-
3
-
 4
4 -
 5
5 -
 6
6 -
 7
7 -
 8
8 -
 9
9 -
 10
10 -
 11
11 -
 12
12 -
 13
13 -
 14
14 -
15
-
16
-
17
-
18
-
19
 |
 |
