Yamaha PF-500 Installation Guide - Page 6
English - driver
 |
View all Yamaha PF-500 manuals
Add to My Manuals
Save this manual to your list of manuals |
Page 6 highlights
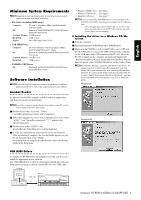
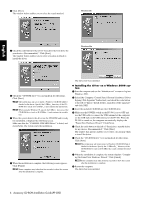
4 Click [Next]. The window below enables you to select the search method. Windows 98 English 5 Check the radio button to the left of "Search for the best driver for your device. (Recommended)." Click [Next]. The window below enables you to select a location in which to install the driver. Windows Me 6 Check the "CD-ROM drive" box and uncheck all other items. Click [Next]. n The system may ask you to insert a Windows CD-ROM while it checks for the driver. Specify the USBdrv_ directory of the CDROM drive (such as D:\USBdrv_\) and continue the installation. n When using the Windows 98, specify the USBdrv_ directory of the CD-ROM drive (such as D:\USBdrv_\) and continue the installation. 7 When the system detects the driver on the CD-ROM and is ready for installation, it displays the following screen. Make sure that the "YAMAHA USB MIDI Driver" is listed, and click [Next]. The system starts the installation. 8 When the installation is complete, the following screen appears. Click [Finish]. n Some computers may take about ten seconds to show this screen after the installation is complete. The driver has been installed. G Installing the driver on a Windows 2000 system 1 Start the computer and use the "Administrator" account to log into Windows 2000. 2 Select [My Computer | Control Panel | System | Hardware | Driver Signing | File Signature Verification], and check the radio button to the left of "Ignore -Install all files, regardless of file signature" and click [OK]. 3 Insert the included CD-ROM into the CD-ROM drive. 4 Make sure the POWER switch on the PF-500 is set to OFF and use the USB cable to connect the USB terminal of the computer (or the USB hub) to the USB terminal of the PF-500. When the PF-500 is turned on, the computer automatically displays the "Found New Hardware Wizard." Click [Next]. 5 Check the radio button to the left of "Search for a suitable driver for my device. (Recommended)." Click [Next]. The window that appears enables you to select a location in which to install the driver. 6 Check the "CD-ROM drives" box and uncheck all other items. Click [Next]. n The system may ask you to insert a Windows CD-ROM while it checks for the driver. Specify the "USBdrv2k_" directory of the CD-ROM drive (such as D:\USBdrv2k_\) and continue the installation. 7 When the installation is complete, the system displays "Completing the Found New Hardware Wizard." Click [Finish]. n Some computers may take about ten seconds to show this screen after the installation is complete. 8 Restart the computer. The driver has been installed. 6 Accessory CD-ROM Installation Guide (PF-500)
-
 1
1 -
 2
2 -
 3
3 -
 4
4 -
 5
5 -
 6
6 -
 7
7 -
 8
8 -
 9
9 -
 10
10 -
 11
11 -
 12
12 -
13
-
14
-
15
-
16
-
17
-
18
-
19
-
20
-
21
-
22
-
23
-
24
-
25
-
26
-
27
-
28
-
29
-
30
-
31
-
32
-
33
-
34
-
35
-
36
-
37
-
38
-
39
-
40
-
41
-
42
-
43
-
44
-
45
-
46
-
47
-
48
-
49
-
50
-
51
-
52
-
53
-
54
-
55
-
56
 |
 |
