Yamaha PSR-200 Owner's Manual - Page 18
MOVING UP TO MIDI PSR-300 only, The Multi Mode, MIDI Receive Channel Selection
 |
View all Yamaha PSR-200 manuals
Add to My Manuals
Save this manual to your list of manuals |
Page 18 highlights
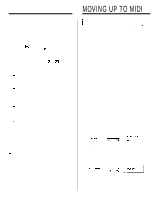
MOVING UP TO MIDI (PSR-300 only) The MIDI program change number corresponding to the number of the selected voice is transmitted when a voice is selected. A MIDI START message is transmitted whenever the rhythm or accompaniment is started, and a MIDI STOP message is transmitted whenever the rhythm or accompaniment is stopped. The same applies to demo and chord memory start/stop operations. Accompaniment style, demo, chord memory, and transpose data is not transmitted. *Refer to the Remote Control Mode "MIDI Implementation Chart" on page 34 for more details. The Multi Mode The Multi mode should be used when the PSR-300 is to be used as a tone generator, for example, receiving data from a second MIDI device (such as a sequencer). In this mode the PSR-300 can receive on multiple MIDI channels, each channel corresponding to a different voice. The PSR-300 panel controls will not function when the Multi mode is selected. Multi Mode Selection If the Remote Control mode is currently selected, the Multi mode can be re-selected by pressing the numeric VOICE/STYLE [0] button while holding the CHORD MEMORY [REC] button. will appear on the display. n Multi Mode Reception In the Multi mode the PSR-300 functions as a multi- timbre tone generator, allowing different voices to played on all 16 MIDI channels (channel 16 is reserved for rhythm only). Since the PSR-300 employs the Yamaha Dynamic Voice Allocation system, it is not necessary to specify the number of notes that can be played via each channel. A maximum of 28 notes can be played simultaneously via all channels. MIDI note and velocity messages received on a MIDI channel will affect only the voice selected for that channel. Velocity sensitivity for each voice is set to a dynamic range of 48 dB linear. SUSTAIN ON/OFF messages are ignored. A program change number will select the voice controlled via the channel on which it is received. The new voice number is shown on the display for approximately 2 seconds. The program change number is the same as the voice number (00 - 99). Program change messages on channel 16 are ignored. MIDI start, stop, and clock data will be ignored. *Refer to the Multi Mode "MIDI Implementation Chart" on page 35 for more details. Multi Mode Transmission The default transmit channel in the Multi mode is the same as that in the Remote Control mode, and can be set via the same procedure (see below). The transmitted data is also the same as in the Remote Control mode, except that no MIDI start/stop message transmission occurs. Keyboard note ON/OFF data is transmitted via the specified MIDI transmit channel, but the internal tone generator does not sound (LOCAL OFF). The transmitted note numbers are not affected by the instruments TRANSPOSE setting. When a new voice is selected, the corresponding MIDI program change message is transmitted on the specified MIDI transmit channel. The internal voice assigned to that transmit channel will also change accordingly. The program change number is the same as the voice number. The channel-16 program change number will not be transmitted. Refer to the Multi-mode MIDI Implementation Chart" on page 35 for more details. MIDI Receive Channel Selection Press the numeric VOICE/STYLE [2] button while holding the CHORD MEMORY [REC] button. The current MIDI receive channel number or "ALL" will appear on the display. While still holding the [REC] button press the key corresponding to the desired receive channel (C1 ... E2), confirm that the desired channel has been selected on the MULTI DISPLAY, then release the [REC] button. The E2 key selects the OMNI ON mode - "ALL" appears on the display. The receive channel setting only applies in the remote control mode. MIDI Receive Channel Selection Press the numeric VOICE/STYLE [1] button while holding the CHORD MEMORY [REC] button. The current MIDI transmit channel number will appear on the display. While still holding the [REC] button press the key corresponding to the desired transmit channel (C1 confirm that the desired channel has been selected on the MULTI DISPLAY, then release the [REC] button. The transmit channel is automatically set to channel 1 and the receive channel is automatically set to OMNI ON when the power is initially turned ON. 16
-
 1
1 -
2
-
3
-
4
-
5
-
6
-
7
-
8
-
9
-
10
-
11
-
12
-
 13
13 -
 14
14 -
 15
15 -
 16
16 -
 17
17 -
 18
18 -
 19
19 -
 20
20 -
 21
21 -
 22
22 -
 23
23 -
24
-
25
-
26
-
27
-
28
-
29
 |
 |
