Yamaha PSR-S910 Owner's Manual
Yamaha PSR-S910 Manual
 |
View all Yamaha PSR-S910 manuals
Add to My Manuals
Save this manual to your list of manuals |
Yamaha PSR-S910 manual content summary:
- Yamaha PSR-S910 | Owner's Manual - Page 1
for purchasing this Yamaha Digital Workstation! We recommend that you read this manual carefully so that you can fully take advantage of the advanced and convenient functions of the instrument. We also recommend that you keep this manual in a safe and handy place for future reference. Before using - Yamaha PSR-S910 | Owner's Manual - Page 2
or; a cart, rack, or stand that is recommended by Yamaha. If a cart, etc., is used, please observe all safety markings and instructions that accompany the accessory product. SPECIFICATIONS SUBJECT TO CHANGE: The information contained in this manual is believed to be correct at the time of printing - Yamaha PSR-S910 | Owner's Manual - Page 3
municipality, your waste disposal service or the point of sale where you purchased the Canada. • This applies only to products distributed by Yamaha Canada Music Ltd. (class B) • Ceci ne s'applique qu'aux produits distribués par Yamaha Canada Musique Ltée. (standby) PSR-S910/S710 Owner's Manual - Yamaha PSR-S910 | Owner's Manual - Page 4
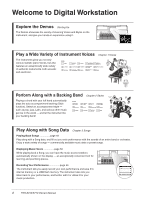
to Digital Workstation Explore the Demos Starting Up The Demos showcase the variety of stunning Voices and Styles on or orchestra. Enjoy a wide variety of songs - commercially available music data or preset songs. Displaying Music Score page 52 While playing back a 4 PSR-S910/S710 Owner's Manual - Yamaha PSR-S910 | Owner's Manual - Page 5
keyboard performance. * The MP3 format is supported only by the PSR-S910. Connect Directly to the Internet Chapter 9 Internet Direct Connection The instrument also connects directly to the Internet, letting you download Song and Style data male voice (or vice versa). PSR-S910/S710 Owner's Manual 5 - Yamaha PSR-S910 | Owner's Manual - Page 6
manual in a safe place for future reference. WARNING Always follow the basic precautions listed Yamaha service personnel. CAUTION Always follow the basic precautions listed is easily accessible. If some trouble or malfunction occurs, immediately turn off PSR-S910/S710 Owner's Manual (3)-13 1/2 - Yamaha PSR-S910 | Owner's Manual - Page 7
Yamaha service personnel. • Do not place vinyl, plastic or rubber objects on the instrument, since this might discolor the panel or keyboard ears, consult a physician. Saving data Saving and backing up your data • Edited Songs/Styles/Voices/Multi Pads and MIDI settings PSR-S910/S710 Owner's Manual 7 - Yamaha PSR-S910 | Owner's Manual - Page 8
Yamaha owns copyrights or with respect to which it has license to use others' copyrights. Such copyrighted materials include, without limitation, all computer software, style files, MIDI files, WAVE data Company, Inc. International Copyright Secured All Rights Reserved 8 PSR-S910/S710 Owner's Manual - Yamaha PSR-S910 | Owner's Manual - Page 9
for the future. This instrument is capable of displaying lyrics when an XF file containing lyric data is played. "SFF (Style File Format)" is an original Style file format by Yamaha which uses a unique conversion system to provide high-quality automatic accompaniment based on a wide range of - Yamaha PSR-S910 | Owner's Manual - Page 10
following instructional materials are available for downloading from the Yamaha Manual Library. Access the Yamaha Manual Library, then enter your model name (PSR-S910, for example) in the Model Name area to search the manuals. Yamaha Manual Library http://www.yamaha.co.jp/manual/ Reference Manual - Yamaha PSR-S910 | Owner's Manual - Page 11
Device 94 Connecting to the Internet 95 Connecting to a Computer 96 Connecting External MIDI Devices 97 11 Utility - Making Global Settings - 98 Basic Procedure 98 Troubleshooting 99 Panel Button Chart 102 Specifications 104 Index 106 PSR-S910/S710 Owner's Manual 11 - Yamaha PSR-S910 | Owner's Manual - Page 12
DEMO] button Page 18 Plays the Demos. 4 [MIC SETTING/VOCAL HARMONY] button (PSR-S910 Page 91 Adds some effects to Microphone input. 5 [PITCH BEND] wheel Page 34 Bends the pitch of the keyboard . 9 STYLE category selection buttons Page 39 These select a Style. 12 PSR-S910/S710 Owner's Manual ) [ - Yamaha PSR-S910 | Owner's Manual - Page 13
keyboard performance. ⁄ UPPER OCTAVE buttons Page 34 These shift the pitch of the keyboard in octave steps. ¤ [DC IN] terminal Page 14 For connecting the supplied power adaptor. For information on the jacks and connectors located on the rear panel, see pages 88 - 97. PSR-S910/S710 Owner's Manual - Yamaha PSR-S910 | Owner's Manual - Page 14
supply (e.g. unplug the AC adaptor) during any PSR-S910/S710 record operation! Doing so can result in a loss of data. CAUTION Even when the switch is in switch. The main display appears in the display. 1 14 PSR-S910/S710 Owner's Manual CAUTION In order to avoid possible damage to the speakers or - Yamaha PSR-S910 | Owner's Manual - Page 15
this may prevent adequate ventilation of the internal components, and possibly result in the instrument overheating. Air Vents Air Vents Attaching the Music Rest The PSR-S910/S710 is supplied with a music rest that can be attached to the instrument by inserting it into the slot at the rear of the - Yamaha PSR-S910 | Owner's Manual - Page 16
display. [FUNCTION] → [J] UTILITY → TAB [E][F] OWNER 1 NOTE Throughout this manual, arrows are used in the instructions, indicating in shorthand the process of calling up certain displays and functions. 2 2 Use the [4 ▲▼]/[5 ▲▼] buttons to select the desired language. 16 PSR-S910/S710 Owner - Yamaha PSR-S910 | Owner's Manual - Page 17
of the display. NOTE Since the color display of the PSRS910 has a high level of visibility, no contrast adjustment function call up the Owner Name display. Refer to page 26 for character-entry details. NOTE 2 (PSR-S910) If desired, you can also change display. PSR-S910/S710 Owner's Manual 17 - Yamaha PSR-S910 | Owner's Manual - Page 18
introductions to the features and functions as well as sound demonstrations. 1 Press the [DEMO] button to start the Demos. Overview Demo will play back continuously, calling up the various displays in . 4 Press the [EXIT] button several times to exit from the Demos. 18 PSR-S910/S710 Owner's Manual - Yamaha PSR-S910 | Owner's Manual - Page 19
22) [DATA ENTRY] File Selection display (page 25), the [A] - [J] buttons can be used to select the corresponding respective files. The [A] and [B] buttons are used to move the cursor up or down. The [H] and [I] buttons are used to select the corresponding parameter. PSR-S910/S710 Owner's Manual - Yamaha PSR-S910 | Owner's Manual - Page 20
a menu appears in this section of the display, use the [1 ▼] - [8 ▼] buttons. If list of the menu appears, use the [1 ▲▼] - [8 ▲▼] button to select the desired item. If a parameter appears in slider (or knob) form, use the [1 ▲▼] - [8 ▲▼] button to adjust the value. 20 PSR-S910/S710 Owner's Manual - Yamaha PSR-S910 | Owner's Manual - Page 21
Style, Song, and so on) When one of the File Selection displays (page 25) is shown, you can use the [DATA ENTRY] dial and the [ENTER] button to select a file (Voice, Style, Song, and so on). Rotate the [DATA the [DATA ENTRY] dial and press [ENTER] to close the window. PSR-S910/S710 Owner's Manual 21 - Yamaha PSR-S910 | Owner's Manual - Page 22
For example, pressing the [GUIDE] button calls up the display in which the Guide mode can be set. Refer to the Data List for a list of the displays that can be called up with the Direct Access function. The Data List is available at the Yamaha website. (See page 10.) 22 PSR-S910/S710 Owner's Manual - Yamaha PSR-S910 | Owner's Manual - Page 23
in Style playback or Song playback. 3 Current chord name When the [ACMP] button is set to on, the chord specified in the chord section of the keyboard will be displayed. When the Song containing the chord data is calls up the Multi Pad Bank Selection display (page 63). PSR-S910/S710 Owner's Manual 23 - Yamaha PSR-S910 | Owner's Manual - Page 24
the Volume Balance display is not shown, press the [EXIT] button to show the Volume Balance display. NOTE For detailed information about the Registration Sequence, refer to the Reference manual on the website. Starting Up 24 PSR-S910/S710 Owner - Yamaha PSR-S910 | Owner's Manual - Page 25
be referred to as "USB storage device." NOTE The data, both pre-programmed and your own original, are saved as "files." NOTE You can open the File Selection display for a specified file from the [USB] button. [USB] → [A] SONG/[B] STYLE/[C] REGIST/[F] VOICE/ [G] MULTI PAD. PSR-S910/S710 Owner's Manual - Yamaha PSR-S910 | Owner's Manual - Page 26
CASE • case capital letters, numbers, marks lowercase letters, numbers, marks 2 Use the [DATA ENTRY] dial to move the cursor to the desired position. NOTE When inputting lyrics in the Song Creator function, you may also enter Japanese characters (kana and kanji). 26 PSR-S910/S710 Owner's Manual - Yamaha PSR-S910 | Owner's Manual - Page 27
the characters are converted to asterisks ▼] (SYMBOL) button to call up the mark list. 2. Use the [DATA ENTRY] dial to move the cursor to the (right-most key on the keyboard), turn the [STANDBY/ON] RESET. For details, refer to the Reference Manual on the website. NOTE PSR-S910/S710 Owner's Manual 27 - Yamaha PSR-S910 | Owner's Manual - Page 28
from the File Selection display (page 60). NOTE To save the Music Finder Record, Effect, MIDI Template and System File, call up the operation display: [FUNCTION] → [J] UTILITY → TAB [E][F] SYSTEM RESET. For more information, refer to the Reference Manual on the website. 28 PSR-S910/S710 Owner - Yamaha PSR-S910 | Owner's Manual - Page 29
, wind instruments and more. 1 Voices - Playing the keyboard - Playing Preset Voices Selecting a Voice (RIGHT 1) and playing the keyboard 1 Press the PART SELECT [RIGHT 1] button. Make For more information on the VOICE category selection buttons, refer to page 33. PSR-S910/S710 Owner's Manual 29 - Yamaha PSR-S910 | Owner's Manual - Page 30
Reference Manual. NOTE (PSR-S910) You can call up the information for the selected Voice by pressing the [7 ▲] (INFO) button. (Some Voices do not have the information display.) To close the information display, press the [EXIT] button. Voices - Playing the keyboard - To listen to the demo phrases - Yamaha PSR-S910 | Owner's Manual - Page 31
keyboard. The notes you play with your left hand sound one Voice (LEFT Voice selected above), while the notes you play with your right sound a different Voices (RIGHT 1 and 2 Voices). NOTE You can save the settings to Registration Memory. See page 71. LEFT part RIGHT 2 part RIGHT 1 part PSR-S910 - Yamaha PSR-S910 | Owner's Manual - Page 32
STYLE SETTING/ SPLIT POINT/CHORD FINGERING → TAB [E][F] SPLIT POINT. For more information, refer to the Reference Manual on the website. Voices - Playing the keyboard - 1 Lower section of the keyboard Upper section of the keyboard sustain pedal has been pressed). 32 PSR-S910/S710 Owner's Manual - Yamaha PSR-S910 | Owner's Manual - Page 33
List provided in the Data List on the website. Organ Flutes Voices (page 37) Voices - Playing the keyboard - • Voice Characteristics The Voice type and its defining characteristics are indicated above the Voice name-Live!, Cool!, Sweet!, etc. For detailed explanation, refer to the Reference Manual - Yamaha PSR-S910 | Owner's Manual - Page 34
to equal temperament. You can change the pitch and scale from [FUNCTION] → [A] MASTER TUNE/SCALE TUNE. You can also adjust the pitch for each part (keyboard parts, Style parts and Song parts) on the TUNE page of the Mixing Console display (page 79). For details, refer to the Reference Manual on - Yamaha PSR-S910 | Owner's Manual - Page 35
Style playback depending on the Style setting. 1 Voices - Playing the keyboard - Applying Voice Effects The PSR-S910 Refer to "Applying Harmony to Your Right-hand Melody" on page 36. • TOUCH This button turns the touch response of the keyboard keyboard to the next. PSR-S910/S710 Owner's Manual 35 - Yamaha PSR-S910 | Owner's Manual - Page 36
added to the notes played in the right-hand range of the keyboard. Chord section You can also use the Harmony effect with the Style stopped. Simply hold down a chord with your left hand and play change the Harmony/Echo type: [FUNCTION] → [H] HARMONY/ECHO. 36 PSR-S910/S710 Owner's Manual - Yamaha PSR-S910 | Owner's Manual - Page 37
Voice is called up. 1 Voices - Playing the keyboard - 2 Use the [1 ▲▼] - [8 ▲▼] File Selection display of the Organ Flute Voices for selecting a preset Organ Flutes Voice. NOTE About the VOLUME/ATTACK Page and EFFECT/EQ Page, see the Reference Manual on the website. PSR-S910/S710 Owner's Manual - Yamaha PSR-S910 | Owner's Manual - Page 38
the instrument off without executing the Save operation. Voices - Playing the keyboard - Advanced Features Refer to the Reference Manual on the website, Chapter 1. Selecting GM/XG or other Voices parameters: [ORGAN FLUTES] → TAB [E][F] VOLUME/ ATTACK or EFFECT/EQ 38 PSR-S910/S710 Owner's Manual - Yamaha PSR-S910 | Owner's Manual - Page 39
hand section of the keyboard (page 32) becomes the Chord section, and chords played in this section are automatically detected and used as a basis for fully automatic accompaniment with the selected Style. 4 Press the [SYNC START] button to enable synchronized start. PSR-S910/S710 Owner's Manual 39 - Yamaha PSR-S910 | Owner's Manual - Page 40
songs and for all chord playing. In some cases for example, playing a simple major triad for a country song may result in a "jazzy" seventh chord, or playing an on-bass chord may result in inappropriate or unexpected accompaniment. Style file compatibility The PSR-S910/S710 uses the SFF GE file format - Yamaha PSR-S910 | Owner's Manual - Page 41
fingering type can be changed from: [FUNCTION] → [C] STYLE SETTING/SPLIT POINT/CHORD FINGERING → TAB [E][F] CHORD FINGERING. arrangement, AI Full Keyboard may not always produce appropriate accompaniment.) For other types, refer to the Reference Manual on the website. PSR-S910/S710 Owner's Manual - Yamaha PSR-S910 | Owner's Manual - Page 42
selected section. • Green: The section contains data but not currently selected. • Off: The section contains no data and cannot be played. NOTE If you press the ENDING/rit. [I] button when the Style is playing, a fill-in automatically plays before the ENDING/rit [I]. 42 PSR-S910/S710 Owner's Manual - Yamaha PSR-S910 | Owner's Manual - Page 43
TEMPO] button During Style playback, you can change the tempo by tapping the [TAP TEMPO] button twice at the desired tempo. When the Style is stopped, tapping the [TAP TEMPO] button (four times for a 4/4 time signature) starts Style playback at the tempo you tapped. PSR-S910/S710 Owner's Manual 43 - Yamaha PSR-S910 | Owner's Manual - Page 44
Music Finder feature (page 65). Styles - Playing Rhythm and Accompaniment - 2 3 3 Use the [2 ▲▼] - [3 ▲▼] buttons to select the desired panel setting. NOTE Depending on the particular selected Style, there may not be any panel settings in the Repertoire function. 44 PSR-S910/S710 Owner's Manual - Yamaha PSR-S910 | Owner's Manual - Page 45
start playing the Style. 2 Styles - Playing Rhythm and Accompaniment - 3 As soon as you play a chord with your left hand, the selected Style starts. Each Style has four One with MAIN VARIATION [A] - [D] change. Refer to the Reference Manual on the website. PSR-S910/S710 Owner's Manual 45 - Yamaha PSR-S910 | Owner's Manual - Page 46
information of the One Touch Setting [1] - [4] assigned to currently selected Style. 1 In the Style Selection display, press the [7 ▲] (OTS INFO.) button to call the [F] (CLOSE) button to close the Information display. Styles - Playing Rhythm and Accompaniment - 46 PSR-S910/S710 Owner's Manual - Yamaha PSR-S910 | Owner's Manual - Page 47
esting. 1 Press the [CHANNEL ON/OFF] button once or twice to call up the CHANNEL ON/OFF (STYLE) display. Styles - Playing Rhythm and Accompaniment - 2 2 Press the [1 ▼] - [8 ▼] buttons to turn the channels is shown, the CHANNEL ON/OFF display cannot be closed. PSR-S910/S710 Owner's Manual 47 - Yamaha PSR-S910 | Owner's Manual - Page 48
• Step Recording: → TAB [E][F] EDIT → [G] STEP REC • Style Assembly: → TAB [E][F] ASSEMBLY • Editing the Rhythmic Feel: → TAB [E][F] GROOVE • Editing Data for Each Channel: → TAB [E][F] CHANNEL • Making Style File Format Settings: → TAB [E][F] PARAMETER 48 PSR-S910/S710 Owner's Manual - Yamaha PSR-S910 | Owner's Manual - Page 49
Playing, Practice and Recording Songs - For the PSR-S910/S710, "Song" refers to the MIDI songs which include preset songs, commercially available MIDI format files, etc. Not only can you play back a Song and listen to it, but you can also play the keyboard along with Song playback and record your own - Yamaha PSR-S910 | Owner's Manual - Page 50
3 Operations During Playback • Synchro Start You can start playback as soon as you start playing the keyboard. While playback is stopped, hold down the SONG [■] (STOP) button and press the [F/ II] . Pressing it again resumes Song playback from the current position. 50 PSR-S910/S710 Owner's Manual - Yamaha PSR-S910 | Owner's Manual - Page 51
Keyboard. See page 48. In the Mixing Console display, you can adjust the volume for each Song part. See page 82. NOTE You can also turn the specific part(s) on or off. See page 54. NOTE You can transpose the Song playback. See page 34. Songs - Playing, Practice and Recording Songs - PSR-S910 - Yamaha PSR-S910 | Owner's Manual - Page 52
to external devices. • Prot. 2 Orig: Indicates Yamaha-protection-formatted Songs. These cannot be copied. These can of commercially-available music data or your recorded Songs. NOTE The style by using the [1 ▲▼] - [8 ▲▼] buttons. For details, refer to the Reference manual on the website. 52 PSR-S910 - Yamaha PSR-S910 | Owner's Manual - Page 53
] button to call up the Lyrics display. When the Song data contains lyrics data, the lyrics are shown on the display. You can look refer to the Reference manual on the website. NOTE (PSR-S910) The Lyrics (text) can be displayed on the external monitor. See page 89. PSR-S910/S710 Owner's Manual - Yamaha PSR-S910 | Owner's Manual - Page 54
and try practicing the part. 1 Select a Song and call up the Score display (page 52). 2 Turn the [GUIDE] button on. 2 3 3 Press the SONG [TR 1] button to mute the right-hand part. The indicator of 2] button, and CH 3 - 16 are assigned to the [EXTRA TR] button. 54 PSR-S910/S710 Owner's Manual - Yamaha PSR-S910 | Owner's Manual - Page 55
Key mode) or for Karaoke. [FUNCTION] → [B] SONG SETTING → [A]/[B] GUIDE MODE For more information, refer to the Reference Manual on the website. Repeat Playback 3 The Song Repeat functions can be used . 2 Press the [REPEAT] button again at the ending point (B). PSR-S910/S710 Owner's Manual 55 - Yamaha PSR-S910 | Owner's Manual - Page 56
-hand, left- 3 hand and Style playback) independently. This is an effective practice tool, allowing you to easily compare your own performance to the original recorded to the following channels. Keyboard parts: Ch. 1-3 Multi Pad parts: Ch. 5-8 Style parts: Ch. 9-16 56 PSR-S910/S710 Owner's Manual - Yamaha PSR-S910 | Owner's Manual - Page 57
can be saved in the Song Selection display. Refer to "Saving Files" on page 58 for instructions. CAUTION The recorded Song will be lost if 16 separate channels. With this method, you can record data to each channel independently, one by one. You can also as desired. PSR-S910/S710 Owner's Manual 57 - Yamaha PSR-S910 | Owner's Manual - Page 58
le. 1 In the Song selection display, select the appropriate tab (USER or USB) to which you want to save the data by using the TAB [E][F] buttons. 1 3 2 2 Press the [6 ▼] (SAVE) button to call up the fi to cancel the Save operation, press the [8 ▼] (CANCEL) button. 58 PSR-S910/S710 Owner's Manual - Yamaha PSR-S910 | Owner's Manual - Page 59
file selection display, select the appropriate tab (USER or NOTE USB) to which you want to save the data by using the TAB In the USER tab display, folder direc- [E][F] buttons. If you want to create a The following marks cannot be entered for a file/folder name PSR-S910/S710 Owner's Manual 59 - Yamaha PSR-S910 | Owner's Manual - Page 60
(CUT) to move. The pop-up window for the Copy/Cut operation appears at the bottom of the display. NOTE Files in the PRESET tab cannot be moved. They can only be copied. 3 Press one of the [A] - [J] buttons selection, press the [6 ▼] (ALL OFF) button again. 60 PSR-S910/S710 Owner's Manual - Yamaha PSR-S910 | Owner's Manual - Page 61
5 Follow the on-display instructions. • YES • YES ALL • NO • CANCEL Delete the file/folder Delete all selected files/folders Leave the file/folder as is without deleting Cancel the Delete operation NOTE To cancel the Delete operation, press the [8 ▼] (CANCEL) button. PSR-S910/S710 Owner's Manual 61 - Yamaha PSR-S910 | Owner's Manual - Page 62
STYLE CONTROL [SYNC START] → SONG [■] + [F/ II] → STYLE CONTROL [START/STOP] Song Playback related parameters: [FUNCTION] → [B] SONG SETTING • Keyboard and Vocal Practice Using the Guide Function: → [A]/[B] GUIDE Songs - Playing, Practice and Recording Songs - 62 PSR-S910/S710 Owner's Manual - Yamaha PSR-S910 | Owner's Manual - Page 63
to your keyboard performances. Multi Pads are grouped in Banks or four each. The PSR-S910/ S710 features data (phrase). • Red: Indicates that the corresponding pad is playing back. • Red (flashing): Indicates that the corresponding pad is in standby (Syn- chro Start). PSR-S910/S710 Owner's Manual - Yamaha PSR-S910 | Owner's Manual - Page 64
Song/Style playback, pressing any note on the keyboard will Refer to the Reference Manual on the website, Chapter 4. Multi Pad creating (Multi Pad Creator): [FUNCTION] → [F] DIGITAL REC MENU → [C] MULTI PAD CREATOR Multi Pad editing: Multi Pad Bank Selection display → [8▼] (EDIT) 64 PSR-S910 - Yamaha PSR-S910 | Owner's Manual - Page 65
all important data has been saved to the USER or USB in the File Section display (step 4 as described at left). 5 Music Finder - Calling Up Ideal Setups (Voice, Style, etc.) for Each Song - 4 Press the [7 ▲▼] (FILES) button to call up the File Selection display. PSR-S910/S710 Owner's Manual 65 - Yamaha PSR-S910 | Owner's Manual - Page 66
file downloaded from the Voice, Style, etc.) for Each Song - Each data which can data which is registered to the Music Finder from the USB Audio Selection display (page 75) NOTE For information on registering the Song/Audio data to the Music Finder, refer to page 68. 66 PSR-S910/S710 Owner's Manual - Yamaha PSR-S910 | Owner's Manual - Page 67
Refer to page 70 for information on selecting SONG and AUDIO records. Shows the song title and information of the Style of the keyboard. Searching the Panel Settings NOTE If you want to avoid changing the Tempo during Style playback when Style, etc.) for Each Song - PSR-S910/S710 Owner's Manual 67 - Yamaha PSR-S910 | Owner's Manual - Page 68
, connect the USB storage device containing the data to the [USB TO DEVICE] terminal. NOTE Before using a USB storage device, be sure to read "Connecting a USB Storage Device" on page 94. Music Finder - Calling Up Ideal Setups (Voice, Style, etc.) for Each Song - 68 PSR-S910/S710 Owner's Manual - Yamaha PSR-S910 | Owner's Manual - Page 69
Record Edit display. 4 Press [8 ▲] (OK) button to start the registration. Press the [8 ▼] (CANCEL) button to cancel the registration. 5 Check the song data (SONG/AUDIO) is added in the MUSIC FINDER display. The song data is shown as SONG or AUDIO in the STYLE column. PSR-S910/S710 Owner's Manual 69 - Yamaha PSR-S910 | Owner's Manual - Page 70
services.music.yamaha.com/musicfinder/ Advanced Features Refer to the Reference Manual on the website, Chapter 5. Creating a Set of Favorite Records: [MUSIC FINDER] → TAB [E][F] ALL → [H] (ADD TO FAVORITE) Editing Records: [MUSIC FINDER] → [8 ▲▼] (RECORD EDIT) Saving the Record as a Single File - Yamaha PSR-S910 | Owner's Manual - Page 71
). Registering Your Panel Setups 1 Set up the panel controls (such as Voice, Style, effects, and so on) as desired. 2 Press the [MEMORY] button in To cancel the operation, press the [I] (CANCEL) button. PSR-S910/S710 Owner's Manual 71 Registration Memory - Saving and Recalling Custom Panel Setups - - Yamaha PSR-S910 | Owner's Manual - Page 72
data and its number is selected. About the lamp status • Red: Data registered and currently selected • Green: Data registered but not currently selected • Off: No data B key on the keyboard). Saving the Registration Memory instructions on saving, refer to page 58. 72 PSR-S910/S710 Owner's Manual - Yamaha PSR-S910 | Owner's Manual - Page 73
- [J] buttons to select a Bank. You can also use the [DATA ENTRY] dial and the [ENTER] button to select a Bank. 3 Press Registration Memory section. NOTE When recalling the setups including Song/Style file selection from a USB storage device, make sure Panel Setups - PSR-S910/S710 Owner's Manual 73 - Yamaha PSR-S910 | Owner's Manual - Page 74
which Voices and Style are memorized to S910), the Voice name for corresponding part is shown in gray. 6 3 Press the [F] (CLOSE) button to close the information display. (On the PSR-S710, the Voice part name for corresponding part is shown in gray.) Advanced Features Refer to the Reference Manual - Yamaha PSR-S910 | Owner's Manual - Page 75
Device" on page 94. 7 2 2 Press the [8 ▲▼] (FILE SELECT) button to display the audio files saved to the connected USB flash memory. 3 Press one of the [A] - [J] buttons corresponding to the file you want to listen to. USB Audio - Playback and Recording Audio Files - PSR-S910/S710 Owner's Manual 75 - Yamaha PSR-S910 | Owner's Manual - Page 76
the USB flash memory or turn the power off during playback. Doing so may corrupt the USB flash memory data. Playback-related Operations You can stop, pause, select, rewind, and forward by using the [1 ▲▼] - [6 back all files in the folder containing the current file. 76 PSR-S910/S710 Owner's Manual - Yamaha PSR-S910 | Owner's Manual - Page 77
. Recording Your Performance as Audio Try recording your performance as audio data (WAV file) to a USB flash memory. For example, when using the PSR-S910, you can record an ensemble performance of guitar and keyboard together or record yourself singing along with song playback by connecting a guitar - Yamaha PSR-S910 | Owner's Manual - Page 78
memory or turn the power off during playback. Doing so may corrupt the USB flash memory data or the recording data. 6 Stop recording by pressing the [J] (STOP) button. The file name is automatically named , then stop the recording by pressing the [J] (STOP) button. 78 PSR-S910/S710 Owner's Manual - Yamaha PSR-S910 | Owner's Manual - Page 79
The Mixing Console gives you intuitive control over aspects of the keyboard parts and Song/Style channels, including volume balance and the timbre of the sounds. It each part (page 83). • EQ Adjusts equalization parameters to correct the tone or timbre of the sound. PSR-S910/S710 Owner's Manual 79 - Yamaha PSR-S910 | Owner's Manual - Page 80
panel [CHANNEL ON/OFF] button once or twice. Song, Style, Multi Pad, MIC (only PSR-S910), PANEL PART Keyboard parts (Left, Right 1, 2) STYLE PART Rhythm 1, 2, Bass, Chord 1, 2, Pad, Phrase up the Song Selection display for saving your data, then save it (page 58). 80 PSR-S910/S710 Owner's Manual - Yamaha PSR-S910 | Owner's Manual - Page 81
and volume for each keyboard part, Style channel or Song channel. Style channels. • The RHY2 channel in the STYLE PART display can only be assigned Drum kit Voices and SFX kit Voices. • When playing GM Song data, channel 10 can only be used for a Drum kit Voice. 8 PSR-S910/S710 Owner's Manual - Yamaha PSR-S910 | Owner's Manual - Page 82
select the VOLUME parameter. 2 PANPOT VOLUME 3 3 Use the [1 ▲▼] - [8 ▲▼] buttons to adjust panning/volume for the desired part. 4 Save your settings (step 5 on page 80). 8 82 PSR-S910/S710 Owner's Manual - Yamaha PSR-S910 | Owner's Manual - Page 83
your settings (step 5 on page 80). Advanced Features Refer to the Reference Manual on the website, Chapter 8. Converting XG Song Voice to this instrument's Voice (Song Auto change the effect type by pressing the [F] (TYPE) button. Refer to the Reference Manual. 8 PSR-S910/S710 Owner's Manual 83 - Yamaha PSR-S910 | Owner's Manual - Page 84
of data from the special website by directly connecting to the Internet. This section provides the overview of the Internet Direct Connection. For specific instructions on connecting and Internetrelated terms, refer to the Internet Connection Guide, which can be downloaded from the Yamaha Manual - Yamaha PSR-S910 | Owner's Manual - Page 85
connection (using a wireless LAN Ethernet Converter) Modem* Access point Wireless LAN Ethernet Converter LAN terminal *Here, "modem" refers to an ADSL modem, optical cable. 9 Internet Direct Connection - Connecting the PSR-S910/S710 Directly to the Internet - PSR-S910/S710 Owner's Manual 85 - Yamaha PSR-S910 | Owner's Manual - Page 86
PSR-S910/S710 Directly to the Internet - Operations in the Special Website After connecting the instrument to the internet, use these operations to take advantage of Internet services directly from the instrument. Following Links By using the [DATA cancel loading. 9 86 PSR-S910/S710 Owner's Manual - Yamaha PSR-S910 | Owner's Manual - Page 87
using data encryption and other tools. Advanced Features Refer to the Reference Manual on the website, Chapter 9. Editing the Browser settings: [INTERNET] → [5 ▼] SETTING → [D] BROWSER SETTINGS Registering bookmarks of your favorite pages: [INTERNET] → [4 ▲▼] BOOKMARK → [3 ▲▼] ADD 9 PSR-S910 - Yamaha PSR-S910 | Owner's Manual - Page 88
stereo system to amplify the instrument's sound by using the OUTPUT [L/L+R]/[R] jacks. When using the PSR-S910, the microphone or guitar sound connected to the instrument's [MIC/LINE IN] jack is output VOLUME] setting affects the input signal from the [AUX IN] jacks. 88 PSR-S910/S710 Owner's Manual - Yamaha PSR-S910 | Owner's Manual - Page 89
like, or text files) displayed on the TV. CAUTION Avoid looking at the television or video monitor for prolonged periods of time since doing so could damage your eyesight. Take frequent breaks and focus instrument. LCD: The currently selected display is output. 10 PSR-S910/S710 Owner's Manual 89 - Yamaha PSR-S910 | Owner's Manual - Page 90
your vocals or guitar sounds through the built-in speakers. The following instructions show how to connect a microphone. Please note that when connecting a microphone from the [MIC/LINE IN] jack. 90 PSR-S910/S710 Owner's Manual NOTE Set the [INPUT VOLUME] knob to the minimum position before turning off - Yamaha PSR-S910 | Owner's Manual - Page 91
harmony vocals (Vocal Harmony) Setting display. 3 Connections - Using Your Instrument with Other Devices - 10 2 2 Press the [6 ▲]/[7 ▲] buttons to turn the harmony vocals (Vocal Harmony) on. PSR-S910/S710 Owner's Manual 91 - Yamaha PSR-S910 | Owner's Manual - Page 92
contains chord data, as you sing along with it. The harmony is applied to your voice according to the chord. NOTE You can adjust the volume balance between the keyboard performance and the microphone by using the [BALANCE] button (page 48). Advanced Features Refer to the Reference Manual on the - Yamaha PSR-S910 | Owner's Manual - Page 93
" in the operation display: [FUNCTION] → [D] CONTROLLER → TAB [E][F] FOOT PEDAL. Advanced Features Refer to the Reference Manual on the website, Chapter 10. Assigning specific functions to each foot pedal: [FUNCTION] → [D] CONTROLLER → TAB [E][F] FOOT PEDAL 10 PSR-S910/S710 Owner's Manual 93 - Yamaha PSR-S910 | Owner's Manual - Page 94
USB connector, do NOT remove the media from the device, and do NOT turn the power off to either device. Doing so may corrupt the data on either or both devices. 94 PSR-S910/S710 Owner's Manual - Yamaha PSR-S910 | Owner's Manual - Page 95
with Other Devices - Connecting to the Internet By using the [LAN] or [USB TO DEVICE] terminal, you can connect the instrument to the Internet. For instructions on connecting, refer to page 85 and Internet Connection Guide downloadable from the Yamaha website. 10 PSR-S910/S710 Owner's Manual 95 - Yamaha PSR-S910 | Owner's Manual - Page 96
edit and organize data on the instrument. IMPORTANT You need to install a USB-MIDI driver to connect the computer and the instrument. Refer to the separate Installation Guide. NOTE You setting up your sequence software, refer to the owner's manual of the relevant software. 96 PSR-S910/S710 Owner - Yamaha PSR-S910 | Owner's Manual - Page 97
the Reference Manual. NOTE For a general overview of MIDI and how you can effectively use it, refer to "MIDI Basics" (downloadable from the Yamaha website). Advanced Features Refer to the Reference Manual on the website, Chapter 10. MIDI settings: [FUNCTION] → [I] MIDI → [8 ▼] EDIT 10 PSR-S910 - Yamaha PSR-S910 | Owner's Manual - Page 98
functions. Also included are data reset functions and storage Style selection display, pop-up display time, etc. • SCREEN OUT (PSR-S910) Monitor type and display content settings which are necessary when connecting a TV monitor refer to the Reference Manual on the website. 98 PSR-S910/S710 Owner - Yamaha PSR-S910 | Owner's Manual - Page 99
been changed or deleted. Manually rename the file, adding the appropriate extension, on a computer. Data files with names of more than 50 characters cannot be handled by the instrument. Rename the file, reducing the number of characters to 50 or less. Troubleshooting PSR-S910/S710 Owner's Manual 99 - Yamaha PSR-S910 | Owner's Manual - Page 100
playback on for those channels that are set to "OFF" (page 54). Some Song data for the instrument has been recorded with special "free tempo" settings. For such Song data, the tempo, beat, measure and music notation will not be displayed correctly. Troubleshooting 100 PSR-S910/S710 Owner's Manual - Yamaha PSR-S910 | Owner's Manual - Page 101
as closely to the microphone as possible. • Use a unidirectional microphone. • Turn down the Master volume, Style volume, or Song volume control (pages 15, 48). Turn the instrument's power off, then turn on again without pressing the footswitch. Troubleshooting PSR-S910/S710 Owner's Manual 101 - Yamaha PSR-S910 | Owner's Manual - Page 102
(downloadable from website). No. Button/Control Display 1 2 3 4 5 6 7 8 SONG 9 STYLE ) ! STYLE CONTROL @ # $ (TEMPO) % ^ (LCD related controls) & MASTER VOLUME control - [STANDBY/ON] Opening display [DEMO] Demo display [MIC SETTING/VOCAL MIC SETTING/VOCAL HARMONY display HARMONY] (PSR-S910 - Yamaha PSR-S910 | Owner's Manual - Page 103
FOOT PEDAL KEYBOARD/PANEL REGIST SEQUENCE/FREEZE/ VOICE SET REGISTRATION SEQUENCE FREEZE VOICE SET DIGITAL REC MENU SONG CREATOR STYLE CREATOR MULTI PAD CREATOR HARMONY/ECHO MIDI MIDI template selection display UTILITY CONFIG 1 CONFIG 2 SCREEN OUT (PSR-S910 74 Reference Manual ● - Yamaha PSR-S910 | Owner's Manual - Page 104
Specifications Size/Weight Dimensions Weight Keyboard Control Interface Other Controllers Display Panel Tone Generation Polyphony Voices Preset Custom Compatibility Types Effects Voice Controls Accompany Style Related Accompaniment Styles PSR-S910 PSR-S710 Width 1,003 mm (39 5/8") - Yamaha PSR-S910 | Owner's Manual - Page 105
on your particular area. Please check with your Yamaha dealer. • Accessory CD-ROM for Windows • Owner's Manual • Accessory CD-ROM for Windows Installation Guide Optional Accessories Footswitches Foot controller FC4/FC5 FC7 Service Internet Direct Connection (IDC) Yes * Specifications and - Yamaha PSR-S910 | Owner's Manual - Page 106
86 I INFO (Voice 30, 33 INFO. (Registration Memory 74 Initial Touch (TOUCH 35 Initialize (Factory Reset 27 INPUT VOLUME 90 INTERNET 84 Internet Connection Guide 10 Internet Direct Connection 84 INTRO 42 K Keyboard Part 32 KEYBOARD/PANEL 35, 38 106 PSR-S910/S710 Owner's Manual Index - Yamaha PSR-S910 | Owner's Manual - Page 107
MONITOR Reference Manual Specifications 104 Split Point 32, 48 STANDBY/ON switch 14 START/STOP 40, 42 STEP REC 48 STOP (Multi Pad 63 STYLE 39 Style Creator 48 Style File Format 9 STYLE SETTING 48 Super Articulation Voice 33 SUSTAIN 35 SYNC START 40, 42 Index PSR-S910/S710 Owner's Manual - Yamaha PSR-S910 | Owner's Manual - Page 108
HOST 96 USB Wireless LAN Adaptor 85 USB-MIDI driver 96 USER 25 USER (Voice 30 Utility 98 Index V VARI 36 VERSION 17 VH 9 Vibrato 35 VIBRATO (Organ Flutes 37 VIDEO OUT 89 VOCAL HARMONY 91 VOICE 29 Voice Effect 35 VOICE SET 36, 38 Voice Type 33 108 PSR-S910/S710 Owner's Manual - Yamaha PSR-S910 | Owner's Manual - Page 109
CUSTOMER SERVICE Yamaha Corporation of America 6600 Orangethorpe Avenue, Buena Park, California 90620-1373 Telephone: 800-854-1569 www.yamaha.com Do not return any product to the above address without a written Return Authorization issued by Yamaha. ©2009 Yamaha Corporation of America. PSR-S910/S710 - Yamaha PSR-S910 | Owner's Manual - Page 110
INFORMATION STATEMENT (DECLARATION OF CONFORMITY PROCEDURE) Responsible Party : Yamaha Corporation of America Address : 6600 Orangethorpe Ave., Buena Park, Calif. 90620 Telephone : 714-522-9011 Type of Equipment : Digital Keyboard Model Name : PSR-S910/S710 This device complies with Part 15 of the - Yamaha PSR-S910 | Owner's Manual - Page 111
Group Nakazawa-cho 10-1, Naka-ku, Hamamatsu, Japan 430-8650 Tel: +81-53-460-2317 OCEANIA AUSTRALIA Yamaha Music Australia Pty. Ltd. Level 1, 99 Queensbridge Street, Southbank, Victoria 3006, Australia Tel: 3-9693-5111 NEW ZEALAND Music Works LTD P.O.BOX 6246 Wellesley, Auckland 4680, New Zealand Tel - Yamaha PSR-S910 | Owner's Manual - Page 112
Yamaha Home Keyboards Home Page http://music.yamaha.com/homekeyboard/ Yamaha Manual Library http://www.yamaha.co.jp/manual/ U.R.G., Pro Audio & Digital Musical Instrument Division, Yamaha Corporation © 2009 Yamaha Corporation WR35340 906MWAPX.X-01A0 Printed in China
-
 1
1 -
 2
2 -
 3
3 -
 4
4 -
 5
5 -
 6
6 -
 7
7 -
8
-
9
-
10
-
11
-
12
-
13
-
14
-
15
-
16
-
17
-
18
-
19
-
20
-
21
-
22
-
23
-
24
-
25
-
26
-
27
-
28
-
29
-
30
-
31
-
32
-
33
-
34
-
35
-
36
-
37
-
38
-
39
-
40
-
41
-
42
-
43
-
44
-
45
-
46
-
47
-
48
-
49
-
50
-
51
-
52
-
53
-
54
-
55
-
56
-
57
-
58
-
59
-
60
-
61
-
62
-
63
-
64
-
65
-
66
-
67
-
68
-
69
-
70
-
71
-
72
-
73
-
74
-
75
-
76
-
77
-
78
-
79
-
80
-
81
-
82
-
83
-
84
-
85
-
86
-
87
-
88
-
89
-
90
-
91
-
92
-
93
-
94
-
95
-
96
-
97
-
98
-
99
-
100
-
101
-
102
-
103
-
104
-
105
-
106
-
107
-
108
-
109
-
110
-
111
-
112
 |
 |

EN
Thank you for purchasing this Yamaha Digital Workstation!
We recommend that you read this manual carefully so that you can fully take advantage of the advanced and
convenient functions of the instrument.
We also recommend that you keep this manual in a safe and handy place for future reference.
Before using the instrument, be sure to read “PRECAUTIONS” on pages 6-7.
Owner's Manual
DIGITAL WORKSTATION