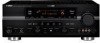
Yamaha RX V663 Owner's Manual
Yamaha RX V663 - AV Receiver Manual
 |
UPC - 027108930121
View all Yamaha RX V663 manuals
Add to My Manuals
Save this manual to your list of manuals |
Yamaha RX V663 manual content summary:
- Yamaha RX V663 | Owner's Manual - Page 1
U RX-V663 AV Receiver OWNER'S MANUAL - Yamaha RX V663 | Owner's Manual - Page 2
IMPORTANT SAFETY INSTRUCTIONS IMPORTANT SAFETY INSTRUCTIONS CAUTION RISK OF ELECTRIC SHOCK DO NOT OPEN CAUTION: TO REDUCE THE RISK OF ELECTRIC SHOCK, DO NOT REMOVE COVER (OR BACK). NO USER-SERVICEABLE PARTS INSIDE. REFER SERVICING TO QUALIFIED SERVICE PERSONNEL. • Explanation of Graphical Symbols - Yamaha RX V663 | Owner's Manual - Page 3
SERVICE GROUNDING ELECTRODE SYSTEM (NEC ART 250. PART H) FCC INFORMATION (for US customers) 1 IMPORTANT NOTICE: DO NOT MODIFY THIS UNIT! This product, when installed as indicated in the instructions contained in this manual, meets FCC requirements. Modifications not expressly approved by Yamaha - Yamaha RX V663 | Owner's Manual - Page 4
this manual outlet until all connections are complete. 8 . Yamaha will Yamaha service personnel when any service Troubleshooting" section on common operating errors before concluding that this unit is faulty. 18 Before moving this unit, press LSYSTEM OFF to set be set connected du Canada. IMPORTANT - Yamaha RX V663 | Owner's Manual - Page 5
MENU 89 3 SOUND MENU 90 4 INPUT MENU 93 5 OPTION MENU 96 Remote control features 100 Controlling this unit, a TV, or other components.......... 100 Setting remote control codes 102 Using multi-zone configuration 103 Connecting Zone 2 103 Controlling Zone 2 104 Advanced setup 106 Using - Yamaha RX V663 | Owner's Manual - Page 6
controlling capability ◆ iPod controlling capability ◆ Remote control with preset remote control codes capability ◆ Zone 2 custom installation facility ◆ Bi-amplification connection capability ◆ Sleep timer Supplied accessories Check that you received all of the following parts. ❏ Remote control - Yamaha RX V663 | Owner's Manual - Page 7
case the button names differ between the front panel and the remote control, the button name on the remote control is given in parentheses. • This manual is printed prior to production. Design and specifications are subject to change in part as a result of improvements, etc. In case of differences - Yamaha RX V663 | Owner's Manual - Page 8
accordance with your local regulations. • If the remote control is without batteries for more than 2 minutes, or if exhausted batteries remain in the remote control, the contents of the memory may be cleared. When the memory is cleared, insert new batteries and set up the remote control code. 4 En - Yamaha RX V663 | Owner's Manual - Page 9
TV monitor, video monitor or projector equipped with a composite video input jack. ☞ P. 7 ❏ Video cable x 2 Select an RCA composite video cable. ❏ Digital coaxial audio cable x 1 Step 3: Press SCENE 1 button y You can also connect two subwoofers to this unit. In this case, prepare two active - Yamaha RX V663 | Owner's Manual - Page 10
start guide Step 1: Set up your speakers Place your speakers in the room and connect them to this unit. PRE OUT SUBWOOFER 1 jack AUDIO L MULTI CH INPUT FRONT Connect the subwoofer cable to the SUBWOOFER PRE OUT 1 jack of this unit and the input jack of the subwoofer. Subwoofer AV receiver - Yamaha RX V663 | Owner's Manual - Page 11
or a turntable ☞ P. 23 • Connecting an external amplifier ☞ P. 24 • Connecting a DVD player via analog multi-channel audio connection ☞ P. 25 • Connecting a Yamaha iPod universal dock or Bluetooth adapter ☞ P. 25 • Using the REMOTE IN/OUT jacks ☞ P. 26 • Using the VIDEO AUX jacks on the - Yamaha RX V663 | Owner's Manual - Page 12
SCENE templates are built combinations of input sources and sound field programs. y If you connect a Yamaha product that has capability of the SCENE control signals, this unit can automatically activate the component and start playback. Refer to the instruction manual of the DVD player for further - Yamaha RX V663 | Owner's Manual - Page 13
various SCENE templates ☞ P. 37 • Creating your original SCENE templates ☞ P. 40 This unit is set to the standby mode and consumes a small amount of power in order to receive infrared signals from the remote control. To turn on this unit from the standby mode, press the desired SSCENE buttons (or - Yamaha RX V663 | Owner's Manual - Page 14
CONNECTIONS Connections Rear panel 1 2 34 5 6 7 AUDIO L MULTI CH INPUT FRONT (8CH) CENTER PRE OUT SINGLE CENTER R IN MD/ OUT CD (PLAY) CD-R (REC) DVD DTV/CBL IN OUT DVR IN OUT VCR SUB SB (8CH) SURROUND WOOFER ZONE 2 HDMI OUT FRONT SURROUND SUR. BACK 1 2 SUBWOOFER - Yamaha RX V663 | Owner's Manual - Page 15
Connections Placing speakers The speaker layout below shows the speaker setting we recommend. You can use it to enjoy the CINEMA DSP and multi-channel audio sources. ■ 7.1-channel speaker layout 7.1-channel speaker layout is highly recommended for playback the sound of high definition audio formats - Yamaha RX V663 | Owner's Manual - Page 16
" (see page 86). Front left and right speakers Center speaker Subwoofer(s) The functions and settings of each speaker are the same as those for the 7.1-channel speaker layout (see page 11). Surround left and right speakers Connect the surround speakers to the SURROUND speaker terminals even if you - Yamaha RX V663 | Owner's Manual - Page 17
adjust the vertical position of dialogues with using the presence speakers (see page 73). To use the presence speakers, connect the speakers to the EXTRA SP terminal (see page 14) and set "EXTRA SP ASSIGN" to "PRESENCE" (see pages 33 and 85). 0.5 to 1 m (1 to 3 ft) PL 1.8 m (6 ft) or FL higher - Yamaha RX V663 | Owner's Manual - Page 18
to the EXTRA SP terminals, set the "EXTRA SP ASSIGN" parameter in "SOUND MENU" (see page 85). y You can also select the function of the speakers connected to the EXTRA SP terminals in "AUTO SETUP" (see page 33). Subwoofers (optional) AUDIO L MULTI CH INPUT FRONT (8CH) CENTER PRE OUT SINGLE - Yamaha RX V663 | Owner's Manual - Page 19
2V 5mA MAX. SINGLE Connections (optional) Subwoofers PREPARATION Right Left Front speakers (FRONT A) Right Left Surround speakers Left (SINGLE) Surround back speaker ■ For the 5.1-channel speaker setting EXTRA SP terminals (see page 14) Center speaker AUDIO MULTI CH INPUT FRONT (8CH - Yamaha RX V663 | Owner's Manual - Page 20
to one speaker system. Check if your speakers support biamplification. To make the bi-amplification connections, use the FRONT and SURROUND BACK/BI-AMP terminals as shown below. To activate the bi-amplification connections, set "BI-AMP" to "ON" in "ADVANCED SETUP" (see page 109). Front speakers - Yamaha RX V663 | Owner's Manual - Page 21
Information on jacks and cable plugs Connect one of the type of the audio jack(s) and/or video jack(s) that your input components are equipped with. Audio jacks and cable plugs AUDIO L R DIGITAL COAXIAL DIGITAL OPTICAL Video jacks and cable plugs VIDEO S VIDEO COMPONENT VIDEO PR - Yamaha RX V663 | Owner's Manual - Page 22
play back the audio sources with the audio commentaries mixed down by using the following connections: - multi-channel analog audio input (see page 25) - DIGITAL INPUT OPTICAL (or COAXIAL) • Refer to the supplied instruction manuals of the input source component, and set the component appropriately - Yamaha RX V663 | Owner's Manual - Page 23
VIDEO Connections Output S VIDEO Digital output Analog output VIDEO Through Video conversion ON (see page 97) Notes • 2-channel as well as multi-channel PCM, Dolby Digital and DTS signals input at one of the HDMI IN jacks can be output at the HDMI OUT jack only when "S.AUDIO" is set to - Yamaha RX V663 | Owner's Manual - Page 24
input source, connect the digital or analog audio output jacks of the TV and digital or analog audio input jacks of this unit. Refer to "Connecting a set-top box" on page 22 for connecting SURROUND SUR. BACK 1 2 SUBWOOFER DVD DTV/CBL 1 2 OPTICAL DIGITAL INPUT FRONT B/ZONE B/ ZONE 2/PRESENCE - Yamaha RX V663 | Owner's Manual - Page 25
" in "I/O ASSIGNMENT" (see page 93). • If you connect your DVD player to both the DIGITAL INPUT (OPTICAL) and the DIGITAL INPUT (COAXIAL) jacks, priority is given to the signals input at the DIGITAL INPUT (COAXIAL) jack. Optical out Coaxial out Audio out DVD player S-video out Video out Component - Yamaha RX V663 | Owner's Manual - Page 26
1 2 SUBWOOFER XM ANTENNA DVD DTV/CBL 1 2 OPTICAL DIGITAL INPUT FRONT B/ZONE Connecting a set-top box Optical out Audio out Satellite receiver, cable TV receiver or HDTV decoder S-video out Video out Component video out Y PB PR HDMI out O RL Y PB PR V S AUDIO L MULTI CH INPUT - Yamaha RX V663 | Owner's Manual - Page 27
component assigned to each the DIGITAL INPUT jack, select the corresponding setting for "OPTICAL IN", or "COAXIAL IN" in "I/O ASSIGNMENT" (see page 93). • When you connect both the DIGITAL INPUT (OPTICAL) jack and the DIGITAL INPUT (COAXIAL) jack to an audio component, the priority is given to - Yamaha RX V663 | Owner's Manual - Page 28
jacks. 3 SUR.BACK PRE OUT jacks Surround back channel output jacks. When you only connect one external amplifier for the surround back channel, connect it to the SINGLE jack. Notes • When "BI-AMP" is set to "ON", this unit outputs the front channel audio signals at the SUR.BACK PRE OUT jacks - Yamaha RX V663 | Owner's Manual - Page 29
out Subwoofer out Surround out Front out Multi-format player/External decoder (5.1-channel output) Multi-format player/External decoder (7.1-channel output) *1 The analog audio input jacks assigned as "FRONT" in "MULTI CH" (see page 95). ■ Connecting a Yamaha iPod universal dock or Bluetooth - Yamaha RX V663 | Owner's Manual - Page 30
playback when you use one of the SCENE buttons. Refer to the owner's manuals for details about the capability of the SCENE control signals of the components. • If the component connected to the REMOTE OUT jack is not the Yamaha product, set "SCENE IR" in the advanced setup menu to "OFF" (see page - Yamaha RX V663 | Owner's Manual - Page 31
Yamaha dealer or service center about outdoor antennas. • The AM loop antenna should always be connected, even if an outdoor AM antenna is connected . REMOTE TRIGGER OUT Outdoor AM antenna Use a 5 to 10 m (16 to 33 ft) vinyl-covered wire extended outdoors from a window. Connections Connecting the - Yamaha RX V663 | Owner's Manual - Page 32
power consumption of the components that can be connected to these outlet(s), see "Specifications" on page setting ("8Ω MIN") appear in the front panel display. 4 Press MTONE CONTROL repeatedly to select "6Ω MIN". 5 Press LSYSTEM OFF to save the new setting and turn off this unit. Note The setting - Yamaha RX V663 | Owner's Manual - Page 33
zone to the standby mode. In the standby mode, this unit consumes a small amount of power in order to receive infrared signals from the remote control. y Press LSYSTEM OFF to set the main zone and Zone 2 (see page 104) to the standby mode simultaneously. Connections PREPARATION English 29 En - Yamaha RX V663 | Owner's Manual - Page 34
the DOCK terminal of this unit (see page 25) and V-AUX is selected as the input source. The DOCK indicator also lights up when this unit is charging the battery of the stationed iPod in the standby mode. • Flashes while the connected Yamaha Bluetooth adapter (such as YBA-10, sold separately) and the - Yamaha RX V663 | Owner's Manual - Page 35
"AUTO SETUP" (see page 32) or manually by adjusting settings for "SUR.B L/R SP" (see page 86) in "SPEAKER SET". Connections Using the remote control The remote control transmits a directional infrared ray. Be sure to aim the remote control directly at the remote control sensor on this unit during - Yamaha RX V663 | Owner's Manual - Page 36
turned on. ❏ This unit is selected as the video input source of the video monitor. ❏ The connected subwoofer is turned on and the volume level is set to about half way (or slightly less). ❏ The crossover frequency controls of the connected subwoofer is set to the maximum. VOLUME CROSSOVER HIGH CUT - Yamaha RX V663 | Owner's Manual - Page 37
desired setting for "EXTRA SP ASSIGN" and then press 8n. Extra speaker assignment EXTRA SP ASSIGN Selects the function of the speakers connected to results. • "RELOAD" or "UNDO" is not available when you change the setting of "BI-AMP" in the advanced setup (see page 109) or "EXTRA SP ASSIGN" in - Yamaha RX V663 | Owner's Manual - Page 38
automatic setup procedure. The following screen appears in the OSD and setup procedure starts in 10 seconds. AUTO SETUP Measurement Start in 9 seconds [RETURN]:Cancel Loud test tones are output from each speaker during the auto setup procedure. Once all items are set, the "RESULT" display appears in - Yamaha RX V663 | Owner's Manual - Page 39
longer than the actual distance depending on the characteristics of your subwoofer. • In the "EQ" results, different values may be set for the same frequency to provide finer adjustments. 12 Press 8ENTER to return to the top result display. RESULT WIRING FRONT L;;;;;;;OK [ [ ]/[[]:Select [ENTER - Yamaha RX V663 | Owner's Manual - Page 40
listening room (YPAO) 15 Press 8ENTER to confirm your selection. The top "SET MENU" screen appears in the OSD. SET MENU . ;AUTO SETUP ;MANUAL SETUP .A;SIGNAL INFO [ ]/[ ]:Up/Down [ENTER]:Enter 16 Press MMENU to exit from "SET MENU". y If you change speakers, speaker positions, or the layout of your - Yamaha RX V663 | Owner's Manual - Page 41
Note Once the desired SCENE templates are assigned to the corresponding SCENE buttons, you need to set the input source of the SCENE template on the remote control. See page 41 for details. 1 Press and hold the SSCENE (or 6SCENE) button for 3 seconds. The indicator on the selected SCENE button - Yamaha RX V663 | Owner's Manual - Page 42
programs Video games DTV/CBL V-AUX* TV Viewing 3 TV Sports Viewing Action Game Playing RPG Playing Note * When iPod is connected to the Yamaha iPod universal dock or a Bluetooth component is connected to the Bluetooth adapter, this unit plays back the audio sources input at the DOCK terminal - Yamaha RX V663 | Owner's Manual - Page 43
programs. Dock Listening TV Viewing 3 V-AUX DTV/CBL MUSIC ENHANCER 7ch Enhancer Select this SCENE template when you play back music on your iPod stationed in a Yamaha iPod universal dock or Bluetooth component that is connected to the Bluetooth adapter. Straight Select this SCENE template - Yamaha RX V663 | Owner's Manual - Page 44
1 Turn on the video monitor connected to this unit. 2 Press and hold the desired 6SCENE button for 3 seconds. The SCENE template customizing screen appears on the video monitor. SCENE1 .p DVD Viewing [ INPUT: DVD MODE: STRAIGHT [ENTER]:Rename [SCENE1]:SET [RETURN]:EXIT Note When the SCENE - Yamaha RX V663 | Owner's Manual - Page 45
this unit and the input source component by using the remote control. You must set the appropriate remote control code for each input source in advance (see page 102). ■ Setting input source of the customized SCENE template on the remote control If you customize the input source of the selected - Yamaha RX V663 | Owner's Manual - Page 46
play DTS-encoded CDs when using a digital audio connection, set "DECODER MODE" in "INPUT MENU" to "DTS" before the playback (see page 94). Before performing the following operations, press 5AMP on the remote control. Basic procedure 1 Turn on the video monitor connected to this unit. y See page 46 - Yamaha RX V663 | Owner's Manual - Page 47
remote control. Selecting the MULTI CH INPUT component Use this feature to select the component connected to the MULTI CH INPUT jacks (see page 25) as the input speaker setting. ■ Using the Zone B feature When you set "EXTRA SP ASSIGN" to "ZONE B" (see page 85), you can use the speakers connected to - Yamaha RX V663 | Owner's Manual - Page 48
selected audio input jack select setting Displaying the current status of this unit on a video monitor You can display the operating information of this unit on a video monitor. 1 Turn on the video monitor connected to this unit. 2 Press ODISPLAY on the remote control. The current status screen - Yamaha RX V663 | Owner's Manual - Page 49
operations, press 5AMP on the remote control. Connect a pair of headphones with a stereo analog audio cable plug to the PHONES jack CONTROL SCENE 1 2 3 4 PROGRAM STRAIGHT PURE DIRECT AUDIO SELECT INPUT SILENT CINEMA EFFECT MUTE SLEEP OPTIMIZER MIC VIDEO AUX S VIDEO VIDEO L AUDIO - Yamaha RX V663 | Owner's Manual - Page 50
source information You can display the audio and video information of the current input signal. 1 Press 5AMP and then press MMENU on the remote control. The top "SET MENU" display appears in the OSD. SET MENU . ;AUTO SETUP ;MANUAL SETUP .A;SIGNAL INFO [ ]/[ ]:Up/Down [ENTER]:Enter p p 2 Press - Yamaha RX V663 | Owner's Manual - Page 51
OUTLET(S) while charging connected iPod (see page 28). Press 5AMP and then press TSLEEP repeatedly to set the amount of time. Each time you press TSLEEP, the front panel display changes as shown below. ■ Canceling the sleep timer Playback Press TSLEEP on the remote control repeatedly until "SLEEP - Yamaha RX V663 | Owner's Manual - Page 52
field programs cannot be selected when the component connected to the MULTI CH INPUT jacks is selected as the input source (see page 43). • When you play back the Dolby TrueHD, Dolby Digital Plus, DTS-HD Master Audio, or DTS-HD High Resolution Audio sources, this unit does not activate any sound - Yamaha RX V663 | Owner's Manual - Page 53
SET" is set to "PRESENCE" (see page 85). MOVIE Program Standard Spectacle Sci-Fi Descriptions This program creates a sound field emphasizing the surrounding feeling without disturbing the original acoustic positioning of multi-channel audio the cinemascope and wider-screen movies with an excellent - Yamaha RX V663 | Owner's Manual - Page 54
optimum 3D feeling, audio to create a comfortable space with a certain sound depth. Note The available parameters differ depending on the input sources and the settings of this unit. STEREO Program 2ch Stereo 7ch Stereo Descriptions Use this program to mix down multi-channel sources to 2 channels - Yamaha RX V663 | Owner's Manual - Page 55
page 51). Sound field programs Before performing the following operation, press 5AMP on the remote control. Enjoying unprocessed input sources (Straight decoding mode) When this unit is in the "Straight" mode, 2-channel stereo sources are output from only the front left and right speakers. Multi - Yamaha RX V663 | Owner's Manual - Page 56
AUDIO FEATURES Using audio features Before performing the following operations, press 5AMP on the remote control. Adjusting the speaker level You can adjust the output level of each speaker while listening to a music source. This is also possible when playing sources input at the MULTI CH INPUT - Yamaha RX V663 | Owner's Manual - Page 57
Using station preset feature" on page 54). Note Orient the connected FM and AM antennas for the best reception. Basic tuning operations Before performing the following operations, press 4TUNER on the remote control. Manual tuning mode (MANUAL TUNING) Use this feature if the signal from the station - Yamaha RX V663 | Owner's Manual - Page 58
stations to this unit by using the automatic or manual preset tuning features in advance (see "Automatic station preset" and "Manual station preset" on page 55). Before performing the following operations, press 4TUNER on the remote control. 1 Press BSEARCH MODE (or MSRCH MODE) repeatedly to select - Yamaha RX V663 | Owner's Manual - Page 59
4TUNER on the remote control. ■ Automatic station number. • If the number of received stations does not reach 40 (E8), automatic stations with weak signals manually. 1 Tune into a station. See page 53 for tuning instructions. 2 Press FMEMORY (stereo or monaural) is stored along with the station - Yamaha RX V663 | Owner's Manual - Page 60
example below describes the procedure to exchange preset station "E1" with "A5". Before performing the following operations, press 4TUNER on the remote control. 1 Select preset station "E1" using DA/B/C/D/E and EPRESET/TUNING/CH l / h. See "Using station preset feature" on page 54. 2 Press and hold - Yamaha RX V663 | Owner's Manual - Page 61
in the front panel or "XM Information" screen in the video monitor (see page 61) to check the antenna reception level and adjust the orientation of the antenna. Note If "CHECK ANTENNA" or "CHECK XM TUNER" appears in the front panel display, the connection and setting of the antenna, Home Dock, or XM - Yamaha RX V663 | Owner's Manual - Page 62
the full lineup on your XM Ready home audio system you are done. MULTI CH VCR DVR V-AUX DTV/CBL DVD MD/CD-R CD TUNER XM SIRIUS 001 Preview y When you select "XM" as the input source, this unit automatically recalls the previously selected channel. Notes • The XM Satellite Radio signals cannot be - Yamaha RX V663 | Owner's Manual - Page 63
as shown below. 1 2 3 y • To enter a one-digit or two-digit channel number, press the numeric buttons (G) on the remote control and then press TENT to confirm the input number. • Instead of pressing TENT to tune into the channel immediately, you can wait a few seconds until this unit confirms - Yamaha RX V663 | Owner's Manual - Page 64
(A1 to E8: 8 preset channel numbers in each of the 5 preset channel groups). You can then recall any preset channel easily by selecting the preset channel group and number as described in "Preset Search mode" on page 59. 1 Search for a channel you want to set as a preset channel by using one of the - Yamaha RX V663 | Owner's Manual - Page 65
Channel number/name CATEGORY INFO Channel category e.g.) ROCK XM Satellite Radio tuning y • The front panel display can indicate up to 14 alphanumeric characters at once. You can set 8ENTER on the remote control while it is being displayed in the OSD. "HOLD" appears in the screen while you are - Yamaha RX V663 | Owner's Manual - Page 66
55 channels of world-class sports, news and entertainment. Included as part of instruction manuals supplied with the SiriusConnect tuner for the installation of the antenna.You can mount it indoors or outdoors. • Use the "ANTENNA INFO" information in the front panel or "SIRIUS Information" screen - Yamaha RX V663 | Owner's Manual - Page 67
115. Basic SIRIUS Satellite Radio™ operations Before performing the following operations, set the operation mode selector on the remote control to FSOURCE. 1 Rotate the RINPUT selector (or press KSIRIUS) to select "SIRIUS" as the input source. The cursor on the left of the SIRIUS indicator lights - Yamaha RX V663 | Owner's Manual - Page 68
1 2 3 y • To display the Sirius ID number displayed in the front panel display, select channel "0". • To enter a one-digit or two-digit channel number, press the numeric buttons (G) on the remote control and then press TENT to confirm the input number. • Instead of pressing TENT to tune into the - Yamaha RX V663 | Owner's Manual - Page 69
code number and the locked channels Use this feature to set the Parental Lock code number (PIN) and select the channels to be locked. 1 Press 5AMP on the remote control and then press MMENU to display. 2 Press 8n to select "MANUAL SETUP" and then press 8ENTER. 3 Press 8n repeatedly to select "INPUT - Yamaha RX V663 | Owner's Manual - Page 70
following menu screen appears. A) SIRIUS . INPUT RENAME VOL channels you want. 12 Press 9RETURN to exit from the "PARENTAL LOCK" screen. [0] [9]:NUMBER [ENT]:Enter Note If a SiriusConnect tuner is not connected to this unit, "Not Available" appears. y If the Parental Lock code number is already set - Yamaha RX V663 | Owner's Manual - Page 71
of the SiriusConnect tuner cannot receive the signals, "ACQUIRING" appears in the front panel display. • When an information is unavailable, "----" appears. ■ Displaying the SIRIUS Satellite Radio information in the OSD Press ODISPLAY on the remote control. The following screen is displayed in the - Yamaha RX V663 | Owner's Manual - Page 72
page 94). The DOCK indicator turns on while this unit charges the battery of the connected iPod when this unit is in the standby mode. Controlling iPod™ You can control your iPod when "V-AUX" is selected as the input source. The operations of your iPod can be done with the aid of the OSD of - Yamaha RX V663 | Owner's Manual - Page 73
or adjusted only in the OSD. Press 8ENTER or 8k/n repeatedly on the remote control to toggle between the "Settings" parameter settings. • You cannot browse the photos or video clips stored on your iPod in the OSD. Use the simple remote mode to enjoy watching the photos or video clips stored on your - Yamaha RX V663 | Owner's Manual - Page 74
"V-AUX" as the input source. 2 Start playback of your Bluetooth component. When the connected Bluetooth adapter detects the Bluetooth component, "BT connected" and the DOCK indicator appears in the front panel display. y • When you press 8ENTER on the remote control, the connected Bluetooth adapter - Yamaha RX V663 | Owner's Manual - Page 75
following considerations and adjustments need to be made. To play DTS-encoded DVDs and CDs (when using a digital audio connection) on your DTS-compatible player, follow its operating instructions to make a setting so that the analog signal will be output from the player. Notes • When this unit is - Yamaha RX V663 | Owner's Manual - Page 76
settings. Although you do not have to change the initial factory settings, you can change some of the parameters to better suit the input set "MEMORY GUARD" to "OFF". 1 Turn on the video monitor connected to this unit. 2 Press 5AMP and then SPARAMETER on the remote control. The following screen - Yamaha RX V663 | Owner's Manual - Page 77
video monitor screen. The ideal dialogue position. If the dialogues are heard at the lower position of the video monitor screen, increase the effect is excessive. Control range: -6 dB to +3 dB Move up to the ideal dialogue position. Choices: 0, 1, 2, 3, 4, 5 "0" (initial setting) is the lowest - Yamaha RX V663 | Owner's Manual - Page 78
sound field programs in detail. y To change sound field parameter settings, see page 72 for details. Sound field parameter INIT.DLY P.INIT room size parameters likewise. This adjustment is especially effective for the CINEMA DSP programs. Control range: 1 to 99 ms (INIT.DLY and P.INIT.DLY) 1 to 49 - Yamaha RX V663 | Owner's Manual - Page 79
is repeatedly reflected around a room, the larger the hall is, the longer the time between the original reflected sound and the subsequent reflections. By controlling the time between the reflected sounds, you can change the apparent size of the virtual venue. Changing this parameter from one to two - Yamaha RX V663 | Owner's Manual - Page 80
apparent size of the acoustic environment over an extremely wide range. Set a longer reverberation time for "dead" sources and listening room environments makes you feel as if you are in a larger acoustic environment. Control range: 0 to 250 ms Level Source sound (dB) Reverberation REV.DELAY - Yamaha RX V663 | Owner's Manual - Page 81
Select "OFF" not to bypass the decoders, the DSP processors and the tone control circuitry when "BASS" and "TREBLE" are set to 0 dB. • When multi-channel signals (Dolby Digital and DTS) are input, they are downmixed to 2 channels and output from the front left and right speakers. • The low-frequency - Yamaha RX V663 | Owner's Manual - Page 82
" is set to "NONE" (see page 86). DTS processing for movie sources. Neo:6 Music DTS processing for music sources. Neural Sur. (U.S.A. and Canada models only) Neural Surround processing for any sources. The Neural Surround decoder is compatible with PCM signals and analog 2-channel input sources - Yamaha RX V663 | Owner's Manual - Page 83
Music panorama. Sends stereo signals to the setting: 3 C. IMAGE ("Neo:6 Music" only) DTS Neo:6 Music center image. Adjusts the front left and right channel output relative to the center channel to make the center channel more or less dominant as necessary. Control range: 0.0 (center channel - Yamaha RX V663 | Owner's Manual - Page 84
(see page 32). ■ Manual setup MANUAL SETUP Use this feature to manually adjust speaker and system parameters. Basic menu 1 BASIC MENU Menu A)SPEAKER SET B)SP LEVEL C)SP DISTANCE D)TEST TONE Parameter Functions EXTRA SP ASSIGN Selects the function of the speakers connected to the EXTRA SP speaker - Yamaha RX V663 | Owner's Manual - Page 85
function is active. Adjustment the audio delay manually when the connected video monitor is not compatible with the automatic audio and video synchronization function or "HDMI AUTO" is set to "OFF". Use this feature to enjoy 6.1/7.1-channel playback for multi-channel sources using the Dolby Pro - Yamaha RX V663 | Owner's Manual - Page 86
Pair the connected Yamaha Bluetooth adapter (such as YBA-10, sold separately) with a 95 Bluetooth component (see page 70). Selects the video source played back in the background of the sources input at the MULTI CH 95 INPUT jacks. Selects the number of channels input from an external decoder - Yamaha RX V663 | Owner's Manual - Page 87
Menu Parameter D)INIT. CONFIG AUDIO SELECT E)HDMI SET F)ZONE2 SET DECODER MODE EXTD SUR. S.AUDIO MAX VOL. INIT. VOL. Customizing this unit (MANUAL SETUP) Functions Designates the default audio input jack select setting for the input sources connected to the DIGITAL INPUT jacks when you turn on - Yamaha RX V663 | Owner's Manual - Page 88
Customizing this unit (MANUAL SETUP) [ p Using SET MENU Use the remote control to access and adjust each parameter. y • You can change the "SET MENU" parameters while this unit is reproducing sound. • If you press SPARAMETER during the "SET MENU" operation, the "SET MENU" operation is canceled. • - Yamaha RX V663 | Owner's Manual - Page 89
of the speakers connected to the EXTRA SP terminals. XA)SPEAKER SET X X EXTRA Subwoofer(s) and speakers Subwoofer(s) Front speakers Other speakers BOTH *1 *2 *3 SWFR *4 *3 *3 FRONT No output *1 *3 *1 Output(s) the low-frequency signals of the front channels and other speakers set - Yamaha RX V663 | Owner's Manual - Page 90
not use the surround back speakers. The surround back channel signals are directed to the surround left and right speakers. Note If the Dolby TrueHD audio signals are input and "SUR.B L/R SP" is set to "NONE", the left and right surround back channels are not directed to the surround left and right - Yamaha RX V663 | Owner's Manual - Page 91
the phase of your subwoofer to reverse. Customizing this unit (MANUAL SETUP) ■ Speaker level B)SP LEVEL Use this feature to manually balance the speaker levels between the front left or surround left speakers and each speaker selected in "SPEAKER SET" (see page 85). Control range: -10.0 dB to +10 - Yamaha RX V663 | Owner's Manual - Page 92
speaker SBL Surround back left speaker SBR Surround back right speaker SWFR Subwoofer PRNS L Presence left speaker PRNS R Presence right speaker Notes • The available speaker channels differ depending on the setting of the speakers. • Instead of "SBL" and "SBR", "SUR.B" is displayed if - Yamaha RX V663 | Owner's Manual - Page 93
or at night. When "ADAPTIVE DRC" is set to "AUTO", this unit controls the dynamic range as follows: - If the VOLUME setting is low: the dynamic range is narrow - If the VOLUME setting is high: the dynamic range is wide Customizing this unit (MANUAL SETUP) Adaptive DSP level ADAPTIVE DSP LEVEL Use - Yamaha RX V663 | Owner's Manual - Page 94
(MANUAL SETUP) 3 SOUND MENU Use this feature to adjust the audio automatically selected as the default setting. Graphic equalizer GEQ Use Control range: -6.0 dB to +6.0 dB Control step: 0.5 dB A)EQUALIZER 1/2 TEST >OFF ON . CHANNEL screen. A)EQUALIZER 1/2 . TEST >OFF ON CHANNEL;;;;FRONT - Yamaha RX V663 | Owner's Manual - Page 95
according to the capacity of your subwoofer or headphones. The LFE channel carries low-frequency special effects which are only added to certain scenes. This setting is effective when the input signal contains the LFE channel. Control range: -20 to 0 dB Control step: 1 dB B)LFE LEVEL . SPEAKER - Yamaha RX V663 | Owner's Manual - Page 96
"OFF". Use "MANUAL" to adjust the audio and video synchronization. [p]/[[]: Select [ENTER]: Return Choice AUTO PLIIxMovie PLIIxMusic EX/ES OFF Functions Activates the optimum decoder to play back signals in 6.1/7.1 channels when this unit recognizes a signal flag being input. Plays back Dolby - Yamaha RX V663 | Owner's Manual - Page 97
reassign the respective jacks and effectively connect more components. Once the input/output jacks are reassigned, you can select the corresponding component by using the RINPUT selector on the front panel (or the input selector buttons on the remote control). K) DVR . COMPONENT IN;;;[B]* COAXIAL IN - Yamaha RX V663 | Owner's Manual - Page 98
to balance the level of each input source to avoid sudden changes in volume when switching between input sources. Control range: -6.0 dB to +6.0 dB Control step: 0.5 dB Initial setting: 0.0 dB C) TUNER INPUT RENAME . VOL. TRIM;;;;+6.0dB Note "DECODER MODE" is only available when the digital audio - Yamaha RX V663 | Owner's Manual - Page 99
left and right channels input jack FRONT If you selected "8CH" in "INPUT CH", you can select the analog audio jacks at which the front left and right channel signals output from the connected external decoder is input. Choices: CD, MD/CD-R, DVD, DTV/CBL, DVR, VCR, V-AUX M) MULTI CH INPUT RENAME VOL - Yamaha RX V663 | Owner's Manual - Page 100
Control step: 1 Initial setting: 0 • Press 8l to lower the position of the OSD. • Press 8h to raise the position of the OSD. Amplifier function OSD display time OSD-AMP Use this feature to set the amount of time to display the status information screen as song title or channel name) in the front - Yamaha RX V663 | Owner's Manual - Page 101
"SOUND MENU" (see page 92) - "DECODER MODE" in "INPUT MENU" (see page 94) - "PARENTAL LOCK" in "INPUT MENU" (see page 94) - "MEMORY GUARD" • When "MEMORY GUARD" is set to "ON", " G " appears at the top right of the "SET MENU" screen. • You can change the settings of "SUR." in the sound field program - Yamaha RX V663 | Owner's Manual - Page 102
component to play back HDMI audio signals. E)HDMI SET S. AUDIO;;;;;RX-V663 [p]/[[]: Select [ENTER]: Return Audio select AUDIO SELECT Use this feature to designate the default audio input jack select setting (see page 44) for the input sources connected to the DIGITAL INPUT jacks when you turn on - Yamaha RX V663 | Owner's Manual - Page 103
of Zone 2 when the power of this unit is turned on. Choices: OFF, MUTE, -80.0 dB to +16.5 dB Control step: 0.5 dB Notes • The "MAX VOL." setting takes priority over the "INI.VOL." setting. • When you select "FRONT B", "PRNS", "Zone B", or "NONE" in "EXTRA SP ASSIGN" (see page 85), "Zone 2 SP Not - Yamaha RX V663 | Owner's Manual - Page 104
must set the appropriate remote control code for DTV/CBL (see page 102). AMP *2 POWER POWER STANDBY POWER TV AV A XM SIRIUS MUTE CD MD/CD-R TUNER DVD DTV/CBL DVR TV CH V-AUX/DOCK VCR B AMP TV INPUT TV MUTE TV VOL SCENE 1 2 3 4 BAND LEVEL TITLE SRCH MODE MENU VOLUME ENTER RETURN - Yamaha RX V663 | Owner's Manual - Page 105
POWER POWER STANDBY POWER TV AV A XM SIRIUS MUTE CD MD/CD-R TUNER DVD DTV/CBL DVR TV CH V-AUX/DOCK VCR B AMP TV INPUT TV MUTE TV VOL SCENE 1 2 3 4 Remote control features [2] BAND LEVEL TITLE SRCH MODE MENU VOLUME [3] ENTER [4] [5] [6] RETURN MEMORY REC DISPLAY INFO l PROG - Yamaha RX V663 | Owner's Manual - Page 106
by setting the appropriate remote control codes. For a complete list of available remote control codes, refer to "List of remote control codes" at the end of this manual. Remote control code default settings Input source Component category Manufacturer Default code A TUNER Yamaha 5012 - Yamaha RX V663 | Owner's Manual - Page 107
component Yamaha component ■ Using the external amplifier Connect the amplifier/receiver in the second zone and other components to this unit as follows. From the ZONE 2 OUT jacks Main zone DVD player (etc.) This unit Infrared signal emitter Amplifier Second zone (Zone 2) Remote control - Yamaha RX V663 | Owner's Manual - Page 108
See this owner's manual for correct usage. Compliance with minimum speaker impedance information for all channels must be maintained at all times. This information is found on the back panel of your Receiver. Connect the speakers in the second zone to the EXTRA SP speaker terminals and then set the - Yamaha RX V663 | Owner's Manual - Page 109
■ Controlling Zone 2 with the remote control Turning on Zone 2 Press RINPUT l / h to select the desired input source AUX" as the input source to use Bluetooth component features in Zone 2. For details about the Bluetooth component operations, see "Using Bluetooth™ components" on page 70. Set - Yamaha RX V663 | Owner's Manual - Page 110
Select "8ΩMIN" to set the speaker impedance to 8 Ω. • Select "6ΩMIN" to set the speaker impedance to 6 Ω. 2 Press and hold MTONE CONTROL and then press KMAIN sets (A and B), the impedance of each speaker must be 8 Ω or higher. The impedance of each speaker must be 6 Ω or higher. * The Canada - Yamaha RX V663 | Owner's Manual - Page 111
Yamaha receivers/ amplifiers in the same room separately. Choices: ID1, ID2 • Select "ID1" when the remote control AMP ID code is set to "5019". • Select "ID2" when the remote control AMP ID code is set to "5020". Setting remote control AMP ID codes You need to set the remote control AMP ID code - Yamaha RX V663 | Owner's Manual - Page 112
need to set the remote control XM ID code for the remote control. 1 While pressing and holding 3XM on the remote control, press 2AV POWER for more than 3 seconds. 5AMP flashes twice. POWER XM AV While holding down Press for 3 seconds ■ Remote control SIRIUS ID REMOTE SR (U.S.A. and Canada models - Yamaha RX V663 | Owner's Manual - Page 113
page 85). ■ SCENE IR code setting SCENE IR Use this feature to output the remote control signals at the REMOTE OUT jack automatically when this unit is in the SCENE mode. Choices: ON, OFF • Select "ON" when the component connected to the REMOTE OUT jack is the Yamaha component and has the capability - Yamaha RX V663 | Owner's Manual - Page 114
that support the HDCP copy protection standards. "S.AUDIO" is set to "OTHER" and Set "S.AUDIO" to "RX-V663" in "MANUAL "HDMI" audio signals are not being played SETUP". back on this unit. The output and input for the picture are Set "VIDEO CONV." to "ON" or connect your source connected to - Yamaha RX V663 | Owner's Manual - Page 115
signals. Audio input jack select is set to "ANALOG". Make an appropriate setting following the operating instructions for your component. Set Audio input jack select to "AUTO". A humming sound is Incorrect cable connections. heard. Connect the audio cables firmly. If the problem persists, the - Yamaha RX V663 | Owner's Manual - Page 116
Troubleshooting Problem Cause Remedy A source cannot be recorded by a digital recording component connected to the DIGITAL OUTPUT jack. A source cannot be recorded by an analog component connected to the AUDIO OUT (REC) jacks. The sound field parameters and some other settings of this unit - Yamaha RX V663 | Owner's Manual - Page 117
■ Tuner (FM/AM) Troubleshooting Problem Cause Remedy FM stereo reception is noisy. The characteristics of FM stereo broadcasts may cause this problem when the transmitter is too far away or the antenna input is poor. There is distortion, and There is multi-path interference. clear reception - Yamaha RX V663 | Owner's Manual - Page 118
INFO" information in the front panel or "XM Information" screen in the video monitor to check the antenna reception level. See instructions supplied with the XM Mini-Tuner and Dock for antenna installation information. The XM channel you selected is not currently broadcasting. Check back at - Yamaha RX V663 | Owner's Manual - Page 119
. Reposition this unit. Replace all batteries. Set the remote control code correctly using "List of remote control codes" at the end of this manual. Try setting another code for the same manufacturer using "List of remote control codes" at the end of this manual. See page 31 - 4 102 102 ADDITIONAL - Yamaha RX V663 | Owner's Manual - Page 120
(such as YBA-10, sold separately). The Bluetooth adapter is not connected to the DOCK terminal. This unit detects a problem of the connected Bluetooth adapter. Connect the Yamaha Bluetooth adapter (such as YBA10, sold separately) to the DOCK terminal. Set this unit to the standby mode and then - Yamaha RX V663 | Owner's Manual - Page 121
■ AUTO SETUP Before AUTO SETUP Troubleshooting Error message Connect MIC! Unplug HP! Memory Guard! During AUTO SETUP Cause Optimizer microphone is not connected. Headphones are connected. The parameters of this unit are protected. Remedy Connect the supplied optimizer microphone to the OPTIMIZER - Yamaha RX V663 | Owner's Manual - Page 122
of the subwoofer. "EXTRA SP ASSIGN" is set to Check the presence speaker connections. "PRESENCE", though the presence channel Set "EXTRA SP ASSIGN" to a setting other signals are not detected. than "PRESENCE". Notes • If the "ERROR" or "WARNING" screens appears, check the cause of the problem - Yamaha RX V663 | Owner's Manual - Page 123
time without making any changes, press LSYSTEM OFF on the front panel. 1 Press LSYSTEM OFF on the front panel to set this unit to the standby mode. 2 Press and hold MTONE CONTROL and then press KMAIN ZONE ON/OFF to turn on this unit. This unit turns on, and the advanced setup - Yamaha RX V663 | Owner's Manual - Page 124
the color signal. A monitor with component input jacks is required in order to output billions of colors and eliminate on-screen color banding for smooth tonal transitions and audio channels simultaneously. Supported by HDMI version 1.3 and designed for the optical disc players and AV receivers - Yamaha RX V663 | Owner's Manual - Page 125
(such as a set-top box or AV receiver) and an audio/video monitor (such as a digital television), HDMI supports standard, enhanced or highdefinition video as well as multi-channel digital audio using a single cable. HDMI transmits all ATSC HDTV standards and supports 8-channel digital audio, with - Yamaha RX V663 | Owner's Manual - Page 126
channel separation and localization of audio elements. System playback is scalable from 5.1 to 7.1 multi-channel audio. The PCM system uses a technique for sampling the size of the analog signal per very small unit of time. Standing for "Pulse Code A color space standard supported by HDMI version 1.3. - Yamaha RX V663 | Owner's Manual - Page 127
experience of a movie theater in the listening room of your own home. ■ SILENT CINEMA Yamaha has developed a natural, realistic sound effect DSP algorithm for headphones. Parameters for headphones have been set for each sound field so that accurate representations of all the sound field programs - Yamaha RX V663 | Owner's Manual - Page 128
Channel Separation (1 kHz/10 kHz) CD, etc. (5.1 kΩ shortened) to Front L/R 60 dB/45 dB or more • Volume Control MUTE/-80 dB to 16.5 dB • Tone Control /Stereo 73 dB/70 dB • Harmonic Distortion (1 kHz) Mono/Stereo 0.5% • Antenna Input (unbalanced 75 Ω AM SECTION • Tuning Range [U.S.A. and Canada - Yamaha RX V663 | Owner's Manual - Page 129
0.8 W or less [Other models 0.1 W or less • Maximum Power Consumption [General model only] 6ch, 10% THD 850 W • AC Outlets [U.S.A., Canada, and China models 2 (Total 100 W maximum) [Asia, General, Europe and Russia models 2 (Total 50 W maximum) [Australia and U.K. models 1 (100 W maximum - Yamaha RX V663 | Owner's Manual - Page 130
settings .........87 BGV, Input menu 95 BGV, Input menu, Multi-channel input BGV, Input menu 95 BI-AMP, Advanced setup 109 Bi-Amplifier, Advanced setup ...........109 Bluetooth adapter connection 25 Bluetooth component playback 70 Bluetooth component use 70 Bluetooth, Troubleshooting 116 - Yamaha RX V663 | Owner's Manual - Page 131
Initial volume, Audio settings 89 INPUT CH, Input menu 95 Input channel and speaker indicators 31 Input channel indicators 31 Input channels, Input menu 95 INPUT MENU, Manual setup 93 Input menu, Manual setup 82 INPUT RENAME, Input menu 94 Input rename, Input menu 94 Input signal indicators - Yamaha RX V663 | Owner's Manual - Page 132
..... 107 Remote control AMP ID, Advanced setup 107 Remote control codes iii Remote control codes setting 102 Remote control SIRIUS ID, Advanced setup 108 Remote control TUNER ID, Advanced setup 107 Remote control XM ID, Advanced setup 108 Remote control, Troubleshooting 115 REMOTE IN/OUT - Yamaha RX V663 | Owner's Manual - Page 133
49 Searching..., Bluetooth status message 116 Selection, Audio input jacks 44 Selection, Front speaker set 43 Selection, MULTI CH INPUT component 43 Selection, SCENE template 37 SET MENU usage 84 Setting SCENE template input source, Remote control 41 Set-top box connection 22 Shuffle - Yamaha RX V663 | Owner's Manual - Page 134
volume, Zone 2 settings 99 Zone 2 settings, Option menu 99 Zone B 43 ZONE2 indicator 31 130 En "ASPEAKERS" or "4DVD" (example) indicates the name of the parts on the front panel or the remote control. Refer to the attached sheet or the pages at the end of this manual for the information about - Yamaha RX V663 | Owner's Manual - Page 135
PRESET/TUNING/CH MEMORY INFO ZONE 2 ON/OFF ZONE CONTROL MAIN ZONE ON/OFF SYSTEM OFF PHONES SILENT CINEMA TONE CONTROL SCENE 1 2 3 4 PROGRAM STRAIGHT PURE DIRECT AUDIO SELECT INPUT EFFECT OPTIMIZER MIC VIDEO AUX S VIDEO VIDEO L AUDIO R OPTICAL KL M NO PQ R S i - Yamaha RX V663 | Owner's Manual - Page 136
■ Remote control 1 2 3 4 5 6 7 8 POWER POWER STANDBY POWER TV AV A XM SIRIUS MUTE CD MD/CD-R TUNER DVD DTV/CBL DVR TV CH V-AUX/DOCK VCR B AMP TV INPUT TV MUTE TV VOL SCENE 1 2 3 4 BAND LEVEL TITLE SRCH MODE MENU VOLUME ENTER 9 0 A B C D E F G RETURN MEMORY REC DISPLAY INFO - Yamaha RX V663 | Owner's Manual - Page 137
List of remote control codes Blu-ray player Samsung 2137 CD player Yamaha 5000, 5013 CD Recorder Yamaha 5001 DVD Acoustic Solutions 2078 Aiwa 2055, 2100 Akai 2096 Akura 2076 Alba 2078, 2086 Apex 2027, 2049 Awa 2078 Axion 2078 Brainwave 2096 Brandt - Yamaha RX V663 | Owner's Manual - Page 138
Akai 0059, 0065, 0127, 0129, 0130, 0200, 0204, 0208, 0209, 0213, 0217, 0218, 0255 Akiba 0209, 0218 Akura 0206, 0209, 0218 Alaron 0200 Alba 0200, 0207, 0208, 0209, 0217, 0218 ALBIRAL 0212 Allstar 0213 Amplivision 0207 Amstrad 0204, 0206, 0208, 0209, 0218 Amtron 0062 Anam 0208 - Yamaha RX V663 | Owner's Manual - Page 139
Lenco 0208 Lenoir 0207, 0208 Lesa 0214 Leyco 0206, 0213, 0217 LG 0016, 0038, 0039, 0127, 0128, 0157, 0158, 0163, 0164, 0166, 0188, 0189, 0200, 0201, 0207, 0208, 0210, 0213, 0214, 0215, 0217 Liesenk 0217 Life 0206, 0208 Lifetec 0206, 0208, 0218 Loewe 0063, 0128, 0203, 0204, - Yamaha RX V663 | Owner's Manual - Page 140
0215 Wega 0205 Weltblick 0213, 0217 Weston 0215 White Westinghouse 0200, 0207, 0217 Yamaha 0000, 0001, 0002, 0003, 0004, 0005, 0060, 0061 Yamishi 0218 1046 Asha 1002, 1014 Asuka 1042, 1045, 1046, 1050 Audio Dynamics1000 Audiovox 1003 Baird 1042, 1043, 1047 Basic Line 1044, - Yamaha RX V663 | Owner's Manual - Page 141
Videon 1044, 1048 Videosonic 1002, 1014 Wards 1002, 1003, 1004, 1005, 1006, 1008, 1010, 1014 Weltblick 1045 White Westinghouse 1013 XR-1000 1004, 1005, 1006 Yamaha 1000, 1001, 1007 Yamishi 1050 Yokan 1050 Yoko 1045, 1050 Zenith 1013, 1026, 1037 vii - Yamaha RX V663 | Owner's Manual - Page 142
, USA 6660 ORANGETHORPE AVE., BUENA PARK, CALIF. 90620, U.S.A. YAMAHA CANADA MUSIC LTD. 135 MILNER AVE., SCARBOROUGH, ONTARIO M1S 3R1, CANADA YAMAHA ELECTRONIK EUROPA G.m.b.H. SIEMENSSTR. 22-34, 25462 RELLINGEN BEI HAMBURG, GERMANY YAMAHA ELECTRONIQUE FRANCE S.A. RUE AMBROISE CROIZAT BP70 CROISSY - Yamaha RX V663 | Owner's Manual - Page 143
FGH I UC RX-V663 J VOLUME SPEAKERS EDIT SEARCH MODE BAND CATEGORY A/B/C/D/E PRESET/TUNING/CH MEMORY INFO ZONE 2 ON/OFF ZONE CONTROL MAIN ZONE ON/OFF SYSTEM OFF PHONES SILENT CINEMA TONE CONTROL SCENE 1 2 3 4 PROGRAM STRAIGHT PURE DIRECT AUDIO SELECT INPUT EFFECT OPTIMIZER - Yamaha RX V663 | Owner's Manual - Page 144
■ Remote control/Boîtier de télécommande 1 2 3 4 5 6 7 8 POWER POWER STANDBY POWER TV AV A XM SIRIUS MUTE CD MD/CD-R TUNER DVD DTV/CBL DVR TV CH V-AUX/DOCK VCR B AMP TV INPUT TV MUTE TV VOL SCENE 1 2 3 4 BAND LEVEL TITLE SRCH MODE MENU VOLUME ENTER 9 0 A B C D E F G RETURN
-
 1
1 -
 2
2 -
 3
3 -
 4
4 -
 5
5 -
 6
6 -
 7
7 -
8
-
9
-
10
-
11
-
12
-
13
-
14
-
15
-
16
-
17
-
18
-
19
-
20
-
21
-
22
-
23
-
24
-
25
-
26
-
27
-
28
-
29
-
30
-
31
-
32
-
33
-
34
-
35
-
36
-
37
-
38
-
39
-
40
-
41
-
42
-
43
-
44
-
45
-
46
-
47
-
48
-
49
-
50
-
51
-
52
-
53
-
54
-
55
-
56
-
57
-
58
-
59
-
60
-
61
-
62
-
63
-
64
-
65
-
66
-
67
-
68
-
69
-
70
-
71
-
72
-
73
-
74
-
75
-
76
-
77
-
78
-
79
-
80
-
81
-
82
-
83
-
84
-
85
-
86
-
87
-
88
-
89
-
90
-
91
-
92
-
93
-
94
-
95
-
96
-
97
-
98
-
99
-
100
-
101
-
102
-
103
-
104
-
105
-
106
-
107
-
108
-
109
-
110
-
111
-
112
-
113
-
114
-
115
-
116
-
117
-
118
-
119
-
120
-
121
-
122
-
123
-
124
-
125
-
126
-
127
-
128
-
129
-
130
-
131
-
132
-
133
-
134
-
135
-
136
-
137
-
138
-
139
-
140
-
141
-
142
-
143
-
144
 |
 |

RX-V663
AV Receiver
OWNER’S MANUAL
U