Yamaha TP-4000 Owner's Manual - Page 4
Before Using The Pedal Timpani
 |
View all Yamaha TP-4000 manuals
Add to My Manuals
Save this manual to your list of manuals |
Page 4 highlights
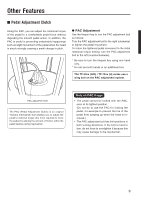
Before Using The Pedal Timpani Your Yamaha pedal timpani is equipped with a plastic head carefully mounted and tuned (adjusted to a note) at the factory, and thus can be used after setup immediately. However, new heads will tend to stretch gradually during shipping and storage, resulting in a tuning deviation when you receive the instrument. Therefore, please perform the steps below to restore the tuning to the factory setting prior to shipment: 1 The area between the kettle edge and the inner circle of the counter hoop is called the collar. Please make sure that the width of this collar is uniform, as shown in the illustration titled "Correct". Correct Wrong 3 If the heel of the pedal is fully lowered as in Fig. C, proceed with step 5. If the pedal position is as shown in Fig. D or the toe of the pedal is fully lowered, perform step 4 first. Fig. C Kettle Counter edge Collar hoop Kettle Counter edge Collar hoop If the collar is not uniform (illustration titled "Wrong"), keep the heel of the pedal fully depressed as shown in Fig. C, and align head and hoop as shown in the illustration titled "Correct". 2 Make sure that the end of the wire tube is not disengaged from the adjuster of the tuning indicator as shown in Fig. A. If it is disengaged, insert it into the adjuster as shown in Fig. B. Fig. D Fig. B Adjuster Wire tube Fig. A 4 Caution Never put your hands etc. under the pedal. 4 Fully depress the heel of the pedal as shown in Fig. C. Hold the pedal in this position, as it will return otherwise.
-
 1
1 -
 2
2 -
 3
3 -
 4
4 -
 5
5 -
 6
6 -
 7
7 -
 8
8 -
 9
9 -
 10
10 -
11
 |
 |
