Yamaha YDP-151 Owner's Manual
Yamaha YDP-151 Manual
 |
View all Yamaha YDP-151 manuals
Add to My Manuals
Save this manual to your list of manuals |
Yamaha YDP-151 manual content summary:
- Yamaha YDP-151 | Owner's Manual - Page 1
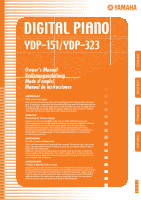
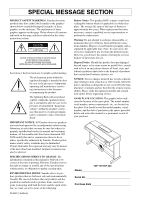
DIGITAL PIANO YDP-151/YDP-323 Owner's Manual Bedienungsanleitung Mode d'emploi Manual keyboard unit near the power cord. Make sure that the voltage selector is set for the voltage in your area. The voltage selector is set at 240V when the unit is initially shipped. To change the setting use sale de - Yamaha YDP-151 | Owner's Manual - Page 2
name plate. The model number, serial number, power requirements, etc., are located on this plate. You should record the model number, serial number, and the date of purchase in the spaces provided below and retain this manual as a permanent record of your purchase. Model YDP-151/YDP-323 Serial No - Yamaha YDP-151 | Owner's Manual - Page 3
moving the instrument, remove all connected cables. • When setting up the instrument, make sure that the AC outlet you are using is easily accessible. If some trouble or malfunction occurs, immediately turn off the power switch and disconnect the plug from the outlet. (1)B-9 2/2 YDP-151/YDP-323 3 - Yamaha YDP-151 | Owner's Manual - Page 4
media via a computer connected to the instrument. (page 31) Yamaha cannot be held responsible for damage caused by improper use or modifications to the instrument, or data that is lost or destroyed. Always turn the power off when the instrument is not in use. 4 YDP-151/YDP-323 (1)B-9 1/2 2 - Yamaha YDP-151 | Owner's Manual - Page 5
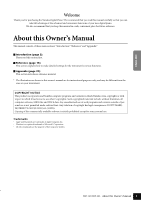
strictly prohibited except for your personal use. Trademarks: • Apple and Macintosh are trademarks of Apple Computer, Inc. • Windows is a registered trademark of Microsoft® Corporation. • All other trademarks are the property of their respective holders. YDP-151/YDP-323 About this Owner's Manual 5 - Yamaha YDP-151 | Owner's Manual - Page 6
Piano 31 Transmitting Song Data from the Digital Piano to a Computer 31 Backing up Data and Initializing the Settings .. 32 Troubleshooting 33 Options 33 Keyboard Stand Assembly 34 Index 37 Appendix MIDI Data Format 40 MIDI Implementation Chart 44 Specifications 45 4 6 YDP-151/YDP-323 - Yamaha YDP-151 | Owner's Manual - Page 7
Song Data from the Digital Piano to a Computer" on page 31 Transmitting song data from a computer to the instrument Loading Song Data from a Computer to the Digital Piano" on page 31 Assembling Assembling and disassembling this instrument Keyboard Stand Assembly" on pages 34-36 YDP-151/YDP-323 - Yamaha YDP-151 | Owner's Manual - Page 8
ENGLISH Accessories • "50 Greats for the Piano" (Music Book) • Owner's Manual This manual contains complete instructions for operating your digital piano. • Quick Guide • Headphone hanger set • Assembly parts Maintenance Clean the instrument using a dry or slightly damp soft cloth (wring well). - Yamaha YDP-151 | Owner's Manual - Page 9
demo song for each voice, or one of the 50 piano preset songs (page 15 and 16). You can also select a different voice while the song playback is stopped. [METRONOME] Control the metronome functions (page 23). MASTER VOLUME] Adjust the volume level using this control (page 12). YDP-151/YDP-323 - Yamaha YDP-151 | Owner's Manual - Page 10
far as it will go. 2. Raise the two metal supports (at the rear of the music rest). 3. Gently lower use the music rest in a half-raised position. When lowering the music rest, do not release your hands from the music rest until it is all the way down. 10 YDP-151/YDP-323 Before Using the Digital Piano - Yamaha YDP-151 | Owner's Manual - Page 11
replaced, contact your Yamaha dealer. The use of an inappropriate located below the left end of the keyboard lights up. Power indicator [POWER] piano and close the key cover, the power indicator will remain lit, indicating that the power is still on. YDP-151/YDP-323 Before Using the Digital Piano - Yamaha YDP-151 | Owner's Manual - Page 12
headphone hanger using the included two screws (4 × 10mm) as shown in the figure. CAUTION Do not hang anything other than the headphones on the hanger. Otherwise, this instrument or the hanger may be damaged. PHONES standard stereo phone plug 10 12 YDP-151/YDP-323 Before Using the Digital Piano - Yamaha YDP-151 | Owner's Manual - Page 13
Computer and the Digital Piano 31 Loading Song Data from a Computer to the Digital Piano 31 Transmitting Song Data from the Digital Piano to a Computer 31 Backing up Data and Initializing the Settings 32 Troubleshooting 33 Options 33 Keyboard Stand Assembly 34 Index 37 YDP-151/YDP-323 13 - Yamaha YDP-151 | Owner's Manual - Page 14
P11 2 [DEMO/SONG P15 3 [PIANO/VOICE P18-21 4 [SELECT P15, 16, 18 5 [REC P25 6 [PLAY P25, 26 7 [METRONOME P23 8 [MASTER VOLUME P12 9 [PHONES P12 0 MIDI [IN] [OUT P27 A [PEDAL P35 B Soft (Left) Pedal P19 C Sostenute (Center) Pedal P19 D Damper (Right) Pedal P19 14 YDP-151/YDP-323 Part - Yamaha YDP-151 | Owner's Manual - Page 15
Title "Eintritt" Waldszenen Op.82 Gavotte Invention No.1 Composer R. Schumann J.S. Bach J.S. Bach Adjusting the Volume Use the [MASTER VOLUME] control to adjust the volume. 4. Stop the Voice demo. Press the [DEMO/SONG] button to stop playback. YDP-151/YDP-323 Listening to the Demo Songs 15 - Yamaha YDP-151 | Owner's Manual - Page 16
song playback, see page 23. When you select a different song (or a different song is selected during chained playback), an appropriate reverb type will be selected accordingly. The 50 piano preset songs will not be transmitted via MIDI. 14 16 YDP-151/YDP-323 Listening to 50 Piano Preset Songs - Yamaha YDP-151 | Owner's Manual - Page 17
sound. B6 The top key Selecting 1 + 2 song playback channels: While pressing and holding down the [DEMO/SONG] button and the [PIANO/ VOICE] button simultaneously, press the C7 key. Channels 1 + 2 will produce the sound. C7 The top key YDP-151/YDP-323 Listening to Songs Loaded from the Computer 17 - Yamaha YDP-151 | Owner's Manual - Page 18
of various voices, listen to demo songs for each voice (page 15). Voice: On this instrument, a voice means a "tone" or "tonal color." Selecting a voice automatically engages the best-suited reverb type and depth (page 20) for that particular voice. 16 18 YDP-151/YDP-323 Selecting & Playing Voices - Yamaha YDP-151 | Owner's Manual - Page 19
acoustic piano. When the damper pedal is pressed, notes sustain longer. Releasing the pedal immediately stops (damps) any sustained notes. Sostenuto (Center) Pedal If you play a note or chord on the keyboard and playing when it is pressed. 17 ENGLISH YDP-151/YDP-323 Selecting & Playing Voices 19 - Yamaha YDP-151 | Owner's Manual - Page 20
digital reverb effects that add extra depth and expression to the sound to create a realistic acoustic ambience. Procedure While holding down the [PIANO sound, use the PIANO/VOICE] button, press the A4 key to set the reverb to the depth most suitable for the selected voice. 18 20 YDP-151/YDP-323 - Yamaha YDP-151 | Owner's Manual - Page 21
1 in relation to Voice 2. F 5 C6 F 6 -6 -4 -2 +1 +3 +6 -5 -3 -1 0 +2 +4 +5 For setting the balance. (F 5-F 6) The highest key 2. Exit Dual mode and return to normal play mode. While holding down the [PIANO/VOICE] button, press one of the C1-A1 keys. YDP-151/YDP-323 Selecting & Playing Voices 21 - Yamaha YDP-151 | Owner's Manual - Page 22
[DEMO/SONG] + [PIANO/VOICE] + F 3 key: Transposes the pitch up by six semitones. Transpose: Changing the key signature. On this instrument, transposing shifts the pitch of the entire keyboard. Fine-tuning the Pitch You can fine-tune the pitch of the entire instrument. This function is useful when - Yamaha YDP-151 | Owner's Manual - Page 23
21 ENGLISH Using the Metronome Your digital piano features a built E3 key: 5/4, F3 key: 6/4 Adjusting the Tempo The tempo of the metronome and preset song playback can be set from 32 to 280 beats per minute. A number is assigned to each the C5 key. YDP-151/YDP-323 Selecting & Playing Voices 23 - Yamaha YDP-151 | Owner's Manual - Page 24
Turn off the metronome by pressing the [METRONOME] button. Adjusting the Keyboard Touch (Touch Sensitivity) You can adjust the volume level that changes the [PIANO/VOICE] button, press one of the A6-C7 keys to select the desired touch sensitivity. A6 C7 22 24 YDP-151/YDP-323 Selecting & Playing - Yamaha YDP-151 | Owner's Manual - Page 25
Performance Your digital piano's recording function enables you to record your performance of one song. The recorded performance is called the "user song." Follow the steps below to record and play back your performance. Audio recording and data recording Cassette tape recordings use a different - Yamaha YDP-151 | Owner's Manual - Page 26
of the recorded user song. The user song always plays at the recorded tempo. 2. Stop the playback. When the user song finishes playing back, this instrument automatically returns to the previous mode. To stop the playback, press the [PLAY] button. ENGLISH 24 26 YDP-151/YDP-323 Recording your - Yamaha YDP-151 | Owner's Manual - Page 27
save user song data to a computer. ● Transferring performance data to and from another MIDI device MIDI OUT connector MIDI IN connector YDP-151/YDP-323 POWER MIDI IN Optional MIDI OUT connector MIDI cables connector MIDI instrument You cannot transmit the voice demo songs and the 50 piano - Yamaha YDP-151 | Owner's Manual - Page 28
For more information on connecting the UX16, refer to the user's manual that came with the UX16. You must install a software application on the computer to be able to transfer MIDI data between this instrument and a computer. 26 OUT IN 28 YDP-151/YDP-323 Connecting the Digital Piano to a Computer - Yamaha YDP-151 | Owner's Manual - Page 29
's panel settings or the notes you play on the keyboard. Data for the demo song and 50 piano preset songs cannot be transmitted via MIDI. CAUTION When Local control is turned OFF, the keyboard of this instrument does not play the internal voices. The highest key YDP-151/YDP-323 MIDI Functions 29 - Yamaha YDP-151 | Owner's Manual - Page 30
be used with this instrument, refer to the MIDI Data Format on page 40. Procedure While holding down the [DEMO/SONG] and [PIANO/VOICE] buttons simultaneously, press the D6 key. Pressing the D6 key repeatedly toggles between Control Change On and Off. D6 The highest key 28 30 YDP-151/YDP-323 MIDI - Yamaha YDP-151 | Owner's Manual - Page 31
may become unstable, causing the entire memory to be erased when you turn the power to the instrument on or off. Before you use this instrument, close the Musicsoft Downloader window and quit the application. YDP-151/YDP-323 Transmitting Song Data between the Computer and the Digital Piano 31 - Yamaha YDP-151 | Owner's Manual - Page 32
data Metronome volume Metronome tempo Touch sensitivity Tuning Recorded performance data (user song) Song data once loaded from a computer Initializing the settings When you the initialization procedure. 30 32 YDP-151/YDP-323 Transmitting Song Data between the Computer and the Digital Piano - Yamaha YDP-151 | Owner's Manual - Page 33
ENGLISH Troubleshooting Problem is audible. The noise may be due to interference caused by the use of a mobile phone in close proximity to this instrument. Turn off match your Yamaha digital piano. UX16 USB-MIDI interface YDP-151/YDP-312531/YTDrPo-u32b3leshTorooutibnlge/sOhopotitoinngs 33 - Yamaha YDP-151 | Owner's Manual - Page 34
×2 5 Headphone hanger 1-1 2. Attach B. Depending on the model of digital piano you purchased, the surface color of one side of B may using two tapping screws 4 (4 × 20mm). 2-4 Insert the other two tapping screws 4 (4 × 20mm) into the other two screw holes to secure B. 34 YDP-151/YDP-323 Keyboard - Yamaha YDP-151 | Owner's Manual - Page 35
cord holders to the rear panel as shown, then clip the cord into the holders. 6-3 Use a vinyl tie to take up any slack in the pedal cord. 6-1 PEDAL AC INLET 6-3 • Do not hold the keyboard in any position other than the position shown in the illustration. YDP-151/YDP-323 Keyboard Stand Assembly 35 - Yamaha YDP-151 | Owner's Manual - Page 36
for 110V, 127V, 220V or 240V main voltages, use a "minus" screwdriver to rotate the selector dial so • Are there any parts left over? ➝ Review the assembly procedure and correct any errors. • Is the keyboard, refer to the assembly diagrams and retighten all screws. 36 YDP-151/YDP-323 Keyboard Stand - Yamaha YDP-151 | Owner's Manual - Page 37
Pedal 14, 19 Song 16 Sostenute Pedal 14, 19 Specifications 45 Stand 34-36 Start/Stop playback 50 Piano Preset Songs 16 Demo Songs 15 User Song 26 T Touch Sensitivity 24 Transmitting Song Data 31 Transporting 8 Transposition 22 Troubleshooting 33 U User Song 25 YDP-151/YDP-323 Index 37 - Yamaha YDP-151 | Owner's Manual - Page 38
ENGLISH MEMO 38 YDP-151/YDP-323 36 - Yamaha YDP-151 | Owner's Manual - Page 39
MIDI Implementation Chart / MIDI Implementierung stabelle / Feuille d'implantation MIDI / Gráfica de implementación MIDI 44 Specifications / Technische Daten / Caractéristiques techniques / Especificaciones 45 YDP-151/YDP-323 39 145 - Yamaha YDP-151 | Owner's Manual - Page 40
all the notes that are currently ON on the spec- ified channel. Any notes being held by used to select the appropriate voice when a program change message is received. • Poly mode is always active. This mode will not change when the instrument receives MONO/POLY mode message. 146 40 YDP-151/YDP-323 - Yamaha YDP-151 | Owner's Manual - Page 41
ppH = Program change number P.C.#=Program Change number YDP-151/YDP-323 Grand Piano 1 Grand Piano 2 E.Piano 1 E.Piano 2 Harpsichord 1 Harpsichord 2 Vibraphone Church Organ FCH FEH Transmission Transmitted every 96 clocks Song start Song stop Transmitted every 200 milliseconds Reception Received - Yamaha YDP-151 | Owner's Manual - Page 42
Yamaha ID 73H = Digital Piano ID 01H = Product ID (digital piano Yamaha ID 1nH = When received, n=0~F. When transmitted, n=0. 27H = Model ID of TG100 30H = Sub ID 00H = 00H = mmH = Master Tune MSB llH = Master Tune LSB ccH = don't care (under 7FH) F7H = End of Exclusive 148 42 YDP-151/YDP-323 - Yamaha YDP-151 | Owner's Manual - Page 43
off) 00 Default value (H) 7F EFFECT MSB LSB CHORUS 42H 10H PHASER 48H 10H TREMOLO 46H 10H ROTARY SP 47H 10H OFF 00H 00H 149 YDP-151/YDP-323 Appendix/Anhang/Annexe/Apéndice 43 - Yamaha YDP-151 | Owner's Manual - Page 44
MIDI Implementation Chart YAMAHA [ Digital Piano ] Date :08-APR-2005 Model YDP-151/YDP-323 MIDI Implementation Chart Version : 1.0 : True # o 0 - 127 o 0 - 127 System Exclusive o o Common : Song Pos. x x : Song Sel. x x : Tune x x System : Clock o o Real Time : Commands o - Yamaha YDP-151 | Owner's Manual - Page 45
Item YDP-151/YDP-323 Keyboard 88 keys (A-1 - C7) Sound Source AWM Stereo Sampling Polyphony 64 Notes Max. Voice Selection 10 Effect Reverb Volume Master Volume Controls Dual, Metoronome, Transpose Pedal Damper, Sostenuto, Soft Demo Songs 10 Demo Songs, 50 Piano Preset Songs - Yamaha YDP-151 | Owner's Manual - Page 46
MEMO 46 YDP-151/YDP-323 Appendix/Anhang/Annexe/Apéndice 152 - Yamaha YDP-151 | Owner's Manual - Page 47
, Spe- cial Message Section items, and any Assembly Instructions found in this manual BEFORE making any connections, including connection to the main supply. 2. Main Power Supply Verification: Yamaha products are 8. This product was NOT designed for use in wet/damp loca- tions and should not be - Yamaha YDP-151 | Owner's Manual - Page 48
digital devices. Compliance with these requirements provides a reasonable level of assurance that your use uses radio frequencies and, if not installed and used according to the instructions found in the users manual the problem by using one of Yamaha Corporation of America, Electronic Service - Yamaha YDP-151 | Owner's Manual - Page 49
9-634-0099 COUNTRIES AND TRUST TERRITORIES IN PACIFIC OCEAN Yamaha Corporation, Asia-Pacific Music Marketing Group Nakazawa-cho 10-1, Hamamatsu, Japan 430-8650 Tel: +81-53-460-2312 HEAD OFFICE Yamaha Corporation, Pro Audio & Digital Musical Instrument Division Nakazawa-cho 10-1, Hamamatsu, Japan 430 - Yamaha YDP-151 | Owner's Manual - Page 50
Yamaha Manual Library http://www.yamaha.co.jp/manual/ U.R.G., Pro Audio & Digital Musical Instrument Division, Yamaha Corporation © 2005 Yamaha Corporation WE93810 506AP???.?-01A0 Printed in ?????
-
 1
1 -
 2
2 -
 3
3 -
 4
4 -
 5
5 -
 6
6 -
 7
7 -
8
-
9
-
10
-
11
-
12
-
13
-
14
-
15
-
16
-
17
-
18
-
19
-
20
-
21
-
22
-
23
-
24
-
25
-
26
-
27
-
28
-
29
-
30
-
31
-
32
-
33
-
34
-
35
-
36
-
37
-
38
-
39
-
40
-
41
-
42
-
43
-
44
-
45
-
46
-
47
-
48
-
49
-
50
 |
 |
ENGLISH
DEUTSCH
FRANÇAIS
ESPAÑOL
EN
DE
FR
ES
Owner's Manual
Bedienungsanleitung
Mode d'emploi
Manual de instrucciones
IMPORTANT
Check your power supply
Make sure that your local AC mains voltage matches the voltage specified on the name plate on the bottom
panel. In some areas a voltage selector may be provided on the bottom panel of the main keyboard unit near
the power cord. Make sure that the voltage selector is set for the voltage in your area. The voltage selector is
set at 240V when the unit is initially shipped. To change the setting use a "minus" screwdriver to rotate the
selector dial so that the correct voltage appears next to the pointer on the panel.
WICHTIG
Überprüfung der Stromversorgung
Vergewissern Sie sich vor dem Anschließen an das Stromnetz, daß die örtliche Netzspannung den
Betriebsspannungswerten auf dem Typenschild an der Unterseite des Instruments entspricht. In bestimmten
Verkaufsgebieten ist das Instrument mit einem Spannungswähler an der Unterseite neben der
Netzkabeldurchführung ausgestattet. Falls vorhanden, muß der Spannungswähler auf die örtliche
Netzspannung eingestellt werden. Der Spannungswähler wurde werkseitig auf 240 V voreingestellt. Zum
Verstellen drehen Sie den Spannungsregler mit einem Schlitzschraubendreher, bis der Zeiger auf den
korrekten Spannungswert weist.
IMPORTANT
Contrôler la source d'alimentation
Vérifiez que la tension spécifiée sur le panneau inférieur correspond
à la tension du secteur. Dans certaines
régions, l'instrument peut être équipé d'un sélecteur de tension situé sur le panneau inférieur du clavier à
proximité du cordon d'alimentation.
Vérifiez que ce sélecteur est bien réglé en fonction de la tension secteur de votre région. Le sélecteur de
tension est réglé sur 240 V au départ d'usine. Pour modifier ce réglage, utilisez un tournevis à lame plate
pour tourner le sélecteur afin de mettre l'indication correspondant à la tension de votre région vis à vis du
repère triangulaire situé sur le panneau.
IMPORTANTE
Verifique la alimentación de corriente
Asegúrese de que tensión de alimentación de CA de su área corresponde con la tensión especificada en la
placa de características del panel inferior. En algunas zonas puede haberse incorporado un selector de tensión
en el panel inferior de la unidad del teclado principal, cerca del cable de alimentación. Asegúrese de que el
selector de tensión esté ajustado a la tensión de su área. El selector de tensión se ajusta a 240V cuando la
unidad sale de fábrica. Para cambiar el ajuste, emplee un destornillador de cabeza "recta" para girar el
selector de modo que aparezca la tensión correcta al lado del indicador del panel.