Yamaha YM-4900A Owner's Manual - Page 9
Insert the rails 2 and 3 into the end frames of the legs.
 |
View all Yamaha YM-4900A manuals
Add to My Manuals
Save this manual to your list of manuals |
Page 9 highlights
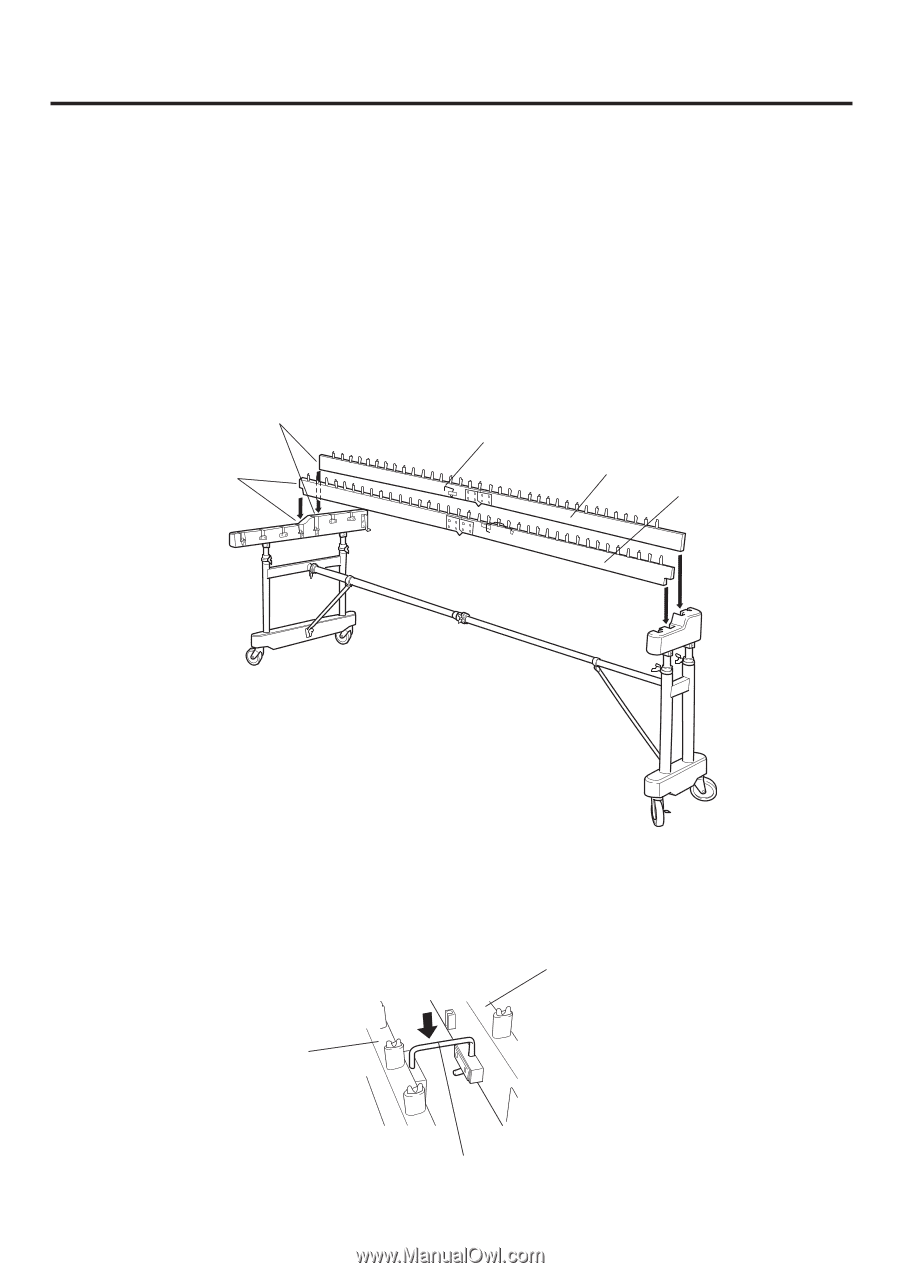
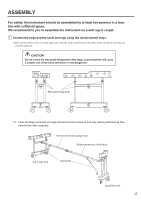
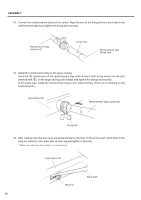
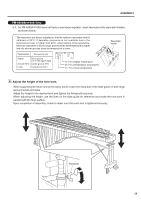
ASSEMBLY x Insert the rails (2) and (3) into the end frames of the legs. 2-1. First, insert the rail (2). A mark "B" is printed on the big end face of the rail (2) and the groove section of the end frame of the big end leg. * Do not insert one side of the rail all the way down first, but push both sides into grooves alternately little by little until both sides are inserted fully and stop. Next, in the same way, insert the rail (3) securely. A mark "C" is printed on the big end face of the rail (3) and the groove section of the end frame of the big end leg. "C" mark on the rail and end frame. "B" mark on the rail and end frame. Rail clamp Rail (3) Rail (2) Large end Small end 2-2. Engage the short rail clamp located at the center of the rail (3) with the rail (2). * Release the clamp from its holder, lift and move it to the rail (2) and push it down fully. Rail (3) Rail (2) Rail clamp 25
-
 1
1 -
2
-
3
-
 4
4 -
 5
5 -
 6
6 -
 7
7 -
 8
8 -
 9
9 -
 10
10 -
 11
11 -
 12
12 -
 13
13 -
 14
14
 |
 |