Yamaha YSP 1000 Owner's Manual - Page 35
Using AUTO SETUP
 |
UPC - 027108924274
View all Yamaha YSP 1000 manuals
Add to My Manuals
Save this manual to your list of manuals |
Page 35 highlights
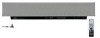
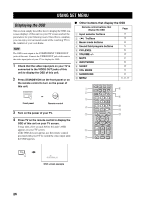
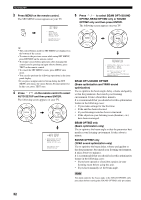
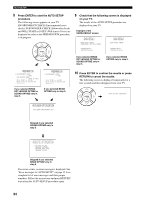
AUTO SETUP Using AUTO SETUP Once the optimizer microphone is firmly connected to this unit and properly placed in your listening room, follow the procedure below to start the AUTO SETUP procedure. INPUT VOLUME + STANDBY/ON STANDBY/ON POWER POWER AV TV DVD VCR STB TV AUX INPUT1 INPUT2 MACRO YSP ( ) INPUTMODE SLEEP 5BEAM 1 ST+3BEAM 2 3BEAM 3 STEREO UNIVERSAL 4 5 6 MUSIC 7 MOVIE 8 NIGHT 9 SPORTS 0 OFF +10 SURROUND CH LEVEL CINEMA DSP MENU Notes • If your listening room has curtains, open the curtains before starting the BEAM OPT+SOUND OPTIMZ or the BEAM OPTIMZ only procedure. • Make sure that your listening room is as quiet as possible while this unit is performing the AUTO SETUP procedure. • Once the AUTO SETUP procedure has started, position yourself beside or behind this unit so that you may not obstruct the path of sound beams. To achieve the best results possible, however, it is strongly recommended that you should evacuate yourself from your listening room until the AUTO SETUP procedure is completed. • Be advised that it is normal for loud test tones to be output during the AUTO SETUP procedure. • The AUTO SETUP procedure may not be run successfully if this unit is installed in one of the rooms described in "Before installing this unit" on page 11. In such cases, run BASIC SETUP (see page 62) or MANUAL SETUP (see page 68) to manually adjust the corresponding parameters. • If the AUTO SETUP procedure stops and an error message appears on the screen, see "Error messages for AUTO SETUP" on page 35 for appropriate remedies. y You can save the settings optimized by the AUTO SETUP procedure (see page 36). A set of settings optimized according to specific conditions of your listening environment can be recalled later depending on the varying conditions of your listening environment (see page 37). 1 Press STANDBY/ON on the front panel or on the remote control to turn on the power of this unit. STANDBY/ON or TEST ENTER RETURN Front panel Remote control 2 Press YSP on the remote control to switch to the operation mode of this unit. YSP SETUP 31
-
 1
1 -
2
-
3
-
4
-
5
-
6
-
7
-
8
-
9
-
10
-
11
-
12
-
13
-
14
-
15
-
16
-
17
-
18
-
19
-
20
-
21
-
22
-
23
-
24
-
25
-
26
-
27
-
28
-
29
-
 30
30 -
 31
31 -
 32
32 -
 33
33 -
 34
34 -
 35
35 -
 36
36 -
 37
37 -
 38
38 -
 39
39 -
 40
40 -
41
-
42
-
43
-
44
-
45
-
46
-
47
-
48
-
49
-
50
-
51
-
52
-
53
-
54
-
55
-
56
-
57
-
58
-
59
-
60
-
61
-
62
-
63
-
64
-
65
-
66
-
67
-
68
-
69
-
70
-
71
-
72
-
73
-
74
-
75
-
76
-
77
-
78
-
79
-
80
-
81
-
82
-
83
-
84
-
85
-
86
-
87
-
88
-
89
-
90
-
91
-
92
-
93
-
94
-
95
-
96
-
97
-
98
-
99
-
100
-
101
-
102
-
103
-
104
-
105
-
106
 |
 |