2010 BMW X5 Owner's Manual - Page 260
2010 BMW X5 Manual
Page 260 highlights
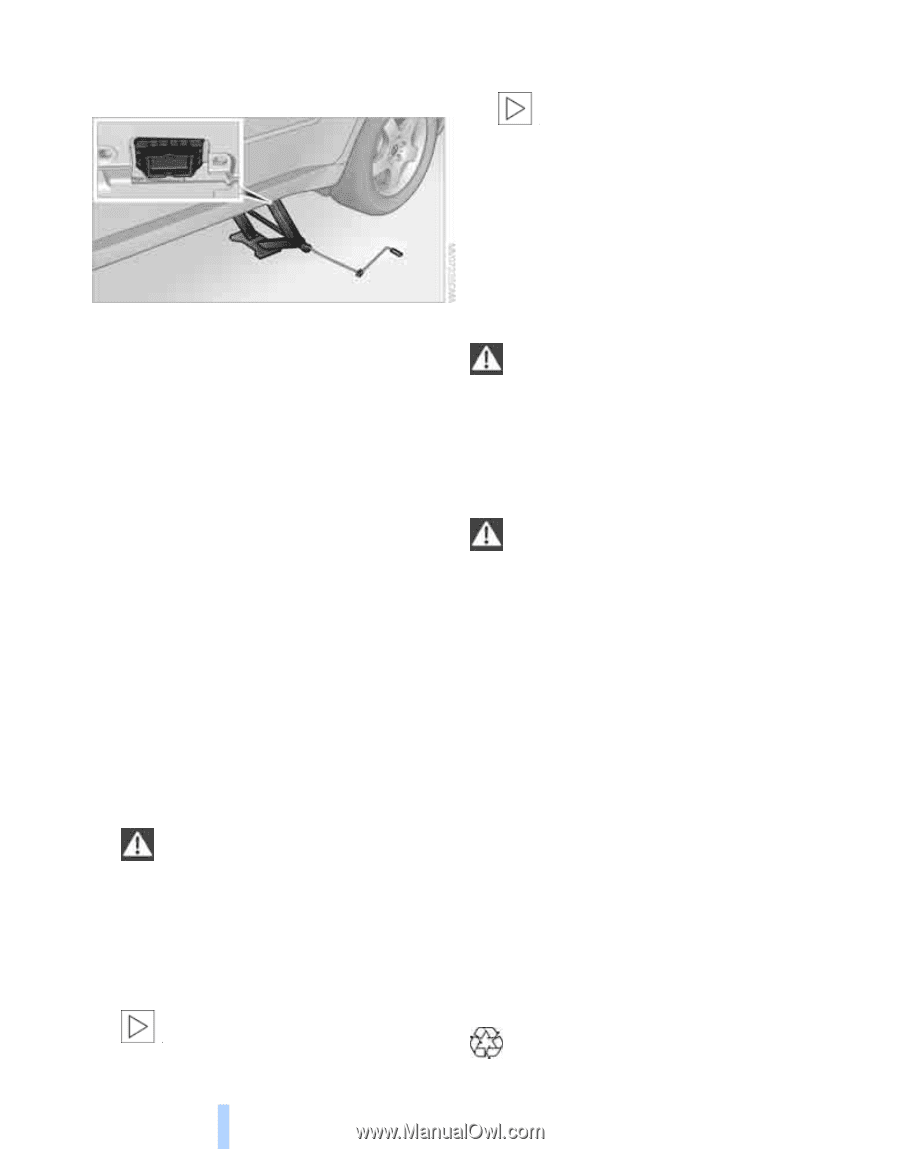
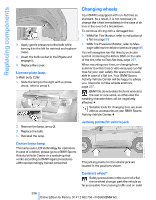
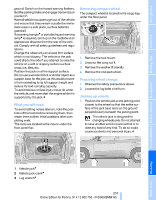
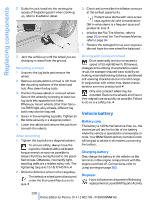
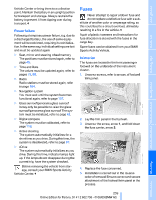
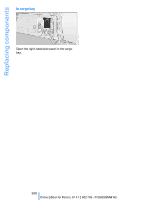
Replacing components 2. Guide the jack head into the rectangular recess of the jacking point when cranking up, refer to illustration detail. 3. Check and correct the tire inflation pressure at the earliest opportunity. Protect valve stems with valve screw caps against dirt and contamination. Dirt in valve stems is a frequent source of gradual air loss.< 4. Initialize the Flat Tire Monitor, refer to page 93, or reset the Tire Pressure Monitor, refer to page 94. 5. Replace the damaged tire as soon as possible and have the new wheel/tire balanced. 3. Jack the vehicle up until the wheel you are changing is raised from the ground. Driving with compact wheel Drive reservedly and do not exceed a speed of 50 mph/80 km/h. Otherwise, changes in the driving characteristics could result, for example reduced track stability on braking, extended braking distance, and altered self-steering characteristics in the limit range. In conjunction with winter tires, these characteristics are more pronounced.< Only one compact wheel may be mounted. Restore the wheels and tires to their original size as quickly as possible. Failure to do so is a safety risk.< Mounting a wheel 1. Unscrew the lug bolts and remove the wheel. 2. Remove accumulations of mud or dirt from the mounting surfaces of the wheel and hub. Also clean the lug bolts. 3. Position the new wheel or compact wheel. Secure the wheel by screwing at least two lug bolts into opposite bolt holes. When you mount wheels other than Genuine BMW light-alloy wheels, different lug bolts may also be required. 4. Screw in the remaining lug bolts. Tighten all the bolts securely in a diagonal pattern. 5. Lower the vehicle and remove the jack from beneath the vehicle. Vehicle battery Battery care The battery is 100% maintenance-free, i.e., the electrolyte will last for the life of the battery when the vehicle is operated in a temperate climate. Your BMW Sports Activity Vehicle Center will be glad to advise in all matters concerning the battery. After mounting 1. Tighten the lug bolts in a diagonal pattern. To ensure safety, always have the lug bolts checked with a calibrated torque wrench as soon as possible to ensure that they are tightened to the specified torque. Otherwise, incorrectly tightened lug bolts are a hidden safety risk. The tightening torque is 101 lb ft/140 Nm.< 2. Stow the defective wheel in the cargo bay. The defective wheel cannot be stored under the floor panel flap due to its size.< 258 Charging battery Only charge the battery in the vehicle via the terminals in the engine compartment with the engine switched off. Connections, refer to Jump starting on page 262. Disposal Have old batteries disposed of following replacement at your BMW Sports Activity Online Edition for Part no. 01 41 2 602 756 - © 06/09 BMW AG
-
 1
1 -
2
-
3
-
4
-
5
-
6
-
7
-
8
-
9
-
10
-
11
-
12
-
13
-
14
-
15
-
16
-
17
-
18
-
19
-
20
-
21
-
22
-
23
-
24
-
25
-
26
-
27
-
28
-
29
-
30
-
31
-
32
-
33
-
34
-
35
-
36
-
37
-
38
-
39
-
40
-
41
-
42
-
43
-
44
-
45
-
46
-
47
-
48
-
49
-
50
-
51
-
52
-
53
-
54
-
55
-
56
-
57
-
58
-
59
-
60
-
61
-
62
-
63
-
64
-
65
-
66
-
67
-
68
-
69
-
70
-
71
-
72
-
73
-
74
-
75
-
76
-
77
-
78
-
79
-
80
-
81
-
82
-
83
-
84
-
85
-
86
-
87
-
88
-
89
-
90
-
91
-
92
-
93
-
94
-
95
-
96
-
97
-
98
-
99
-
100
-
101
-
102
-
103
-
104
-
105
-
106
-
107
-
108
-
109
-
110
-
111
-
112
-
113
-
114
-
115
-
116
-
117
-
118
-
119
-
120
-
121
-
122
-
123
-
124
-
125
-
126
-
127
-
128
-
129
-
130
-
131
-
132
-
133
-
134
-
135
-
136
-
137
-
138
-
139
-
140
-
141
-
142
-
143
-
144
-
145
-
146
-
147
-
148
-
149
-
150
-
151
-
152
-
153
-
154
-
155
-
156
-
157
-
158
-
159
-
160
-
161
-
162
-
163
-
164
-
165
-
166
-
167
-
168
-
169
-
170
-
171
-
172
-
173
-
174
-
175
-
176
-
177
-
178
-
179
-
180
-
181
-
182
-
183
-
184
-
185
-
186
-
187
-
188
-
189
-
190
-
191
-
192
-
193
-
194
-
195
-
196
-
197
-
198
-
199
-
200
-
201
-
202
-
203
-
204
-
205
-
206
-
207
-
208
-
209
-
210
-
211
-
212
-
213
-
214
-
215
-
216
-
217
-
218
-
219
-
220
-
221
-
222
-
223
-
224
-
225
-
226
-
227
-
228
-
229
-
230
-
231
-
232
-
233
-
234
-
235
-
236
-
237
-
238
-
239
-
240
-
241
-
242
-
243
-
244
-
245
-
246
-
247
-
248
-
249
-
250
-
251
-
252
-
253
-
254
-
 255
255 -
 256
256 -
 257
257 -
 258
258 -
 259
259 -
 260
260 -
 261
261 -
 262
262 -
 263
263 -
 264
264 -
 265
265 -
266
-
267
-
268
-
269
-
270
-
271
-
272
-
273
-
274
-
275
-
276
-
277
-
278
-
279
-
280
-
281
-
282
-
283
-
284
-
285
-
286
-
287
-
288
-
289
-
290
-
291
-
292
-
293
-
294
-
295
-
296
-
297
-
298
-
299
-
300
 |
 |