2004 Chevrolet Malibu Owner's Manual - Page 207
2004 Chevrolet Malibu Manual
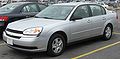
Page 207 highlights
Playing a CD The CD player can play the smaller 8cm single CDs with an adapter ring. Full-size CDs and the smaller CDs are loaded in the same manner. If playing a CD-R the sound quality may be reduced due to CD-R quality, the method of recording, the quality of the music that has been recorded and the way the CD-R has been handled. You may experience an increase in skipping, difficulty in finding tracks, and/or difficulty in loading and ejecting. If these problems occur try a known good CD. Do not add paper labels to CDs, they could get caught in the CD player. Do not play 3-inch CDs without a standard adapter CD. If an error appears on the display, see "CD Messages" later in this section. CDs may be loaded or ejected with the radio or ignition off or on. LOAD: Press the LOAD button to load CDs into the CD player. This CD player will hold up to six CDs. To insert one CD, do the following: 1. Turn the ignition on. 2. Press and release the LOAD button. 3. Wait for INSERT CD to flash on the display. 4. Load a CD. Insert the CD partway into the slot, label side up. The player will pull the CD in. When a CD is inserted, the CD symbol will appear on the display. If you select an equalization setting for your CD, it will be activated each time you play a CD. The CD will begin to play automatically. To insert multiple CDs, do the following: 1. Turn the ignition on. 2. Press and hold the LOAD button for two seconds. You will hear a beep and MULTI LOAD CD, then INSERT CD and the number will appear on the display. 3. Once INSERT CD and the number appears on the display, load a CD. Insert the CD partway into the slot, label side up. The player will pull the CD in. Once the CD is loaded, INSERT CD and the number will appear on the display again. Once INSERT CD and the number appear on the display again, you can load another CD. The CD player takes up to six CDs. Do not try to load more than six. To load more than one CD but less than six, complete Steps 1 through 3. When you have finished loading CDs, with the radio on or off, press the LOAD button to cancel the loading function. The radio will begin to play the last CD loaded. 3-91
-
 1
1 -
2
-
3
-
4
-
5
-
6
-
7
-
8
-
9
-
10
-
11
-
12
-
13
-
14
-
15
-
16
-
17
-
18
-
19
-
20
-
21
-
22
-
23
-
24
-
25
-
26
-
27
-
28
-
29
-
30
-
31
-
32
-
33
-
34
-
35
-
36
-
37
-
38
-
39
-
40
-
41
-
42
-
43
-
44
-
45
-
46
-
47
-
48
-
49
-
50
-
51
-
52
-
53
-
54
-
55
-
56
-
57
-
58
-
59
-
60
-
61
-
62
-
63
-
64
-
65
-
66
-
67
-
68
-
69
-
70
-
71
-
72
-
73
-
74
-
75
-
76
-
77
-
78
-
79
-
80
-
81
-
82
-
83
-
84
-
85
-
86
-
87
-
88
-
89
-
90
-
91
-
92
-
93
-
94
-
95
-
96
-
97
-
98
-
99
-
100
-
101
-
102
-
103
-
104
-
105
-
106
-
107
-
108
-
109
-
110
-
111
-
112
-
113
-
114
-
115
-
116
-
117
-
118
-
119
-
120
-
121
-
122
-
123
-
124
-
125
-
126
-
127
-
128
-
129
-
130
-
131
-
132
-
133
-
134
-
135
-
136
-
137
-
138
-
139
-
140
-
141
-
142
-
143
-
144
-
145
-
146
-
147
-
148
-
149
-
150
-
151
-
152
-
153
-
154
-
155
-
156
-
157
-
158
-
159
-
160
-
161
-
162
-
163
-
164
-
165
-
166
-
167
-
168
-
169
-
170
-
171
-
172
-
173
-
174
-
175
-
176
-
177
-
178
-
179
-
180
-
181
-
182
-
183
-
184
-
185
-
186
-
187
-
188
-
189
-
190
-
191
-
192
-
193
-
194
-
195
-
196
-
197
-
198
-
199
-
200
-
201
-
 202
202 -
 203
203 -
 204
204 -
 205
205 -
 206
206 -
 207
207 -
 208
208 -
 209
209 -
 210
210 -
 211
211 -
 212
212 -
213
-
214
-
215
-
216
-
217
-
218
-
219
-
220
-
221
-
222
-
223
-
224
-
225
-
226
-
227
-
228
-
229
-
230
-
231
-
232
-
233
-
234
-
235
-
236
-
237
-
238
-
239
-
240
-
241
-
242
-
243
-
244
-
245
-
246
-
247
-
248
-
249
-
250
-
251
-
252
-
253
-
254
-
255
-
256
-
257
-
258
-
259
-
260
-
261
-
262
-
263
-
264
-
265
-
266
-
267
-
268
-
269
-
270
-
271
-
272
-
273
-
274
-
275
-
276
-
277
-
278
-
279
-
280
-
281
-
282
-
283
-
284
-
285
-
286
-
287
-
288
-
289
-
290
-
291
-
292
-
293
-
294
-
295
-
296
-
297
-
298
-
299
-
300
-
301
-
302
-
303
-
304
-
305
-
306
-
307
-
308
-
309
-
310
-
311
-
312
-
313
-
314
-
315
-
316
-
317
-
318
-
319
-
320
-
321
-
322
-
323
-
324
-
325
-
326
-
327
-
328
-
329
-
330
-
331
-
332
-
333
-
334
-
335
-
336
-
337
-
338
-
339
-
340
-
341
-
342
-
343
-
344
-
345
-
346
-
347
-
348
-
349
-
350
-
351
-
352
-
353
-
354
-
355
-
356
-
357
-
358
-
359
-
360
-
361
-
362
-
363
-
364
-
365
-
366
-
367
-
368
-
369
-
370
-
371
-
372
-
373
-
374
-
375
-
376
-
377
-
378
-
379
-
380
-
381
-
382
-
383
-
384
-
385
-
386
-
387
-
388
-
389
-
390
-
391
-
392
-
393
-
394
-
395
-
396
-
397
-
398
-
399
-
400
-
401
-
402
-
403
-
404
-
405
-
406
-
407
-
408
-
409
-
410
-
411
-
412
-
413
-
414
-
415
-
416
-
417
-
418
-
419
-
420
-
421
-
422
-
423
-
424
-
425
-
426
 |
 |
