2006 Ford GT Owner Guide 1st Printing - Page 79
2006 Ford GT Manual
Page 79 highlights
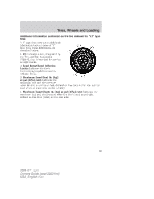
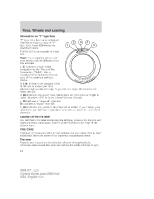
Tires, Wheels and Loading Note: If you experience any unusual vibration, ride disturbance or noise while driving, reduce your speed until you can safely pull off to the side of the road to call for roadside assistance. You can check the tire pressure any time within the 120 miles by performing the following: 1. Ensure the compressor is turned off by pressing the "O" side of the orange button. 2. Remove the hose and the cable with the electrical plug from the kit's storage compartment. 3. Remove the valve cap from the sealed tire, then screw the hose firmly onto the tire's air valve. 4. Insert the electrical plug into the vehicle's power point. 5. Start the engine (only if the vehicle is outdoors or in a well-ventilated area) to prevent the vehicle's battery from draining. 6. Read the air pressure gauge on the inflation kit. If the tire pressure needs to be increased, operate the air compressor and inflate the tire to the recommended pressure as indicated on the label on the B-Pillar. WHEEL LUG NUT TORQUE SPECIFICATIONS Retighten the lug nuts to the specified torque at 500 miles (800 km) after any wheel disturbance (tire rotation, changing a flat tire, wheel removal, etc.). Wheel lug nut torque* lb.ft. N•m 1⁄2 x 20 100 135 * Torque specifications are for nut and bolt threads free of dirt and rust. Use only Ford recommended replacement fasteners. When a wheel is installed, always remove any corrosion, dirt or foreign materials present on the mounting surfaces of the wheel or the surface of the front disc brake hub and rotor that contacts the wheel. Installing wheels without correct metal-to-metal contact at the wheel mounting surfaces can cause the wheel nuts to loosen and the wheel to come off while the vehicle is in motion, resulting in loss of control. Bolt size 79 2006 GT (gto) Owners Guide (post-2002-fmt) USA_English (fus)
-
 1
1 -
2
-
3
-
4
-
5
-
6
-
7
-
8
-
9
-
10
-
11
-
12
-
13
-
14
-
15
-
16
-
17
-
18
-
19
-
20
-
21
-
22
-
23
-
24
-
25
-
26
-
27
-
28
-
29
-
30
-
31
-
32
-
33
-
34
-
35
-
36
-
37
-
38
-
39
-
40
-
41
-
42
-
43
-
44
-
45
-
46
-
47
-
48
-
49
-
50
-
51
-
52
-
53
-
54
-
55
-
56
-
57
-
58
-
59
-
60
-
61
-
62
-
63
-
64
-
65
-
66
-
67
-
68
-
69
-
70
-
71
-
72
-
73
-
 74
74 -
 75
75 -
 76
76 -
 77
77 -
 78
78 -
 79
79 -
 80
80 -
 81
81 -
 82
82 -
 83
83 -
 84
84 -
85
-
86
-
87
-
88
-
89
-
90
-
91
-
92
-
93
-
94
-
95
-
96
-
97
-
98
-
99
-
100
-
101
-
102
-
103
-
104
-
105
-
106
-
107
-
108
-
109
-
110
-
111
-
112
-
113
-
114
-
115
-
116
-
117
-
118
-
119
-
120
-
121
-
122
-
123
-
124
-
125
-
126
-
127
-
128
-
129
-
130
-
131
-
132
-
133
-
134
-
135
-
136
-
137
-
138
-
139
-
140
-
141
-
142
-
143
-
144
-
145
-
146
-
147
-
148
-
149
-
150
-
151
-
152
-
153
-
154
-
155
-
156
-
157
-
158
-
159
-
160
-
161
-
162
-
163
-
164
-
165
-
166
-
167
-
168
-
169
-
170
-
171
-
172
-
173
-
174
-
175
-
176
-
177
-
178
-
179
-
180
-
181
-
182
-
183
-
184
-
185
-
186
-
187
-
188
-
189
-
190
-
191
-
192
-
193
-
194
-
195
-
196
-
197
-
198
-
199
-
200
 |
 |
