2012 Jeep Compass User Guide - Page 77
2012 Jeep Compass Manual

Page 77 highlights
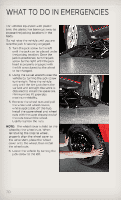
WHAT TO DO IN EMERGENCIES Jump-Starting Procedure NOTE: Remove Air Intake before proceeding with this Jump-Starting procedure. 1. Connect the positive (+) end of the jumper cable to the positive (+) post of the discharged vehicle. 2. Connect the opposite end of the positive (+) jumper cable to the positive (+) post of the booster battery. 3. Connect the negative end (-) of the jumper cable to the negative (-) post of the booster battery. 4. Connect the opposite end of the negative (-) jumper cable to a good engine ground (exposed metal part of the discharged vehicle's engine) away from the battery and the fuel injection system. 5. Start the engine in the vehicle that has the booster battery, let the engine idle a few minutes, and then start the engine in the vehicle with the discharged battery. Once the engine is started, remove the jumper cables in the reverse sequence: 6. Disconnect the negative (-) jumper cable from the engine ground of the vehicle with the discharged battery. 7. Disconnect the negative end (-) of the jumper cable from the negative (-) post of the booster battery. 8. Disconnect the opposite end of the positive (+) jumper cable from the positive (+) post of the booster battery. 9. Disconnect the positive (+) end of the jumper cable from the positive (+) post of the discharged vehicle. 10. Reinstall the air intake duct. NOTE: If frequent jump-starting is required to start your vehicle you should have the battery and charging system inspected at your authorized dealer. CAUTION! • Accessories that can be plugged into the vehicle power outlets draw power from the vehicle's battery, even when not in use (i.e., cellular phones, etc.). Eventually, if plugged in long enough, the vehicle's battery will discharge sufficiently to degrade battery life and/or prevent the engine from starting. • Do not use a portable battery booster pack or any other booster source with a system voltage greater than 12 Volts or damage to the battery, starter motor, alternator or electrical system may occur. • Failure to follow these procedures could result in damage to the charging system of the booster vehicle or the discharged vehicle. 75
-
 1
1 -
2
-
3
-
4
-
5
-
6
-
7
-
8
-
9
-
10
-
11
-
12
-
13
-
14
-
15
-
16
-
17
-
18
-
19
-
20
-
21
-
22
-
23
-
24
-
25
-
26
-
27
-
28
-
29
-
30
-
31
-
32
-
33
-
34
-
35
-
36
-
37
-
38
-
39
-
40
-
41
-
42
-
43
-
44
-
45
-
46
-
47
-
48
-
49
-
50
-
51
-
52
-
53
-
54
-
55
-
56
-
57
-
58
-
59
-
60
-
61
-
62
-
63
-
64
-
65
-
66
-
67
-
68
-
69
-
70
-
71
-
 72
72 -
 73
73 -
 74
74 -
 75
75 -
 76
76 -
 77
77 -
 78
78 -
 79
79 -
 80
80 -
 81
81 -
 82
82 -
83
-
84
-
85
-
86
-
87
-
88
-
89
-
90
-
91
-
92
-
93
-
94
-
95
-
96
-
97
-
98
-
99
-
100
-
101
-
102
-
103
-
104
-
105
-
106
-
107
-
108
 |
 |
