2009 Lexus ES 350 Navigation Manual
2009 Lexus ES 350 Manual
2009 Lexus ES 350 manual content summary:
- 2009 Lexus ES 350 | Navigation Manual - Page 1
BASIC FUNCTIONS SECTION BASIC FUNCTIONS Basic information before operation D Initial screen D Touch screen operation D Inputting letters and numbers/List screen operation D Function help D Map screen operation Current position display ...Screen scroll operation ...Switching the screens ...Map scale - 2009 Lexus ES 350 | Navigation Manual - Page 2
parts or components and shows dealer information (if registered) on the screen. When the vehicle reaches a previously set driving distance or date specified for a scheduled maintenance check, the "Information" screen will be displayed when the navigation system is in operation. When the "ENGINE - 2009 Lexus ES 350 | Navigation Manual - Page 3
when the navigation system is in operation. The memo information screen will be displayed every time the system is turned on. This system is operated mainly memo" on page 122. buttons D Wipe off fingerprints using a glass cleaning cloth. Do not use chemical cleaners to clean the touch screen. D The - 2009 Lexus ES 350 | Navigation Manual - Page 4
can be input via the touch screen. D To input letters To display the alphabet keys, touch "A−Z" or " ". INFORMATION Keyboard layout can be changed. (See page 108.) Enter letters by touching the alphabet keys directly. Touching this button erases one letter. By holding this button, letters will - 2009 Lexus ES 350 | Navigation Manual - Page 5
The number of matching items is shown to the right side of the screen. If the number of matching items is more than 9,999, the system displays on the screen. 25 - 2009 Lexus ES 350 | Navigation Manual - Page 6
BASIC FUNCTIONS D List screen operation When a list is displayed, use the appropriate button to scroll through the list. D Sorting The order of a list displayed on the screen can be rearranged. TYPE A To shift to the - 2009 Lexus ES 350 | Navigation Manual - Page 7
BASIC FUNCTIONS Function help TYPE B Explanations for the functions of the "Destination", "Setup" and "Menu" screens can be viewed. "Dist. Sort": To sort in the order of distance from the current vehicle location. The distance from current vehicle position up to the destination is displayed to the - 2009 Lexus ES 350 | Navigation Manual - Page 8
starting the navigation system, the new vehicle, the current position may not be correct. As soon as the system receives signals from the GPS, the correct current position is displayed. D To correct the current position manually, see page 115. INFORMATION When the one−touch scroll feature is used - 2009 Lexus ES 350 | Navigation Manual - Page 9
a destination A specific point on the map can be set as a destination using the one−touch scroll function. D To register the cursor position as a . The registered point is shown by on the map. To change the icon or name, etc., see " - Editing memory points" on page 94. Up to 106 memory points - 2009 Lexus ES 350 | Navigation Manual - Page 10
is already a set destination, "Add to " and "Replace " are displayed. "Add to ": To add a destination. "Replace ": To delete the existing destinations and set a new one. To register this POI as a memory point, touch "Mark". (See page 93.) is touched, the registered telephone If number can be called - 2009 Lexus ES 350 | Navigation Manual - Page 11
to " and "Replace " are displayed. "Add to ": To add a destination. "Replace ": To delete the existing destinations and set a new one. To edit a memory point, touch "Edit". (See " - Editing memory points" on page 94.) To delete a memory point, touch "Delete". is touched, the registered telephone If - 2009 Lexus ES 350 | Navigation Manual - Page 12
BASIC FUNCTIONS - Switching the screens Any one of the screen configurations can be selected . Depending on the conditions, certain screen configuration buttons cannot be selected. : To display the single map screen. (See page 33.) : To display the dual map screen. (See page 33.) : To display the - 2009 Lexus ES 350 | Navigation Manual - Page 13
map. The map on the left is the main map. The right side map can be edited. Touch the right side map to display the edit screen. This screen can perform the following procedures: 1. Changing the map scale 2. Displaying the POI icon 3. Changing the orientation of the map Touch "OK" when you complete - 2009 Lexus ES 350 | Navigation Manual - Page 14
a different screen, touching will display the compass mode screen. Touch or to change the scale of the map display. The scale bar and indicator at the When the vehicle travels out of the coverage area, the guidance screen changes to the compass mode screen. INFORMATION When the map scale is at - 2009 Lexus ES 350 | Navigation Manual - Page 15
by the foot print map, the screen scale automatically changes to 150 feet (50 m). D On the foot print map, a one way street is displayed by . D It is not possible to perform scrolling on the foot print map (one− touch scroll) while driving. 2. Using the eight−direction arrow, move the cursor to the - 2009 Lexus ES 350 | Navigation Manual - Page 16
BASIC FUNCTIONS - Orientation of the map The orientation of the map can be changed from North−up to Heading−up by touching the orientation symbol at the top left of the screen. Touch or . Details of POIs in some - 2009 Lexus ES 350 | Navigation Manual - Page 17
DESTINATION SEARCH SECTION DESTINATION SEARCH D Quick reference ("Destination" screen) D Destination search Selecting the region to search ...Destination search by Home ...Destination search by Quick access ...Destination search by "Address" ...Destination search by "POI*" ...Destination search by - 2009 Lexus ES 350 | Navigation Manual - Page 18
1 "Address" A house number and the street address can be input by using the input keys...43 2 "POI" Select one of the many POIs (Points of 6 "Emergency" One of the four categories of emergency service points that are already stored in the system's database can be selected...54 7 "Map" A - 2009 Lexus ES 350 | Navigation Manual - Page 19
11 "Del. Dest." Set destinations can be deleted...59 12 "Change" To change the selected region to search, touch this button...40 13 Quick access screen. To use this function, it is necessary to set the "Quick Access" for each memory point. (To register a "Quick Access", see " - Editing memory points - 2009 Lexus ES 350 | Navigation Manual - Page 20
"DEST" button. SELECTING THE REGION TO SEARCH ON THE INPUT SCREEN Change the selected region in order to set a destination from a different region by using "Address", "POI", "Freeway Ent./Exit" or "Intersection". 2. Touch "Change" on the "Destination" screen to display a map of the United States - 2009 Lexus ES 350 | Navigation Manual - Page 21
DESTINATION SEARCH U.S.A. Button "US1" "US2" States included in the search region Idaho Oregon Washington California Nevada Arizona Colorado Montana New Mexico Utah Wyoming Iowa Kansas Minnesota Missouri North Dakota Nebraska South Dakota Oklahoma Texas Illinois Indiana Kentucky Michigan Ohio - 2009 Lexus ES 350 | Navigation Manual - Page 22
the home touch−screen button on the "Destination" screen. The screen changes and displays the map location for home and the route preference. (See message will be displayed and will automatically switch to the setting screen. To use this function, it is necessary to set "Home" for the memory point. - 2009 Lexus ES 350 | Navigation Manual - Page 23
DESTINATION SEARCH - Destination search by "Address" There are 2 ways to input a destination by address. 1. Push the "DEST" button. 2. Touch "Address" on the "Destination" screen. (a) Inputting a house number and a street name 1. Touch numbers directly on the screen to input a house number. After - 2009 Lexus ES 350 | Navigation Manual - Page 24
"Starting route guidance" on page 60.) If the same address exists in more than one city, the current screen changes to the city list screen. If inputting a street name first, the screen changes. The house number can then be input. If the above screen appears, an address range on the screen can - 2009 Lexus ES 350 | Navigation Manual - Page 25
, the following three methods are possible. 1. Input the city name 2. Select from the nearest 5 cities 3. Select from the last 5 cities INFORMATION D To change the selected region, touch "Select Region". D To cancel the city setting, touch "Any City". 3. Touch the button of the desired city name - 2009 Lexus ES 350 | Navigation Manual - Page 26
number and a street name" on page 43.) Touch the button of the desired city name. If the navigation has never been used, no cities will be displayed on the screen. The current screen changes to the screen for inputting a house number or a street name. (See "(a) Inputting a house number and a street - 2009 Lexus ES 350 | Navigation Manual - Page 27
the name of the Point of Interest. 3. Touch the button for the desired method. 2. Touch the button of the desired destination. The screen changes and displays the map location of the selected destination and the route preference. (See "Starting route guidance" on page 60.) When inputting the name - 2009 Lexus ES 350 | Navigation Manual - Page 28
destination. If the same name exists in more than one city, a search can be performed more easily with "City" and "Category". (See "Selecting a city to search" on Select from the last 5 cities INFORMATION D To change the selected region, touch "Select Region". D To cancel the city setting, touch " - 2009 Lexus ES 350 | Navigation Manual - Page 29
DESTINATION SEARCH INPUTTING THE CITY NAME 1. Touch "Input City Name". SELECTING FROM THE NEAREST 5 CITIES 1. Touch "Nearest 5 Cities". 2. Input the city name. 2. Touch the button of the desired city name. 3. Touch the button of the desired city name from the displayed list. 49 - 2009 Lexus ES 350 | Navigation Manual - Page 30
DESTINATION SEARCH SELECTING FROM THE LAST 5 CITIES D Selecting from the categories Touch the button of the desired city name. If the navigation has never been used, no cities will be displayed on the screen. Touch "Category". If the desired POI category is on the screen, touch the name to - 2009 Lexus ES 350 | Navigation Manual - Page 31
DESTINATION SEARCH (b) Search by "Category" The destination can be set by selecting the search point and the POI category. INPUTTING THE CITY CENTER 1. Touch "Input City Center". 2. Input the city center name. Set the search point by the following method: 1. Input the city center 2. Set the - 2009 Lexus ES 350 | Navigation Manual - Page 32
DESTINATION SEARCH SETTING THE CURRENT POSITION AS THE SEARCH POINT Touch "Current Position". The search point is set at the current position, and the "POI Category" screen will be displayed. SETTING THE SEARCH POINT VIA THE MAP SCREEN 1. Touch "Map". SETTING THE SEARCH POINT FROM DESTINATIONS 1. - 2009 Lexus ES 350 | Navigation Manual - Page 33
and touch "OK". The selected category icon appears on the top left of the screen. By touching the button of the desired item, the screen changes and displays the map location of the selected destination and the route preference. (See "Starting route guidance" on page 60.) The direction arrows of - 2009 Lexus ES 350 | Navigation Manual - Page 34
. D To set a memory point as a destination using the phone number, the number must be registered previously. changes and displays the map location of the selected destination and the route preference. (See "Starting route guidance" on page 60.) INFORMATION The navigation system does not guide - 2009 Lexus ES 350 | Navigation Manual - Page 35
Destination" screen. A list of registered memory points is displayed. (To register or edit memory points, see "My places" on page 92.) - Destination search by 3. Touch the button of your desired memory point. The screen changes and displays the map location of the selected destination and the route - 2009 Lexus ES 350 | Navigation Manual - Page 36
point button you want to delete. "Delete All": To delete all previous points in the system. 1. Push the "DEST" button. 2. Touch "Map" on the second page of touch "Yes". To cancel the deletion, touch "No". The screen changes and displays the map location that was previously displayed just before the - 2009 Lexus ES 350 | Navigation Manual - Page 37
two intersecting streets which are located near the destination to be set. If the same two streets cross at more than one intersection, the screen changes and displays the menu to select the city name where the streets intersect. Select the city, and the map location of the selected destination and - 2009 Lexus ES 350 | Navigation Manual - Page 38
the hyphen, when entering the destination. Freeways and interstates use an "I" (I−405). US highways use the state designation before the number (CA−118). 5. Touch the button of the desired entrance or exit name. The screen changes and displays the map location of the selected destination and - 2009 Lexus ES 350 | Navigation Manual - Page 39
Input the latitude and the longitude. 4. When the input is finished, touch "OK". By touching the button of the desired point, the screen changes and displays the map location of the selected destination and the route preference. (See "Starting route guidance" on page 60.) 3. Touch the destination - 2009 Lexus ES 350 | Navigation Manual - Page 40
the arrow will stop the scrolling. 2. Touch "Enter". The system starts route search and displays recommended routes. If there is already . "Replace ": To delete the existing destinations and set a new one. "Route Preference": To change the route preference. (See page 62.) "Info.": If this - 2009 Lexus ES 350 | Navigation Manual - Page 41
To start guidance, touch "Guide". "3 Routes": To select the desired route from three possible routes. (See page 62.) "Route": To change the route. (See pages 72 the map scale changes to 0.5 miles (800m) automatically. Set the destination again. D If a destination is entered, the road nearest to the - 2009 Lexus ES 350 | Navigation Manual - Page 42
desired route from three routes, touch "3 Routes". 1. You can change route preference by touching "Route Preference". 2. Select the desired route preference by touching the button. When searching for a route, the system will avoid routes when the indicator is off. 3. After choosing the - 2009 Lexus ES 350 | Navigation Manual - Page 43
DESTINATION SEARCH 1 2 3 4 5 Time necessary for the entire trip Distance of the entire trip Toll road Freeway Ferry 63 - 2009 Lexus ES 350 | Navigation Manual - Page 44
DESTINATION SEARCH 64 - 2009 Lexus ES 350 | Navigation Manual - Page 45
Adding destinations ...Reordering destinations ...Deleting destinations ...D Setting route Search condition ...Detour setting ...Route preference ...Starting route from adjacent road ...D Map view Display POI* icons ...Route overview ...Route preview ...Route trace ... 3 66 69 71 72 72 72 73 - 2009 Lexus ES 350 | Navigation Manual - Page 46
the vehicle goes off the guidance route, the route is searched again. D For some areas, the roads have not been completely digitized in our database. For this reason, the route guidance may select road that should not be traveled on. D When you arrive at your destination, the destination name will - 2009 Lexus ES 350 | Navigation Manual - Page 47
the freeway will be displayed. D When approaching an intersection When the vehicle approaches an intersection, the intersection guidance screen will be displayed. Road/area name 2 Distance from the current position to the exit or junction 3 Current position "OFF": The guidance screen on freeway - 2009 Lexus ES 350 | Navigation Manual - Page 48
ROUTE GUIDANCE D Other screens TURN LIST SCREEN On this screen, the list of turns on the guidance route can be viewed. Touching the turn list. during guidance displays ARROW SCREEN On this screen, information about next turns on the guidance route can be viewed. Touching during guidance displays - 2009 Lexus ES 350 | Navigation Manual - Page 49
ROUTE GUIDANCE Typical voice guidance prompts The voice guidance provides various messages as you approach an intersection, or other point where you need to maneuver the vehicle. 4.2 miles 0.25 miles 4.7 miles 0.25 miles +α 1 "Proceed about 4 miles to the traffic circle." "In a quarter of a mile - 2009 Lexus ES 350 | Navigation Manual - Page 50
ROUTE GUIDANCE One −way road One −way road ∗: The system indicates a U−turn if the distance between two one−way roads (of opposite directions) is less than 50 feet (15 m) in residential areas or 164 feet (50 m) in non−residential areas. The system announces the approach to the final destination. - 2009 Lexus ES 350 | Navigation Manual - Page 51
ROUTE GUIDANCE Distance and time to destination The distance, the estimated travel time and the estimated arrival time from the current position to the selected destination are displayed. Estimated travel time is displayed. Estimated arrival time is displayed. When the vehicle is on the guidance - 2009 Lexus ES 350 | Navigation Manual - Page 52
Adding destinations and searching again for the routes can be done. - Reordering destinations When more than one destination is set, you can change the arrival order of the destinations. 1. Touch "Route". 1. Touch "Route". 2. Touch "Add". 3. Input an additional destination in the same way as the - 2009 Lexus ES 350 | Navigation Manual - Page 53
ROUTE GUIDANCE - Deleting destinations 4. After selecting the destinations, touch "OK". The system searches for the guidance route again, and displays the entire route. Even if "OK" is not touched, the entire route is displayed automatically within a few - 2009 Lexus ES 350 | Navigation Manual - Page 54
If "No" is touched, the previous screen will return. 5. If more than one destination is set, touch "OK" after deleting the destinations. The system searches for the guidance route again, and displays the entire route. You can designate the route conditions of the route to the destination. 1. Touch - 2009 Lexus ES 350 | Navigation Manual - Page 55
to detour around a section of the route where a delay is caused by road repairs, or an accident, etc. The entire route from the starting point to the destination is displayed. "Guide": To start guidance. "Route": To change a route. (See pages 72 and 74.) 1. Touch "Route". 2. Touch "Detour". 75 - 2009 Lexus ES 350 | Navigation Manual - Page 56
will calculate an entire new route to the destination. This picture shows an example of how the system would guide around a delay caused by a traffic jam. 1 This position indicates the location of a traffic jam caused by road repairs or an accident. 2 This route indicates the detour suggested - 2009 Lexus ES 350 | Navigation Manual - Page 57
the system uses to determine the route to the destination. - Starting route from adjacent road You can start the route guidance from the adjacent road. " to change the conditions that determine the route to the destination. 2. Touch "Start from Adjacent Road". When there is no adjacent road, this - 2009 Lexus ES 350 | Navigation Manual - Page 58
Interest such as gas stations and restaurants can be displayed on the map screen. You can also set their location as a destination and use them for route Point of Interest, touch this button. Then choose one of the categories. The system will list the points within 20 miles (32 km). (See page 80.) A - 2009 Lexus ES 350 | Navigation Manual - Page 59
ROUTE GUIDANCE Touch "Other POIs" on the "Display POI icons" screen. When a Point of Interest category is selected from either the limited list or the complete list, the screen will display symbols of those locations on the map screen. Select the desired POI categories from the list. The selected - 2009 Lexus ES 350 | Navigation Manual - Page 60
one of the Points of Interest icons on the map screen as a destination and use it for route guidance. 1. Touch "Local POI List" on the "Display POI Interest overlaps with the cursor, touch "Enter ". The screen changes and displays the map location of the selected destination and route preference - 2009 Lexus ES 350 | Navigation Manual - Page 61
scroll through the list of roads by or . However, not all road touching names in the route may appear on the list. If a road changes its name without requiring a current position to the destination is displayed. "Guide": To start guidance. "Route": To change the route. (See pages 72 and 74.) "Turn - 2009 Lexus ES 350 | Navigation Manual - Page 62
. : To preview the route to the next destination in fast−forward mode. : To stop the preview. : To review the route to the previous destination or starting point. : To review the route to the previous destination or starting point in fast−forward mode. : To indicate the previous destination or - 2009 Lexus ES 350 | Navigation Manual - Page 63
- Route trace It is possible to store the traveled route up to 124 miles (200 km) and retrace the route on the display. INFORMATION This feature is available on the map with more detailed map scale than 30 mile (50 km). "Record": To start recording the route trace. "Stop": To stop - 2009 Lexus ES 350 | Navigation Manual - Page 64
ROUTE GUIDANCE 84 - 2009 Lexus ES 350 | Navigation Manual - Page 65
Descriptions of functions for more effective use D Quick reference ("Menu" screen) D Quick reference ("Setup" screen) D Suspending and resuming guidance D Volume D User selection 4 86 87 88 89 90 D My places 92 Registering memory points ...93 Editing memory points ...94 Deleting memory points - 2009 Lexus ES 350 | Navigation Manual - Page 66
reference ("Menu" screen) The "Menu" screen allows effective use of the navigation system. To display the "Menu" screen, push the "MENU be memorized...90 6 "Setup" Enables various settings for the navigation system...87, 106 7 "My Places" Enables changes to "Memory points", "Home" and "Areas to avoid - 2009 Lexus ES 350 | Navigation Manual - Page 67
"km" or "miles" can be selected...107 2 "Estimated Travel Time" The system to display the travel time and the arrival time to the destination on the route guidance screen can be set...107 3 "Keyboard Layout" Key layout can be changed...108 4 "Time Zone" The desired time zone can be selected...109 5 - 2009 Lexus ES 350 | Navigation Manual - Page 68
13 "Calibration" Adjustment of the current vehicle position mark can be done manually...115 14 "Default" This touch−screen button initializes all of the settings...106 route guidance, "Suspend Guidance" cannot be used. The screen will return to the current position map without route guidance. - 2009 Lexus ES 350 | Navigation Manual - Page 69
off. 2. Touch "Resume Guidance". 1. Push the "MENU" button. The screen will change to the current position map with route guidance. 2. Touch "Volume". To adjust the is not needed, touch "OFF" to disable the feature. When selected the number or "OFF" will be highlighted. 3. Touch "OK" to - 2009 Lexus ES 350 | Navigation Manual - Page 70
the navigation screen is changed to other system can memorize the following settings for up to three users. D Map direction D Map scale D Map configuration D Guidance mode D Setup D Volume D Language D Route trace D Travel time/arrival time D Right screen of dual map D Route preference D Maintenance - 2009 Lexus ES 350 | Navigation Manual - Page 71
ADVANCED FUNCTIONS D To register D To change user 1. Touch "Memorize". The confirmation screen will be displayed. Touch "User number". The above message appears, then the map screen will be displayed. 2. To register, - 2009 Lexus ES 350 | Navigation Manual - Page 72
ADVANCED FUNCTIONS My places - D To delete user Points or areas on the map can be registered. The registered points can be used on the "Destination" screen. (See " - Destination search by Home" on page 42, " - Destination search by Quick access" on page 42 and " - Destination search by Memory" - 2009 Lexus ES 350 | Navigation Manual - Page 73
"My Places" on the "Menu" screen. On this screen, the following operations can be performed. 1 Registers memory points (See " - Registering memory points" on page 93.) 2 Edits memory points (See " - Editing memory points" on page 94.) 3 Deletes memory points (See " - Deleting memory points" on page - 2009 Lexus ES 350 | Navigation Manual - Page 74
, attribute, name, location and/or telephone number of a registered memory point can be edited. 1. Push the "MENU" button. 2. Touch "My Places" on the "Menu" screen. 5. Touch "OK". To edit registered information, see " - Editing memory Points" on page 94. INFORMATION Up to 106 memory points can be - 2009 Lexus ES 350 | Navigation Manual - Page 75
ADVANCED FUNCTIONS D To change "Icon" 1. Touch "Icon" on the "Memory Point" screen. 5. Touch the button to be edited. "Icon": To select icons to be displayed on the map. (See page 95.) "Quick Access": To set an attribute. Memory points with a set attribute can be used as a "Quick access" or "Home" - 2009 Lexus ES 350 | Navigation Manual - Page 76
, the selected sound will be heard. 1. Touch "with Sound" on the "Change Icon" screen. D To change "Quick Access" It is possible to change attributes of the quick access points. Memory points with a set attribute can be used as a "Quick Access" or "Home" touch−screen button. (See " - Destination - 2009 Lexus ES 350 | Navigation Manual - Page 77
ADVANCED FUNCTIONS DELETING "Quick Access" D To change "Name" 1. Touch "Name" on the "Memory Point" screen. 1. Touch "Del.". 2. Enter the name using the alphanumeric keys. Up to 24 letters can be entered. 3. Touch "OK". The previous screen will be displayed. 2. To delete an attribute, touch "Yes - 2009 Lexus ES 350 | Navigation Manual - Page 78
ADVANCED FUNCTIONS DISPLAYING MEMORY POINT NAMES The name of a memory point that may be displayed on the map can be set. D To change "Location" 1. Touch "Location" on the "Memory Point" screen. To show the name, touch "ON" on the "Memory Point" screen. To not show it, touch "OFF". 2. - 2009 Lexus ES 350 | Navigation Manual - Page 79
ADVANCED FUNCTIONS - Deleting memory points D To change "Phone #" (telephone number) 1. Touch "Phone #" on the "Memory Point" screen. 1. Push the "MENU" button. 2. Touch "My Places" on the "Menu" screen. 2. Enter the number using number keys. 3. Touch "OK". The previous screen will be displayed. - 2009 Lexus ES 350 | Navigation Manual - Page 80
home If home has been registered, that information can be recalled by using the "Home" touch−screen button on the "Destination" screen Point" screen will be displayed. 5. Touch "OK". To edit registered information, see " - Editing memory points" on page 94. 3. Touch "Register". 4. Enter - 2009 Lexus ES 350 | Navigation Manual - Page 81
ADVANCED FUNCTIONS - Deleting home 1. Push the "MENU" button. 2. Touch "My Places" on the "Menu" screen. - Registering area to avoid Areas you want to avoid because of traffic jams, construction work or other reasons can be registered as areas to avoid. 1. Push the "MENU" button. 2. Touch "My - 2009 Lexus ES 350 | Navigation Manual - Page 82
Touch the eight directional touch− to screen button to move the cursor the desired point on the map. 6. Touch "Enter". 3. Touch "Edit". 7. Touch either or to change the size of the area to be avoided. 8. Touch "OK". 4. Touch the desired area button. INFORMATION D If a destination is input in the - 2009 Lexus ES 350 | Navigation Manual - Page 83
.) "Area Size": To edit area size. (See page 105.) "Active": To turn on or off the area to avoid feature. To turn on the feature touch "ON" on the "Edit Area to Avoid" screen. To turn off the feature touch "OFF" on the "Edit Area to Avoid" screen. 6. Touch "OK". 2. Enter the name using alphanumeric - 2009 Lexus ES 350 | Navigation Manual - Page 84
of an area to be avoided that may be displayed on the map can be set. D To change "Location" 1. Touch "Location" on the "Edit Area to Avoid" screen. To show the name, touch "ON" on the "Edit Area to Avoid" screen. To not show it, touch "OFF". 2. Touch the eight directional touch− to - 2009 Lexus ES 350 | Navigation Manual - Page 85
ADVANCED FUNCTIONS - Deleting area to avoid D To change "Area Size" 1. Touch "Area Size" on the "Edit Area to Avoid" screen. 1. Push the "MENU" button. 2. Touch "My Places" on the "Menu" screen. 2. Touch either or to change the size of the area to be avoided. 3. Touch "OK". The previous screen - 2009 Lexus ES 350 | Navigation Manual - Page 86
"Delete Previous Points". 1. Push the "MENU" button. 4. Touch the button you want to delete. "Delete All": To delete all previous points in the system. 2. Touch "Setup". 3. Touch the items to be set. 5. To delete the point, touch "Yes". To cancel the deletion, touch "No". 4. Touch "OK". The - 2009 Lexus ES 350 | Navigation Manual - Page 87
ADVANCED FUNCTIONS D Unit of Measurement Unit of measurement can be changed. 1. Push the "MENU" button. 2. Touch "Setup" on the "Menu" screen. D Estimated travel time The speed that is used for the calculation of the estimated travel time and the estimated arrival time can be set. 1. Push the " - 2009 Lexus ES 350 | Navigation Manual - Page 88
depending on progress along the route, which may be affected by road conditions such as traffic jams, and construction work. D It is possible to display up to 99 hours 59 minutes. Key layout can be changed. 1. Push the "MENU" button. 2. Touch "Setup" on the "Menu" screen. 3. - 2009 Lexus ES 350 | Navigation Manual - Page 89
MENU" button. 2. Touch "Setup" on the "Menu" screen. When you touch "Other", this screen is displayed. Touch "Y" or "B" to adjust the time zone. 3. Touch "Change" of "Time Zone". The "Adjust Time Zone" screen will be displayed on the display. 4. Touch the desired time zone. The selected button is - 2009 Lexus ES 350 | Navigation Manual - Page 90
current street name on the map screen can be displayed or hidden. 1. Push the "MENU" button. 2. Touch "Setup" on the "Menu" screen. D POI category change (Display POI Icons) Select from among the 6 icons displayed on the "Display POI Icons" top screen, so that setting of the icons to be displayed - 2009 Lexus ES 350 | Navigation Manual - Page 91
ADVANCED FUNCTIONS D Display of building shape When the "Display Building Shapes" feature is turned on, the system will display the building shape on the map screen using a scale of 150 feet (50 m) to 300 feet (100 m). To turn the "Display Building Shapes" on: 1. Push the "MENU" button. 2. Touch " - 2009 Lexus ES 350 | Navigation Manual - Page 92
ADVANCED FUNCTIONS D Notifying traffic restriction When the "Traffic Restrict. Notification" feature is turned on, the system notifies you of traffic or seasonal restrictions. To turn the "Traffic Restrict. Notification" on: 1. Push the "MENU" button. 2. Touch "Setup" on the "Menu" screen. Then - 2009 Lexus ES 350 | Navigation Manual - Page 93
is turned on, the voice guidance in all modes can be heard. When the "Voice Guidance in All Modes" feature is turned off, voice guidance cannot be heard when using the audio system. To turn the "Voice Guidance in All Modes" on: 1. Push the "MENU" button. 2. Touch "Setup" on the "Menu" screen. Then - 2009 Lexus ES 350 | Navigation Manual - Page 94
display page 3 of the "Setup" screen. When the "Pop−up Message" is turned off, the following messages will not displayed. This message appears when the system is in the POI mode and the map scale is over 0.5 miles (800 m). 3. Touch "ON" of "Pop−up Message". The selected button is highlighted - 2009 Lexus ES 350 | Navigation Manual - Page 95
ADVANCED FUNCTIONS D Current position/tire change calibration The current vehicle position mark can be adjusted manually. Miscalculation of the distance caused by tire replacement can also be accuracy of a current vehicle position, see "Limitations of the navigation system" on page 298. 115 - 2009 Lexus ES 350 | Navigation Manual - Page 96
ADVANCED FUNCTIONS TIRE CHANGE CALIBRATION The tire change calibration function will be used when replacing the tires. This function will adjust the miscalculation caused by the circumference difference between the old and new tires. If this procedure is not performed when the tires are replaced, - 2009 Lexus ES 350 | Navigation Manual - Page 97
OTHER FUNCTIONS SECTION OTHER FUNCTIONS D Maintenance information Maintenance information setting ...Dealer setting ...D Calendar with memo Adding a memo ...Editing a memo ...Memo list ...D Hands−free system (for cellular phone) D Speech command system D Help screen D Screen adjustment D Screen - 2009 Lexus ES 350 | Navigation Manual - Page 98
"ON" is selected, the system gives maintenance information with the "Information" screen when the system is turned on. (See page 22.) If "OFF" is selected, the "Information" screen is disabled. When the vehicle needs to be serviced, the touch−screen button color will change to orange. 1. Push the - 2009 Lexus ES 350 | Navigation Manual - Page 99
": To reset the date and distance conditions. 5. Touch "OK". The screen then returns to the "Maintenance" screen. INFORMATION D For scheduled maintenance information, please refer to the "Warranty and Services Guide/Owner's Manual Supplement/Scheduled Maintenance". D Depending on driving or road - 2009 Lexus ES 350 | Navigation Manual - Page 100
register a dealer in the system. With dealer information registered, route guidance to the dealer is available. 1. Push the "INFO" button. 2. Touch "Maintenance" on the "Information" screen. 3. Touch "Set Dealer" on the "Maintenance" screen. 5. Touch the button to be edited. "Dealer": To enter the - 2009 Lexus ES 350 | Navigation Manual - Page 101
"Dealer" or "Contact" 1. Touch "Dealer" or "Contact" on the "Edit Dealer" screen. D To edit "Location" 1. Touch "Location" on the "Edit Dealer" screen. 2. Enter the name using the alphanumeric keys. Up to 24 letters can be entered. 3. Touch "OK". The previous screen will be displayed. 2. Touch - 2009 Lexus ES 350 | Navigation Manual - Page 102
(telephone number) 1. Touch "Phone #" on the "Edit Dealer" screen. It is possible to enter memos for particular dates on the calendar. The system informs you of the memo entry when the system is turned on. (See page 23.) Memos can also be used for route guidance if the memo has been registered with - 2009 Lexus ES 350 | Navigation Manual - Page 103
on the "Calendar" screen displays the "Memo" screen. Memos can be edited by touching the list button. (See " - Editing a memo" on page 125.) "Add Memo": To add a memo. (See " - Adding a memo" on page 124.) "Mark f": To change the color of the mark displayed next to the date. To default the mark - 2009 Lexus ES 350 | Navigation Manual - Page 104
- Adding a memo If a memo is added, the system informs of the memo entry when the system is started on the memo date. (See page 23.) Memo". Up to 100 memos can be added. 5. Touch "Memo". 6. Enter text using the keys. Up to 24 letters can be entered. After entering the text, touch "OK" at - 2009 Lexus ES 350 | Navigation Manual - Page 105
"Period": To display the list of memos for a specified period. (See page 126.) 5. Touch the item to be edited. "Memo": To edit a memo. (See " - Adding a memo" on page 124.) "Location": To change a registered location. (See " - Adding a memo" on page 124.) "Enter ": To set the registered location as - 2009 Lexus ES 350 | Navigation Manual - Page 106
Touch "Period" on the "Memo Search" screen. 5. To delete and/or edit the memo, touch the desired memo button. "Delete All": To delete all the touch "Yes". To cancel the deletion, touch "No". 2. Enter the period using the numeral keys. The period from January 1, 2005 through December 31, 2024 can - 2009 Lexus ES 350 | Navigation Manual - Page 107
has a low battery. " Microphone You can use the microphone above when talking on the phone. The other party's voice outputs from the driver's speaker. When the received calls or received voice outputs, the audio from the audio system or voice guidance from the navigation system will be muted. 127 - 2009 Lexus ES 350 | Navigation Manual - Page 108
following situations, your voice may not reach the other party. D Driving on unpaved road. (Making a traffic noise.) D Driving at the high speed. D The does not always correspond with the one of your cellular phone. This system doesn't have a charging function. 3 Indicates the receiving area. "Rm - 2009 Lexus ES 350 | Navigation Manual - Page 109
correspond with the one of your cellular phone. INFORMATION This system supports the following service. D HFP (Hands Free Profile) Ver. 1.0 D OPP Bluetooth is a trademark owned by Bluetooth SIG, Inc. When you release your car: A lot of personal data is registered when you use the Hands−free system - 2009 Lexus ES 350 | Navigation Manual - Page 110
phone FCC ID: BABBT005A IC ID: 2024B−BT005A MADE IN JAPAN To use the hands−free system, you need to enter your phone into the system. Once you have registered it, you can make a hands−free call. This device complies with Part 15 of the FCC Rules and RSS−Gen of the IC Rules - 2009 Lexus ES 350 | Navigation Manual - Page 111
. For the operation of the phone, see the manual that comes with your cellular phone. If you want to cancel it, touch "Cancel". 5. Touch "Register" to connect your cellular phone to the system. ∗: Bluetooth is a registered trademark of Bluetooth SIG. Inc. 7. When the connection is completed, this - 2009 Lexus ES 350 | Navigation Manual - Page 112
in a condition where connection can be established. Each time you touch "Auto Connect", auto connection will be switched on or off. When the "ENGINE START STOP" switch is in ACCESSORY or IGNITION ON mode, the selected Bluetoothr phone will be automatically connected and the connection result is - 2009 Lexus ES 350 | Navigation Manual - Page 113
manually. Touch "Connect" after having enabled the Bluetoothr connection on the phone. the Bluetoothr phone If the Bluetoothr phone is disconnected with a poor reception from the Bluetoothr network when the "ENGINE START STOP" switch is in the ACCESSORY or IGNITION ON mode, the system - 2009 Lexus ES 350 | Navigation Manual - Page 114
OTHER FUNCTIONS - Call on the Bluetoothr phone After you enter the Bluetoothr phone, you can call by using hands−free system. You can call using the 7 methods described below. D By dial You can call by inputting the telephone number. This cannot be operated while driving. D By phone book You can - 2009 Lexus ES 350 | Navigation Manual - Page 115
OTHER FUNCTIONS D By dialed numbers You can call by dialed number. The system memorizes up to 5 dialed numbers. If it is more than 5, the oldest number is deleted. This cannot be operated while driving. 2. Select the desired number - 2009 Lexus ES 350 | Navigation Manual - Page 116
OTHER FUNCTIONS D By received calls You can call by received calls. When a call is received, the system memorizes up to 5 numbers. If it is more than 5, the oldest number is deleted. This cannot be operated while driving. D When you call by phone - 2009 Lexus ES 350 | Navigation Manual - Page 117
. D Unnoticed telephone number such as a public telephone is not memorized in the system. 3. Select the desired number from the list. 1. Touch "Speed Dial" to phone which you have. 2. Touch the desired number to call. You can change the page by touching "Speed Dial 2" or "Speed Dial 3". When you - 2009 Lexus ES 350 | Navigation Manual - Page 118
voice recognition" on page 156. Example: Call Charlize. You can call by giving a command. (For the operation and command of voice recognition, see "Speech command system" on page 174 and "Help screen" on page 177.) Push the talk switch. "After the beep, please say the name." You: "Charlize - 2009 Lexus ES 350 | Navigation Manual - Page 119
entries can be displayed including the first searched one. Do the following to change the entry to the next one. D Touch "Next". D Push the for recognizing the command.) You: System: Push the talk switch. "After the beep, please say the number." You: "812387." System: "When ready, please briefly - 2009 Lexus ES 350 | Navigation Manual - Page 120
pound, or star." You: "1234." System: "1234." "Push the talk switch." You: Push the talk switch. System: "Send? Say "Yes" or "No"." You: "Yes." System: "Sending." Now you can send the tone. You can call by touching when it is displayed on the screen from navigation system. (See page 30 for details - 2009 Lexus ES 350 | Navigation Manual - Page 121
Bluetooth or use the volume change from cellular phone call to Hands−free call, the Hands−free screen will be displayed and you can operate it on the screen. Transferring method and behavior are different depending on the cellular phone which you have. For the operation of the phone, see the manual - 2009 Lexus ES 350 | Navigation Manual - Page 122
marked sign (p or w) and the number following telephone number. (ex. 056133p0123w#1:) You can do this operation when you want to operate an answering machine or use a telephone service in bank for example. You can register the phone number and the code number in the phone book. 142 - 2009 Lexus ES 350 | Navigation Manual - Page 123
tone. (For registering the speed tone, see "(b) Registering the speed tone" on page 146.) Touch "Settings" to display "Settings" screen. 1. Touch "Speed Tone". You can change the settings of the phone. 2. Touch the desired switch to send a tone. 143 - 2009 Lexus ES 350 | Navigation Manual - Page 124
OTHER FUNCTIONS (a) Registering the speed dial You can register the desired telephone number from phone book, dialed numbers and received calls. Up to 17 speed dial numbers can be registered. The 6th entry is the speed dial for redialing. 4. Touch the desired telephone number. 1. Touch "Speed - 2009 Lexus ES 350 | Navigation Manual - Page 125
OTHER FUNCTIONS D Deleting the speed dial individually You can delete "01" − "17" of the speed dial individually. If you delete them all at once, all of 17 numbers are deleted. D Deleting all of the speed dial 1. Touch "Delete All" of "Speed Dial". 1. Touch "Delete" of "Speed Dial". 2. Touch " - 2009 Lexus ES 350 | Navigation Manual - Page 126
3. Input the number and touch "OK". 1. Touch "Register" of "Speed Tone". 4. Touch the desired touch−screen button you want to register in. 2. Use the software keyboard to input the name. If you select a touch−screen button you register before, this screen is displayed. 5. Touch "Yes" if you want - 2009 Lexus ES 350 | Navigation Manual - Page 127
OTHER FUNCTIONS D Editing the speed tone You can edit the speed tone. 3. Use the software keyboard to input the name. 1. Touch "Edit" of "Speed Tone". 4. Input the number and touch "OK". 2. Touch the touch−screen button you want to edit. 147 - 2009 Lexus ES 350 | Navigation Manual - Page 128
OTHER FUNCTIONS D Deleting the speed tone individually You can delete "1" to "6" of the speed tone. If you delete them all at once, all of 6 numbers are deleted. D Deleting all the speed tone 1. Touch "Delete All" of "Speed Tone". 1. Touch "Delete" of "Speed Tone". 2. Touch "Yes". 2. Touch the - 2009 Lexus ES 350 | Navigation Manual - Page 129
OTHER FUNCTIONS (c) Setting the volume D Automatic volume settings for high speed You can set the volume one step up when the speed is over 50 mph (80 km/h). (When it is under 43 mph (70 km/h), previous volume is back.) Each time you touch "Adaptive Volume Control", you can switch on or off. 1. - 2009 Lexus ES 350 | Navigation Manual - Page 130
OTHER FUNCTIONS D Initializing the settings You can initialize the settings. (d) Setting the screen Touch "Default". 1. Touch "Screen" to display the "Screen Settings" screen. Touch "Yes". 2. Do the detail settings of the screen and touch "OK". 150 - 2009 Lexus ES 350 | Navigation Manual - Page 131
FUNCTIONS D Incoming call display You can select the method of the receiving call display. D Auto answer When a call is received, the display automatically changes to the talking screen and you can start to talk on the phone (without touching any button) after the preset time. Touch "Full" or - 2009 Lexus ES 350 | Navigation Manual - Page 132
startup D Initializing the settings You can initialize the settings. When the "ENGINE START STOP" switch is in the ACCESSORY or IGNITION ON mode and the "Yes". Touch "ON" or "OFF" of "Show Bluetooth∗ connection status at startup". ∗: Bluetooth is a registered trademark of Bluetooth SIG. Inc. 152 - 2009 Lexus ES 350 | Navigation Manual - Page 133
number You can transfer the telephone numbers in your Bluetoothr phone to the system. Up to 1000 person's data (up to 2 numbers a person) can be registered in the phone book. Transfer it while the engine is running. Touch "Phone Book" to display the "Phone Book Management" screen. 1. Touch - 2009 Lexus ES 350 | Navigation Manual - Page 134
the phone book data. 4. Transfer the phone book data to the system using the Bluetoothr phone. This screen appears while transferring. To cancel it, then can be memorized in the system. 1. Touch "Register" of "Phone Book". 2. Touch the desired touch−screen button to edit the phone book. 5. When - 2009 Lexus ES 350 | Navigation Manual - Page 135
you don't input the name, the number is displayed. D Editing the phone number You can register a phone number in "TEL1" and "TEL 2" separately. Up to 2 numbers a person can be registered. 1. Touch "Name". 1. Touch "TEL1" or "TEL2". 2. Use the software keyboard to input the name. 2. Input the - 2009 Lexus ES 350 | Navigation Manual - Page 136
You can set a group for a contact (for example: "Family", "Friends", "Office"...). It will then be easier for you to find this contact when needed, by using the group display. You can select "No group" or "Group 01" to "Group 19". "No Group" is displayed if you don't set the group. D Setting - 2009 Lexus ES 350 | Navigation Manual - Page 137
to the phone book You can add data to the phone book. D Editing the data You can edit the registered data. 1. Touch "Add to". 1. Touch "Edit". 2. Select the data you want to add log data to. 2. Select the data you want to edit. 3. Confirm the added data on the screen and touch "OK". 157 - 2009 Lexus ES 350 | Navigation Manual - Page 138
you release your car, delete all your data on the system. 3. Touch the desired touch−screen button. When you edit the data, touch "OK". 1. Touch "Delete" of "Phone Book". When you also touch "Edit" on this screen, you can edit it. 2. Touch the desired touch−screen button. 3. Touch "Yes". 158 - 2009 Lexus ES 350 | Navigation Manual - Page 139
OTHER FUNCTIONS You can also delete it in the following way. 4. Touch "Yes". 1. Touch "Phone Book". 2. Select the desired data. 3. Touch "Delete". 159 - 2009 Lexus ES 350 | Navigation Manual - Page 140
OTHER FUNCTIONS D Deleting all the phone data 3. When you select "Group Data", the "Select Group" screen is displayed. 1. Touch "Delete All" of "Phone Book". 4. Select the desired group. 2. Select the deleting method. "Group Data" ...Deleting all the phone data in group. "All Contact Data" ... - 2009 Lexus ES 350 | Navigation Manual - Page 141
following way. D Registering a group name You can register 20 groups. "No Group", "Group 01" − "Group 19" are registered by default. You can change "Group 01" − "Group 19" into desired names. 1. Touch "Phone Book". 1. Touch "Register" of "Group Name". 2. Touch "Delete All". 2. Select the group - 2009 Lexus ES 350 | Navigation Manual - Page 142
OTHER FUNCTIONS D Selecting a group icon D Editing a group name 1. Touch "Icon". 1. Touch "Name". 2. Select the desired icon. 2. Use the software keyboard to input the name. 162 - 2009 Lexus ES 350 | Navigation Manual - Page 143
OTHER FUNCTIONS D Deleting a group name You can delete the group names individually or all at once. If you delete a group name, that group will return to the default setting (excluding "No Group"). D Deleting all the group name 1. Touch Name". "Delete All" of "Group 1. Touch "Delete" of " - 2009 Lexus ES 350 | Navigation Manual - Page 144
the log data You can delete the log data individually or all at once. When you release your car, delete all the data on the system. INDIVIDUALLY ALL AT ONCE 1. Touch "Delete All" on the "Outgoing Calls" or "Incoming Calls" screen. 1. Touch "Delete" on the "Log Data" screen. 2. Touch "Yes - 2009 Lexus ES 350 | Navigation Manual - Page 145
set or unlock the security, you have to input the security code. Be sure to change the default code when you use the security for the first time. D Changing the security code The security code is 4 digits and the default is "0000". Change a new code that is hard for other people to know. When you - 2009 Lexus ES 350 | Navigation Manual - Page 146
functions locked. D Display of the phone book screen and transferring, registering, editing, deleting the phone book data. D Display of speed dial screen, numbers and received numbers. D Display of phone information screen. D Changing the security code. When you set this function, the speed dial - 2009 Lexus ES 350 | Navigation Manual - Page 147
OTHER FUNCTIONS D Initializing the security code You can initialize the settings. 1. Touch "ON". 1. Touch "Default". 2. Input the security code and touch "OK". 2. Input the security code and touch "OK". 3. Touch "Yes". 167 - 2009 Lexus ES 350 | Navigation Manual - Page 148
when you choose the phone. 1. Touch "Settings" to display the "Settings" screen. Although you can register up to 6 Bluetoothr phones in the system, only one Bluetoothr phone can function at a time. 2. Touch "Select Telephone" to display the "Select Telephone" screen. 3. Touch "OK". When the - 2009 Lexus ES 350 | Navigation Manual - Page 149
the information of the Bluetoothr phone on the system. "Device Name" ...The name of Bluetoothr phone which is displayed on the screen. You can change it into a desired name. ∗ "Bluetooth Device Address" ...The address peculiar to the system. You cannot change it. Touch "Yes" or "No". 1. Select the - 2009 Lexus ES 350 | Navigation Manual - Page 150
OTHER FUNCTIONS D Changing a device name You can change a device name. If you change a device name, the name registered in your cellular phone is not changed. 2. Touch "Change". 1. Touch "Change". 3. When you complete the setting, touch . 2. Use the software keyboard to input the device name. - 2009 Lexus ES 350 | Navigation Manual - Page 151
it. "Passkey" ...The password when you register your cellular phone in the system. You can change it into the figure of 4−8 digits. ∗ "Bluetooth Device Address" ...The address peculiar to the system. You can not change it. If you have registered two Bluetoothr phones with the same Device Name or - 2009 Lexus ES 350 | Navigation Manual - Page 152
OTHER FUNCTIONS D Initializing the Bluetoothr settings You can initialize the settings. 3. Use the software keyboard to input the device name. You can input up to 20 characters. 1. Touch "Default". 4. Input a Passkey with 4 − 8 digits. When you touch A, the - 2009 Lexus ES 350 | Navigation Manual - Page 153
you delete the telephone while another Bluetoothr phone is connecting, this message is displayed. 1. Touch "Delete" of "Bluetooth∗ Telephone". Touch "Yes". 2. Select the telephone you want to delete and touch "OK". 3. Touch "Yes". ∗: Bluetooth is a registered trademark of Bluetooth SIG. Inc. 173 - 2009 Lexus ES 350 | Navigation Manual - Page 154
can make sure whether the telephone you delete is correct or not. The speech command system enables you to operate the navigation system, audio system, air conditioning system and hands−free system by giving a command. 1. Select the telephone you want to display the information about. 1. Push the - 2009 Lexus ES 350 | Navigation Manual - Page 155
list, touch "Help" to display the help screen. (See "Help screen" on page 177.) When you touch "Cancel", the previous screen returns. If the navigation system does not respond or the confirmation screen does not disappear, please push the talk switch and try again. If no command is given, a beep - 2009 Lexus ES 350 | Navigation Manual - Page 156
is already registered, "Add to " or "Replace " is displayed on the screen.) Touch or say "Cancel", and the search will be canceled. 3. If the system recognized the command, the recognition result "Home" is displayed on the top of the screen with the screen message. (Displayed message and the touch - 2009 Lexus ES 350 | Navigation Manual - Page 157
Guide" screen is displayed, touch "Command List" on the upper side of the screen. Touch "Enter" or say "Enter destination". When you touch "Show List", you can search another spot in its category. INFORMATION In the following conditions, the system may not recognize the command properly and using - 2009 Lexus ES 350 | Navigation Manual - Page 158
1. If the "Command List" screen is displayed, touch "Operating Guide" on the upper side of the screen. You can adjust the brightness, contrast, color and tone of the screen. You can also turn the display off, and change the screen to either day or night mode. D Contrast and brightness adjustment - 2009 Lexus ES 350 | Navigation Manual - Page 159
when "Screen Off" is touched. To turn the display screen back on, push any button such as "INFO", etc. The selected screen appears. D Color and tone adjustment The color and tone of the screen can be adjusted while a DVD video, DVD audio or video CD is being played. 1. Push the "DISP" button - 2009 Lexus ES 350 | Navigation Manual - Page 160
day mode and night mode Depending on the position of the headlight switch, the screen changes to the day mode or night mode. 1. Push the "INFO" button. To the headlight switch turned to on, this condition is memorized in the system even with the engine turned off. 2. Touch "Screen Setting". 180 - 2009 Lexus ES 350 | Navigation Manual - Page 161
function that enables automatic return to the navigation screen from the audio/air conditioner screen. (b) Switch color You can select the color of the touch− screen buttons. Select "ON" or "OFF" and then touch "OK". "ON": The navigation screen automatically returns from the audio/air conditioner - 2009 Lexus ES 350 | Navigation Manual - Page 162
OTHER FUNCTIONS (c) Delete personal data The following personal data can be deleted or returned to their default settings: D Maintenance conditions D Maintenance information "off" setting D Memory points D Areas to avoid D Previous points D Route trace D User selection settings D Phone book data D - 2009 Lexus ES 350 | Navigation Manual - Page 163
You can set a beep sound off. Selecting a language The language of the touch−screen buttons, pop−up messages and the voice guidance can be changed. 1. Push the "INFO" button. 1. Push the "INFO" button. 2. Touch "Beep Off". "Beep Off" is highlighted. To switch the beep sound on, touch "Beep Off - 2009 Lexus ES 350 | Navigation Manual - Page 164
OTHER FUNCTIONS If a screen other than for the navigation system is displayed, the current screen would change to the "CAUTION" screen by pushing the "MAP/VOICE", "DEST" or "MENU" button. 4. Touch "OK". The language is changed and the screen returns to the map display. 184 - 2009 Lexus ES 350 | Navigation Manual - Page 165
AUDIO/VIDEO SYSTEM SECTION AUDIO/VIDEO SYSTEM D Quick reference D Using your audio/video system Some basics ...Radio operation ...Cassette taple player operation ...CD changer operation ...DVD changer operation ...D Audio/video remote controls D Audio/video system operating hints 6 186 188 188 195 - 2009 Lexus ES 350 | Navigation Manual - Page 166
the sound balance are carried out on the touch screen. To display the audio screen, push the "AUDIO" button. " If a Mark Levinson brand audio system is installed, the "Mark Levinson" logo is shown on the panel. 1 4 "AUDIO" button "SEEK/TRACK" button Push this button to display the audio Push - 2009 Lexus ES 350 | Navigation Manual - Page 167
AUDIO/VIDEO SYSTEM 7 8 9 10 11 12 "LOAD" button Push this button to insert the disc. For details, see pages 211 , see pages 189, 195 and 201. "PWR·VOL" knob Push this knob to turn the audio system on and off, and turn it to adjust the volume. For details, see page 189. 13 14 15 16 187 - 2009 Lexus ES 350 | Navigation Manual - Page 168
AUDIO/VIDEO SYSTEM Using your audio/video system - - Some basics This section describes some of the basic features on Lexus audio/video systems. Some information may not pertain to your system. Your audio/video system works when the "ENGINE START STOP" switch is in the ACCESSORY or IGNITION ON mode - 2009 Lexus ES 350 | Navigation Manual - Page 169
"AUDIO": Push this button to display touch−screen buttons for audio system (audio control mode). "PWR·VOL": Push this knob to turn the audio system on and off. Turn this knob to adjust the volume. The system turns on in the last mode used. You can select the function that enables automatic return to - 2009 Lexus ES 350 | Navigation Manual - Page 170
AUDIO/VIDEO SYSTEM The buttons for radio, cassette tape player, CD changer and DVD changer operation are displayed on the function button display screen when the audio control mode is selected. Touch them lightly and directly on the screen. The selected button is highlighted. 190 - 2009 Lexus ES 350 | Navigation Manual - Page 171
system does not respond to a touch of a touch−screen button, move your finger away from the screen and then touch it again. D You cannot operate touch−screen buttons. dimmed D Wipe off fingerprints on the surface of the display using stereo recording or broadcast, changing the right/left balance - 2009 Lexus ES 350 | Navigation Manual - Page 172
AUDIO/VIDEO SYSTEM D DSP control You can change the listening position or turn on/off the surround function and the automatic sound levelizer. 1. Push the "AUDIO" button. 3. Touch the desired button. "TREB" "+" or "-": - 2009 Lexus ES 350 | Navigation Manual - Page 173
road noise, wind noise or other noises while driving, touch "ON". The system . D Selecting screen size The video screen can be changed from noral mode to side mode. 1. Push the "AUDIO" button. 2. Touch "WIDE". "NORMAL": When a 3 4 screen is displayed, the remaining parts - 2009 Lexus ES 350 | Navigation Manual - Page 174
AUDIO/VIDEO SYSTEM D DISC Check" will appear on the screen. NOTICE Never try to disassemble or oil any part of the cassette player. Do not insert anything other than cassette tapes into D Never try to disassemble or oil any part of the changer. Do not insert anything other than discs into the slot. - 2009 Lexus ES 350 | Navigation Manual - Page 175
to AUX mode. For details, refer to the "Owner's Manual". D Listening to the radio Push "AM·SAT" or "FM" to choose either an AM or FM station. "AM", "FM1" or "FM2" appears on the screen. If your vehicle is equipped with a satellite radio broadcast system, when you push the "AM·SAT" button, "AM - 2009 Lexus ES 350 | Navigation Manual - Page 176
AUDIO/VIDEO SYSTEM D Presetting a station Turn the knob clockwise to step up the station band or counterclockwise to step down. Your radio automatically changes to stereo reception when a stereo broadcast is received. "ST" appears on the screen. If the signal becomes weak, the radio reduces the - 2009 Lexus ES 350 | Navigation Manual - Page 177
- select only stations of a particular program type, - display messages from radio stations, - search for a stronger signal station. RDS features are available for use only on FM stations which broadcast RDS information. If the system receives no RDS stations, "NO PTY" appears on the display. 197 - 2009 Lexus ES 350 | Navigation Manual - Page 178
AUDIO/VIDEO SYSTEM "TYPE A "" Each time you touch "TYPE A" or "TYPE "", the program type changes as follows: D ROCK D MISC (Miscellaneous) D INFORM (Information) D EASY LIS (Easy listening) D CLS/JAZZ (Classical music and Jazz) D R & B (Rhythm and Blues) D RELIGION D ALARM (Emergency message) " - 2009 Lexus ES 350 | Navigation Manual - Page 179
Traffic announcement "MSG" (MESSAGE) If the system receives a radio text from an RDS station, "MSG" the rest of the message. When the system can show the station name, "RDS" appears on the display. Each time you touch "MSG", indication on the display changes from the band to the station name, - 2009 Lexus ES 350 | Navigation Manual - Page 180
as proof of compatibility with the services offered by the XMr Satellite Radio. D Displaying the radio ID Each XMr tuner is identified with a unique radio ID. You will need the radio ID when activating XMr service or when reporting a problem. If you select the "CH 000" using the "TUNE" knob, the ID - 2009 Lexus ES 350 | Navigation Manual - Page 181
AUDIO/VIDEO SYSTEM D Listening to satellite radio Push the "AM·SAT" button to choose either an AM station or a SAT (sattellite) channel. Besides "AM", "SAT1", "SAT2" or "SAT3" - 2009 Lexus ES 350 | Navigation Manual - Page 182
AUDIO/VIDEO SYSTEM D Channel category D Presetting a channel 1. Tune in the desired channel. Touch either appears on the touch−screen button. Each SAT mode can store up to 6 stations. To change the preset channel to a different one, follow the same procedure. The preset channel memory is cancelled - 2009 Lexus ES 350 | Navigation Manual - Page 183
AUDIO/VIDEO SYSTEM D Selecting a channel Tune in the desired channel using one of the following methods. Preset tuning: Touch the channel selector touch−screen button (1 - 6) for the channel you want. The touch−screen button (1 - 6) is highlighted - 2009 Lexus ES 350 | Navigation Manual - Page 184
AUDIO/VIDEO SYSTEM D Displaying the title and name When you touch "TEXT", the song/program title and the artist name/feature are displayed. Up to 10 alphanumeric characters can be displayed. (Some information will not be fully displayed.) When you touch "TEXT" again, the display returns. 204 - 2009 Lexus ES 350 | Navigation Manual - Page 185
. Wait for about 2 seconds until the radio returns to the previous channel or "CH001". If it does not change automatically, select another channel. If you want to listen to the premium channel, contact the XMr Satellite Radio. The XMr signal is too weak at the current location. Wait until your - 2009 Lexus ES 350 | Navigation Manual - Page 186
SYSTEM NOTICE This equipment has been tested and found to comply with the limits for a class B digital device, pursuant to Part 15 of the FCC Rules. These limits are designed to provide reasonable protection against harmful interference in a residential installation. This equipment generates, uses - 2009 Lexus ES 350 | Navigation Manual - Page 187
AUDIO/VIDEO SYSTEM - Cassette tape player operation D Setting a cassette tape D Playing a cassette tape When you insert a cassette tape, the exposed tape should face to the right. The player - 2009 Lexus ES 350 | Navigation Manual - Page 188
AUDIO/VIDEO SYSTEM D Manual program selection Dolbyr Noise Reduction* feature: If you are listening to a tape that was recorded with the cassette player will play the other side of the tape using the auto−reverse feature. Auto−reverse feature: After the cassette player reaches the end of a tape, - 2009 Lexus ES 350 | Navigation Manual - Page 189
must be at least 3 seconds of blank space between programs for the repeat feature to work correctly. "SKIP": The skip feature allows you to fast forward past long stretches of blank tape. This is especially useful at the end of cassettes. Touch "SKIP" on the screen. The player will automatically - 2009 Lexus ES 350 | Navigation Manual - Page 190
AUDIO/VIDEO SYSTEM - CD changer operation There must be at least 3 seconds of blank space between programs for this feature to work correctly. "RPT", "SKIP" or "Automatic program selection" features: These features may not work well with some spoken word, live or classical recordings. The CD - 2009 Lexus ES 350 | Navigation Manual - Page 191
discs The "ENGINE START STOP" switch must be in the ACCESSORY or IGNITION ON mode. Your CD changer can store up to 6 discs. D Setting a single disc: 1. Push the "LOAD" button briefly. The amber indicators at both ends of the slot start blinking. After the amber indicators change to green and - 2009 Lexus ES 350 | Navigation Manual - Page 192
AUDIO/VIDEO SYSTEM D Setting all the discs: 3. Insert the next disc after the amber indicators change to green and stay on . The amber indicators at both ends of the slot start blinking. After the amber indicators change to green and stay on, the CD changer door will open. Do not insert one disc - 2009 Lexus ES 350 | Navigation Manual - Page 193
AUDIO/VIDEO SYSTEM D Ejecting a single alone: D Ejecting all the discs: 1. Push the " " or " " button of "CH/ DISC" or touch the disc number button on the screen to highlight - 2009 Lexus ES 350 | Navigation Manual - Page 194
AUDIO/VIDEO SYSTEM (b) Playing a disc The numbers of the trays where the disc is not set are dimmed. Push the "DISC·AUX" button if the disc are already - 2009 Lexus ES 350 | Navigation Manual - Page 195
AUDIO/VIDEO SYSTEM (c) Selecting a desired disc (d) Operating an audio CD D Playing an audio CD Push the "AUDIO" button to display this screen. You can operate the touch−screen - 2009 Lexus ES 350 | Navigation Manual - Page 196
AUDIO/VIDEO SYSTEM D Selecting a desired track Touch the desired track number. The changer will start playing the selected track from the beginning. "SEEK/TRACK" button: Use for a direct access to a desired track. Push the " " or " " button of "SEEK/ TRACK" and repeat it until the desired track - 2009 Lexus ES 350 | Navigation Manual - Page 197
AUDIO/VIDEO SYSTEM D Searching for a desired track or a disc D Other functions Searching for SCAN" once again. After all the audio discs are scanned in one pass, normal play resumes. "RPT": Use it for automatic repeat of the track or disc you are currently listening to. Repeating a track - While - 2009 Lexus ES 350 | Navigation Manual - Page 198
AUDIO/VIDEO SYSTEM "RAND": Use it for automatic and random selection. Playing the tracks on one disc in random order - While the disc is playing, touch "RAND" briefly. "RAND" appears on the screen. The system selects a track on the disc being listened to in random order. To cancel it, touch "RAND" - 2009 Lexus ES 350 | Navigation Manual - Page 199
AUDIO/VIDEO SYSTEM D Selecting a desired folder "FOLDERY": Touch "FOLDERY" to go to the next folder. "FOLDERB": Touch "FOLDERB" briefly to go to the previous folder. To jump up - 2009 Lexus ES 350 | Navigation Manual - Page 200
AUDIO/VIDEO SYSTEM D Selecting a desired file "SEEK/TRACK" button: Use for direct access to a desired file. Push the " the disc. When you release the button, the changer will resume playing. "TUNE·FILE" knob: Use for direct access to a desired file in the disc. Turn the "TUNE·FILE" knob to step - 2009 Lexus ES 350 | Navigation Manual - Page 201
AUDIO/VIDEO SYSTEM "FILE": The desired file can be selected in a list. This function is available only when the vehicle is not moving. Touch "FILE". The file list - 2009 Lexus ES 350 | Navigation Manual - Page 202
AUDIO/VIDEO SYSTEM D Searching for a desired file D Searching for a desired folder While the disc is playing, touch "SCAN" on the screen briefly. "SCAN" appears on the screen. The - 2009 Lexus ES 350 | Navigation Manual - Page 203
SYSTEM D Other functions "RPT": Use touch "RPT" once again. "RAND": Use it for automatic and random selection of the RAND" briefly. "RAND" appears on the screen. The system selects a file in the folder you are currently listening on the screen. The system selects a file in all the folders. To cancel - 2009 Lexus ES 350 | Navigation Manual - Page 204
on the display: The following causes are possible. D There is a trouble inside the system. Eject the disc. D The inside of the changer unit may be discs and video CDs only when the vehicle is completely stopped with the "ENGINE START STOP" switch is in the ACCESSORY or IGNITION ON mode and the - 2009 Lexus ES 350 | Navigation Manual - Page 205
discs The "ENGINE START STOP" switch must be in the ACCESSORY or IGNITION ON mode. Your DVD changer can store up to 6 discs. D Setting a single disc: 1. Push the "LOAD" button briefly. The amber indicators at both ends of the slot start blinking. After the amber indicators change to green and - 2009 Lexus ES 350 | Navigation Manual - Page 206
AUDIO/VIDEO SYSTEM D Setting all the discs: 3. Insert the next disc after the amber indicators change to green and stay on . The amber indicators at both ends of the slot start blinking. After the amber indicators change to green and stay on, the DVD changer door will open. Do not insert one disc - 2009 Lexus ES 350 | Navigation Manual - Page 207
AUDIO/VIDEO SYSTEM D Ejecting a single alone: D Ejecting all the discs: 1. Push the " " or " " button of "CH/ DISC" or touch the disc number button on the screen to highlight - 2009 Lexus ES 350 | Navigation Manual - Page 208
AUDIO/VIDEO SYSTEM (b) Playing a disc (c) Selecting a desired disc Push the "DISC·AUX" button if the disc are already loaded in the DVD changer. The "DVD CHANGER" screen will - 2009 Lexus ES 350 | Navigation Manual - Page 209
SYSTEM (d) Operating a DVD disc NOTE: The playback condition of some DVD discs may be determined by a DVD software producer. This DVD changer plays a disc as the software producer intended. So some functions may not work properly. Be sure to read the instruction manual "ENGINE START you change to - 2009 Lexus ES 350 | Navigation Manual - Page 210
choose the number of the disc you want to play. The selected disc is automatically played. When you touch "WIDE", the screen mode can be changed. It you touch "PICTURE" when the vehicle is completely stopped and the parking brake is applied, the video screen returns. " DVD video 230 - 2009 Lexus ES 350 | Navigation Manual - Page 211
SYSTEM D Description of DVD controls TOP PAGE OF DVD VIDEO CONTROLS "Menu" and "Top Menu": If you touch either button, the menu screen for DVD video appears. (For the operation, see the manual you touch a part of the screen, changing screen appears. (See page 236.) "Subtitle": The subtitle changing - 2009 Lexus ES 350 | Navigation Manual - Page 212
": Touch this button to forward the still pictures. (See page 235.) "Subtitle": The subtitle changing screen appears. (See page 235.) "Angle": The angle selection screen appears. (See page 237.) D Selecting a menu item Enter the menu item using Y, ", B and A buttons and touch "Enter". The changer - 2009 Lexus ES 350 | Navigation Manual - Page 213
AUDIO/VIDEO SYSTEM D Searching by title D Searching by track DVD video only - Enter the title number and touch "Enter". The player starts playing video for that title number. - 2009 Lexus ES 350 | Navigation Manual - Page 214
AUDIO/VIDEO SYSTEM D Searching by group D Selecting the bonus group DVD audio only - Enter the group number and touch "Enter". The selected group number will appear on the - 2009 Lexus ES 350 | Navigation Manual - Page 215
AUDIO/VIDEO SYSTEM D Changing the still picture D Changing the subtitle language DVD audio only - Touch "Prev. Still" or "Next Still" on the screen to forward or reverse the still pictures. Each time you touch "Subtitle", the language is selected from the ones stored in the discs and changed. To - 2009 Lexus ES 350 | Navigation Manual - Page 216
AUDIO/VIDEO SYSTEM D Changing the audio language D Changing the audio format DVD video only - Each time you touch "AUDIO", the language is selected from the ones stored in the discs and changed. When you touch screen returns. , the previous DVD audio only - Each time you touch "AUDIO", another - 2009 Lexus ES 350 | Navigation Manual - Page 217
appears on the screen. Each time you touch "Angle", the angle changes. When you touch screen returns. , the previous The initial setting can be changed. After you change the initial setting, touch "Enter". The previous picture will be displayed. When "Default" is touched, all menus are initialized - 2009 Lexus ES 350 | Navigation Manual - Page 218
AUDIO/VIDEO SYSTEM SUBTITLE LANGUAGE You can change the subtitle language. 1. Touch "Subtitle Language". 2. code, see page 239. To return to the "Setup Menu" screen, touch . DVD LANGUAGE You can change the language on the DVD video menu. 1. Touch "DVD Language". 2. Touch the language you want to - 2009 Lexus ES 350 | Navigation Manual - Page 219
AUDIO/VIDEO SYSTEM D Enter subtitle language code 0101 0102 0106 0113 0118 0119 0125 0126 0201 0205 0207 0208 0209 0214 0215 0218 0301 0315 0319 0325 0401 - 2009 Lexus ES 350 | Navigation Manual - Page 220
AUDIO/VIDEO SYSTEM 0704 0712 0714 0721 0801 0809 0818 0821 0825 0901 0905 0911 0914 0919 0923 1009 1023 1101 1111 1112 1113 1114 1119 1121 1125 - 2009 Lexus ES 350 | Navigation Manual - Page 221
AUDIO/VIDEO SYSTEM 1914 1915 1917 1918 1919 1920 1921 1923 2001 2005 2007 2008 2009 2011 2012 2014 2015 2018 to display this screen. When you touch "WIDE", the screen mode can be changed. It you touch "PICTURE" when the vehicle is completely stopped and the parking brake is applied, the video screen - 2009 Lexus ES 350 | Navigation Manual - Page 222
AUDIO/VIDEO SYSTEM D Displaying changing button. The mode changes from Main/Sub to Main, to Sub and back to Main/Sub by touching this button. BUTTONS ON SECOND PAGE : Use this and hold it to play slowly. If you touch the part where touch−screen buttons are not located while you are watching video - 2009 Lexus ES 350 | Navigation Manual - Page 223
indicates that the DVD region code is not set properly. If "DVD Error" appears on the display: The following causes are possible. D There is a trouble inside the system. Eject the disc. D The inside of the changer unit may be too hot due to the very high ambient temperature. Eject the disc and - 2009 Lexus ES 350 | Navigation Manual - Page 224
AUDIO/VIDEO SYSTEM (g) DVD player and DVD video disc information D DVD video discs This DVD player conforms to NTSC color TV formats. Region codes: Some DVD video discs have a region code indicating a country where you can use the DVD video disc on this DVD player. If the DVD video disc is not - 2009 Lexus ES 350 | Navigation Manual - Page 225
is compressed by 1/40 on average and stored. Variable rate encoded technology in which the volume of data assigned to the picture is changed depending on the picture format has also been adopted. Audio data is stored using PCM and Dolby digital, which enables higher quality of sound. Furthermore - 2009 Lexus ES 350 | Navigation Manual - Page 226
of the switch. The track number will be increased or reduced. Some parts of the audio/video system can be adjusted with the switches on the steering wheel. Details of the specific switches, controls, and features are described below. 1 Volume control switch 2 " " " " switches 3 "MODE" switch 246 - 2009 Lexus ES 350 | Navigation Manual - Page 227
cassette will play the other side of the tape using the auto−reverse feature. CD changer or DVD changer Use this button to skip up or down to "MODE" switch, the system changes the audio mode. To turn the audio/video system on, push the "MODE" switch. To turn the audio/video system off, push and hold - 2009 Lexus ES 350 | Navigation Manual - Page 228
changer or DVD changer slot. D The use of a cellular phone inside or near the vehicle may cause a noise from the speakers of the audio/video system which you are listening to. However, this does not indicate a malfunction. Radio reception Usually, the problem with radio reception does not mean there - 2009 Lexus ES 350 | Navigation Manual - Page 229
SYSTEM CARING FOR YOUR CASSETTE TAPE PLAYER AND TAPES For high performance from your cassette tape player and tapes: Clean the tape head and other parts regularly. D A dirty tape head or tape path can decrease sound quality and tangle your cassette tapes. The easiest way to clean them is by using - 2009 Lexus ES 350 | Navigation Manual - Page 230
the audio player. The MP3 player is compatible with VBR (Variable Bit Rate). When playing back files recorded as VBR (Variable Bit Rate) files, the play time will not be correctly displayed if fast−forward or reverse operations are used. It is not possible to check folders that do not include MP3 - 2009 Lexus ES 350 | Navigation Manual - Page 231
disc. Recordings on CD−R/CD−RW cannot be played using the DDCD (Double Density CD) system. D D CARING FOR YOUR CD CHANGER, DVD CHANGER AND DISCS working. On hot days, use air conditioning to cool the vehicle interior before you listen to a disc. D Bumpy roads or other vibrations may make your - 2009 Lexus ES 350 | Navigation Manual - Page 232
AUDIO/VIDEO SYSTEM CD changer DVD changer Audio CDs Audio CDs D Use only compact discs marked as shown above. The following products may not be playable on your CD changer. SACDs dts−CDs Copy−protected CDs DVD video discs DVD audio discs Video CDs D Use only discs marked as shown above. The - 2009 Lexus ES 350 | Navigation Manual - Page 233
or labeled discs such as those shown in the illustrations. The use of such discs may damage the player or changer, or it may be impossible to eject the disc. D This system is not designed for use of Dual Disc. Do not use Dual Disc because it may cause damage to the player or - 2009 Lexus ES 350 | Navigation Manual - Page 234
AUDIO/VIDEO SYSTEM " Correct " Wrong D Handle discs carefully, especially when you see a pin hole, hold the disc up to the light.) D Remove discs from the changer when you are not using them. Store them in their plastic cases away from moisture, heat, and direct sunlight. To clean a disc: Wipe - 2009 Lexus ES 350 | Navigation Manual - Page 235
VIDEO SYSTEM TERMS comments and other data. The contents can be freely edited using software with ID3 tag editing functions. Although the tags are restricted to the number Standard Organization). MP3 compresses audio data to about 1/10 the size of that on conventional discs. WMA- WMA (Windows Media - 2009 Lexus ES 350 | Navigation Manual - Page 236
AUDIO/VIDEO SYSTEM 256 - 2009 Lexus ES 350 | Navigation Manual - Page 237
AIR CONDITIONING SECTION AIR CONDITIONING D Automatic air conditioning controls 7 258 For information about the "Rear window defogger", please refer to the "Owner's Manual". 257 - 2009 Lexus ES 350 | Navigation Manual - Page 238
2 3 4 5 6 Driver side temperature display ...262 Outside temperature display ...268 Passenger side temperature display ...262 "DUAL" (Temperature setting mode change touch−screen button) ...263 Air flow control touch−screen buttons ...264 Fan speed control touch−screen buttons ...265 7 8 9 10 11 - 2009 Lexus ES 350 | Navigation Manual - Page 239
AIR CONDITIONING 12 13 14 "AUTO" button ...261 "TEMP" buttons (Driver side temperature control button) (At the independent mode that display shows "DUAL"; mainly or driver and secondarily for front passenger) (At the linked mode that display does not show "DUAL"; for driver) ...262 "CLIMATE" - 2009 Lexus ES 350 | Navigation Manual - Page 240
AIR CONDITIONING " Air flow selection 260 - 2009 Lexus ES 350 | Navigation Manual - Page 241
the air conditioning according to the temperature. The "ENGINE START STOP" switch must be in the IGNITION ON the air conditioning on longer than necessary when the engine is not running. 1. Push the "AUTO" indicator and display. When one of the manual control buttons is depressed while operating in - 2009 Lexus ES 350 | Navigation Manual - Page 242
can be selected manually by touching the air flow control button. 2. Use the "TEMP" or "PASSENGER TEMP" button to set the desired vehicle interior temperature. The "TEMP" or "PASSENGER TEMP" selector button is used to set the desired interior temperature. The interior temperature will be controlled - 2009 Lexus ES 350 | Navigation Manual - Page 243
: This air conditioning system has two independent temperature selectors: left and right (for the use of driver and front passenger respectively). "DUAL" - This button is used to set the temperatures independently for the driver's seat and front passenger seat. Touching the button changes from the - 2009 Lexus ES 350 | Navigation Manual - Page 244
is desired - Driver side setting air flow Passenger side setting air flow Mixed air flow The outlets from which air is delivered can be selected manually by touching the touch−screen button. The function of each mode is as follows: 1 Panel - Air flows mainly from the instrument panel vents and - 2009 Lexus ES 350 | Navigation Manual - Page 245
- If manual switching of interior windshield fog, use the high speed setting. The selected mode is highlighted. Each time you push the air intake control button, the mode changes gas (i.e., when the vehicle running just in front of your vehicle accelerates rapidly), the system changes automatically - 2009 Lexus ES 350 | Navigation Manual - Page 246
AIR CONDITIONING Turning off the air conditioning manually will cancel the EXHAUST GAS AUTOMATIC mode. If you select the "AUTO" mode during fan operating, the air conditioning turns on and the EXHAUST GAS AUTOMATIC mode will operate. For normal use, it is best to keep the air intake control button - 2009 Lexus ES 350 | Navigation Manual - Page 247
GAS AUTOMATIC mode resumes. If the system is used for ventilation, heating in dry weather or removing frost or exterior fog on the windshield, turn the air conditioning off once it is no longer required. This will improve fuel economy checked by your Lexus dealer. If the engine coolant temperature - 2009 Lexus ES 350 | Navigation Manual - Page 248
button once again returns the air flow mode to the last one used. This button automatically changes the air intake mode to select the OUTSIDE AIR mode. This shows "− −" or "E", take your vehicle to your Lexus dealer. CAUTION Do not use the windshield air flow button during cooled air operation in - 2009 Lexus ES 350 | Navigation Manual - Page 249
Lexus after it has been parked in the hot sun, drive with the windows open for a few minutes. After the excess heat has blown away, close the windows. This vents the hot air, allowing the air conditioning to cool the interior vehicle on a dusty road, or driving in - OFF For manual operation - Fan - 2009 Lexus ES 350 | Navigation Manual - Page 250
this button once again returns the air flow mode to the last one used. This button allows the air intake to select OUTSIDE AIR mode automatically. Towards low temperature Air intake - OUTSIDE AIR Air conditioning - OFF For manual operation - Fan speed - To the desired fan speed Temperature - Towards - 2009 Lexus ES 350 | Navigation Manual - Page 251
intake - OUTSIDE AIR Air flow - WINDSHIELD For manual operation - Fan speed - To the desired returns the air flow mode to the last one used. This button allows the air intake to select OUTSIDE button is on. D To heat the vehicle interior while defrosting the windshield, choose floor/ windshield air - 2009 Lexus ES 350 | Navigation Manual - Page 252
vents may not be warmed up enough for a while until that the engine coolant temperature becomes high enough. If air flow from the center vents, side vents and rear vents is not satisfactory, air flow direction can be changed manually by adjusting the vents fin direction or the vents may be closed - 2009 Lexus ES 350 | Navigation Manual - Page 253
and blow for approximately 2 minutes at 72 psi (500 kPa, 5.0 kgf/cm2 or bar). If it is not available, have the filter cleaned by your Lexus dealer. 273 - 2009 Lexus ES 350 | Navigation Manual - Page 254
to the "Warranty and Services Guide/Owner's Manual Supplement/ Scheduled Maintenance".) If air flow from the vents decreases dramatically The filter may be clogged. Check the filter and replace if necessary. NOTICE D To prevent damage to the system D When using the air conditioning system, make - 2009 Lexus ES 350 | Navigation Manual - Page 255
REAR VIEW MONITOR SYSTEM SECTION REAR VIEW MONITOR SYSTEM D Rear view monitor system 8 276 275 - 2009 Lexus ES 350 | Navigation Manual - Page 256
selector lever in the "R" position when the "ENGINE START STOP" switch is in the IGNITION ON mode. If you move the selector lever out of the "R" position, the screen returns to the previous screen. Operating another function of the navigation system will display another screen. The rear view monitor - 2009 Lexus ES 350 | Navigation Manual - Page 257
SYSTEM it off as soon as possible. D Use your own eyes to confirm the vehicle's surroundings use the system in the following cases: D On icy or slick road surfaces, or in snow. D When using tire chains or emergency tires. D On roads Lexus dealer. If you replace the tires, the area displayed on the - 2009 Lexus ES 350 | Navigation Manual - Page 258
camera The area displayed on the screen may vary according to vehicle orientation or road conditions. The rear view monitor system camera is located on the trunk as shown in the illustration. The camera uses a special lens. The distance of the image that appears on the screen differs from the - 2009 Lexus ES 350 | Navigation Manual - Page 259
REAR VIEW MONITOR SYSTEM If a bright light (for example, sunlight reflected off the vehicle body) is picked up by the camera, the smear effect∗ peculiar to the camera may - 2009 Lexus ES 350 | Navigation Manual - Page 260
REAR VIEW MONITOR SYSTEM 280 - 2009 Lexus ES 350 | Navigation Manual - Page 261
INTUITIVE PARKING ASSIST SECTION INTUITIVE PARKING ASSIST D Intuitive parking assist 9 282 281 - 2009 Lexus ES 350 | Navigation Manual - Page 262
parking assist is a warning system used when parking the vehicle at low speed (e.g. into a garage). It uses an ultrasonic sensor, which checks (See " - Back sensors" on page 286.) To use the Intuitive parking assist, with the "ENGINE START STOP" switch in IGNITION ON mode, push the Intuitive - 2009 Lexus ES 350 | Navigation Manual - Page 263
or injury, observe the following instructions, and then drive slowly using the brakes while visually confirming screen display) 2 Touch screen (vehicles with rear view monitor system) (See " - Rear view monitor display" on page changed. See " - Setting the Intuitive parking assist" on page 293. 283 - 2009 Lexus ES 350 | Navigation Manual - Page 264
than 0.8 ft. (25 cm). Beeps: As distance to the obstacle gets closer, the interval of the intermittent sound gets shorter, and then finally changes to a continuous sound when the distance between the vehicle and the obstacle is less than about 0.8 ft. (25 cm). " Multi−information display CAUTION - 2009 Lexus ES 350 | Navigation Manual - Page 265
than 0.8 ft. (25 cm). Beeps: As distance to the obstacle gets closer, the interval of the intermittent sound gets shorter, and then finally changes to a continuous sound when the distance between the vehicle and the obstacle is less than about 0.8 ft. (25 cm). " Multi−information display CAUTION - 2009 Lexus ES 350 | Navigation Manual - Page 266
than 1.1 ft. (35 cm). Beeps: As distance to the obstacle gets closer, the interval of the intermittent sound gets shorter, and then finally changes to a continuous sound when the distance between the vehicle and the obstacle is less than about 1.1 ft. (35 cm). " Multi−information display CAUTION - 2009 Lexus ES 350 | Navigation Manual - Page 267
to hear beeps due to the volume of audio or air flow noise of the air conditioning. To avoid an accident or injury, drive slowly using the brakes while visually confirming a safe distance around your vehicle. 287 - 2009 Lexus ES 350 | Navigation Manual - Page 268
When the bumper is damaged. D When the part near the sensors is subjected to a strong , gravelled roads or grass. D Devices issuing ultrasonic waves are operated around your vehicle, such as a horn from another vehicle, motorcycle engine, air change depending on the shape of the object etc.. 288 - 2009 Lexus ES 350 | Navigation Manual - Page 269
your vehicle. D When you are driving towards a tall curb stone or curb stone having right angle. D The detection range for with a sharp edge D Tall objects with the upper part projected D Shorter objects If an error is detected when of the following operations: D Changing to another screen D Turning - 2009 Lexus ES 350 | Navigation Manual - Page 270
does not go off even after the foreign matter is removed, the Intuitive parking assist may be malfunctioning. Have it checked by your Lexus dealer. " 1 Multi−information display 2 Touch screen If the sensor cable is broken and the Intuitive parking assist cannot detect the object properly, the - 2009 Lexus ES 350 | Navigation Manual - Page 271
INTUITIVE PARKING ASSIST - Rear view monitor display (Vehicles with rear view monitor system) As the Intuitive parking assist might be malfunctioning in the following cases, have it checked by your Lexus dealer. D The indicator in the instrument cluster does not come on and a beep does not sound - 2009 Lexus ES 350 | Navigation Manual - Page 272
indicator will illuminate in red. Beeps: As distance to the obstacle gets closer, the interval of the intermittent sound gets shorter, and then finally changes to a continuous sound when the distance between the vehicle and the obstacle is less than about 0.8 ft. (25 cm). " 1 About 1.1 ft. (37.5 cm - 2009 Lexus ES 350 | Navigation Manual - Page 273
indicator will illuminate in red. Beeps: As distance to the obstacle gets closer, the interval of the intermittent sound gets shorter, and then finally changes to a continuous sound when the distance between the vehicle and the obstacle is less than about 1.1 ft. (35 cm). 1. Push the "INFO" button - 2009 Lexus ES 350 | Navigation Manual - Page 274
INTUITIVE PARKING ASSIST (a) Changing the volume of the beeps 2. Touch "LEXUS Park Assist". The volume has 5 levels, increasing with higher value. Select your desired volume and touch screen. to return to the previous 3. Touch your desired item. 294 - 2009 Lexus ES 350 | Navigation Manual - Page 275
off setting Vehicles with rear view monitor system - Although "Display OFF" is turned on, if the obstacle is detected during the rear view monitoring, the warning appears on the right top of the screen. For vehicles sold in U.S.A. This device complies with Part 15 of the FCC Rules. Operation is - 2009 Lexus ES 350 | Navigation Manual - Page 276
INTUITIVE PARKING ASSIST 296 - 2009 Lexus ES 350 | Navigation Manual - Page 277
APPENDIX SECTION APPENDIX D Limitations of the navigation system D Map database information and updates 10 298 300 297 - 2009 Lexus ES 350 | Navigation Manual - Page 278
APPENDIX Limitations of the navigation system This navigation system calculates the current vehicle position using satellite signals, various vehicle signals, map data, etc. However, the accurate position may not be shown depending on the satellite condition, road configuration, vehicle condition - 2009 Lexus ES 350 | Navigation Manual - Page 279
a tire or tires. D When using tires that are smaller or larger current position manually. For changed. D An unnecessary U−turn may be shown or announced. D A location may have multiple names and the system road and map data stored in your navigation system may not be complete or may not - 2009 Lexus ES 350 | Navigation Manual - Page 280
APPENDIX Map database information and updates After replacing a tire, implement the operation described in the "TIRE CHANGE CALIBRATION". (See page 116.) This navigation system uses tire turning data and is designed to work with factory− specified tires for your vehicle. Installing tires that are - 2009 Lexus ES 350 | Navigation Manual - Page 281
The following trademarks and registrations are owned by the USPS: United States Postal Service, USPS, and ZIP+4. TERMS AND CONDITIONS Personal Use Only. You agree to use this Data together with the navigation system for the solely personal, non− commercial purposes for which you were licensed, and - 2009 Lexus ES 350 | Navigation Manual - Page 282
. The Data may contain inaccurate or incomplete information due to the passage of time, changing circumstances, sources used and the nature of collecting comprehensive geographic data, any of which may lead to incorrect results. No Warranty. This Data is provided to you "as is," and you agree to - 2009 Lexus ES 350 | Navigation Manual - Page 283
from anywhere any part of the Data provided (ii) the United Nations Convention for Contracts for the International Sale of Goods, which is explicitly excluded. You agree to submit government agency, or any federal official refuses to use the legend provided herein, the Contracting Officer, federal - 2009 Lexus ES 350 | Navigation Manual - Page 284
PRODUCTS (COLLECTIVELY, THE "DATABASE"), USED IN THE NAVIGATION SYSTEM. BY USING THE NAVIGATION SYSTEM AND THE DATABASE, YOU ACCEPT AND part of the DATABASE without the prior written consent of TANA and its licensors. LIMITATIONS ON USE The DATABASE is restricted for use in the specific system - 2009 Lexus ES 350 | Navigation Manual - Page 285
of the sources used. The DATABASE does not include or reflect information relating to, among other things, neighborhood safety; law enforcement; emergency assistance; construction work; road or lane closures; vehicle or speed restrictions; road slope or grade; bridge height, weight or other limits - 2009 Lexus ES 350 | Navigation Manual - Page 286
are an agency, department, or other entity of the United States Government, or funded in whole or in part by the United States Government, then use, duplication, reproduction, release, modification, disclosure or transfer of this commercial product and accompanying documentation, is restricted in - 2009 Lexus ES 350 | Navigation Manual - Page 287
APPENDIX END USER NOTICE PLEASE READ THIS NOTICE CAREFULLY BEFORE USING THIS NAVIGATION SYSTEM The Point Of Interest Data ("POI" Data) in the navigation system is in part provided by infoUSA Inc. ("infoUSA"). By using the POI Data, you accept and agree to all terms and conditions set forth below. - 2009 Lexus ES 350 | Navigation Manual - Page 288
change. In some places, construction on roads may be in progress. For that reason, information on some areas in this system might be different from the actual location. The map database is normally updated once a year. Contact your Lexus dealer for information about the availability and pricing - 2009 Lexus ES 350 | Navigation Manual - Page 289
using your Lexus dealer. To change the Map DVD−ROM yourself, follow these instructions carefully. 1. Set the "ENGINE START STOP" switch in the ACCESSORY mode. 4. Touch "Map DVD". 2. Push the cover, and slide it upward to remove it. 5. Touch " DVD" to eject the map DVD−ROM. 6. Insert the new - 2009 Lexus ES 350 | Navigation Manual - Page 290
version of the database on this screen. To display the disc coverage area, touch "Covered Area". Confirm the covered area on the screen. Contact your Lexus dealer to find out if there is a more recent update available. 310 - 2009 Lexus ES 350 | Navigation Manual - Page 291
you for your purchase of the Navigation System. Please read this manual carefully to ensure proper use. Keep this manual in your vehicle at all times. The Navigation System is one of the most technologically advanced vehicle accessories ever developed. The system receives satellite signals from the - 2009 Lexus ES 350 | Navigation Manual - Page 292
Please be aware that all current vehicle navigation systems have certain limitations that may affect their ability to perform properly. The accuracy of the vehicle's position depends on the satellite condition, road configuration, vehicle condition or other circumstances. For more information on the - 2009 Lexus ES 350 | Navigation Manual - Page 293
and the safety of your passengers. Do not use any feature of this system to the extent it becomes a distraction and Navigation System Owner's Manual to make sure you understand the system. Do not allow other people to use this system until they have read and understood the instructions in this manual - 2009 Lexus ES 350 | Navigation Manual - Page 294
not operate the navigation system while he/she is driving. Insufficient attention to the road and traffic may cause an accident. D While driving, be sure to obey the traffic regulations and maintain awareness of the road conditions. If a traffic sign on the road has been changed, route guidance may - 2009 Lexus ES 350 | Navigation Manual - Page 295
Quick guide - - Overview buttons and guidance screen 0U5050cX No. 1 2 Name North−up or heading−up symbol Scale indicator "MAP/VOICE" button "DEST" button "MENU" button Function This symbol indicates a map view with north−up or heading−up. Touching this symbol changes the map orientation. This - 2009 Lexus ES 350 | Navigation Manual - Page 296
information. Push this button to display the "Information" screen. Touch this button to change the screen mode. Push this button to display the "Display" screen. Page 34 destination. "GPS" mark (Global Positioning System) Speech command system indicator Whenever the vehicle is receiving signals - 2009 Lexus ES 350 | Navigation Manual - Page 297
- Registering home 1 Push the "DEST" button. 0U5089X 2 Touch . If home has not been registered, you can 0U5057L register it by touching . 3 There are 11 different methods to search your home. 0U5058L See "Destination search" on page 39. 4 Touch "Enter". The "Memory Point" screen is - 2009 Lexus ES 350 | Navigation Manual - Page 298
5 Touch "OK". 0U5036L Registration of home is complete. You can also register home by pushing the "MENU" button. (See " - Registering home" on page 100.) You can change the icon, quick access, name, location and phone number. (See " - Editing memory points" on page 94.) 8 - 2009 Lexus ES 350 | Navigation Manual - Page 299
- Registering preset memory points (Quick access) 1 Push the "DEST" button. 0U5089X 2 Touch one of the quick access buttons. 0U5059L You can set a memory point to one of the quick access buttons which has not been set. 3 There are 12 different methods to search preset memory points. 0U5060L - 2009 Lexus ES 350 | Navigation Manual - Page 300
the "MENU" button. (See " - Registering memory points" on page 93.) You can change the icon, quick access, name, location and phone number. (See " - Editing memory points" on page 94.) The registered points can be used on the "Destination" screen. (See " - Destination search by Quick access" on page - 2009 Lexus ES 350 | Navigation Manual - Page 301
There are 12 different methods to search destinations. See "Destination search" on page 39. 3 Touch "Enter". The navigation system performs a search for the route. 4 Touch "Guide", and start driving. Routes other than the one recommended can also be selected. (See "Starting route guidance" on - 2009 Lexus ES 350 | Navigation Manual - Page 302
DEST" button. 0U5089X 2 Touch . The can be used if your home has been registered. (To register "Home", see " - Registering home" on page 7.) 3 Touch "Enter". The navigation system performs a search for the route. 1U5061L 4 Touch "Guide", and start driving. 1U5040aL Routes other than the
-
 1
1 -
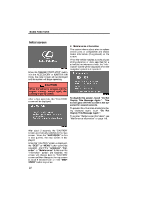 2
2 -
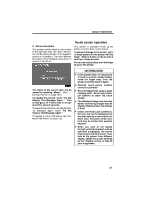 3
3 -
 4
4 -
 5
5 -
 6
6 -
 7
7 -
8
-
9
-
10
-
11
-
12
-
13
-
14
-
15
-
16
-
17
-
18
-
19
-
20
-
21
-
22
-
23
-
24
-
25
-
26
-
27
-
28
-
29
-
30
-
31
-
32
-
33
-
34
-
35
-
36
-
37
-
38
-
39
-
40
-
41
-
42
-
43
-
44
-
45
-
46
-
47
-
48
-
49
-
50
-
51
-
52
-
53
-
54
-
55
-
56
-
57
-
58
-
59
-
60
-
61
-
62
-
63
-
64
-
65
-
66
-
67
-
68
-
69
-
70
-
71
-
72
-
73
-
74
-
75
-
76
-
77
-
78
-
79
-
80
-
81
-
82
-
83
-
84
-
85
-
86
-
87
-
88
-
89
-
90
-
91
-
92
-
93
-
94
-
95
-
96
-
97
-
98
-
99
-
100
-
101
-
102
-
103
-
104
-
105
-
106
-
107
-
108
-
109
-
110
-
111
-
112
-
113
-
114
-
115
-
116
-
117
-
118
-
119
-
120
-
121
-
122
-
123
-
124
-
125
-
126
-
127
-
128
-
129
-
130
-
131
-
132
-
133
-
134
-
135
-
136
-
137
-
138
-
139
-
140
-
141
-
142
-
143
-
144
-
145
-
146
-
147
-
148
-
149
-
150
-
151
-
152
-
153
-
154
-
155
-
156
-
157
-
158
-
159
-
160
-
161
-
162
-
163
-
164
-
165
-
166
-
167
-
168
-
169
-
170
-
171
-
172
-
173
-
174
-
175
-
176
-
177
-
178
-
179
-
180
-
181
-
182
-
183
-
184
-
185
-
186
-
187
-
188
-
189
-
190
-
191
-
192
-
193
-
194
-
195
-
196
-
197
-
198
-
199
-
200
-
201
-
202
-
203
-
204
-
205
-
206
-
207
-
208
-
209
-
210
-
211
-
212
-
213
-
214
-
215
-
216
-
217
-
218
-
219
-
220
-
221
-
222
-
223
-
224
-
225
-
226
-
227
-
228
-
229
-
230
-
231
-
232
-
233
-
234
-
235
-
236
-
237
-
238
-
239
-
240
-
241
-
242
-
243
-
244
-
245
-
246
-
247
-
248
-
249
-
250
-
251
-
252
-
253
-
254
-
255
-
256
-
257
-
258
-
259
-
260
-
261
-
262
-
263
-
264
-
265
-
266
-
267
-
268
-
269
-
270
-
271
-
272
-
273
-
274
-
275
-
276
-
277
-
278
-
279
-
280
-
281
-
282
-
283
-
284
-
285
-
286
-
287
-
288
-
289
-
290
-
291
-
292
-
293
-
294
-
295
-
296
-
297
-
298
-
299
-
300
-
301
-
302
 |
 |

SECTION
1
BASIC FUNCTIONS
21
BASIC FUNCTIONS
Basic information before operation
D
Initial screen
22
D
Touch screen operation
23
D
Inputting letters and numbers/List screen operation
24
D
Function help
27
D
Map screen operation
28
Current position display
28
. . . . . . . . . . . . . . . . . . . . . . . . . . . . . . .
Screen scroll operation
28
. . . . . . . . . . . . . . . . . . . . . . . . . . . . . . .
Switching the screens
32
. . . . . . . . . . . . . . . . . . . . . . . . . . . . . . . . .
Map scale
34
. . . . . . . . . . . . . . . . . . . . . . . . . . . . . . . . . . . . . . . . . . .
Foot print map
35
. . . . . . . . . . . . . . . . . . . . . . . . . . . . . . . . . . . . . . .
Orientation of the map
36
. . . . . . . . . . . . . . . . . . . . . . . . . . . . . . . .