| Section |
Page |
| <GRAPHIC> |
1 |
| <GRAPHIC> |
1 |
| <GRAPHIC> |
1 |
| <GRAPHIC> |
1 |
| <GRAPHIC> |
2 |
| <GRAPHIC> |
2 |
| <GRAPHIC> (null)
<TABLE> |
2 |
| <TABLE> |
2 |
| <TABLE BODY> |
2 |
| <TABLE ROW> |
2 |
| E�320 E�430 E�55�AMG |
2 |
| Our company and staff congratulate you on the purchase of your new Mercedes-Benz. |
3 |
| Your selection of our product is a demonstration of your trust in our company name. Further, it e... |
3 |
| Your Mercedes-Benz represents the efforts of many skilled engineers and craftsmen. To ensure your... |
3 |
| • Please read this manual carefully before putting it aside. Then return it to your vehicle where... |
3 |
| • Please read this manual carefully before putting it aside. Then return it to your vehicle where... |
3 |
| • Please abide by the recommendations contained in this manual. They are designed to acquaint you... |
3 |
| • Please abide by the warnings and cautions contained in this manual. They are designed to help i... |
3 |
| We extend our best wishes for many miles of safe, pleasurable driving. |
3 |
| DaimlerChrysler AG |
3 |
| Contents |
4 |
| Contents |
4 |
| Contents |
4 |
| Contents (null)
Product information 7 |
4 |
| Operator’s manual 8 |
4 |
| Where to find it 13 |
4 |
| Reporting Safety Defects 15 |
4 |
| Instruments and controls |
4 |
| Instruments and controls 18 |
4 |
| Center console 20 |
4 |
| Center console 20 |
4 |
| Overhead control panel 21 |
4 |
| Operation |
4 |
| Vehicle keys 24 |
4 |
| Start lock-out 27 |
4 |
| General notes on the central locking system 28 |
4 |
| Central locking system 29 |
4 |
| Radio frequency and infrared remote control 29 |
4 |
| Radio frequency and infrared remote control 29 |
4 |
| Opening the trunk 32 |
4 |
| Opening and closing windows and sliding/pop-up roof from outside 33 |
4 |
| Panic button 34 |
4 |
| Mechanical keys 34 |
4 |
| Doors 35 |
4 |
| Central locking switch 37 |
4 |
| Automatic central locking 38 |
4 |
| Emergency unlocking in case of accident 38 |
4 |
| Trunk 39 |
4 |
| Trunk lid release switch 41 |
4 |
| Trunk lid emergency release 42 |
4 |
| Antitheft alarm system 43 |
4 |
| Tow-away alarm 45 |
4 |
| Power seats front 46 |
4 |
| Front seat head restraints 52 |
4 |
| Rear seat head restraints 53 |
4 |
| Multicontour seat 54 |
4 |
| Seat heater 55 |
4 |
| Seat ventilation 58 |
4 |
| Seat belts and integrated restraint system 60 |
4 |
| Seat belts 60 |
4 |
| Seat belt nonusage warning system 61 |
4 |
| BabySmart |
4 |
| Self-test BabySmart |
4 |
| Self-test BabySmart |
4 |
| Supplemental restraint system (SRS) 68 |
4 |
| Emergency tensioning retractor (ETR) 69 |
4 |
| Airbags 70 |
4 |
| Safety guidelines for the seat belt, emergency tensioning retractor and airbag 76 |
4 |
| Infant and child restraint systems 78 |
4 |
| Steering wheel adjustment 81 |
4 |
| Rear view mirrors 82 |
4 |
| Instrument cluster 86 |
4 |
| Multifunction steering wheel, multifunction display 92 |
4 |
| Trip and main odometer, FSS and engine oil level display 96 |
4 |
| Audio systems 97 |
5 |
| Radio 97 |
5 |
| Radio 97 |
5 |
| CD player 98 |
5 |
| Cassette player 99 |
5 |
| Telephone 100 |
5 |
| Telephone book 100 |
5 |
| Telephone book 100 |
5 |
| Redialing 102 |
5 |
| Incoming call 104 |
5 |
| Navigation system 105 |
5 |
| Trip computer 106 |
5 |
| Malfunction message memory 108 |
5 |
| Individual settings 110 |
5 |
| Setting the audio volume 113 |
5 |
| Flexible service system (FSS) 114 |
5 |
| Engine oil level indicator 117 |
5 |
| Engine oil consumption 118 |
5 |
| Exterior lamp switch 119 |
5 |
| Night security illumination 120 |
5 |
| Headlamp cleaning system 121 |
5 |
| Combination switch 122 |
5 |
| Hazard warning flasher switch 125 |
5 |
| Automatic climate control 126 |
5 |
| Display and controls 128 |
5 |
| Display and controls 128 |
5 |
| Basic setting 129 |
5 |
| Special settings 129 |
5 |
| Defogging windows 129 |
5 |
| Defrosting 129 |
5 |
| Rear window defroster 130 |
5 |
| Air distribution 130 |
5 |
| Air volume 130 |
5 |
| Air recirculation 131 |
5 |
| Dust filter 131 |
5 |
| Activated charcoal filter 132 |
5 |
| Residual engine heat utilization 132 |
5 |
| Front center console compartment ventilation 133 |
5 |
| Rear passenger compartment adjustable air outlet 134 |
5 |
| Audio and telephone, operation 135 |
5 |
| Power windows 154 |
5 |
| Sliding / pop-up roof 156 |
5 |
| Interior lighting 159 |
5 |
| Entrance lamps, exit lamps in doors 159 |
5 |
| Rear window sunshade 160 |
5 |
| Sun visors 161 |
5 |
| Illuminated vanity mirrors 161 |
5 |
| Interior 162 |
5 |
| Armrest, rear bench 162 |
5 |
| Cup holder in rear bench armrest 162 |
5 |
| Glove box 163 |
5 |
| Cup holder and coin holder in glove box lid 163 |
5 |
| Cup holder and coin holder in glove box lid 163 |
5 |
| Storage compartment above ashtray in center console 164 |
5 |
| Storage compartments in center console 164 |
5 |
| Cup holder in center console 165 |
5 |
| Ashtrays 166 |
5 |
| Lighter 168 |
5 |
| Cargo tie-down hooks 169 |
5 |
| Parcel net in front passenger footwell 169 |
5 |
| Cellular telephone 170 |
5 |
| Shelf below rear window 170 |
6 |
| Garage door opener 171 |
6 |
| Driving |
6 |
| Control and operation of radio transmitters 176 |
6 |
| The first 1 000 miles (1 500 km) 177 |
6 |
| Maintenance 177 |
6 |
| Tele Aid 178 |
6 |
| Catalytic converter 188 |
6 |
| Emission control 189 |
6 |
| Steering lock 190 |
6 |
| Starting and turning off the engine 192 |
6 |
| Automatic transmission 193 |
6 |
| Parking brake 202 |
6 |
| Driving instructions 203 |
6 |
| Drive sensibly - Save Fuel 203 |
6 |
| Drive sensibly - Save Fuel 203 |
6 |
| Drinking and driving 203 |
6 |
| Pedals 203 |
6 |
| Power assistance 204 |
6 |
| Brakes 204 |
6 |
| Driving off 205 |
6 |
| Parking 205 |
6 |
| Tires 206 |
6 |
| Snow chains 208 |
6 |
| Winter driving instructions 209 |
6 |
| Block heater 210 |
6 |
| Deep water 211 |
6 |
| Passenger compartment 211 |
6 |
| Traveling abroad 211 |
6 |
| Cruise control 212 |
6 |
| Brake assist system (BAS) 215 |
6 |
| Antilock brake system (ABS) 217 |
6 |
| Four Wheel Electronic Traction System (4MATIC) 219 |
6 |
| Electronic stability program (ESP) 220 |
6 |
| Parking assist (Parktronic) 224 |
6 |
| What you should know at the gas station 229 |
6 |
| Check regularly and before a long trip 231 |
6 |
| Instrument cluster display |
6 |
| Malfunction and indicator lamps in the instrument cluster 234 |
6 |
| On-board diagnostic system 234 |
6 |
| On-board diagnostic system 234 |
6 |
| Check engine malfunction indicator lamp 234 |
6 |
| Brake warning lamp 235 |
6 |
| Supplemental restraint system (SRS) indicator lamp 236 |
6 |
| Fuel reserve and fuel cap placement warning 236 |
6 |
| Electronic stability program (ESP) — warning lamp 237 |
6 |
| BAS / ESP malfunction indicator lamp 237 |
6 |
| ABS malfunction indicator lamp 237 |
6 |
| Seat belt warning lamp 238 |
6 |
| Malfunction and indicator lamp in the center console 238 |
6 |
| AIRBAG OFF indicator lamp 238 |
7 |
| AIRBAG OFF indicator lamp 238 |
7 |
| Malfunction and warning messages in the multifunction display 239 |
7 |
| DISPLAY DEFECTIVE 240 |
7 |
| DISPLAY DEFECTIVE 240 |
7 |
| BATTERY / ALTERNATOR 241 |
7 |
| ABS-SYSTEM 242 |
7 |
| BRAKE ASSIST 242 |
7 |
| BRAKE LINING WEAR 243 |
7 |
| BRAKE FLUID 243 |
7 |
| PARKING BRAKE 244 |
7 |
| ENGINE FAN 244 |
7 |
| COOLANT (coolant level) 245 |
7 |
| COOLANT TEMP. 246 |
7 |
| LIGHTING SYSTEM 247 |
7 |
| LIGHT SENSOR 248 |
7 |
| REMOVE KEY 248 |
7 |
| TELE AID 249 |
7 |
| STEERING GEAR OIL 249 |
7 |
| ENGINE OIL LEVEL 250 |
7 |
| WASHER FLUID 251 |
7 |
| ELEC. STABIL. PROG. (Electronic stability program) 252 |
7 |
| Practical hints |
7 |
| First aid kit 254 |
7 |
| Stowing things in the vehicle 254 |
7 |
| Fuses 255 |
7 |
| Hood 257 |
7 |
| Checking engine oil level 260 |
7 |
| Automatic transmission fluid level 261 |
7 |
| Coolant level 261 |
7 |
| Adding coolant 262 |
7 |
| Adding coolant 262 |
7 |
| Windshield and headlamp washer system 263 |
7 |
| Windshield and headlamp washer fluid mixing ratio 263 |
7 |
| Windshield and headlamp washer fluid mixing ratio 263 |
7 |
| Spare wheel, vehicle tools, storage compartment 264 |
7 |
| Vehicle jack 265 |
7 |
| Wheels 266 |
7 |
| Tire replacement 266 |
7 |
| Tire replacement 266 |
7 |
| Rotating wheels 267 |
7 |
| Spare wheel 268 |
7 |
| Spare wheel bolts 268 |
7 |
| Spare wheel bolts 268 |
7 |
| Spare wheel 269 |
7 |
| Changing wheels 271 |
7 |
| Tire inflation pressure 276 |
7 |
| Battery 277 |
7 |
| Jump starting 279 |
7 |
| Towing the vehicle 282 |
7 |
| Transmission selector lever, manually unlocking 284 |
7 |
| Exterior lamps 285 |
7 |
| Headlamp assembly 286 |
7 |
| Headlamp assembly 286 |
7 |
| Taillamp assemblies 289 |
7 |
| Changing batteries in the electronic main key 291 |
7 |
| Synchronizing remote control 293 |
7 |
| Synchronizing remote control 293 |
7 |
| Emergency engine shut-down 293 |
7 |
| Rear seat cushion 294 |
7 |
| Emergency operation of sliding / pop-up roof 295 |
7 |
| Manual release for fuel filler flap 296 |
7 |
| Replacing wiper blade insert 296 |
7 |
| Trunk lamp 298 |
7 |
| Roof rack 298 |
7 |
| Vehicle care |
8 |
| Cleaning and care of the vehicle 300 |
8 |
| Power washer 301 |
8 |
| Power washer 301 |
8 |
| Tar stains 301 |
8 |
| Paintwork, painted body components 301 |
8 |
| Engine cleaning 302 |
8 |
| Vehicle washing 302 |
8 |
| Ornamental moldings 302 |
8 |
| Headlamps, taillamps, turn signal lenses 302 |
8 |
| Cleaning the parktronic system sensors 303 |
8 |
| Window cleaning / glass sunroof 303 |
8 |
| Wiper blades 303 |
8 |
| Light alloy wheels 304 |
8 |
| Instrument cluster 304 |
8 |
| Steering wheel and gear selector lever 304 |
8 |
| Cup holder 304 |
8 |
| Seat belts 304 |
8 |
| Headliner and shelf below rear window 304 |
8 |
| Upholstery 305 |
8 |
| Hard plastic trim items 305 |
8 |
| Plastic and rubber parts 305 |
8 |
| Technical data |
8 |
| Spare parts service 308 |
8 |
| Warranty coverage 308 |
8 |
| Identification labels 309 |
8 |
| Layout of poly-V-belt drive 311 |
8 |
| Technical data 312 |
8 |
| Fuels, coolants, lubricants etc. - capacities 318 |
8 |
| Engine oils 320 |
8 |
| Engine oil additives 320 |
8 |
| Air conditioner refrigerant 320 |
8 |
| Brake fluid 320 |
8 |
| Premium unleaded gasoline 321 |
8 |
| Fuel requirements 321 |
8 |
| Gasoline additives 322 |
8 |
| Coolants 322 |
8 |
| Consumer information 324 |
8 |
| Index |
8 |
| Index 326 |
8 |
| Introduction |
10 |
| Introduction |
10 |
| Introduction |
10 |
| Introduction |
10 |
| Introduction (null)
Product information |
10 |
| Product information (null)
Introduction (null)
Product information (null)
Kindly observe the following in your own best interest: |
10 |
| We recommend using Mercedes-Benz original parts as well as conversion parts and accessories expli... |
10 |
| We have tested these parts to determine their reliability, safety and their special suitability f... |
10 |
| We are unable to make an assessment for other products and therefore cannot be held responsible f... |
10 |
| Mercedes-Benz original parts as well as conversion parts and accessories approved by us are avail... |
10 |
| Operator’s manual |
11 |
| Operator’s manual |
11 |
| Operator’s manual |
11 |
| Operator’s manual (null)
Operator’s manual (null)
This Operator’s Manual contains a great deal of useful information. We urge you to read it carefu... |
11 |
| For your own safety and longer service life of the vehicle, we urge you to follow the instruction... |
11 |
| Your vehicle may have some or all of the equipment described in this manual. Therefore, you may f... |
11 |
| Service and warranty information |
11 |
| Service and warranty information |
11 |
| The Service and Warranty Information Booklet contains detailed information about the warranties c... |
11 |
| • New Car Limited Warranty, |
11 |
| • New Car Limited Warranty, |
11 |
| • Emission System Warranty, |
11 |
| • Emission Performance Warranty, |
11 |
| • California, Massachusetts, and Vermont Emission Control System Warranty (California, Massachuse... |
11 |
| • State Warranty Enforcement Laws (Lemon Laws). |
11 |
| Important notice for California retail buyers of Mercedes-Benz automobiles |
12 |
| Important notice for California retail buyers of Mercedes-Benz automobiles |
12 |
| Under California law you may be entitled to a replacement of your vehicle or a refund of the purc... |
12 |
| Maintenance |
12 |
| Maintenance |
12 |
| The Service Booklet describes all the necessary maintenance work which should be performed at reg... |
12 |
| Always have the Service Booklet with you when you take the vehicle to your authorized Mercedes-Be... |
12 |
| Roadside assistance |
13 |
| Roadside assistance |
13 |
| Roadside assistance (null)
Roadside assistance |
13 |
| The Mercedes-Benz Roadside Assistance Program provides factory trained technical help in the even... |
13 |
| will be answered by Mercedes-Benz Client Assistance Representatives 24�hours a day, 365�days a year. |
13 |
| For additional information refer to the Mercedes-Benz Roadside Assistance Program brochure in you... |
13 |
| Change of address or ownership |
13 |
| Change of address or ownership |
13 |
| If you change your address, be sure to send in the |
13 |
| If you sell your Mercedes, please leave all literature with the vehicle to make it available to t... |
13 |
| If you bought this vehicle used, be sure to send in the |
13 |
| Operating your vehicle outside the USA or Canada |
14 |
| Operating your vehicle outside the USA or Canada |
14 |
| If you plan to operate your vehicle in foreign countries, please be aware that: |
14 |
| • Service facilities or replacement parts may not be readily available, |
14 |
| • Service facilities or replacement parts may not be readily available, |
14 |
| • unleaded gasoline for vehicles with catalytic converters may not be available; the use of leade... |
14 |
| • gasoline may have a considerably lower octane rating, and improper fuel can cause engine damage. |
14 |
| Certain Mercedes-Benz models are available for delivery in Europe under our European Delivery Pro... |
14 |
| <TABLE> |
14 |
| <TABLE BODY> |
14 |
| <TABLE ROW> |
14 |
| In the USA: |
14 |
| In Canada: |
14 |
| <TABLE ROW> |
14 |
| Mercedes-Benz usa, LLC European Delivery Department One Mercedes Drive Montvale, NJ 07645-0350 |
14 |
| Mercedes-Benz Canada, Inc. European Delivery Department 849 Eglinton Avenue East Toronto, Ontario... |
14 |
| We continuously strive to improve our product, and ask for your understanding that we reserve the... |
15 |
| Optional equipment is also described in this manual, including operating instructions wherever ne... |
15 |
| If there are any equipment details that are not shown or described in this Operator’s Manual, you... |
15 |
| The Operator’s Manual and Service Booklet are important documents and should be kept with the veh... |
15 |
| Where to find it |
16 |
| Where to find it |
16 |
| Where to find it |
16 |
| Where to find it (null)
Where to find it (null)
The Operator’s Manual is divided into eight sections: |
16 |
| • Instruments and controls: |
16 |
| • Instruments and controls: |
16 |
| • Instruments and controls: |
16 |
| • Operation: |
16 |
| • Operation: |
16 |
| • Driving: |
16 |
| • Driving: |
16 |
| • Instrument cluster display: |
16 |
| • Instrument cluster display: |
16 |
| • Practical hints: |
16 |
| • Practical hints: |
16 |
| • Car care: |
16 |
| • Car care: |
16 |
| • Technical data: |
16 |
| • Technical data: |
16 |
| • Index: |
16 |
| • Index: |
16 |
| Other documents may also be supplied, depending on your vehicle’s equipment. |
16 |
| Explanation of color used: |
16 |
| <TABLE> |
16 |
| <TABLE BODY> |
16 |
| <TABLE ROW> |
16 |
| Warning notices for the protection of yourself and others appear on red background. |
16 |
| Problems with your vehicle |
17 |
| Problems with your vehicle |
17 |
| Problems with your vehicle |
17 |
| Problems with your vehicle (null)
If you should experience a problem with your vehicle, particularly one that you believe may affec... |
17 |
| In the |
17 |
| In the |
17 |
| Client Assistance Center Mercedes-Benz |
17 |
| In Canada: |
17 |
| Customer Relations Department Mercedes-Benz Canada, Inc. 849 Eglinton Avenue East Toronto, Ontari... |
17 |
| For the |
18 |
| Reporting Safety Defects |
18 |
| Reporting Safety Defects |
18 |
| Reporting Safety Defects |
18 |
| Reporting Safety Defects (null)
Reporting Safety Defects (null)
If you believe that your vehicle has a defect which could cause a crash or could cause injury or ... |
18 |
| If |
18 |
| To contact |
18 |
| Contents - Instruments and controls |
20 |
| Contents - Instruments and controls |
20 |
| Contents - Instruments and controls |
20 |
| Contents - Instruments and controls (null)
Instruments and controls 18 |
20 |
| Center console 20 |
20 |
| Center console 20 |
20 |
| Overhead control panel 21 |
20 |
| Instruments and controls |
21 |
| Instruments and controls |
21 |
| Instruments and controls |
21 |
| Instruments and controls |
21 |
| Instruments and controls (null)
Instruments and controls |
21 |
| Instruments and controls (null)
Instruments and controls (null)
Instruments and controls (null)
P68.10-2411-29 (null)
<GRAPHIC> |
21 |
|
21 |
|
22 |
|
23 |
|
24 |
|
25 |
|
26 |
| Malfunction message memory 108 |
26 |
| Individual settings 110 |
26 |
| Setting the audio volume 113 |
26 |
| Flexible service system (FSS) 114 |
26 |
| Engine oil level indicator 117 |
26 |
| Engine oil consumption 118 |
26 |
| Exterior lamp switch 119 |
26 |
| Night security illumination 120 |
26 |
| Headlamp cleaning system 121 |
26 |
| Combination switch 122 |
26 |
| Hazard warning flasher switch 125 |
26 |
| Automatic climate control 126 |
26 |
| Display and controls 128 |
26 |
| Display and controls 128 |
26 |
| Basic setting 129 |
26 |
| Special settings 129 |
26 |
| Defogging windows 129 |
26 |
| Defrosting 129 |
26 |
| Rear window defroster 130 |
26 |
| Air distribution 130 |
26 |
| Air volume 130 |
26 |
| Air recirculation 131 |
26 |
| Dust filter 131 |
26 |
| Activated charcoal filter 132 |
26 |
| Residual engine heat utilization 132 |
26 |
| Front center console compartment ventilation 133 |
26 |
| Rear passenger compartment adjustable air outlet 134 |
26 |
| Audio and telephone, operation 135 |
26 |
| Power windows 154 |
26 |
| Sliding / pop-up roof 156 |
26 |
| Interior lighting 159 |
26 |
| Entrance lamps, exit lamps in doors 159 |
26 |
| Rear window sunshade 160 |
26 |
| Sun visors 161 |
26 |
| Illuminated vanity mirrors 161 |
26 |
| Interior 162 |
26 |
| Armrest, rear bench 162 |
26 |
| Cup holder in rear bench armrest 162 |
26 |
| Glove box 163 |
26 |
| Cup holder and coin holder in glove box lid 163 |
26 |
| Cup holder and coin holder in glove box lid 163 |
26 |
| Storage compartment above ashtray in center console 164 |
26 |
| Storage compartments in center console 164 |
26 |
| Cup holder in center console 165 |
26 |
| Ashtrays 166 |
26 |
| Lighter 168 |
26 |
| Cargo tie-down hooks 169 |
26 |
| Parcel net in front passenger footwell 169 |
26 |
| Cellular telephone 170 |
26 |
| Shelf below rear window 170 |
26 |
| Garage door opener 171 |
26 |
| Operation |
27 |
| Operation |
27 |
| Operation |
27 |
| Operation |
27 |
| Operation (null)
Vehicle keys |
27 |
| Vehicle keys (null)
Keys, vehicle (null)
Included with your vehicle are: |
27 |
| • 2�electronic main keys with integrated radio frequency and infrared remote controls plus remova... |
27 |
| • 2�electronic main keys with integrated radio frequency and infrared remote controls plus remova... |
27 |
| • 1 electronic reserve key without remote control functions, plus removable mechanical key. |
27 |
| The locking tabs for the mechanical key portion of the two electronic main keys are a different c... |
27 |
| <TABLE> |
27 |
| <TABLE BODY> |
27 |
| <TABLE ROW> |
27 |
| <TABLE ROW> |
27 |
| Warning! |
27 |
| Warning! |
27 |
| When leaving the vehicle always remove the electronic key from the steering lock, and lock your v... |
27 |
| Central locking system |
28 |
| Central locking system |
28 |
| Central locking system |
28 |
| Central locking system (null)
Electronic main key (null)
Central locking system:Electronic main key (null)
Central locking system:Remote control (null)
P80.35-2031-26 (null)
<GRAPHIC> |
28 |
| <GRAPHIC> (null)
The electronic main key has an integrated radio frequency and infrared remote control, plus remov... |
28 |
| The remote control�(1) operates all locks on the vehicle. |
28 |
| The mechanical key�(2) works only in the driver’s door, trunk, and storage compartment locks. |
28 |
| When using the mechanical key�(2) for lock operations, it can be removed by sliding it out of the... |
28 |
| The remote control transmitter is located in the electronic main key. |
28 |
| The infrared receivers are located in the front door handles. |
28 |
| Note: |
28 |
| Note: |
28 |
| Remove the mechanical key from the electronic main key when using valet parking service. To preve... |
28 |
| See page� |
28 |
| Central locking system:Electronic reserve key |
29 |
| Central locking system:Electronic reserve key |
29 |
| Central locking system:Electronic reserve key |
29 |
| Central locking system:Electronic reserve key (null)
Reserve key (null)
P80.30-2069-26 (null)
<GRAPHIC> |
29 |
| <GRAPHIC> (null)
The electronic reserve key is without remote control functions, but with removable mechanical key. |
29 |
| The electronic reserve key�(1) works only in the steering lock. There are no batteries inside the... |
29 |
| The mechanical key�(2) works only in the driver’s door, trunk (tailgate), and storage compartment... |
29 |
| To use the mechanical key�(2), remove it from its electronic reserve key�(1). |
29 |
| Note: |
29 |
| Note: |
29 |
| We recommend that you carry the electronic reserve key plus mechanical key with you and keep it i... |
29 |
| Obtaining replacement keys |
30 |
| Obtaining replacement keys |
30 |
| Your vehicle is equipped with a theft deterrent locking system requiring a special key manufactur... |
30 |
| Start lock-out |
30 |
| Start lock-out |
30 |
| Start lock-out |
30 |
| Start lock-out (null)
Start lock-out (null)
Important! |
30 |
| Important! |
30 |
| Removing the electronic key from the steering lock activates the start lock-out. The engine canno... |
30 |
| Inserting the electronic key in the steering lock deactivates the start lock-out. |
30 |
| Note: |
30 |
| Note: |
30 |
| In case the engine cannot be started (vehicle’s battery is in order), the system is not operation... |
30 |
| General notes on the central locking system |
31 |
| General notes on the central locking system |
31 |
| General notes on the central locking system |
31 |
| General notes on the central locking system (null)
General notes on the central locking system (null)
If the electronic key is inserted in the steering lock, the vehicle cannot be locked or unlocked ... |
31 |
| If the vehicle cannot be locked or unlocked: |
31 |
| • Aim transmitter eye at a receiver of either front door handle. Check the batteries of the elect... |
31 |
| • Aim transmitter eye at a receiver of either front door handle. Check the batteries of the elect... |
31 |
| • Use the mechanical key to unlock the vehicle. To start engine, insert the electronic key in the... |
31 |
| Important! |
31 |
| Important! |
31 |
| When unlocking the driver’s door with the mechanical key, the exterior lamps will flash and the a... |
31 |
| To cancel the alarm, insert the electronic key in the steering lock or press button� |
31 |
| Central locking system |
32 |
| Central locking system |
32 |
| Central locking system |
32 |
| Central locking system (null)
Central locking system (null)
Radio frequency and infrared remote control |
32 |
| Radio frequency and infrared remote control |
32 |
| Radio frequency and infrared remote control |
32 |
| Radio frequency and infrared remote control (null)
Remote control (null)
The electronic main key has an integrated radio frequency and infrared remote control. |
32 |
| Due to the extended operational range of the remote control, it could be possible to unintentiona... |
32 |
| The vehicle doors, trunk and fuel filler flap can be centrally locked and unlocked via remote con... |
32 |
| Opening and closing the windows and sliding�/�pop-up roof remotely can only be done with the infr... |
32 |
| With vehicle centrally locked, the trunk can also be opened by using the remote control. |
32 |
| If the electronic key is inserted in steering lock, the vehicle cannot be locked or unlocked, and... |
32 |
| <GRAPHIC> |
32 |
| <GRAPHIC> |
32 |
| <GRAPHIC> |
32 |
| P80.35-2032-26 |
32 |
| P80.35-2032-26 (null)
‹ |
32 |
| ‹ |
32 |
| Π|
32 |
| Π|
32 |
| Trunk:Remote opening |
32 |
| Trunk:Remote opening |
32 |
| Trunk:Remote opening (null)
³ |
32 |
| <GRAPHIC> |
33 |
| <GRAPHIC> |
33 |
| <GRAPHIC> |
33 |
| P80.30-2137-26 |
33 |
| P80.30-2137-26 (null)
<GRAPHIC> |
33 |
| <GRAPHIC> |
33 |
| <GRAPHIC> |
33 |
| P80.30-2138-26 |
33 |
| P80.30-2138-26 (null)
Central locking system:Locking and unlocking |
34 |
| Central locking system:Locking and unlocking |
34 |
| Central locking system:Locking and unlocking |
34 |
| Central locking system:Locking and unlocking (null)
Locking and unlocking (null)
Unlocking: |
34 |
| Press transmit button |
34 |
| The remote control can be programmed for two kinds of unlocking modes (see below): |
34 |
| Selective unlocking mode – Press transmit button |
34 |
| Global unlocking mode – Press transmit button |
34 |
| Notes: |
34 |
| Notes: |
34 |
| If the trunk was previously locked separately, it will remain locked, see page� |
34 |
| The presently active unlocking mode (selective or global) can only be determined by unlocking the... |
34 |
| If within 40 seconds of unlocking with the remote control, neither door nor trunk is opened, the ... |
34 |
| Locking: |
34 |
| Press transmit button |
34 |
| If the turn signal lamps do not blink, a door or trunk is not closed properly. |
34 |
| Note: |
34 |
| Note: |
34 |
| If the vehicle cannot be locked or unlocked by pressing the transmit button, then it may be neces... |
34 |
| Central locking system:Choosing global or selective mode |
35 |
| Central locking system:Choosing global or selective mode |
35 |
| Central locking system:Choosing global or selective mode |
35 |
| Central locking system:Choosing global or selective mode (null)
Press and hold transmit buttons |
35 |
| Opening the trunk |
35 |
| Opening the trunk |
35 |
| Opening the trunk |
35 |
| Opening the trunk (null)
The trunk lid will swing open automatically. You should always make sure there is sufficient clea... |
35 |
| A minimum height clearance of 5.9�ft. (1.8�m) is required to open the trunk lid. |
35 |
| Press transmit button |
35 |
| Important! |
35 |
| Important! |
35 |
| Do not place remote control in trunk since trunk is locked when the lid is closed if the vehicle ... |
35 |
| Note: |
35 |
| Note: |
35 |
| If the trunk was previously locked separately, it will remain locked, see page� |
35 |
| Opening and closing windows and sliding/pop-up roof from outside |
36 |
| Opening and closing windows and sliding/pop-up roof from outside |
36 |
| Opening and closing windows and sliding/pop-up roof from outside |
36 |
| Opening and closing windows and sliding/pop-up roof from outside (null)
Central locking system:Summer opening/convenience feature (null)
Sliding/pop-up roof:Opening and closing (null)
Power windows:Opening and closing (null)
Aim transmitter eye of remote control at a door receiver. |
36 |
| Summer opening: |
36 |
| Summer opening: |
36 |
| Continue to press transmit button |
36 |
| The windows and sliding�/�pop-up roof begin to open after approximately 1�second. |
36 |
| To interrupt opening procedure, release transmit button. |
36 |
| Convenience feature: |
36 |
| Convenience feature: |
36 |
| Continue to press transmit button |
36 |
| The windows and sliding�/�pop-up roof begin to close after approximately 1�second. |
36 |
| To interrupt closing procedure, release transmit button. |
36 |
| Ensure that all side windows and the sliding/pop-up roof are properly closed before leaving the v... |
36 |
| <TABLE> |
36 |
| <TABLE BODY> |
36 |
| <TABLE ROW> |
36 |
| Warning! |
36 |
| Warning! |
36 |
| Never operate the windows or sliding�/�pop-up roof if there is the possibility of anyone being ha... |
36 |
| <TABLE ROW> |
36 |
| In case the procedure causes potential danger, the procedure can be immediately halted by releasi... |
36 |
| In case the procedure causes potential danger, the procedure can be immediately halted by releasi... |
36 |
| Note: |
36 |
| Note: |
36 |
| If the windows and sliding�/�pop-up roof cannot be operated automatically by pressing the transmi... |
36 |
| Panic button |
37 |
| Panic button |
37 |
| Panic button |
37 |
| Panic button (null)
Panic button (null)
P80.35-2035-26 (null)
<GRAPHIC> |
37 |
| <GRAPHIC> (null)
To activate press and hold button�(1) for at least one second. An audible alarm and blinking exte... |
37 |
| To deactivate press button�(1) again, or insert electronic key in steering lock. |
37 |
| Note: |
37 |
| Note: |
37 |
| For operation in the USA only: This device complies with Part�15, Subpart C, Section 209 of the F... |
37 |
| (1)�This device may not cause harmful interference, and |
37 |
| (2)�this device must accept any interference received, including interference that may cause unde... |
37 |
| Warning |
37 |
| Warning |
37 |
| Mechanical keys |
37 |
| Mechanical keys |
37 |
| Mechanical keys |
37 |
| Mechanical keys (null)
Central locking system:Mechanical keys (null)
Mechanical keys (null)
The mechanical keys work only in the driver’s door, trunk, and storage compartment locks. |
37 |
| Notes: |
37 |
| Notes: |
37 |
| The mechanical key does not operate the central locking system or antitheft alarm system. |
37 |
| The fuel filler flap cannot be locked or unlocked with the mechanical key. |
37 |
| Doors |
38 |
| Doors |
38 |
| Doors |
38 |
| Doors (null)
P72.10-2240-26 (null)
Doors (null)
<GRAPHIC> |
38 |
| Important! |
38 |
| Important! |
38 |
| The mechanical key does not operate the central locking system or antitheft alarm system. |
38 |
| P72.10-2241-26 |
38 |
| P72.10-2241-26 |
38 |
| P72.10-2241-26 |
38 |
| P72.10-2241-26 (null)
<GRAPHIC> |
38 |
| When you lock the driver’s door with the mechanical key, the door lock button should move down. |
38 |
| Each individual door must be locked with the respective door lock button – the driver’s door can ... |
38 |
| If the vehicle has previously been locked from the outside, opening a door from the inside will t... |
39 |
| • selective unlocking mode, only that individual door is unlocked. The remaining doors, the trunk... |
39 |
| • selective unlocking mode, only that individual door is unlocked. The remaining doors, the trunk... |
39 |
| • global unlocking mode, all doors, the trunk and fuel filler flap are unlocked. |
39 |
| Notes: |
39 |
| Notes: |
39 |
| In case of a malfunction in the central locking system the doors can be locked and unlocked indiv... |
39 |
| To lock, push down lock buttons and turn mechanical key in driver’s door lock to position�3. In a... |
39 |
| To unlock, pull inside door handles or turn mechanical key in driver’s door lock to position�2. |
39 |
| Rear doors can only be opened from inside by first pulling up the door lock button. |
39 |
| When unlocking the driver’s door with the mechanical key, the exterior lamps will flash and the a... |
39 |
| To cancel the alarm, insert the electronic key in the steering lock or press button� |
39 |
| Central locking switch |
40 |
| Central locking switch |
40 |
| Central locking switch |
40 |
| Central locking switch (null)
P82.50-0757-26 (null)
Central locking switch (null)
<GRAPHIC> |
40 |
| The central locking switch is located in the center console. |
40 |
| The doors and trunk can only be locked with the central locking switch if both front doors are cl... |
40 |
| If the vehicle was previously locked with the central locking switch, while in the selective remo... |
40 |
| If the vehicle was previously locked with the central locking switch, while in the global remote ... |
40 |
| Notes: |
40 |
| Notes: |
40 |
| If the vehicle was previously locked with the remote control, the doors and trunk cannot be unloc... |
40 |
| The fuel filler flap cannot be locked or unlocked with the central locking switch. |
40 |
| If the vehicle has previously been locked from the outside, opening a door from the inside will t... |
40 |
| <TABLE> |
40 |
| <TABLE BODY> |
40 |
| <TABLE ROW> |
40 |
| Warning! |
40 |
| Warning! |
40 |
| When leaving the vehicle always remove the electronic key from the steering lock, and lock your v... |
40 |
| Automatic central locking |
41 |
| Automatic central locking |
41 |
| Automatic central locking |
41 |
| Automatic central locking (null)
Central locking system:Automatic central locking (null)
Automatic central locking (null)
The central locking switch also operates the automatic central locking. |
41 |
| With the automatic central locking system activated, the doors and trunk are locked at vehicle sp... |
41 |
| To activate: |
41 |
| With electronic key in steering lock position�2 hold upper portion of switch�(1) for a minimum of... |
41 |
| To deactivate: |
41 |
| With electronic key in steering lock position�2 hold lower portion of switch�(2) for a minimum of... |
41 |
| Notes: |
41 |
| Notes: |
41 |
| If doors are unlocked with the central locking switch after activating the automatic central lock... |
41 |
| If a door is opened from the inside at speeds of approximately 9�mph (15�km�/�h) or less with the... |
41 |
| Important! |
41 |
| Important! |
41 |
| When towing the vehicle, or with the vehicle on a dynamometer test stand, please, note the follow... |
41 |
| With the automatic central locking activated and the electronic key in steering lock position�2, ... |
41 |
| To prevent the vehicle door locks from locking, deactivate the automatic central locking. |
41 |
| Emergency unlocking in case of accident |
41 |
| Emergency unlocking in case of accident |
41 |
| Emergency unlocking in case of accident |
41 |
| Emergency unlocking in case of accident (null)
Emergency unlocking in case of accident (null)
The doors unlock automatically a short time after a strong deceleration is detected, such as in a... |
41 |
| Driving on rough roads may cause the vehicle to unlock. If necessary, the vehicle can be locked a... |
41 |
| Trunk |
42 |
| Trunk |
42 |
| Trunk |
42 |
| Trunk (null)
Trunk (null)
When the trunk is separately locked, it remains locked when centrally unlocking the vehicle. |
42 |
| To deny any unauthorized person access to the trunk, lock it separately with the mechanical key. ... |
42 |
| Notes: |
42 |
| Notes: |
42 |
| In case of a malfunction in the central locking system the trunk can be unlocked individually. |
42 |
| To unlock and open the trunk lid, turn mechanical key to position�1, hold and push to open. |
42 |
| The mechanical key does not operate the central locking system or antitheft alarm system. |
42 |
| When unlocking the trunk with the mechanical key, the exterior lamps will flash and the alarm wil... |
42 |
| To cancel the alarm, insert the electronic key in the steering lock or press button� |
42 |
| If the fuel filler flap cannot be opened, see page� |
42 |
| Important! |
42 |
| Important! |
42 |
| Do not place mechanical key inside trunk, since trunk is locked again when the lid is closed if t... |
42 |
| <TABLE> |
42 |
| <TABLE BODY> |
42 |
| <TABLE ROW> |
42 |
| Warning! |
42 |
| Warning! |
42 |
| To prevent possible personal injury, always keep hands and fingers away from the trunk opening wh... |
42 |
| <GRAPHIC> |
43 |
| <GRAPHIC> |
43 |
| <GRAPHIC> |
43 |
| P80.00-2020-26 (2c) |
43 |
| Trunk:Separately locked |
43 |
| Trunk:Separately locked |
43 |
| Trunk:Separately locked (null)
<GRAPHIC> |
43 |
| <GRAPHIC> |
43 |
| P88.50-2052-26 |
43 |
| P88.50-2052-26 (null)
Trunk lid release switch |
44 |
| Trunk lid release switch |
44 |
| Trunk lid release switch |
44 |
| Trunk lid release switch (null)
Trunk lid:Release switch (null)
P54.25-2170-26 (null)
<GRAPHIC> |
44 |
| <GRAPHIC> (null)
The switch is located on the center console. |
44 |
| The trunk lid will swing open automatically. You should always make sure there is sufficient clea... |
44 |
| A minimum height clearance of 5.9�ft. (1.8�m) is required to open the trunk lid. |
44 |
| To open the trunk, the vehicle must be at standstill. Pull�up on switch until trunk lid is open. |
44 |
| The indicator lamp in the switch remains on with trunk lid open. |
44 |
| Notes: |
44 |
| Notes: |
44 |
| The trunk can also be opened by using the remote control. Press |
44 |
| The trunk lid cannot be opened by the switch or the remote control when previously locked separat... |
44 |
| The trunk lid cannot be opened with the trunk lid release switch when the vehicle was previously ... |
44 |
| Trunk lid emergency release |
45 |
| Trunk lid emergency release |
45 |
| Trunk lid emergency release |
45 |
| Trunk lid emergency release (null)
Trunk lid:Emergency release (null)
Emergency trunk lid release button (null)
xxx (null)
<GRAPHIC> |
45 |
| <GRAPHIC> (null)
The emergency release button�(1) is located in the trunk lid. |
45 |
| Briefly press emergency release button (1). All doors, the fuel filler flap, and the trunk unlock... |
45 |
| Note: |
45 |
| Note: |
45 |
| The emergency release button�(1) only unlocks and opens the trunk while the vehicle is standing. |
45 |
| Important! |
45 |
| Important! |
45 |
| The emergency trunk lid release button (1) does not open the trunk lid, if: |
45 |
| • the vehicle battery is discharged or disconnected, |
45 |
| • the vehicle battery is discharged or disconnected, |
45 |
| • the trunk lid was previously locked separately with the mechanical key, see page� |
45 |
| Illumination of the emergency release button�(1): |
45 |
| The button will blink for 30 minutes after opening the trunk. |
45 |
| The button will blink for 60 minutes after closing the trunk. |
45 |
| Antitheft alarm system |
46 |
| Antitheft alarm system |
46 |
| Antitheft alarm system |
46 |
| Antitheft alarm system (null)
Antitheft alarm system (null)
P82.50-2062-26 (null)
Antitheft alarm system (null)
Alarm system (null)
<GRAPHIC> |
46 |
| The antitheft alarm is automatically armed or disarmed with the remote control by locking or unlo... |
46 |
| The antitheft alarm is armed within approximately 10�seconds after locking the vehicle. |
46 |
| A blinking lamp�(1) indicates that the alarm is armed. |
46 |
| Operation: |
46 |
| Once the alarm system has been armed, the exterior vehicle lamps will flash and an alarm will sou... |
46 |
| • opens a door, |
46 |
| • opens a door, |
46 |
| • opens the trunk, |
46 |
| • opens the hood, |
46 |
| • attempts to raise the vehicle. |
46 |
| The alarm will last approximately 3�minutes in form of flashing exterior lamps. At the same time ... |
47 |
| Notes: |
47 |
| Notes: |
47 |
| We recommend that you carry the electronic reserve key plus mechanical key with you and keep it i... |
47 |
| When you unlock the driver’s door with the mechanical key, the exterior lamps will flash and the ... |
47 |
| To cancel the alarm, insert the electronic key in the steering lock or press button� |
47 |
| Tow-away alarm |
48 |
| Tow-away alarm |
48 |
| Tow-away alarm |
48 |
| Tow-away alarm (null)
Tow-away alarm (null)
Tow-away alarm (null)
P82.50-2063-26 (null)
Alarm system (null)
<GRAPHIC> |
48 |
| <GRAPHIC> (null)
The switch is located in the center console. |
48 |
| Once the alarm system has been armed, the exterior vehicle lamps will flash and an alarm will sou... |
48 |
| The alarm will last approximately 3�minutes in form of flashing exterior lamps. At the same time ... |
48 |
| If the alarm stays on for more than 20 seconds, an emergency call is initiated automatically. See... |
48 |
| To prevent triggering the tow-away alarm feature, switch off the tow-away alarm before towing the... |
48 |
| To do so, turn electronic key in steering lock to position�0 or�1, or remove electronic key from ... |
48 |
| Exit vehicle, and lock vehicle with the remote control. |
48 |
| The tow-away alarm remains switched off until the vehicle is locked again with the electronic mai... |
48 |
| Power seats front |
49 |
| Power seats front |
49 |
| Power seats front |
49 |
| Power seats front (null)
Seats (null)
Power seats front (null)
Seats (null)
<TABLE> |
49 |
| <TABLE BODY> |
49 |
| <TABLE ROW> |
49 |
| Warning! |
49 |
| Warning! |
49 |
| Do not adjust the driver’s seat while driving. Adjusting the seat while driving could cause the d... |
49 |
| <TABLE ROW> |
49 |
| Never ride in a moving vehicle with the backrest reclined. Sitting in an excessively reclined pos... |
49 |
| Never ride in a moving vehicle with the backrest reclined. Sitting in an excessively reclined pos... |
49 |
| <TABLE ROW> |
49 |
| Never place hands under seat or near any moving parts while a seat is being adjusted. |
49 |
| Never place hands under seat or near any moving parts while a seat is being adjusted. |
49 |
| <TABLE ROW> |
49 |
| <TABLE ROW> |
49 |
| When leaving the vehicle always remove the electronic key from the steering lock, and lock your v... |
49 |
| When leaving the vehicle always remove the electronic key from the steering lock, and lock your v... |
49 |
| <TABLE ROW> |
49 |
| The power seats can also be operated with the driver’s or front passenger door open. Do not leave... |
49 |
| The power seats can also be operated with the driver’s or front passenger door open. Do not leave... |
49 |
| To operate the front power seat adjustment switches, turn electronic key in steering lock to posi... |
49 |
| <GRAPHIC> |
50 |
| <GRAPHIC> |
50 |
| P54.00-2074-26 |
50 |
| P54.00-2074-26 (null)
We recommend to adjust the power seat in the following order: |
50 |
| Adjust the head restraint angle by hand. |
50 |
| Note: |
50 |
| Your vehicle is equipped with power head restraints, do not try to raise or lower them manually. |
50 |
| Head restraints:Synchronizing |
51 |
| Head restraints:Synchronizing |
51 |
| Head restraints:Synchronizing |
51 |
| Head restraints:Synchronizing (null)
If the power supply was interrupted (battery disconnected or empty), the head restraints are no l... |
51 |
| To resynchronize the adjustment feature, turn electronic key in steering lock to position 2, move... |
51 |
| Caution! |
51 |
| Caution! |
51 |
| Do not remove head restraints except when mounting seat covers. For removal refer to Front seat h... |
51 |
| Seats:Memory function |
52 |
| Seats:Memory function |
52 |
| Seats:Memory function |
52 |
| Seats:Memory function (null)
P54.00-2075-26 (null)
Memory (null)
<GRAPHIC> |
52 |
| Memory:Storing |
52 |
| Memory:Storing |
52 |
| Memory:Storing |
52 |
| Memory:Storing (null)
Three sets of seat�/�head restraint�/�steering wheel and exterior rear view mirror positions may ... |
52 |
| Note: |
52 |
| Note: |
52 |
| For instructions on adjustment of steering wheel and mirrors, see page� |
52 |
| Memory:Recalling |
53 |
| Memory:Recalling |
53 |
| Memory:Recalling |
53 |
| Memory:Recalling (null)
To recall a seat�/�head restraint�/�steering wheel and exterior rear view mirror position, push a... |
53 |
| Caution! |
53 |
| Caution! |
53 |
| Do not operate the power seats using the memory button if the seat backrest is in an excessively ... |
53 |
| First move the backrest to an upright position. |
53 |
| Important! |
53 |
| Important! |
53 |
| Prior to operating the vehicle, the driver should adjust the seat height for proper vision as wel... |
53 |
| In addition, also adjust the steering wheel to ensure adequate control, reach, operation, and com... |
53 |
| Both the inside and outside rear view mirrors should be adjusted for adequate rearward vision. |
53 |
| Fasten seat belts. Infants and small children should be seated in a properly secured restraint sy... |
53 |
| All seat, head restraint, steering wheel, and rear view mirror adjustments as well as fastening o... |
53 |
| <TABLE> |
53 |
| <TABLE BODY> |
53 |
| <TABLE ROW> |
53 |
| <TABLE ROW> |
54 |
| Warning! |
54 |
| Warning! |
54 |
| Children 12 years old and under must never ride in the front seat, except in a Mercedes-Benz auth... |
54 |
| <TABLE ROW> |
54 |
| <TABLE ROW> |
54 |
| According to accident statistics, children are safer when properly restrained in the rear seating... |
54 |
| According to accident statistics, children are safer when properly restrained in the rear seating... |
54 |
| <TABLE ROW> |
54 |
| A child’s risk of serious or fatal injuries is significantly increased if the child restraints ar... |
54 |
| A child’s risk of serious or fatal injuries is significantly increased if the child restraints ar... |
54 |
| Front seat head restraints |
55 |
| Front seat head restraints |
55 |
| Front seat head restraints |
55 |
| Front seat head restraints (null)
Head restraints:Front seat (null)
P82.40-2009-26 (null)
<GRAPHIC> |
55 |
| <GRAPHIC> (null)
Removal: |
55 |
| Push button (1) up to bring the power adjustable head restraint to its highest position. |
55 |
| Pull out head restraint completely with both hands. |
55 |
| Installation: |
55 |
| Push button (1) of the power adjustable head restraint up for approximately�5 seconds. |
55 |
| Insert the head restraint and push it down to the stop. |
55 |
| Adjust head restraint to the desired position. |
55 |
| For positioning of head restraints |
55 |
| <TABLE> |
55 |
| <TABLE BODY> |
55 |
| <TABLE ROW> |
55 |
| Warning! |
55 |
| Warning! |
55 |
| For your protection, drive only with properly positioned head restraints. |
55 |
| <TABLE ROW> |
55 |
| Adjust head restraint to support the back of the head approximately at ear level. |
55 |
| Adjust head restraint to support the back of the head approximately at ear level. |
55 |
| <TABLE ROW> |
55 |
| Do not drive the vehicle without the seat head restraints. Head restraints are intended to help r... |
55 |
| Do not drive the vehicle without the seat head restraints. Head restraints are intended to help r... |
55 |
| Rear seat head restraints |
56 |
| Rear seat head restraints |
56 |
| Rear seat head restraints |
56 |
| Rear seat head restraints (null)
Head restraints:Rear seat (null)
P54.25-0425-26 (null)
<GRAPHIC> |
56 |
| <GRAPHIC> (null)
Folding head restraints backward (with engine running): |
56 |
| Press symbol-side of rocker switch to release the head restraints. The head restraints will then ... |
56 |
| Placing head restraints upright: Pull head restraint forward until it locks in position. |
56 |
| P91.16-2018-26 |
56 |
| P91.16-2018-26 |
56 |
| P91.16-2018-26 |
56 |
| P91.16-2018-26 (null)
<GRAPHIC> |
56 |
| <GRAPHIC> (null)
Angle of head restraints: The head restraint angle can be adjusted manually. |
56 |
| Important! |
56 |
| Important! |
56 |
| For safety reasons, always drive with the rear head restraints in the upright position when the r... |
56 |
| Multicontour seat |
57 |
| Multicontour seat |
57 |
| Multicontour seat |
57 |
| Multicontour seat (null)
Seats:Multicontour seat (null)
P91.25-2025-26 (null)
Multicontour seat (null)
<GRAPHIC> |
57 |
| <GRAPHIC> (null)
We recommend to adjust the multicontour seat in the following order: |
57 |
| Some models may be equipped with multicontour seats. These seats have movable seat cushions, and ... |
57 |
| The seat cushion movement and amount of backrest cushion height and curvature can be continuously... |
57 |
| The side bolsters of the backrest can be adjusted with rocker switch (4): |
57 |
| • press to the right – increase side support, |
57 |
| • press to the right – increase side support, |
57 |
| • press to the left – decrease side support. |
57 |
| If the engine is turned off, the last cushion setting is retained in memory, and automatically ad... |
57 |
| Seat heater |
58 |
| Seat heater |
58 |
| Seat heater |
58 |
| Seat heater (null)
Seat heater (null)
Heated seats (null)
P54.25-2036-26 (null)
The seat heaters can be switched on with the electronic key in steering lock positions�1 or�2. |
58 |
| Notes: |
58 |
| Notes: |
58 |
| When in operation, the seat heater consumes a large amount of electrical power. It is not advisab... |
58 |
| The seat heaters may automatically switch off if too many power consumers are switched on at the ... |
58 |
| If the blinking of the indicator lamps is distracting to you, the seat heaters can be switched off. |
58 |
| Seat heater:Vehicles without seat ventilation |
59 |
| Seat heater:Vehicles without seat ventilation |
59 |
| Seat heater:Vehicles without seat ventilation |
59 |
| Seat heater:Vehicles without seat ventilation (null)
<GRAPHIC> |
59 |
| <GRAPHIC> (null)
The front seat heater switches are located in the center console. |
59 |
| Press switch to turn on seat heater: |
59 |
| Turning off seat heater: |
59 |
| If one indicator lamp is on, press upper half of switch. |
59 |
| If both indicator lamps are on, press lower half of switch. |
59 |
| If left on, the seat heater automatically turns off after approximately 30�minutes of operation. |
59 |
| Seat heater:Vehicles with seat ventilation |
60 |
| Seat heater:Vehicles with seat ventilation |
60 |
| Seat heater:Vehicles with seat ventilation |
60 |
| Seat heater:Vehicles with seat ventilation (null)
P54.25-2216-26 (null)
<GRAPHIC> |
60 |
| <GRAPHIC> (null)
The front seat heater switches are located in the center console. |
60 |
| Rapid heating mode: Press button�(3) once. Both red indicator lamps above the button light up. |
60 |
| The system switches over to normal heating mode automatically after approximately 5�minutes. |
60 |
| Normal heating mode: Press button�(3) twice. One red indicator lamp above the button lights up. |
60 |
| The seat heater will be automatically switched off after approximately 30�minutes. |
60 |
| Turning off the heater: Press the button�(3) again. The indicator lamps go out. The seat heater i... |
60 |
| Seat ventilation |
61 |
| Seat ventilation |
61 |
| Seat ventilation |
61 |
| Seat ventilation (null)
Seat ventilation (null)
P54.25-2217-26 (null)
<GRAPHIC> |
61 |
| <GRAPHIC> (null)
The front seat ventilation switches are located in the center console. |
61 |
| Turn the electronic key in steering lock to position�1 or�2. |
61 |
| Level�3 ventilation setting (maximum): |
61 |
| Press button�(1). |
61 |
| Three blue indicator lamps beside the button light up. |
61 |
| The level of ventilation is decreased one step approximately every 10�minutes. |
61 |
| Level�2 ventilation setting (middle): |
61 |
| Press button�(1) again. |
61 |
| Two blue indicator lamps beside the button light up. |
61 |
| Level�1 ventilation setting (minimum): |
61 |
| Press button�(1) again. |
61 |
| One blue indicator lamp beside the button lights up. |
61 |
| Turning off seat ventilation: |
61 |
| If one blue indicator lamp is on, press button�(1) once. |
61 |
| If two blue indicator lamps are on, press button�(1) twice. |
61 |
| If three blue indicator lamps are on, press button�(1) three times. |
61 |
| Notes: |
62 |
| Notes: |
62 |
| When in operation, the seat ventilation consumes a large amount of electrical power. It is not ad... |
62 |
| The seat ventilation may automatically switch off if too many power consumers are switched on at ... |
62 |
| The seat ventilation will switch on again automatically as soon as sufficient voltage is available. |
62 |
| If the blinking indicator lamps pose a distraction, the seat ventilation can be switched off. |
62 |
| Seat belts and integrated restraint system |
63 |
| Seat belts and integrated restraint system |
63 |
| Seat belts and integrated restraint system |
63 |
| Seat belts and integrated restraint system (null)
Seat belts and integrated restraint system (null)
Restraint systems (null)
Child restraint (null)
Your vehicle is equipped with seat belts for all seats, emergency tensioning retractors for all o... |
63 |
| Seat belts |
63 |
| Seat belts |
63 |
| Seat belts |
63 |
| Seat belts (null)
Seat belts (null)
Important |
63 |
| Important |
63 |
| Laws in most states and all Canadian provinces require seat belt use. |
63 |
| All states and provinces require use of child restraints that comply with U.S. Federal Motor Vehi... |
63 |
| All child restraint systems are designed to be secured in vehicle seats by lap belts or the lap b... |
63 |
| For your safety and that of your passengers we strongly recommend their use. |
63 |
| <TABLE> |
63 |
| <TABLE BODY> |
63 |
| <TABLE ROW> |
63 |
| <TABLE ROW> |
63 |
| Warning! |
63 |
| Warning! |
63 |
| Children 12 years old and under must never ride in the front seat, except in a Mercedes-Benz auth... |
63 |
| <TABLE ROW> |
63 |
| According to accident statistics, children are safer when properly restrained in the rear seating... |
63 |
| According to accident statistics, children are safer when properly restrained in the rear seating... |
63 |
| <TABLE ROW> |
63 |
| A child’s risk of serious or fatal injuries is significantly increased if the child restraints ar... |
63 |
| A child’s risk of serious or fatal injuries is significantly increased if the child restraints ar... |
63 |
| <TABLE> |
64 |
| <TABLE BODY> |
64 |
| <TABLE ROW> |
64 |
| Warning! |
64 |
| Warning! |
64 |
| Never ride in a moving vehicle with the backrest reclined. Sitting in an excessively reclined pos... |
64 |
| Note: |
64 |
| Note: |
64 |
| For cleaning and care of the seat belts, see page� |
64 |
| Seat belt nonusage warning system |
64 |
| Seat belt nonusage warning system |
64 |
| Seat belt nonusage warning system |
64 |
| Seat belt nonusage warning system (null)
Seat belts:Seat belt nonusage warning system (null)
With the electronic key in steering lock position�2, a warning sounds for a short time if the dri... |
64 |
| <TABLE> |
64 |
| <TABLE BODY> |
64 |
| <TABLE ROW> |
64 |
| <TABLE ROW> |
64 |
| Warning! |
64 |
| Warning! |
64 |
| Failure to wear and properly fasten and position your seat belt greatly increases your risk of in... |
64 |
| <TABLE ROW> |
64 |
| If you are ever in an accident, your injuries can be considerably more severe without your seat b... |
64 |
| If you are ever in an accident, your injuries can be considerably more severe without your seat b... |
64 |
| <TABLE ROW> |
64 |
| In the same crash, the possibility of injury or death is lessened if you are wearing your seat belt. |
64 |
| In the same crash, the possibility of injury or death is lessened if you are wearing your seat belt. |
64 |
| <TABLE> |
64 |
| <TABLE BODY> |
64 |
| <TABLE ROW> |
64 |
| Warning! |
64 |
| Warning! |
64 |
| Never let more people ride in the vehicle than there are seat belts available. Be sure everyone r... |
64 |
| Seat belts:Fastening |
65 |
| Seat belts:Fastening |
65 |
| Seat belts:Fastening |
65 |
| Seat belts:Fastening (null)
P91.40-2155-26 (null)
<GRAPHIC> |
65 |
| Push latch plate (1) into buckle (2) until it clicks. Do not twist the belt. A twisted seat belt ... |
65 |
| To help avoid severe or fatal injuries, the lap belt should be positioned as low as possible on y... |
65 |
| <TABLE> |
65 |
| <TABLE BODY> |
65 |
| <TABLE ROW> |
65 |
| Warning! |
65 |
| Warning! |
65 |
| Always fasten your seat belt before driving off. Always make sure your passengers are properly re... |
65 |
| <GRAPHIC> |
66 |
| <GRAPHIC> |
66 |
| P91.10-2077-26 |
66 |
| P91.10-2077-26 (null)
The shoulder portion of the seat belt must be pulled snug and checked for snugness immediately af... |
66 |
| Adjust seat belt so that shoulder portion is located as close as possible to the middle of your s... |
66 |
| <GRAPHIC> |
66 |
| <GRAPHIC> |
66 |
| <GRAPHIC> |
66 |
| P91.40-2060-26 |
66 |
| P91.40-2060-26 (null)
Raising: Slide belt outlet upward. |
66 |
| Lowering: Press button�(4) and slide belt outlet downward. |
66 |
| Caution! |
66 |
| Caution! |
66 |
| For safety reasons, avoid adjusting the seat or seat back into positions which could affect the c... |
66 |
| Seat belts:Unfastening |
67 |
| Seat belts:Unfastening |
67 |
| Seat belts:Unfastening |
67 |
| Seat belts:Unfastening (null)
P91.40-2191-26 (null)
<GRAPHIC> |
67 |
| <GRAPHIC> (null)
Push the release button (3) in the belt buckle (2). |
67 |
| Allow the retractor to completely rewind the seat belt by guiding the latch plate (1). |
67 |
| Operation |
67 |
| Operation |
67 |
| The inertia reel stops the belt from unwinding during sudden vehicle stops or when quickly pullin... |
67 |
| <TABLE> |
67 |
| <TABLE BODY> |
67 |
| <TABLE ROW> |
67 |
| <TABLE ROW> |
67 |
| Warning! |
67 |
| Warning! |
67 |
| USE SEAT BELTS PROPERLY. |
67 |
| <TABLE ROW> |
67 |
| • Seat belts can only work when used properly. Never wear seat belts in any other way than as des... |
67 |
| • Seat belts can only work when used properly. Never wear seat belts in any other way than as des... |
67 |
| • Seat belts can only work when used properly. Never wear seat belts in any other way than as des... |
67 |
| <TABLE ROW> |
67 |
| • Each occupant should wear their seat belt at all times, because seat belts help reduce the like... |
67 |
| • Each occupant should wear their seat belt at all times, because seat belts help reduce the like... |
67 |
| • Each occupant should wear their seat belt at all times, because seat belts help reduce the like... |
67 |
| <TABLE ROW> |
68 |
| • Never wear belts over rigid or breakable objects in or on your clothing, such as eyeglasses, pe... |
68 |
| • Never wear belts over rigid or breakable objects in or on your clothing, such as eyeglasses, pe... |
68 |
| • Never wear belts over rigid or breakable objects in or on your clothing, such as eyeglasses, pe... |
68 |
| <TABLE ROW> |
68 |
| • Position the lap belt as low as possible on your hips and not across the abdomen. If the belt i... |
68 |
| • Position the lap belt as low as possible on your hips and not across the abdomen. If the belt i... |
68 |
| • Position the lap belt as low as possible on your hips and not across the abdomen. If the belt i... |
68 |
| <TABLE ROW> |
68 |
| • Never wear the shoulder belt under your arm, against your neck or off your shoulder. In a crash... |
68 |
| • Never wear the shoulder belt under your arm, against your neck or off your shoulder. In a crash... |
68 |
| • Never wear the shoulder belt under your arm, against your neck or off your shoulder. In a crash... |
68 |
| <TABLE ROW> |
68 |
| <TABLE ROW> |
68 |
| • Each seat belt should never be used for more than one person at a time. Do not fasten a seat be... |
68 |
| • Each seat belt should never be used for more than one person at a time. Do not fasten a seat be... |
68 |
| • Each seat belt should never be used for more than one person at a time. Do not fasten a seat be... |
68 |
| <TABLE ROW> |
68 |
| • Belts should not be worn twisted. In a crash, you wouldn’t have the full width of the belt to m... |
68 |
| • Belts should not be worn twisted. In a crash, you wouldn’t have the full width of the belt to m... |
68 |
| • Belts should not be worn twisted. In a crash, you wouldn’t have the full width of the belt to m... |
68 |
| <TABLE ROW> |
68 |
| • Pregnant women should also use a lap- shoulder belt. The lap belt portion should be positioned ... |
68 |
| • Pregnant women should also use a lap- shoulder belt. The lap belt portion should be positioned ... |
68 |
| • Pregnant women should also use a lap- shoulder belt. The lap belt portion should be positioned ... |
68 |
| <TABLE ROW> |
68 |
| • Never place your feet on the instrument panel or on the seat. Always keep both feet on the floo... |
68 |
| • Never place your feet on the instrument panel or on the seat. Always keep both feet on the floo... |
68 |
| • Never place your feet on the instrument panel or on the seat. Always keep both feet on the floo... |
68 |
| <TABLE ROW> |
68 |
| <TABLE> |
69 |
| <TABLE BODY> |
69 |
| <TABLE ROW> |
69 |
| Warning! |
69 |
| Warning! |
69 |
| USE CHILD RESTRAINTS PROPERLY. |
69 |
| Children 12 years old and under must never ride in the front seat, except in a Mercedes-Benz auth... |
69 |
| <TABLE ROW> |
69 |
| According to accident statistics, children are safer when properly restrained in the rear seating... |
69 |
| According to accident statistics, children are safer when properly restrained in the rear seating... |
69 |
| <TABLE ROW> |
69 |
| <TABLE ROW> |
69 |
| A child’s risk of serious or fatal injuries is significantly increased if the child restraints ar... |
69 |
| A child’s risk of serious or fatal injuries is significantly increased if the child restraints ar... |
69 |
| <TABLE ROW> |
69 |
| Children too big for child restraint systems must ride in back seats using regular seat belts. Po... |
69 |
| Children too big for child restraint systems must ride in back seats using regular seat belts. Po... |
69 |
| BabySmartTM airbag deactivation system |
70 |
| BabySmartTM airbag deactivation system |
70 |
| BabySmartTM airbag deactivation system |
70 |
| BabySmartTM airbag deactivation system (null)
BabySmartTM airbag deactivation system (null)
Airbag deactivation system (null)
Child restraint (null)
Special BabySmart |
70 |
| BabySmart |
70 |
| <TABLE> |
70 |
| <TABLE BODY> |
70 |
| <TABLE ROW> |
70 |
| Warning! |
70 |
| Warning! |
70 |
| The BabySmart |
70 |
| <TABLE ROW> |
70 |
| Never place anything between seat cushion and child seat (e.g. pillow), since it reduces the effe... |
70 |
| Never place anything between seat cushion and child seat (e.g. pillow), since it reduces the effe... |
70 |
| <TABLE ROW> |
70 |
| Follow the manufacturer’s instructions for installation of special child seats. |
70 |
| Follow the manufacturer’s instructions for installation of special child seats. |
70 |
| <TABLE ROW> |
70 |
| The passenger front airbag will not deploy only if the 7 indicator lamp remains illuminated. |
70 |
| The passenger front airbag will not deploy only if the |
70 |
| <TABLE ROW> |
70 |
| Please be sure to check the indicator every time you use the special system child seat. |
70 |
| Please be sure to check the indicator every time you use the special system child seat. |
70 |
| Should the light go out while the restraint is installed, please check installation. If the light... |
70 |
| Self-test BabySmartTM without special child seat installed |
70 |
| Self-test BabySmartTM without special child seat installed |
70 |
| Self-test BabySmartTM without special child seat installed |
70 |
| Self-test BabySmartTM without special child seat installed (null)
BabySmartTM airbag deactivation system:Self-test (null)
Child restraint (null)
After turning electronic key in steering lock to position�1 or�2, the |
70 |
| If the indicator lamp should not come on or is continuously lit, the system is not functioning. Y... |
70 |
| BabySmart |
70 |
| Supplemental restraint system (SRS) |
71 |
| Supplemental restraint system (SRS) |
71 |
| Supplemental restraint system (SRS) |
71 |
| Supplemental restraint system (SRS) (null)
Supplemental restraint system (SRS) (null)
SRS (Supplemental restraint system) (null)
Airbags are intended as a supplement to seat belts. Airbags alone cannot protect as well as airba... |
71 |
| The SRS uses two crash severity levels (thresholds) to activate either the Emergency Tensioning R... |
71 |
| Seat belt fastened |
71 |
| • first threshold exceeded: ETR activates |
71 |
| • first threshold exceeded: ETR activates |
71 |
| Seat belt not fastened |
71 |
| Front seats: |
71 |
| • first threshold exceeded: airbag activates, but not ETR |
71 |
| • first threshold exceeded: airbag activates, but not ETR |
71 |
| Rear outer seats: |
71 |
| • first threshold exceeded: ETR activates |
71 |
| • first threshold exceeded: ETR activates |
71 |
| Driver, front passenger and rear outer seat systems operate independently of each other. |
71 |
| Emergency tensioning retractor (ETR) |
72 |
| Emergency tensioning retractor (ETR) |
72 |
| Emergency tensioning retractor (ETR) |
72 |
| Emergency tensioning retractor (ETR) (null)
Emergency tensioning retractor (ETR) (null)
ETR (Emergency tensioning retractor) (null)
The seat belts for the front and outer rear seats are equipped with emergency tensioning retracto... |
72 |
| The emergency tensioning retractors are designed to activate only when the seat belts are fastene... |
72 |
| In cases of other frontal impacts, angled impacts, roll- overs, certain side impacts, or other ac... |
72 |
| For seat belt and emergency tensioning retractor safety guidelines |
72 |
| Airbags |
73 |
| Airbags |
73 |
| Airbags |
73 |
| Airbags (null)
P91.60-2248-27 (null)
Airbags (null)
<GRAPHIC> |
73 |
| The most effective occupant restraint system yet developed for use in production vehicles is the ... |
73 |
| In conjunction with wearing the seat belts, the driver and front passenger airbags can provide in... |
73 |
| Door mounted side impact and head protection window curtain airbags can provide increased protect... |
73 |
| SRS (Supplemental restraint system):SRS malfunction |
73 |
| SRS (Supplemental restraint system):SRS malfunction |
73 |
| SRS (Supplemental restraint system):SRS malfunction (null)
Supplemental restraint system (SRS):SRS malfunction (null)
The following system components are monitored or undergo a selfcheck: crash-sensor(s), airbag ign... |
74 |
| Initially, when the electronic key is turned from steering lock position 0 to position 1 or 2, ma... |
74 |
| Have the system checked at your authorized Mercedes�Benz Center immediately. |
74 |
| In the operational mode, after the indicator lamp has gone out following the initial check, inter... |
74 |
| <TABLE> |
74 |
| <TABLE BODY> |
74 |
| <TABLE ROW> |
74 |
| <TABLE ROW> |
74 |
| Warning! |
74 |
| Warning! |
74 |
| In the event a malfunction of the |
74 |
| Note: |
74 |
| Note: |
74 |
| See page� |
74 |
| Front airbags |
75 |
| Front airbags |
75 |
| The driver and passenger front airbags are designed to activate only in certain frontal impacts e... |
75 |
| The front passenger airbag deploys only if the front passenger seat is occupied and the |
75 |
| Note: |
75 |
| Note: |
75 |
| Heavy objects on the front passenger seat can appear to the |
75 |
| P91.60-2169-27 |
75 |
| P91.60-2169-27 |
75 |
| P91.60-2169-27 |
75 |
| P91.60-2169-27 (null)
<GRAPHIC> |
75 |
| Side impact airbags |
76 |
| Side impact airbags |
76 |
| The side impact airbags are designed to activate only in certain side impacts exceeding a preset ... |
76 |
| The side impact airbag for the front passenger deploys only if the front passenger seat is occupied. |
76 |
| Side impact airbags operate best in conjunction with a properly positioned and fastened seat belt. |
76 |
| Note: |
76 |
| Note: |
76 |
| Heavy objects on front passenger seat can cause the front passenger-side impact airbag to deploy ... |
76 |
| Window curtain airbags |
76 |
| Window curtain airbags |
76 |
| The head protection window curtain airbags afford greater protection against injuries to the head... |
76 |
| The window curtain airbags are designed to activate only in certain side impacts exceeding a pres... |
76 |
| Important! |
76 |
| Important! |
76 |
| Airbags are designed to activate only in certain frontal (front airbags) impacts, or side (side i... |
76 |
| Airbags are designed to activate only in certain frontal (front airbags) impacts, or side (side i... |
76 |
| Only during these types of impacts, if of sufficient severity to meet the deployment thresholds, ... |
76 |
| Only during these types of impacts, if of sufficient severity to meet the deployment thresholds, ... |
76 |
| The driver and passenger should always wear their seat belts, otherwise it is not possible for th... |
76 |
| The driver and passenger should always wear their seat belts, otherwise it is not possible for th... |
76 |
| In cases of other frontal impacts, angled impacts, roll-overs, other side impacts, rear collision... |
76 |
| In cases of other frontal impacts, angled impacts, roll-overs, other side impacts, rear collision... |
76 |
| We caution you not to rely on the presence of the airbags in order to avoid wearing your seat belt. |
76 |
| We caution you not to rely on the presence of the airbags in order to avoid wearing your seat belt. |
76 |
| <TABLE> |
76 |
| <TABLE BODY> |
76 |
| <TABLE ROW> |
76 |
| <TABLE ROW> |
77 |
| Warning! |
77 |
| Warning! |
77 |
| Airbags are designed to reduce the potential of injury in certain frontal (front airbags) impacts... |
77 |
| <TABLE ROW> |
77 |
| The activation of the “SRS” temporarily releases a small amount of dust from the airbags. This du... |
77 |
| The activation of the |
77 |
| Your vehicle was originally equipped with airbags which are designed to activate in certain impac... |
77 |
| Your vehicle was originally equipped with airbags which are designed to activate in certain impac... |
77 |
| <TABLE> |
77 |
| <TABLE BODY> |
77 |
| <TABLE ROW> |
77 |
| Warning! |
77 |
| Warning! |
77 |
| Warning! |
77 |
| To reduce the risk of injury when the front airbags inflate, it is very important for the driver ... |
77 |
| <TABLE ROW> |
77 |
| For maximum protection in the event of a collision always be in normal seated position with your ... |
77 |
| For maximum protection in the event of a collision always be in normal seated position with your ... |
77 |
| <TABLE ROW> |
77 |
| Since the airbag inflates with considerable speed and force, a proper seating and hands on steeri... |
77 |
| Since the airbag inflates with considerable speed and force, a proper seating and hands on steeri... |
77 |
| <TABLE ROW> |
78 |
| • Sit properly belted in an upright position with your back against the backrest. |
78 |
| • Sit properly belted in an upright position with your back against the backrest. |
78 |
| • Sit properly belted in an upright position with your back against the backrest. |
78 |
| <TABLE ROW> |
78 |
| • Adjust the driver’s seat as far as possible rearward, still permitting proper operation of vehi... |
78 |
| • Adjust the driver’s seat as far as possible rearward, still permitting proper operation of vehi... |
78 |
| • Adjust the driver’s seat as far as possible rearward, still permitting proper operation of vehi... |
78 |
| <TABLE ROW> |
78 |
| • Do not lean with your head or chest close to the steering wheel or dashboard. |
78 |
| • Do not lean with your head or chest close to the steering wheel or dashboard. |
78 |
| • Do not lean with your head or chest close to the steering wheel or dashboard. |
78 |
| <TABLE ROW> |
78 |
| • Keep hands on the outside of steering wheel rim. Placing hands and arms inside the rim can incr... |
78 |
| • Keep hands on the outside of steering wheel rim. Placing hands and arms inside the rim can incr... |
78 |
| • Keep hands on the outside of steering wheel rim. Placing hands and arms inside the rim can incr... |
78 |
| <TABLE ROW> |
78 |
| • Adjust the front passenger seat as far as possible rearward from the dashboard when the seat is... |
78 |
| • Adjust the front passenger seat as far as possible rearward from the dashboard when the seat is... |
78 |
| • Adjust the front passenger seat as far as possible rearward from the dashboard when the seat is... |
78 |
| <TABLE ROW> |
78 |
| • Occupants, especially children, should never lean their heads in the area of the door where the... |
78 |
| • Occupants, especially children, should never lean their heads in the area of the door where the... |
78 |
| • Occupants, especially children, should never lean their heads in the area of the door where the... |
78 |
| <TABLE ROW> |
78 |
| • Children 12 years old and under must never ride in the front seat, except in a Mercedes- Benz a... |
78 |
| • Children 12 years old and under must never ride in the front seat, except in a Mercedes- Benz a... |
78 |
| • Children 12 years old and under must never ride in the front seat, except in a Mercedes- Benz a... |
78 |
| <TABLE ROW> |
78 |
| Failure to follow these instructions can result in severe injuries to you or other occupants. |
78 |
| Failure to follow these instructions can result in severe injuries to you or other occupants. |
78 |
| <TABLE> |
79 |
| <TABLE BODY> |
79 |
| <TABLE ROW> |
79 |
| Warning! |
79 |
| Warning! |
79 |
| Accident research shows that the safest place for children in an automobile is in the rear seat. ... |
79 |
| <TABLE ROW> |
79 |
| It should be noted that with respect to both front and rear side impact airbags there is a possib... |
79 |
| It should be noted that with respect to both front and rear side impact airbags there is a possib... |
79 |
| <TABLE ROW> |
79 |
| To help avoid the possibility of injury, please follow these guidelines: (1) occupants, especiall... |
79 |
| To help avoid the possibility of injury, please follow these guidelines: (1) occupants, especiall... |
79 |
| <TABLE ROW> |
79 |
| If you believe that, even with the use of these guidelines, it would be safer for your rear seat ... |
79 |
| If you believe that, even with the use of these guidelines, it would be safer for your rear seat ... |
79 |
| Safety guidelines for the seat belt, emergency tensioning retractor and airbag |
79 |
| Safety guidelines for the seat belt, emergency tensioning retractor and airbag |
79 |
| Safety guidelines for the seat belt, emergency tensioning retractor and airbag |
79 |
| Safety guidelines for the seat belt, emergency tensioning retractor and airbag (null)
Safety guidelines for the seat belt, emergency tensioning retractor and airbag (null)
<TABLE> |
79 |
| <TABLE BODY> |
79 |
| <TABLE ROW> |
79 |
| Warning! |
79 |
| Warning! |
79 |
| • Damaged seat belts or belts that were highly stressed in an accident must be replaced and their... |
79 |
| • Damaged seat belts or belts that were highly stressed in an accident must be replaced and their... |
79 |
| <TABLE ROW> |
79 |
| • Do not pass belts over sharp edges. |
79 |
| • Do not pass belts over sharp edges. |
79 |
| • Do not pass belts over sharp edges. |
79 |
| <TABLE ROW> |
79 |
| • Do not make any modification that could change the effectiveness of the belts. |
79 |
| • Do not make any modification that could change the effectiveness of the belts. |
79 |
| • Do not make any modification that could change the effectiveness of the belts. |
79 |
| <TABLE ROW> |
80 |
| • Airbags and “ETR’s” are designed to function on a one-time-only basis. An airbag or emergency t... |
80 |
| • Airbags and |
80 |
| • Airbags and |
80 |
| <TABLE ROW> |
80 |
| • No modifications of any kind may be made to any components or wiring of the “SRS”. This include... |
80 |
| • No modifications of any kind may be made to any components or wiring of the |
80 |
| • No modifications of any kind may be made to any components or wiring of the |
80 |
| <TABLE ROW> |
80 |
| • Do not use handles above doors for placing such items as coat hangers etc.. |
80 |
| • Do not use handles above doors for placing such items as coat hangers etc.. |
80 |
| • Do not use handles above doors for placing such items as coat hangers etc.. |
80 |
| <TABLE ROW> |
80 |
| • An airbag system component within the steering wheel gets hot after the airbag has inflated. Do... |
80 |
| • An airbag system component within the steering wheel gets hot after the airbag has inflated. Do... |
80 |
| • An airbag system component within the steering wheel gets hot after the airbag has inflated. Do... |
80 |
| <TABLE ROW> |
80 |
| • Improper work on the system, including incorrect installation and removal, can lead to possible... |
80 |
| • Improper work on the system, including incorrect installation and removal, can lead to possible... |
80 |
| • Improper work on the system, including incorrect installation and removal, can lead to possible... |
80 |
| <TABLE ROW> |
80 |
| • In addition, through improper work there is the risk of rendering the “SRS” inoperative or caus... |
80 |
| • In addition, through improper work there is the risk of rendering the |
80 |
| • In addition, through improper work there is the risk of rendering the |
80 |
| <TABLE ROW> |
80 |
| • For your protection and the protection of others, when scrapping the airbag unit or emergency t... |
80 |
| • For your protection and the protection of others, when scrapping the airbag unit or emergency t... |
80 |
| • For your protection and the protection of others, when scrapping the airbag unit or emergency t... |
80 |
| <TABLE ROW> |
80 |
| • Given the considerable deployment speed and the textile structure of the airbags, there is the ... |
80 |
| • Given the considerable deployment speed and the textile structure of the airbags, there is the ... |
80 |
| • Given the considerable deployment speed and the textile structure of the airbags, there is the ... |
80 |
| When you sell the vehicle we strongly urge you to give notice to the subsequent owner that it is ... |
80 |
| Infant and child restraint systems |
81 |
| Infant and child restraint systems |
81 |
| Infant and child restraint systems |
81 |
| Infant and child restraint systems (null)
Infant and child restraint systems (null)
Child restraint (null)
We recommend all infants and children be properly re- strained at all times while the vehicle is ... |
81 |
| To activate, pull shoulder belt out completely and let it retract. During the seat belt retractio... |
81 |
| To deactivate, release seat belt buckle and let seat belt retract completely. The seat belt can a... |
81 |
| Note: |
81 |
| Note: |
81 |
| For child seats with mounting fittings for tether anchorages refer to page� |
81 |
| <TABLE> |
81 |
| <TABLE BODY> |
81 |
| <TABLE ROW> |
81 |
| Warning! |
81 |
| Warning! |
81 |
| Never release the seat belt buckle while vehicle is in motion, since the special seat belt retrac... |
81 |
| Important! |
81 |
| Important! |
81 |
| The use of infant or child restraints is required by law in all 50 states and all Canadian provin... |
81 |
| Infants and small children should be seated in an appropriate infant or child restraint system pr... |
81 |
| When using any infant or child restraint system, be sure to carefully read and follow all manufac... |
81 |
| Please read and observe warning labels affixed to inside of vehicle and to infant or child restra... |
81 |
| <TABLE> |
81 |
| <TABLE BODY> |
81 |
| <TABLE ROW> |
81 |
| <TABLE ROW> |
82 |
| Warning! |
82 |
| Warning! |
82 |
| Children 12 years old and under must never ride in the front seat, except in a Mercedes-Benz auth... |
82 |
| <TABLE ROW> |
82 |
| According to accident statistics, children are safer when properly restrained in the rear seating... |
82 |
| According to accident statistics, children are safer when properly restrained in the rear seating... |
82 |
| <TABLE ROW> |
82 |
| <TABLE ROW> |
82 |
| Infants and small children should never share a seat belt with another occupant. During an accide... |
82 |
| Infants and small children should never share a seat belt with another occupant. During an accide... |
82 |
| <TABLE ROW> |
82 |
| Children too big for child restraint systems must ride in back seats using regular seat belts. Po... |
82 |
| Children too big for child restraint systems must ride in back seats using regular seat belts. Po... |
82 |
| <TABLE ROW> |
82 |
| When the child restraint is not in use, remove it from the vehicle or secure it with the seat bel... |
82 |
| When the child restraint is not in use, remove it from the vehicle or secure it with the seat bel... |
82 |
| P91.40-2123-26 (W163) |
83 |
| P91.40-2123-26 (W163) |
83 |
| P91.40-2123-26 (W163) |
83 |
| P91.40-2123-26 (W163) (null)
<GRAPHIC> |
83 |
| <GRAPHIC> (null)
This vehicle is provided with tether anchorages for a top tether strap at each of the rear seatin... |
83 |
| Prior to installing a tether strap, remove cover (1) from anchorage ring�(2) and store in a conve... |
83 |
| <GRAPHIC> |
83 |
| <GRAPHIC> (null)
To secure a tether strap to the anchorage, securely fasten the hook�(3), which is part of the tet... |
83 |
| After removing the tether strap, reinstall the cover (1). |
83 |
| Steering wheel adjustment |
84 |
| Steering wheel adjustment |
84 |
| Steering wheel adjustment |
84 |
| Steering wheel adjustment (null)
Steering wheel adjustment (null)
Adjusting steering wheel (null)
Steering wheel adjustment (null)
P46.00-2010-26 (null)
<GRAPHIC> |
84 |
| <GRAPHIC> (null)
Turn electronic key in steering lock to position�1 or�2 (with the driver’s or front passenger’s d... |
84 |
| To lengthen or shorten the steering column, push switch forward or backward. |
84 |
| To raise or lower steering wheel, push switch up or down. |
84 |
| Note: |
84 |
| Note: |
84 |
| Memory |
84 |
| Memory |
84 |
| Memory (null)
<TABLE> |
84 |
| <TABLE BODY> |
84 |
| <TABLE ROW> |
84 |
| Warning! |
84 |
| Warning! |
84 |
| Do not adjust the steering wheel while driving. Adjusting the steering wheel while driving could ... |
84 |
| Rear view mirrors |
85 |
| Rear view mirrors |
85 |
| Rear view mirrors |
85 |
| Rear view mirrors (null)
Rear view mirrors (null)
Rear view mirrors (null)
Rear view mirrors:Inside |
85 |
| Rear view mirrors:Inside |
85 |
| Rear view mirrors:Inside |
85 |
| Rear view mirrors:Inside (null)
Mirror, inside, rear view (null)
Manually adjust the mirror. |
85 |
| Use your inside mirror to determine the size and distance of objects seen in the passenger-side c... |
85 |
| Rear view mirrors:Antiglare night position |
85 |
| Rear view mirrors:Antiglare night position |
85 |
| Rear view mirrors:Antiglare night position (null)
Antiglare night position |
85 |
| With the electronic key in steering lock position 2, the mirror reflection brightness responds to... |
85 |
| With gear selector lever in position “R”, or with the interior lamp switched on, the mirror brigh... |
85 |
| Note: |
85 |
| Note: |
85 |
| The automatic antiglare function does not react, if incoming light is not aimed directly at senso... |
85 |
| <TABLE> |
85 |
| <TABLE BODY> |
85 |
| <TABLE ROW> |
85 |
| Warning! |
85 |
| Warning! |
85 |
| In the case of an accident liquid electrolyte may escape the mirror housing when the mirror glass... |
85 |
| <TABLE ROW> |
85 |
| Electrolyte has an irritating effect. Do not allow the liquid come into contact with eyes, skin, ... |
85 |
| Electrolyte has an irritating effect. Do not allow the liquid come into contact with eyes, skin, ... |
85 |
| Rear view mirrors:Exterior |
86 |
| Rear view mirrors:Exterior |
86 |
| Rear view mirrors:Exterior |
86 |
| Rear view mirrors:Exterior (null)
P82.00-2028-26 (null)
Mirror, exterior, adjusting (null)
Mirror, exterior, rear view (null)
<GRAPHIC> |
86 |
| <GRAPHIC> (null)
The switch is located on the center console. |
86 |
| Turn electronic key in steering lock to position�1 or�2. |
86 |
| First select the mirror to be adjusted – press button: |
86 |
| % |
86 |
| % |
86 |
| % |
86 |
| Left mirror |
86 |
| & |
86 |
| & |
86 |
| Right mirror |
86 |
| To adjust, toggle the switch forward, backward or to either side. |
86 |
| With the electronic key in steering lock position 2, the driver’s side mirror reflection brightne... |
86 |
| With gear selector lever in position |
86 |
| <TABLE> |
86 |
| <TABLE BODY> |
86 |
| <TABLE ROW> |
86 |
| Warning! |
86 |
| Warning! |
86 |
| Exercise care when using the passenger-side mirror. The passenger-side exterior mirror is convex ... |
86 |
| Note: |
87 |
| Note: |
87 |
| The exterior mirrors have electrically heated glass. The heater switches on automatically, depend... |
87 |
| If an exterior mirror housing is forcibly pivoted from its normal position, it must be reposition... |
87 |
| <TABLE> |
87 |
| <TABLE BODY> |
87 |
| <TABLE ROW> |
87 |
| Warning! |
87 |
| Warning! |
87 |
| In the case of an accident liquid electrolyte may escape the mirror housing when the mirror glass... |
87 |
| <TABLE ROW> |
87 |
| Electrolyte has an irritating effect. Do not allow the liquid come into contact with eyes, skin, ... |
87 |
| Electrolyte has an irritating effect. Do not allow the liquid come into contact with eyes, skin, ... |
87 |
| Important! |
87 |
| Important! |
87 |
| Electrolyte drops coming into contact with the vehicle paint finish can only be completely remove... |
87 |
| Rear view mirrors:Storing mirror positions in memory |
87 |
| Rear view mirrors:Storing mirror positions in memory |
87 |
| Rear view mirrors:Storing mirror positions in memory (null)
Memory (null)
Storing mirror positions in memory |
87 |
| The exterior rear view mirror positions are stored in memory with the seat�/�head restraint�/�ste... |
87 |
| Rear view mirrors:Parking position |
88 |
| Rear view mirrors:Parking position |
88 |
| Rear view mirrors:Parking position (null)
Parking position |
88 |
| The passenger-side exterior mirror can be adjusted and programmed to assist the driver during par... |
88 |
| With electronic key in steering lock position 2, and the exterior rear view mirror switch in the ... |
88 |
| The mirror position can now be adjusted as desired. |
88 |
| At speeds above approximately 6�mph (10�km�/�h), upon shifting gear selector lever from |
88 |
| One passenger-side mirror position can be stored in memory. To do so: |
88 |
| The vehicle must be stationary. |
88 |
| Repeat the memory procedure if the mirror moves. |
88 |
| Instrument cluster |
89 |
| Instrument cluster |
89 |
| Instrument cluster |
89 |
| Instrument cluster (null)
Instrument cluster (null)
Instrument cluster (null)
P54.30-3571-29 (null)
<GRAPHIC> |
89 |
| Instrument cluster:Indicator lamps |
91 |
| Instrument cluster:Indicator lamps |
91 |
| Instrument cluster:Indicator lamps |
91 |
| Instrument cluster:Indicator lamps (null)
Indicator lamps in the instrument cluster (null)
<GRAPHIC> |
91 |
| <GRAPHIC> |
91 |
| <GRAPHIC> (null)
High beam |
91 |
| <GRAPHIC> |
91 |
| <GRAPHIC> (null)
ABS |
91 |
| ABS |
91 |
| <GRAPHIC> |
91 |
| <GRAPHIC> (null)
Brake fluid low (except Canada). Parking brake engaged, see page� |
91 |
| <GRAPHIC> |
91 |
| <GRAPHIC> (null)
Brake fluid low (Canada only). Parking brake engaged, see page� |
91 |
| <GRAPHIC> |
91 |
| <GRAPHIC> (null)
BAS |
91 |
| BAS |
91 |
| <GRAPHIC> |
91 |
| <GRAPHIC> (null)
Fasten seat belts, see page� |
91 |
| <GRAPHIC> |
91 |
| <GRAPHIC> (null)
ESP |
91 |
| ESP |
91 |
| <GRAPHIC> |
91 |
| <GRAPHIC> (null)
Engine malfunction indicator lamp. If the |
91 |
| <GRAPHIC> |
91 |
| <GRAPHIC> (null)
SRS malfunction, see page� |
91 |
| Function indicator lamp on the center console |
91 |
| Function indicator lamp on the center console |
91 |
| <GRAPHIC> |
91 |
| <GRAPHIC> |
91 |
| <GRAPHIC> (null)
Front passenger airbag automatically switched off, see page� |
91 |
| Instrument cluster:Activating |
92 |
| Instrument cluster:Activating |
92 |
| Instrument cluster:Activating |
92 |
| Instrument cluster:Activating (null)
The instrument cluster is activated by: |
92 |
| • Opening the door. |
92 |
| • Opening the door. |
92 |
| • Pressing button� |
92 |
| • Turning the electronic key in steering lock to position 1 or 2. |
92 |
| • Switching on the exterior lamps. |
92 |
| Instrument cluster:Illumination |
92 |
| Instrument cluster:Illumination |
92 |
| Instrument cluster:Illumination |
92 |
| Instrument cluster:Illumination (null)
P54.30-2767-26 (null)
Display illumination (null)
<GRAPHIC> |
92 |
| <GRAPHIC> (null)
Activating the instrument cluster. |
92 |
| Press� |
92 |
| Coolant temperature gauge |
93 |
| Coolant temperature gauge |
93 |
| Coolant temperature gauge |
93 |
| Coolant temperature gauge (null)
During severe operating conditions and stop-and-go city traffic, the coolant temperature may rise... |
93 |
| The engine should not be operated with the coolant temperature in the red zone. Doing so may caus... |
93 |
| <TABLE> |
93 |
| <TABLE BODY> |
93 |
| <TABLE ROW> |
93 |
| Warning! |
93 |
| Warning! |
93 |
| • Driving when your engine is badly overheated can cause some fluids which may have leaked into t... |
93 |
| • Driving when your engine is badly overheated can cause some fluids which may have leaked into t... |
93 |
| <TABLE ROW> |
93 |
| • Steam from an overheated engine can cause serious burns and can occur just by opening the engin... |
93 |
| • Steam from an overheated engine can cause serious burns and can occur just by opening the engin... |
93 |
| • Steam from an overheated engine can cause serious burns and can occur just by opening the engin... |
93 |
| <TABLE ROW> |
93 |
| Turn off the engine, get out of the vehicle and do not stand near the vehicle until it cools down. |
93 |
| Turn off the engine, get out of the vehicle and do not stand near the vehicle until it cools down. |
93 |
| Outside temperature indicator |
93 |
| Outside temperature indicator |
93 |
| Outside temperature indicator |
93 |
| Outside temperature indicator (null)
The temperature sensor is located in the front bumper area. Due to its location, the sensor can b... |
93 |
| Adaption to ambient temperature takes place in steps and depends on the prevailing driving condit... |
93 |
| <TABLE> |
93 |
| <TABLE BODY> |
93 |
| <TABLE ROW> |
93 |
| Warning! |
93 |
| Warning! |
93 |
| The outside temperature indicator is not designed to serve as an Ice-Warning Device and is theref... |
93 |
| Trip odometer |
94 |
| Trip odometer |
94 |
| Trip odometer |
94 |
| Trip odometer (null)
To reset to |
94 |
| Activate the instrument cluster if it is not already activated, see page� |
94 |
| Press button |
94 |
| Press button� |
94 |
| Tachometer |
94 |
| Tachometer |
94 |
| Tachometer |
94 |
| Tachometer (null)
The red marking on tachometer denotes excessive engine speed. |
94 |
| Avoid this engine speed, as it may result in serious engine damage that is not covered by the Mer... |
94 |
| To help protect the engine, the fuel supply is interrupted if the engine is operated within the r... |
94 |
| Multifunction steering wheel, multifunction display |
95 |
| Multifunction steering wheel, multifunction display |
95 |
| Multifunction steering wheel, multifunction display |
95 |
| Multifunction steering wheel, multifunction display (null)
Multifunction steering wheel (null)
Multifunction display (null)
Multifunction steering wheel, multifunction display (null)
P54.30-2752-29 (null)
<GRAPHIC> |
95 |
| <GRAPHIC> (null)
Depending on your vehicle’s equipment, you may use the buttons on the multifunction steering whee... |
96 |
| Vehicle speed, see page� |
96 |
| Radio, see page� |
96 |
| After start After reset Fuel tank content |
96 |
| Press the |
96 |
| Pressing the |
96 |
| Pressing the |
96 |
| You may call up additional displays within some of these categories by pressing the |
96 |
| <TABLE> |
96 |
| <TABLE BODY> |
96 |
| <TABLE ROW> |
96 |
| Warning! |
96 |
| Warning! |
96 |
| A driver’s attention to the road must always be his�/ her primary focus when driving. |
96 |
| <TABLE ROW> |
96 |
| For your safety and the safety of others, selecting features through the multifunction steering w... |
96 |
| For your safety and the safety of others, selecting features through the multifunction steering w... |
96 |
| <GRAPHIC> |
97 |
| <GRAPHIC> |
97 |
| <GRAPHIC> |
97 |
| P46.10-2165-27 |
97 |
| Turn the electronic key in steering look to position�1�or�2. |
97 |
| Press button: |
97 |
| See page� |
97 |
| Press the |
98 |
| Pressing the |
98 |
| Pressing the |
98 |
| You may call up additional displays in some systems by pressing the |
98 |
| Note: |
98 |
| Note: |
98 |
| The displays in the multifunction display can be set to German, English, French, Italian or Spani... |
98 |
| The displays for the audio systems (radio, CD player, cassette player) will appear in English, re... |
98 |
| Trip and main odometer, FSS and engine oil level display |
99 |
| Trip and main odometer, FSS and engine oil level display |
99 |
| Trip and main odometer, FSS and engine oil level display |
99 |
| Trip and main odometer, FSS and engine oil level display (null)
Multifunction display:Engine oil level indicator (null)
Multifunction display:FSS (Flexible service system) (null)
Multifunction display:Trip and main odometer (null)
P54.30-3577-27 (null)
Multifunction display:Vehicle speed (null)
<GRAPHIC> |
99 |
| Press |
99 |
| Press the |
99 |
| Pressing the |
99 |
| Audio systems |
100 |
| Audio systems |
100 |
| Audio systems |
100 |
| Audio systems (null)
Multifunction display:Audio systems (null)
Audio systems (null)
Radio |
100 |
| Radio |
100 |
| Radio |
100 |
| Radio (null)
P54.30-2936-27 (null)
Audio systems:Radio (null)
<GRAPHIC> |
100 |
| The radio must be switched on. |
100 |
| Press the |
100 |
| Press button |
100 |
| Use the |
100 |
| Pressing the |
100 |
| CD player |
101 |
| CD player |
101 |
| CD player |
101 |
| CD player (null)
P54.30-2187-27 (null)
Audio systems:CD player (null)
<GRAPHIC> |
101 |
| The radio must be switched on. |
101 |
| The CD player must be switched on. |
101 |
| Press the |
101 |
| Press the |
101 |
| Pressing the |
101 |
| Note: |
101 |
| Note: |
101 |
| To select a |
101 |
| Cassette player |
102 |
| Cassette player |
102 |
| Cassette player |
102 |
| Cassette player (null)
P54.30-2186-27 (null)
Audio systems:Cassette player (null)
<GRAPHIC> |
102 |
| The radio must be switched on. |
102 |
| The cassette player must be switched on. |
102 |
| Press the |
102 |
| Pressing the |
102 |
| Pressing the |
102 |
| Pressing the |
102 |
| Note: |
102 |
| Note: |
102 |
| To select the reverse side of the tape, press button below track number on the audio system displ... |
102 |
| Telephone |
103 |
| Telephone |
103 |
| Telephone |
103 |
| Telephone (null)
Multifunction display:Telephone (null)
Telephone (null)
Telephone book |
103 |
| Telephone book |
103 |
| Telephone book |
103 |
| Telephone book (null)
P54.30-3578-27 (null)
Telephone:Telephone book (null)
<GRAPHIC> |
103 |
| The telephone must be switched on. |
104 |
| Press the |
104 |
| Pressing |
104 |
| Note: |
104 |
| Note: |
104 |
| Press the |
104 |
| The procedure is cancelled and display (3) appears. |
104 |
| Press the |
104 |
| The name will be displayed when dialing is completed. Display�(6) remains for the duration of the... |
104 |
| Pressing the |
104 |
| Pressing the |
104 |
| Redialing |
105 |
| Redialing |
105 |
| Redialing |
105 |
| Redialing (null)
P54.30-3580-27 (null)
Telephone:Redialing (null)
<GRAPHIC> |
105 |
| The telephone is switched on. |
106 |
| Press the |
106 |
| Pressing the |
106 |
| Pressing the |
106 |
| Note: |
106 |
| Note: |
106 |
| Press the |
106 |
| The procedure is cancelled and display (1) appears. |
106 |
| Press the |
106 |
| Once dialing is completed the name (4) is displayed if the name is stored in the telephone book; ... |
106 |
| Pressing the |
106 |
| Pressing the |
106 |
| Incoming call |
107 |
| Incoming call |
107 |
| Incoming call |
107 |
| Incoming call (null)
P54.30-2202-21 (null)
Telephone:Incoming call (null)
<GRAPHIC> |
107 |
| <GRAPHIC> (null)
The telephone must be switched on. |
107 |
| call |
107 |
| call |
107 |
| call |
107 |
| Press the |
107 |
| Press the |
107 |
| Navigation system |
108 |
| Navigation system |
108 |
| Navigation system |
108 |
| Navigation system (null)
Multifunction display:Navigation system (null)
Navigation system - Multifunction display (null)
P54.30-2537-27 (null)
<GRAPHIC> |
108 |
| Press the |
108 |
| See the separate |
108 |
| Pressing the |
108 |
| Trip computer |
109 |
| Trip computer |
109 |
| Trip computer |
109 |
| Trip computer (null)
Multifunction display:Trip computer (null)
P54.30-2529-27 (null)
Trip computer (null)
<GRAPHIC> |
109 |
| <GRAPHIC> (null)
After�start |
109 |
| After�start |
109 |
| After�start |
109 |
| After�reset |
109 |
| After�reset |
109 |
| Press the button |
110 |
| Press the |
110 |
| Important! |
110 |
| Important! |
110 |
| The reading in the display |
110 |
| Pressing the |
110 |
| Note: |
110 |
| Note: |
110 |
| The |
110 |
| To reset the |
110 |
| Call up the relevant display�(1 or�2) using the |
110 |
| The |
110 |
| Malfunction message memory |
111 |
| Malfunction message memory |
111 |
| Malfunction message memory |
111 |
| Malfunction message memory (null)
Multifunction display:Malfunction message memory (null)
P54.30-2066-27 (null)
Malfunction message memory (null)
<GRAPHIC> |
111 |
| Press the |
111 |
| Press the |
111 |
| Should any malfunctions be stored while driving, they will reappear in the display (2) when the e... |
112 |
| Specific malfunctions can be recalled by pressing button� |
112 |
| Pressing the� |
112 |
| The malfunction message memory will be cleared when the electronic key is turned in the steering ... |
112 |
| Pressing the |
112 |
| Important! |
112 |
| Important! |
112 |
| Malfunctions and warning messages are only indicated for certain systems and displayed to a low l... |
112 |
| The malfunction and warning messages are simply a reminder with respect to the operation of certa... |
112 |
| Individual settings |
113 |
| Individual settings |
113 |
| Individual settings |
113 |
| Individual settings (null)
Multifunction display:Individual settings (null)
P54.30-3576-29 (null)
Individual settings (null)
<GRAPHIC> |
113 |
| Clock, setting |
114 |
| Clock, setting |
114 |
| Clock, setting (null)
set time�–�hours |
114 |
| set time�–�minutes |
114 |
| set time�–�minutes |
114 |
| Temp. indicator |
114 |
| Temp. indicator |
114 |
| Display Values in |
114 |
| Display Values in |
114 |
| text |
114 |
| text |
114 |
| station search using |
114 |
| station search using |
114 |
| Frequency |
114 |
| Frequency |
114 |
| Memory |
114 |
| Memory |
114 |
| Notes: |
114 |
| Notes: |
114 |
| These settings may only be performed with the vehicle at standstill and with the key in steering ... |
114 |
| The figure depicts the factory setting for the Federal Republic of Germany. |
114 |
| Press the |
115 |
| Press the |
115 |
| Pressing the |
115 |
| The individual setting preliminary display (1) will appear again after you have run through all t... |
115 |
| Pressing the |
115 |
| Notes: |
115 |
| Notes: |
115 |
| Settings can only be selected with the vehicle stationary or moving slowly. |
115 |
| The individual setting preliminary display (1) will appear if you speed up. |
115 |
| The setting menu previously called up will reappear when the vehicle stops or slows down, providi... |
115 |
| To return setting menus (4 to 8) to their factory settings: |
116 |
| • Call up the individual setting preliminary display�(1). |
116 |
| • Call up the individual setting preliminary display�(1). |
116 |
| • Press the�� |
116 |
| • Press the�� |
116 |
| The individual setting preliminary display (1) will appear if you do not press the�� |
116 |
| Setting the audio volume |
116 |
| Setting the audio volume |
116 |
| Setting the audio volume |
116 |
| Setting the audio volume (null)
Multifunction steering wheel:Setting the audio volume (null)
Setting the audio volume (null)
You can only adjust the volume of the system currently in use. The volume setting for each system... |
116 |
| Setting button: |
116 |
| æ |
116 |
| æ |
116 |
| ç |
116 |
| ç |
116 |
| Flexible service system (FSS) |
117 |
| Flexible service system (FSS) |
117 |
| Flexible service system (FSS) |
117 |
| Flexible service system (FSS) (null)
Flexible service system (FSS) (null)
Service indicator:See Flexible service system (FSS) (null)
Flexible service system (null)
P54.30-2765-26 (null)
<GRAPHIC> |
117 |
| <GRAPHIC> (null)
The FSS permits a flexible service schedule that is directly related to the operating conditions ... |
117 |
| The symbol |
117 |
| Depending on operating conditions throughout the year, the next service is calculated and display... |
117 |
| The message is displayed for approximately 10 seconds when turning the electronic key in steering... |
117 |
| The symbols and messages indicate the type of service to be performed: |
117 |
| Service�A |
117 |
| º |
117 |
| º |
117 |
| Service�B |
117 |
| One of the following messages will appear in the display (e.g. Service�A): |
117 |
| service�A – in |
117 |
| service�A – in |
117 |
| service�A – in |
117 |
| The next service due date is displayed either in days or in miles, depending on your driving style. |
117 |
| Once the suggested service term has passed, the symbol and message appear for approximately 30�se... |
117 |
| The service indicator disappears automatically after 30�seconds or if button�� |
118 |
| Calling up service indicator manually: |
118 |
| Turn the electronic key in steering lock to position 1. |
118 |
| Call up the trip odometer and main odometer by pressing button |
118 |
| Press button |
118 |
| Pressing the |
118 |
| Important! |
118 |
| Important! |
118 |
| The FSS indicator is not an engine oil level indicator. See page� |
118 |
| Note: |
118 |
| Note: |
118 |
| When disconnecting vehicle battery for one or more days at a time, such days will not be counted.... |
118 |
| Following a completed A or B service the Mercedes-Benz Center sets the counter mileage to 10�000�... |
119 |
| The counter can also be set by any individual. To do so: |
119 |
| Turn the electronic key in steering lock to position�2. |
119 |
| To call up the trip odometer and main odometer, press button |
119 |
| Press button |
119 |
| Press button�� |
119 |
| The multifunction display will show the question: |
119 |
| Press button� |
119 |
| The new service indicator is displayed with the reset distance of 10�000�miles (Canada 15�000�km). |
119 |
| If the FSS counter was inadvertently reset, have a Mercedes�Benz Center correct it. |
119 |
| However you choose to set your reference numbers, the scheduled services as posted in the Service... |
119 |
| Engine oil level indicator |
120 |
| Engine oil level indicator |
120 |
| Engine oil level indicator |
120 |
| Engine oil level indicator (null)
Checking engine oil level:Via engine oil level indicator (null)
Engine oil level:Checking (null)
Engine oil level indicator (null)
Engine oil level indicator (null)
P54.30-3575-26 (null)
<GRAPHIC> |
120 |
| <GRAPHIC> (null)
To check the engine oil level, park vehicle on level ground, with engine at normal operational te... |
120 |
| Check oil level approximately 5 minutes after stopping the engine, allowing for the oil to return... |
120 |
| Turn the electronic key in steering lock to position 2. |
120 |
| To call up the trip odometer and main odometer, press button |
120 |
| Press button |
120 |
| The electronic key in steering lock is not in position 2 if the |
120 |
| The |
120 |
| One of the following messages will subsequently appear on the indicator: |
121 |
| ENGINE OIL LEVEL�–�O.K. |
121 |
| ENGINE OIL LEVEL�–�O.K. |
121 |
| ENGINE OIL LEVEL�–�ADD 1.0 QUART |
121 |
| ENGINE OIL LEVEL�–�ADD 1.0 QUART |
121 |
| ENGINE OIL LEVEL�–�ADD 1.5 QUART |
121 |
| ENGINE OIL LEVEL�–�ADD 1.5 QUART |
121 |
| ENGINE OIL LEVEL�–�ADD 2.0 QUART |
121 |
| ENGINE OIL LEVEL�–�ADD 2.0 QUART |
121 |
| See page� |
121 |
| ENGINE OIL LEVEL�–�REDUCE OIL LEVEL |
121 |
| ENGINE OIL LEVEL�–�REDUCE OIL LEVEL |
121 |
| Do not overfill the engine. |
121 |
| The message |
121 |
| Perform the engine oil level check with the dipstick, if it cannot be completed via the multifunc... |
121 |
| Note: |
121 |
| Note: |
121 |
| See |
121 |
| The engine oil level cannot be checked while the engine is running. The |
121 |
| Engine oil consumption |
121 |
| Engine oil consumption |
121 |
| Engine oil consumption |
121 |
| Engine oil consumption (null)
Engine oil consumption (null)
Engine oil consumption checks should only be made after the break-in period. During the break-in ... |
121 |
| Exterior lamp switch |
122 |
| Exterior lamp switch |
122 |
| Exterior lamp switch |
122 |
| Exterior lamp switch (null)
Exterior lamp switch (null)
Exterior lamp switch (null)
P82.10-2181-26 (null)
Lamps, exterior:Headlamps (null)
Lamps, exterior:Taillamps (null)
Lamps, exterior:Standing lamps (null)
Lamps, exterior:Parking lamps (null)
Lamps, exterior:Fog lamps (null)
Lamps, exterior:Side marker lamp, front (null)
<GRAPHIC> |
122 |
| <GRAPHIC> (null)
D |
122 |
| D |
122 |
| D |
122 |
| Off |
122 |
| C |
122 |
| C |
122 |
| Parking lamps (also side marker lamps, taillamps, licence plate lamps, instrument panel lamps) |
122 |
| Canada only: When the engine is running, the low beam is additionally switched on. |
122 |
| B |
122 |
| B |
122 |
| Parking lamps plus low beam or high beam headlamps (combination switch pushed forward). |
122 |
| ˆ |
122 |
| ˆ |
122 |
| Standing lamps, right (turn left one stop) |
122 |
| ‚ |
122 |
| ‚ |
122 |
| Standing lamps, left (turn left two stops) |
122 |
| ‡ |
122 |
| ‡ |
122 |
| Front fog lamps (pull out one stop) with parking lamps and�/�or low beam headlamps on. Green indi... |
122 |
| † |
122 |
| † |
122 |
| Rear fog lamp (pull out to second detent) in addition to the front fog lamps. Yellow indicator in... |
122 |
| Standing lamps |
122 |
| Standing lamps |
122 |
| When the vehicle is parked on the street the standing lamps (right or left side parking lamps) ca... |
122 |
| The standing lamps cannot be operated with the electronic key in steering lock position 2. |
122 |
| Note: |
123 |
| Note: |
123 |
| With the electronic key removed and the driver’s door open, a warning sounds and the message |
123 |
| Fog lamps will operate with the parking lamps and�/�or the low beam headlamps on. Fog lamps shoul... |
123 |
| Daytime running lamps |
123 |
| Daytime running lamps |
123 |
| Daytime running lamps |
123 |
| Daytime running lamps (null)
When the engine is running and the selector lever is in a driving position, the low beam headlamp... |
123 |
| When shifting from a driving position to position |
123 |
| For nighttime driving the exterior lamp switch should be turned to position |
123 |
| Night security illumination |
123 |
| Night security illumination |
123 |
| Night security illumination |
123 |
| Night security illumination (null)
Night security illumination (null)
When exiting the vehicle after driving with the exterior lamps on, they switch on again for added... |
123 |
| Headlamp cleaning system |
124 |
| Headlamp cleaning system |
124 |
| Headlamp cleaning system |
124 |
| Headlamp cleaning system (null)
Headlamp cleaning system (null)
Headlamp cleaning system (null)
P82.15-2007-26 (null)
<GRAPHIC> |
124 |
| <GRAPHIC> (null)
The switch is located in the center console. |
124 |
| The headlamp washer can be activated with the electronic key in steering lock position 2. |
124 |
| Briefly press symbol side of switch. |
124 |
| Combination switch |
125 |
| Combination switch |
125 |
| Combination switch |
125 |
| Combination switch (null)
Combination switch (null)
Combination switch (null)
P54.25-2218-26 (null)
Headlights (null)
Turn signals (null)
<GRAPHIC> |
125 |
| To signal minor directional changes, such as changing lanes on a highway, move combination switch... |
125 |
| To operate the turn signals continuously, move the combination switch past the point of resistanc... |
125 |
| Turn signal failure |
125 |
| Turn signal failure |
125 |
| Turn signal failure (null)
Turn signal failure |
125 |
| If one of the turn signals fails, the turn signal indicator system flashes and sounds at a faster... |
125 |
| P54.25-2423-26 |
126 |
| P54.25-2423-26 |
126 |
| P54.25-2423-26 |
126 |
| P54.25-2423-26 (null)
<GRAPHIC> |
126 |
| Push briefly for single wipe without adding washer fluid (use only when windshield is wet). |
126 |
| Push past detent and hold to activate wiper and washer. |
126 |
| Wiper off |
126 |
| I |
126 |
| Intermittent wiping |
126 |
| Vehicles with optional rain sensor: One initial wipe, pauses between wipes are automatically cont... |
126 |
| Notes: |
126 |
| With switch in this position, one wipe occurs when turning the electronic key in steering lock fr... |
126 |
| Rain sensor |
126 |
| Rain sensor |
126 |
| Rain sensor (null)
II |
126 |
| Normal wiper speed |
126 |
| III |
126 |
| Fast wiper speed |
126 |
| Note: |
127 |
| Note: |
127 |
| The windshield washer reservoir, hoses and nozzles are automatically heated. |
127 |
| For windshield and headlamp washer fluid mixing ratio see page� |
127 |
| Windshield wiper smears |
127 |
| Windshield wiper smears |
127 |
| If the windshield wiper smears the windshield, even during rain, activate the washer system as of... |
127 |
| Blocked windshield wiper |
127 |
| Blocked windshield wiper |
127 |
| If the windshield wiper becomes blocked (for example, due to snow), switch off the wiper. |
127 |
| For safety reasons before removing ice or snow, remove electronic key from steering lock. Remove ... |
127 |
| Activate combination switch again (electronic key in steering lock position 1). |
127 |
| Hazard warning flasher switch |
128 |
| Hazard warning flasher switch |
128 |
| Hazard warning flasher switch |
128 |
| Hazard warning flasher switch (null)
Hazard warning flasher (null)
Hazard warning flasher switch (null)
<GRAPHIC> |
128 |
| <GRAPHIC> (null)
The hazard warning flasher can be activated with the switch located in the dashboard. |
128 |
| To activate hazard warning flasher, press switch once. To deactivate, press switch again. |
128 |
| Note: |
128 |
| Note: |
128 |
| With the hazard warning flasher activated, the combination switch in position for either left or ... |
128 |
| Automatic climate control |
129 |
| Automatic climate control |
129 |
| Automatic climate control |
129 |
| Automatic climate control (null)
Automatic climate control (null)
Automatic climate control (null)
P83.30-3291-29 (null)
<GRAPHIC> |
129 |
| To open side air outlets: Turn wheel to position |
130 |
| To open defroster outlets: Turn wheel to position |
130 |
| The system is always at operational readiness, except when manually switched off. |
130 |
| The automatic climate control only operates with the engine running. |
130 |
| The temperature selector should be left at the desired temperature setting. The temperature selec... |
130 |
| The system will not heat or cool any quicker by setting a higher or lower temperature. |
130 |
| The automatic climate control removes considerable moisture from the air during operation in the ... |
130 |
| The desired interior temperature can be selected separately for the left and right side of the pa... |
130 |
| Display and controls |
131 |
| Display and controls |
131 |
| Display and controls |
131 |
| Display and controls (null)
P83.40-2167-26 (null)
Automatic climate control:Display and controls (null)
<GRAPHIC> |
131 |
| <GRAPHIC> (null)
Press the desired button to activate, indicator lamp is on while activated. |
131 |
| U |
131 |
| U |
131 |
| U |
131 |
| Automatic mode |
131 |
| f |
131 |
| f |
131 |
| Raise temperature |
131 |
| g |
131 |
| g |
131 |
| Lower temperature |
131 |
| P |
131 |
| P |
131 |
| Defrost |
131 |
| O |
131 |
| O |
131 |
| Air recirculation |
131 |
| e |
131 |
| e |
131 |
| Activated charcoal filter |
131 |
| F |
131 |
| F |
131 |
| Rear window defroster |
131 |
| b |
131 |
| b |
131 |
| Air distribution, manual |
131 |
| S |
131 |
| S |
131 |
| Economy mode |
131 |
| ï |
131 |
| ï |
131 |
| Air volume, manual |
131 |
| T |
131 |
| T |
131 |
| Residual engine heat utilization |
131 |
| Basic setting |
132 |
| Basic setting |
132 |
| Basic setting |
132 |
| Basic setting (null)
Automatic climate control:Basic setting (null)
Press left and right |
132 |
| Simultaneously press both |
132 |
| Q |
132 |
| Q |
132 |
| Air volume and distribution are controlled automatically. |
132 |
| This setting can be used all year around. |
132 |
| Automatic climate control:Economy |
132 |
| Automatic climate control:Economy |
132 |
| Automatic climate control:Economy |
132 |
| Automatic climate control:Economy (null)
The function of this setting corresponds to the automatic mode. However, because the air conditio... |
132 |
| Press |
132 |
| Press |
132 |
| Special settings |
132 |
| Special settings |
132 |
| Special settings |
132 |
| Special settings (null)
Automatic climate control:Special settings (null)
Special settings (Automatic climate control) (null)
Defogging windows |
132 |
| Defogging windows |
132 |
| Defogging windows (null)
Automatic climate control:Defogging windows (null)
Defogging windows |
132 |
| Switch off |
132 |
| Press left and right |
132 |
| Press |
132 |
| S |
132 |
| S |
132 |
| Turn wheels (2) to position to open left and right defroster outlets (5). |
132 |
| Defrosting |
132 |
| Defrosting |
132 |
| Defrosting (null)
Automatic climate control:Defrosting (null)
Defrosting |
132 |
| Turn wheels (2) to position |
132 |
| Press |
132 |
| P |
132 |
| P |
132 |
| Press |
132 |
| Rear window defroster |
133 |
| Rear window defroster |
133 |
| Rear window defroster (null)
Automatic climate control:Rear window defroster (null)
Rear window defroster (null)
Rear window defroster |
133 |
| Turn electronic key in steering lock to position�2. |
133 |
| To select, press |
133 |
| To cancel, press |
133 |
| Notes: |
133 |
| Notes: |
133 |
| Heavy accumulation of snow and ice should be removed before activating the defroster. |
133 |
| The rear window defroster uses a large amount of power. To keep the battery drain to a minimum, t... |
133 |
| The defroster is automatically turned off after a maximum of 12 minutes of operation. |
133 |
| If several power consumers are turned on simultaneously, or the battery is only partially charged... |
133 |
| As soon as the battery has sufficient voltage, the defroster automatically turns itself back on. |
133 |
| Air distribution |
133 |
| Air distribution |
133 |
| Air distribution (null)
Automatic climate control:Air distribution (null)
Air distribution (null)
Air distribution |
133 |
| U |
133 |
| U |
133 |
| Press |
133 |
| Air volume |
133 |
| Air volume |
133 |
| Air volume (null)
Automatic climate control:Air volume (null)
Air volume (null)
Air volume |
133 |
| Press - or + side of rocker switch |
133 |
| To switch the automatic climate control off, press -�side of rocker switch |
133 |
| I |
133 |
| I |
133 |
| The fresh air supply to the car interior is shut off. |
133 |
| While driving, use this setting only temporarily, otherwise the windshield could fog up. |
133 |
| To switch the automatic climate control on again, press |
133 |
| Air recirculation |
134 |
| Air recirculation |
134 |
| Air recirculation (null)
Automatic climate control:Air recirculation (null)
Air recirculation |
134 |
| This mode can be selected to temporarily reduce the entry of annoying odors or dust into the vehi... |
134 |
| Outside air is not supplied to the car’s interior. |
134 |
| To select, press |
134 |
| To cancel, press |
134 |
| The system will automatically switch from recirculated air to fresh air |
134 |
| • after approximately 5�minutes at outside temperatures below approximately 40 |
134 |
| • after approximately 5�minutes at outside temperatures below approximately 40 |
134 |
| • after approximately 30�minutes, at outside temperatures above approximately 40 |
134 |
| • after approximately 5�minutes, if button |
134 |
| If the windows should fog up from the inside, switch from recirculated air back to fresh air. |
134 |
| At high outside temperatures, the system automatically engages the recirculated air mode thereby ... |
134 |
| Dust filter |
134 |
| Dust filter |
134 |
| Dust filter (null)
Automatic climate control:Dust filter (null)
Dust filter |
134 |
| Nearly all dust particles and pollen are filtered out before outside air enters the passenger com... |
134 |
| Notes: |
134 |
| Notes: |
134 |
| Do not obstruct the air flow by placing objects on the air flow through exhaust slots below the r... |
134 |
| Also keep the air intake grille in front of windshield free of snow and debris. |
134 |
| Activated charcoal filter |
135 |
| Activated charcoal filter |
135 |
| Activated charcoal filter (null)
Automatic climate control:Activated charcoal filter (null)
Activated charcoal filter |
135 |
| An activated charcoal filter markedly reduces bad odors and removes pollutants from the air enter... |
135 |
| To select, press |
135 |
| To cancel, press |
135 |
| The blower speed is slightly increased to supply a constant volume of air. |
135 |
| The system switches automatically to the air recirculation mode, if the carbon monoxide (CO) or n... |
135 |
| When pressing button |
135 |
| Notes: |
135 |
| Notes: |
135 |
| The automatic air recirculation does not function when selecting the Economy mode |
135 |
| The activated charcoal filter should be switched off when windows fog up on the inside, or if the... |
135 |
| Residual engine heat utilization |
135 |
| Residual engine heat utilization |
135 |
| Residual engine heat utilization (null)
Automatic climate control:Residual engine heat utilization (REST) (null)
Residual engine heat utilization (REST) (null)
Residual engine heat utilization |
135 |
| With the engine switched off, it is possible to continue heating the interior for a short while. |
135 |
| Air volume and distribution are controlled automatically. |
135 |
| To select: |
135 |
| Turn electronic key in steering lock to position 1 or 0 or remove electronic key. Close air outle... |
135 |
| Press |
135 |
| This function selection will not activate if the battery charge level is insufficient. |
135 |
| To cancel: |
135 |
| Press |
135 |
| The system will automatically shut off |
135 |
| • If you turn electronic key in steering lock to position�2, |
135 |
| • If you turn electronic key in steering lock to position�2, |
135 |
| • after approximately 30�minutes, |
135 |
| • if the battery voltage drops. |
135 |
| Front center console compartment ventilation |
136 |
| Front center console compartment ventilation |
136 |
| Front center console compartment ventilation |
136 |
| Front center console compartment ventilation (null)
Automatic climate control:Front center console compartment ventilation (null)
The front center console compartment has its own air outlet. |
136 |
| To open: Push lever down. |
136 |
| To close: Push lever up. |
136 |
| The air volume is dependent on the setting of the |
136 |
| • air volume control |
136 |
| • air volume control |
136 |
| • air distribution control |
136 |
| • air outlets in the dashboard and rear passenger compartment. |
136 |
| The air temperature is about the same as that of the dashboard air outlets. It cannot be regulate... |
136 |
| Note: |
136 |
| Note: |
136 |
| The compartment can get very warm due to its confined space. When storing heat sensitive objects ... |
136 |
| Also, do not obstruct the air outlet. |
136 |
| Rear passenger compartment adjustable air outlet |
137 |
| Rear passenger compartment adjustable air outlet |
137 |
| Rear passenger compartment adjustable air outlet |
137 |
| Rear passenger compartment adjustable air outlet (null)
Automatic climate control:Rear passenger compartment adjustable air outlet (null)
P68.00-2136-26 (null)
<GRAPHIC> |
137 |
| <GRAPHIC> (null)
To open air outlet, rotate wheel (1) upward. |
137 |
| The air outlet is adjustable. |
137 |
| Important |
137 |
| Important |
137 |
| This vehicle is equipped with an air conditioner system that uses R-134a (HFC: hydrofluorocarbon)... |
137 |
| Audio and telephone, operation |
138 |
| Audio and telephone, operation |
138 |
| Audio and telephone, operation |
138 |
| Audio and telephone, operation (null)
Audio system (null)
Audio system:Operation – audio and telephone (null)
These instructions are intended to help you become acquainted with your Mercedes- Benz car radio.... |
138 |
| <TABLE> |
138 |
| <TABLE BODY> |
138 |
| <TABLE ROW> |
138 |
| Warning! |
138 |
| Warning! |
138 |
| In order to avoid distraction which could lead to an accident, system settings should be entered ... |
138 |
| <TABLE ROW> |
138 |
| Bear in mind that at a speed of just 30�mph (approximately 50�km�/�h), your vehicle is covering a... |
138 |
| Bear in mind that at a speed of just 30�mph (approximately 50�km�/�h), your vehicle is covering a... |
138 |
| The right to correct errors and make technical amendments is reserved. |
138 |
| Audio system:Operating safety |
138 |
| Audio system:Operating safety |
138 |
| Audio system:Operating safety |
138 |
| Audio system:Operating safety (null)
<TABLE> |
138 |
| <TABLE BODY> |
138 |
| <TABLE ROW> |
138 |
| Warning! |
138 |
| Warning! |
138 |
| Any alternations made to electronic components can cause malfunctions |
138 |
| <TABLE ROW> |
138 |
| The radio, cassette deck, CD changer1 and telephone1 are interconnected. Therefore, when one of t... |
138 |
| The radio, cassette deck, CD changer |
138 |
| <TABLE ROW> |
138 |
| These malfunctions might seriously impair the operating safety of your vehicle. |
138 |
| These malfunctions might seriously impair the operating safety of your vehicle. |
138 |
| <TABLE ROW> |
138 |
| We recommend that you have any service work or alternations on electronic components done in an a... |
138 |
| We recommend that you have any service work or alternations on electronic components done in an a... |
138 |
| Dolby and the double-D symbol |
138 |
| Operating and display elements |
139 |
| Operating and display elements |
139 |
| <GRAPHIC> |
139 |
| Anti-theft system |
140 |
| Anti-theft system |
140 |
| <GRAPHIC> |
140 |
| <GRAPHIC> |
140 |
| P82.60-2138-26 |
140 |
| P82.60-2138-26 |
140 |
| P82.60-2138-26 (null)
<GRAPHIC> |
140 |
| Important! |
140 |
| Important! |
140 |
| Never leave the Radio code card in the vehicle. Keep it in a safe place. |
140 |
| Entering the code number |
141 |
| Entering the code number |
141 |
| Switch on the radio. |
141 |
| If an incorrect code has been entered and confirmed, |
141 |
| <GRAPHIC> |
141 |
| <GRAPHIC> |
141 |
| Note: |
141 |
| Note: |
141 |
| The lock out time will only count down if the radio is left switched on. |
141 |
| Button and soft key operation |
141 |
| Button and soft key operation |
141 |
| In these instructions, the alpha-numeric keypad (right side of radio face) and the function butto... |
141 |
| Note: |
141 |
| Note: |
141 |
| Do not press directly on the radio display face. |
141 |
| Operation |
142 |
| Operation |
142 |
| Switching on and off |
142 |
| Switching on and off |
142 |
| Press the control knob |
142 |
| The radio is switched off when the ignition key is turned to position 0 or removed from the ignit... |
142 |
| Note: |
142 |
| Note: |
142 |
| The radio can also be switched on even if the ignition key is not inserted, but will switch itsel... |
142 |
| Adjusting the volume |
142 |
| Adjusting the volume |
142 |
| Turn the control knob - turning the knob clockwise will increase the volume, counterclockwise wil... |
142 |
| Audio functions |
142 |
| Audio functions |
142 |
| The AUD key is used to select the BASS, TREBLE, FADER and BALANCE functions. Settings for bass an... |
142 |
| Bass |
142 |
| Bass |
142 |
| <GRAPHIC> |
142 |
| <GRAPHIC> |
142 |
| Treble |
142 |
| Treble |
142 |
| <GRAPHIC> |
142 |
| <GRAPHIC> |
142 |
| Press the |
142 |
| Fader� |
143 |
| Fader� |
143 |
| <GRAPHIC> |
143 |
| <GRAPHIC> |
143 |
| Balance |
143 |
| Balance |
143 |
| <GRAPHIC> |
143 |
| <GRAPHIC> |
143 |
| Press the |
143 |
| Centering all audio functions |
143 |
| Centering all audio functions |
143 |
| <GRAPHIC> |
143 |
| <GRAPHIC> |
143 |
| Radio mode |
144 |
| Radio mode |
144 |
| Selecting radio mode |
144 |
| Selecting radio mode |
144 |
| Press |
144 |
| Selecting the band |
144 |
| Selecting the band |
144 |
| <GRAPHIC> |
144 |
| <GRAPHIC> |
144 |
| <GRAPHIC> |
144 |
| <GRAPHIC> (null)
<TABLE> |
144 |
| <TABLE> |
144 |
| <TABLE BODY> |
144 |
| <TABLE ROW> |
144 |
| Frequency ranges: |
144 |
| FM |
144 |
| <TABLE ROW> |
144 |
| AM |
144 |
|
530 |
|
6000 |
|
6000 |
|
6000 |
 1
1 48
48 49
49 50
50 51
51 52
52 53
53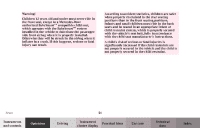 54
54 55
55 56
56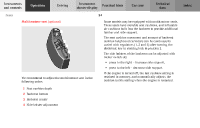 57
57 58
58

