2005 Mercury Mariner Quick Reference Guide 1st Printing - Page 1
2005 Mercury Mariner Manual
Page 1 highlights
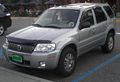
GAUGES_WARNING LIGHTS 03 02 01 02 04 06 03 08 07 09 10 05 01 02 03 11 13 01 MERCURY MARINER_QUICK REFERENCE GUIDE Your new Mercury Mariner is about to turn your everyday driving experience into an everyday driving adventure. You're going to love the way this smart, stylish and sophisticated SUV handles whatever road life lays out before you. This Quick Reference Guide was designed to help you quickly get to know the many features of your new Mariner. For more detailed information, please consult your Owner's Guide. INSTRUMENT PANEL_FEATURES 12 08 10 11 12 13 14 01. TURN SIGNAL, HEADLAMP AND AUTOLAMP CONTROL Turning the headlamp control up to the first position turns on the parking lamps. Continuing to turn the headlamp control to the second position, turns on the headlamps. To activate the high beams, push the lever forward to the instrument panel. Pull the lever towards you to deactivate them. Use the same lever to activate the "Flash to Pass" feature. Pull the lever towards you to the first detent to activate and release quickly to flash. The battery saver will shut off the exterior lamps 10 minutes after the ignition has been turned to the LOCK position and the headlamp control is in the position. To use the autolamp light sensitive, automatic on-off control (if equipped) for the headlamps, turn the headlamp control down to the AUTO position. To turn autolamps off, turn the control back to the OFF position. For more information, please consult your Owner's Guide. 02. POWER SIDE VIEW MIRRORS 03. FOG LAMP CONTROL The fog 04. PANEL DIMMER CONTROL Use the 05. TILT STEERING WHEEL LEVER To 06. MESSAGE CENTER 07. COMPASS To adjust the power side view mirrors, the ignition must be in the RUN position. Rotate the control clockwise to adjust the right mirror, and counterclockwise to adjust the left mirror. Then move the control in the direction you wish to tilt the mirror. Return the control to the center position to lock the mirrors in place. lamps can be turned on when the headlamp control is in the parking lamp or headlamp position and the high beams are not on. Press the control to turn on the fog lamps. The fog lamp indicator light will illuminate. Press again to deactivate. Remember, the fog lamps will not operate when the high beams are on. The fog lamps are deactivated when the ignition is turned to the LOCK position. dimmer control to adjust the brightness of the instrument panel and all applicable switches in the vehicle when headlamps and parklamps are on. Push and hold the top of the control to brighten. Push and hold the bottom of the control to dim. adjust the steering wheel, push the adjustment lever down to unlock the steering column. While the lever is in the down position, tilt the steering column to your desired position. Then, while holding the steering column in place, pull the lever up to its original position to lock the steering column. (If equipped) The message center, located on your instrument cluster, displays important vehicle information through constant monitoring of vehicle systems. You may select display features on the message center for a display of status preceded by a brief indicator chime. The system will also notify you of potential vehicle problems with a display of system warnings followed by a long indicator chime. (If equipped) The compass heading (N, NE, E, SE, S, SW, W or NW) is displayed in the message center display. The compass reading may be affected when you drive by large buildings, power lines and powerful broadcast antennas. For more information, please consult your Owner's Guide. 08. FRONT AND REAR WIPER WASHER CONTROL The multi- function lever controls the windshield wiper modes, speeds, and the windshield washer. For intermittent operation, move the lever down one position. You can then adjust the rotary control to the desired speed. For normal or low speed wiper operation, move the lever down two positions from OFF. For high speed operation, move the lever down three positions from OFF. For windshield washer fluid, pull the end of the stalk towards you. Move the lever up and release for one wipe. REAR: Rotate the end of the lever upward to the position for intermittent operation. Rotate the end of the lever upward to ON for normal-speed operation. Rotate the end of the lever to the position and release to activate rear washer. 09. MACH® 300 SATELLITE READY SOUND SYSTEM RADIO 10. SPEED CONTROL (If equipped) Please see reverse side for details. For your speed control to work, it must be in the ON position. Pressing and releasing the ON button will engage it. Pressing and releasing the OFF button disengages it. Speed control does not work at speeds below 30 mph (48 km/h). To set a desired speed, press SET ACC. You can increase speed using the speed control by pressing SET ACC again. You can decrease speed the same way using the CST button. Pressing the RES control will automatically return the vehicle to the previously set speed. To disengage the speed control, press the OFF button or press the brake pedal. 11. HAZARD FLASHER CONTROL Push the 12. REAR WINDOW DEFROSTER CONTROL / HEATED OUTSIDE MIRRORS flasher control and all front, side and rear direction signals will flash. Press again to turn them off. Use it when your vehicle is disabled and is creating a safety hazard for other motorists. The hazard flashers will operate when the ignition is in the LOCK position. Ensure that the ignition is in the RUN position. Press the control to clear the rear window of thin ice and fog. The LED will illuminate. The rear defroster turns off automatically after 15 minutes or when the ignition is turned to LOCK. To manually turn off the rear defroster before 15 minutes have passed, push the control again. When the rear window defroster is activated, both outside heated mirrors (if equipped) will remove ice, mist, and fog. Like the rear window defroster, the mirrors have an auto time-out feature that will turn the system off after 15 minutes. 13. REVERSE SENSING SYSTEM (If equipped) When you are within 10 inches, the tone sounds continuously. The system is not effective at speeds above 3 mph (5km/h) and may not detect certain angular or moving objects. 14. CLIMATE CONTROL 01. ABS WARNING LAMP This system sounds a tone to warn the driver of obstacles near the rear bumper, when R (Reverse) is selected and the vehicle is moving at speeds less than 3 mph (5km/h). The closer you get to the obstacle, the more the rate of the tone increases. Please see reverse side for details. The ABS warning lamp will momentarily illuminate when the ignition is turned on. If the light doesn't illuminate, stays on or flashes, have your vehicle serviced. In an emergency, apply continuous force to the brake pedal. Do not pump the brakes. Any pulsation or mechanical noise you may feel or hear is normal. 02. FOUR-WHEEL DRIVE (4WD) SYSTEM 03. SERVICE ENGINE SOON LAMP The (If equipped) Four Wheel Drive is capable of handling various road conditions, including street and highway driving as well as off-road and winter driving. The 4WD indicator light illuminates when ignition is first turned to the RUN position to check the bulb. Solid illumination indicates 4WD system is locked. Blinking indicator indicates system has been disabled or requires service. Service Engine Soon lamp illuminates when the ignition is first turned to the RUN position to check the system. If the light turns solid or blinks, the On-Board Diagnostics System has detected a malfunction. Drive in a moderate fashion (avoid heavy acceleration or deceleration) and have your vehicle serviced immediately. Always secure your fuel cap by turning it clockwise 1/8 of a turn until it stops to avoid a warning caused by a loose cap.
-
 1
1 -
 2
2
 |
 |
