1999 Nissan Altima Owner's Manual - Page 164
1999 Nissan Altima Manual

Page 164 highlights
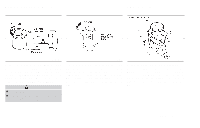
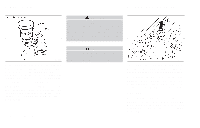
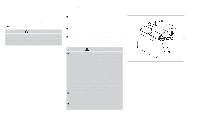
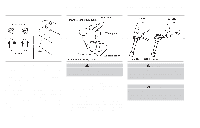
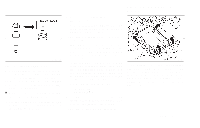
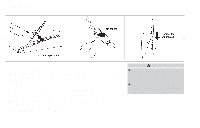
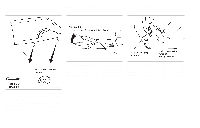
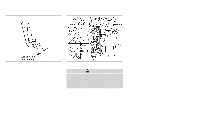
AIR CLEANER HOUSING FILTER 2. Disconnect the spark plug cables from the spark plugs. When disconnecting, always hold the boots, not the cables. Mark all cables to identify their original locations. 3. Remove the spark plugs with a spark plug socket. The plug socket has a rubber seal that holds the spark plug so it does not fall when it is pulled out. Make sure each spark plug is snugly fitted into the spark plug socket. 4. Fit the new plugs, one at a time, into the spark plug socket and install them. Use only the specified spark plugs. Turn each plug several full turns by hand, then tighten with the spark plug socket to the correct torque. Do not overtighten. Spark plug tightening torque: 14 to 22 ft-lb (20 to 29 N m) 5. Holding the boot, reconnect each high tension cable to its proper spark plug by pushing it on until you feel a snap. 6. Reinstall all brackets as necessary. Do-it-yourself ADI1099 DI1312 Platinum-tipped spark plug It is not necessary to replace platinumtipped spark plugs as frequently as conventional type spark plugs because they last much longer. Follow the maintenance schedule, but do not reuse the spark plugs by cleaning or regapping. ● Always replace spark plugs with recommended or equivalent ones. 1. Remove brackets as necessary to give access to the high tension spark plug cables and spark plugs. The air cleaner filter should not be cleaned and reused. Replace it according to the maintenance intervals shown in the ''Maintenance'' section of this manual. When replacing the filter, wipe the inside of the air cleaner filter housing and the cover with a damp cloth. 8-15
-
 1
1 -
2
-
3
-
4
-
5
-
6
-
7
-
8
-
9
-
10
-
11
-
12
-
13
-
14
-
15
-
16
-
17
-
18
-
19
-
20
-
21
-
22
-
23
-
24
-
25
-
26
-
27
-
28
-
29
-
30
-
31
-
32
-
33
-
34
-
35
-
36
-
37
-
38
-
39
-
40
-
41
-
42
-
43
-
44
-
45
-
46
-
47
-
48
-
49
-
50
-
51
-
52
-
53
-
54
-
55
-
56
-
57
-
58
-
59
-
60
-
61
-
62
-
63
-
64
-
65
-
66
-
67
-
68
-
69
-
70
-
71
-
72
-
73
-
74
-
75
-
76
-
77
-
78
-
79
-
80
-
81
-
82
-
83
-
84
-
85
-
86
-
87
-
88
-
89
-
90
-
91
-
92
-
93
-
94
-
95
-
96
-
97
-
98
-
99
-
100
-
101
-
102
-
103
-
104
-
105
-
106
-
107
-
108
-
109
-
110
-
111
-
112
-
113
-
114
-
115
-
116
-
117
-
118
-
119
-
120
-
121
-
122
-
123
-
124
-
125
-
126
-
127
-
128
-
129
-
130
-
131
-
132
-
133
-
134
-
135
-
136
-
137
-
138
-
139
-
140
-
141
-
142
-
143
-
144
-
145
-
146
-
147
-
148
-
149
-
150
-
151
-
152
-
153
-
154
-
155
-
156
-
157
-
158
-
 159
159 -
 160
160 -
 161
161 -
 162
162 -
 163
163 -
 164
164 -
 165
165 -
 166
166 -
 167
167 -
 168
168 -
 169
169 -
170
-
171
-
172
-
173
-
174
-
175
-
176
-
177
-
178
-
179
-
180
-
181
-
182
-
183
-
184
-
185
-
186
-
187
-
188
-
189
-
190
-
191
-
192
-
193
-
194
-
195
-
196
-
197
-
198
-
199
-
200
-
201
-
202
-
203
-
204
-
205
-
206
-
207
-
208
-
209
-
210
-
211
-
212
-
213
-
214
-
215
-
216
-
217
-
218
-
219
-
220
 |
 |
