1999 Oldsmobile 88 Owner's Manual - Page 81

1999 Oldsmobile 88 Manual

Page 81 highlights

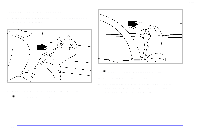
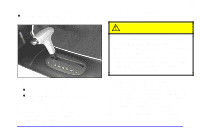
yellowblue THIRD (3): This position is also used for normal driving, however, it offers more power and lower fuel economy than AUTOMATIC OVERDRIVE ( ). B NOTICE: Don't drive in SECOND (2) for more than 5 miles (8 km), or at speeds over 55 mph (90 km/h), or you can damage your transaxle. Use AUTOMATIC OVERDRIVE ( ) or THIRD (3) as much as possible. Don't shift into SECOND (2) unless you are going slower than 65 mph (105 km/h), or you can damage your engine. Here are some times you might choose THIRD (3) instead of AUTOMATIC OVERDRIVE ( ): D When driving on hilly, winding roads. D When towing a trailer, so there is less shifting between gears. B B D When going down a steep hill. SECOND (2): This position gives you more power but lower fuel economy. You can use SECOND (2) on hills. It can help control your speed as you go down steep mountain roads, but then you would also want to use your brakes off and on. FIRST (1): This position gives you even more power (but lower fuel economy) than SECOND (2). You can use it on very steep hills, or in deep snow or mud. If the selector lever is put in FIRST (1), the transaxle won't shift into first gear until the vehicle is going slowly enough. 2-25

  • 1
  • 2
  • 3
  • 4
  • 5
  • 6
  • 7
  • 8
  • 9
  • 10
  • 11
  • 12
  • 13
  • 14
  • 15
  • 16
  • 17
  • 18
  • 19
  • 20
  • 21
  • 22
  • 23
  • 24
  • 25
  • 26
  • 27
  • 28
  • 29
  • 30
  • 31
  • 32
  • 33
  • 34
  • 35
  • 36
  • 37
  • 38
  • 39
  • 40
  • 41
  • 42
  • 43
  • 44
  • 45
  • 46
  • 47
  • 48
  • 49
  • 50
  • 51
  • 52
  • 53
  • 54
  • 55
  • 56
  • 57
  • 58
  • 59
  • 60
  • 61
  • 62
  • 63
  • 64
  • 65
  • 66
  • 67
  • 68
  • 69
  • 70
  • 71
  • 72
  • 73
  • 74
  • 75
  • 76
  • 77
  • 78
  • 79
  • 80
  • 81
  • 82
  • 83
  • 84
  • 85
  • 86
  • 87
  • 88
  • 89
  • 90
  • 91
  • 92
  • 93
  • 94
  • 95
  • 96
  • 97
  • 98
  • 99
  • 100
  • 101
  • 102
  • 103
  • 104
  • 105
  • 106
  • 107
  • 108
  • 109
  • 110
  • 111
  • 112
  • 113
  • 114
  • 115
  • 116
  • 117
  • 118
  • 119
  • 120
  • 121
  • 122
  • 123
  • 124
  • 125
  • 126
  • 127
  • 128
  • 129
  • 130
  • 131
  • 132
  • 133
  • 134
  • 135
  • 136
  • 137
  • 138
  • 139
  • 140
  • 141
  • 142
  • 143
  • 144
  • 145
  • 146
  • 147
  • 148
  • 149
  • 150
  • 151
  • 152
  • 153
  • 154
  • 155
  • 156
  • 157
  • 158
  • 159
  • 160
  • 161
  • 162
  • 163
  • 164
  • 165
  • 166
  • 167
  • 168
  • 169
  • 170
  • 171
  • 172
  • 173
  • 174
  • 175
  • 176
  • 177
  • 178
  • 179
  • 180
  • 181
  • 182
  • 183
  • 184
  • 185
  • 186
  • 187
  • 188
  • 189
  • 190
  • 191
  • 192
  • 193
  • 194
  • 195
  • 196
  • 197
  • 198
  • 199
  • 200
  • 201
  • 202
  • 203
  • 204
  • 205
  • 206
  • 207
  • 208
  • 209
  • 210
  • 211
  • 212
  • 213
  • 214
  • 215
  • 216
  • 217
  • 218
  • 219
  • 220
  • 221
  • 222
  • 223
  • 224
  • 225
  • 226
  • 227
  • 228
  • 229
  • 230
  • 231
  • 232
  • 233
  • 234
  • 235
  • 236
  • 237
  • 238
  • 239
  • 240
  • 241
  • 242
  • 243
  • 244
  • 245
  • 246
  • 247
  • 248
  • 249
  • 250
  • 251
  • 252
  • 253
  • 254
  • 255
  • 256
  • 257
  • 258
  • 259
  • 260
  • 261
  • 262
  • 263
  • 264
  • 265
  • 266
  • 267
  • 268
  • 269
  • 270
  • 271
  • 272
  • 273
  • 274
  • 275
  • 276
  • 277
  • 278
  • 279
  • 280
  • 281
  • 282
  • 283
  • 284
  • 285
  • 286
  • 287
  • 288
  • 289
  • 290
  • 291
  • 292
  • 293
  • 294
  • 295
  • 296
  • 297
  • 298
  • 299
  • 300
  • 301
  • 302
  • 303
  • 304
  • 305
  • 306
  • 307
  • 308
  • 309
  • 310
  • 311
  • 312
  • 313
  • 314
  • 315
  • 316
  • 317
  • 318
  • 319
  • 320
  • 321
  • 322
  • 323
  • 324
  • 325
  • 326
  • 327
  • 328
  • 329
  • 330
  • 331
  • 332
  • 333
  • 334
  • 335
  • 336
  • 337
  • 338
  • 339
  • 340
  • 341
  • 342
  • 343
  • 344

yellow
blue
2-25
THIRD (3):
This position is also used for normal
driving, however, it offers more power and lower fuel
economy than AUTOMATIC OVERDRIVE (
).
Here are some times you might choose THIRD (3)
instead of AUTOMATIC OVERDRIVE (
):
When driving on hilly, winding roads.
When towing a trailer, so there is less shifting
between gears.
When going down a steep hill.
SECOND (2):
This position gives you more power but
lower fuel economy. You can use SECOND (2) on hills.
It can help control your speed as you go down steep
mountain roads, but then you would also want to use
your brakes off and on.
NOTICE:
Don’t drive in SECOND (2) for more than
5 miles (8 km), or at speeds over 55 mph
(90 km/h), or you can damage your transaxle.
Use AUTOMATIC OVERDRIVE (
) or
THIRD (3) as much as possible.
Don’t shift into SECOND (2) unless you are going
slower than 65 mph (105 km/h), or you can
damage your engine.
FIRST (1):
This position gives you even more power
(but lower fuel economy) than SECOND (2). You can
use it on very steep hills, or in deep snow or mud. If the
selector lever is put in FIRST (1), the transaxle won’t
shift into first gear until the vehicle is going
slowly enough.