2007 Subaru Impreza Owner's Manual - Page 100
2007 Subaru Impreza Manual
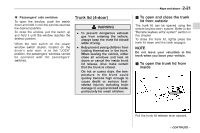
Page 100 highlights
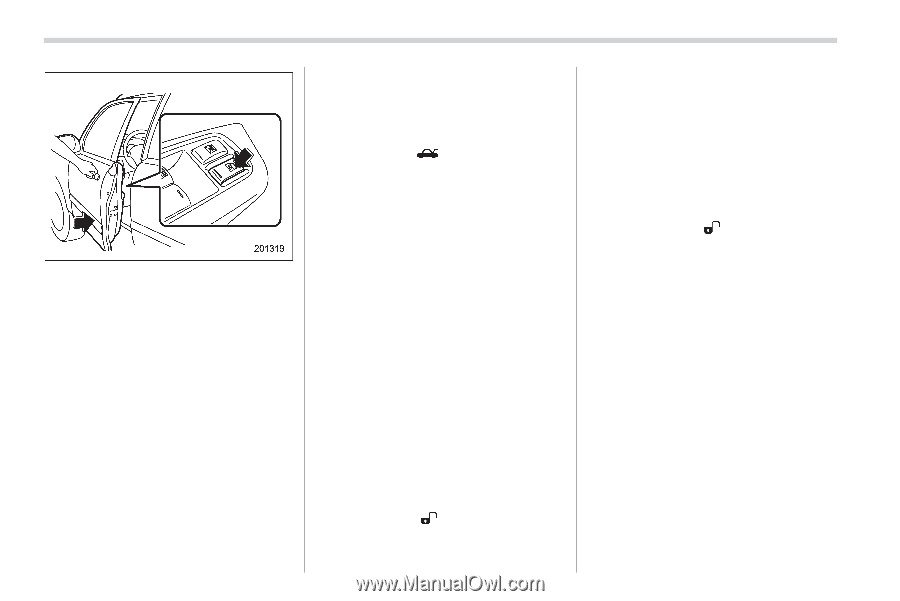
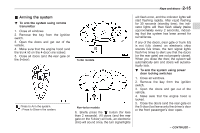
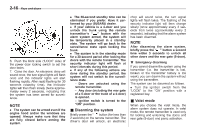
2-16 Keys and doors 6. Push the front side ("LOCK" side) of the power door locking switch to set the door locks. 7. Close the door. An electronic chirp will sound once, the turn signal lights will flash once and the indicator lights will start flashing rapidly. After rapid flashing for 30 seconds (standby time), the indicator lights will then flash slowly (twice approximately every 2 seconds), indicating that the system has been armed for surveillance. NOTE . The system can be armed even if the engine hood and/or the windows are opened. Always make sure that they are fully closed before arming the system. . The 30-second standby time can be eliminated if you prefer. Have it performed by your SUBARU dealer. . If your vehicle is a 4-door and you unlock the trunk using the remote " button with the transmitter's " alarm system armed, the system will be temporarily placed in a standby state. The system will go back to the surveillance state upon locking the trunk. . The system is in the standby mode for a 30-second period after locking the doors with the remote transmitter. The security indicator light will flash at short intervals during this period. . If any of the following actions are done during the standby period, the system will not switch to the surveillance state. - Doors are unlocked using the remote transmitter. - Any door (including the rear gate of a 5-door or the trunk of a 4-door) is opened. - Ignition switch is turned to the "ON" position. chirp will sound twice, the turn signal lights will flash twice. The flashing of the security indicator light will then change slowly (once approximately every 3 seconds from twice approximately every 2 seconds), indicating that the alarm system has been disarmed. NOTE After disarming the alarm system, briefly press the " " button a second time within 5 seconds to unlock all other doors and the rear gate (5-door). ! Emergency disarming If you cannot disarm the system using the transmitter (i.e. the transmitter is lost, broken or the transmitter battery is too weak), you can disarm the system without using the transmitter. The system can be disarmed as follows. . Turn the ignition switch from the "LOCK" to the "ON" position with a registered key. & Valet mode When you choose the valet mode, the alarm system does not operate. In valet mode, the remote transmitter is used only for locking and unlocking the doors and rear gate (5-door) and panic activation. & Disarming the system Briefly press the " " button (for less than 2 seconds) on the remote transmitter. The driver's door will unlock, an electronic
-
 1
1 -
2
-
3
-
4
-
5
-
6
-
7
-
8
-
9
-
10
-
11
-
12
-
13
-
14
-
15
-
16
-
17
-
18
-
19
-
20
-
21
-
22
-
23
-
24
-
25
-
26
-
27
-
28
-
29
-
30
-
31
-
32
-
33
-
34
-
35
-
36
-
37
-
38
-
39
-
40
-
41
-
42
-
43
-
44
-
45
-
46
-
47
-
48
-
49
-
50
-
51
-
52
-
53
-
54
-
55
-
56
-
57
-
58
-
59
-
60
-
61
-
62
-
63
-
64
-
65
-
66
-
67
-
68
-
69
-
70
-
71
-
72
-
73
-
74
-
75
-
76
-
77
-
78
-
79
-
80
-
81
-
82
-
83
-
84
-
85
-
86
-
87
-
88
-
89
-
90
-
91
-
92
-
93
-
94
-
 95
95 -
 96
96 -
 97
97 -
 98
98 -
 99
99 -
 100
100 -
 101
101 -
 102
102 -
 103
103 -
 104
104 -
 105
105 -
106
-
107
-
108
-
109
-
110
-
111
-
112
-
113
-
114
-
115
-
116
-
117
-
118
-
119
-
120
-
121
-
122
-
123
-
124
-
125
-
126
-
127
-
128
-
129
-
130
-
131
-
132
-
133
-
134
-
135
-
136
-
137
-
138
-
139
-
140
-
141
-
142
-
143
-
144
-
145
-
146
-
147
-
148
-
149
-
150
-
151
-
152
-
153
-
154
-
155
-
156
-
157
-
158
-
159
-
160
-
161
-
162
-
163
-
164
-
165
-
166
-
167
-
168
-
169
-
170
-
171
-
172
-
173
-
174
-
175
-
176
-
177
-
178
-
179
-
180
-
181
-
182
-
183
-
184
-
185
-
186
-
187
-
188
-
189
-
190
-
191
-
192
-
193
-
194
-
195
-
196
-
197
-
198
-
199
-
200
-
201
-
202
-
203
-
204
-
205
-
206
-
207
-
208
-
209
-
210
-
211
-
212
-
213
-
214
-
215
-
216
-
217
-
218
-
219
-
220
-
221
-
222
-
223
-
224
-
225
-
226
-
227
-
228
-
229
-
230
-
231
-
232
-
233
-
234
-
235
-
236
-
237
-
238
-
239
-
240
-
241
-
242
-
243
-
244
-
245
-
246
-
247
-
248
-
249
-
250
-
251
-
252
-
253
-
254
-
255
-
256
-
257
-
258
-
259
-
260
-
261
-
262
-
263
-
264
-
265
-
266
-
267
-
268
-
269
-
270
-
271
-
272
-
273
-
274
-
275
-
276
-
277
-
278
-
279
-
280
-
281
-
282
-
283
-
284
-
285
-
286
-
287
-
288
-
289
-
290
-
291
-
292
-
293
-
294
-
295
-
296
-
297
-
298
-
299
-
300
-
301
-
302
-
303
-
304
-
305
-
306
-
307
-
308
-
309
-
310
-
311
-
312
-
313
-
314
-
315
-
316
-
317
-
318
-
319
-
320
-
321
-
322
-
323
-
324
-
325
-
326
-
327
-
328
-
329
-
330
-
331
-
332
-
333
-
334
-
335
-
336
-
337
-
338
-
339
-
340
-
341
-
342
-
343
-
344
-
345
-
346
-
347
-
348
-
349
-
350
-
351
-
352
-
353
-
354
-
355
-
356
-
357
-
358
-
359
-
360
-
361
-
362
-
363
-
364
-
365
-
366
-
367
-
368
-
369
-
370
-
371
-
372
-
373
-
374
-
375
-
376
-
377
-
378
-
379
-
380
-
381
 |
 |