2009 Volvo XC70 Owner's Manual - Page 257
2009 Volvo XC70 Manual
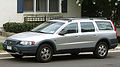
Page 257 highlights
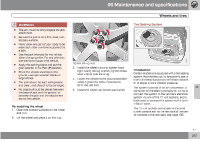
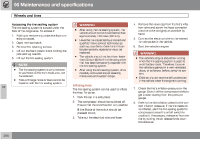
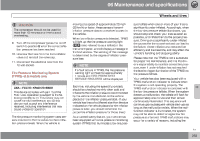
06 Maintenance and specifications Wheels and tires WARNING Tire Sealing System The jack must correctly engage the jack attachment. Be sure the jack is on a firm, level, nonslippery surface. Never allow any part of your body to be extended under a vehicle supported by a jack. Use the jack intended for the vehicle when changing a tire. For any other job, use stands to support the vehicle. Apply the parking brake and put the gear selector in the Park (P) position. Block the wheels standing on the ground, use rigid wooden blocks or large stones. The jack should be kept well-greased and clean, and should not be damaged. No objects should be placed between the base of jack and the ground, or between the jack and the attachment bar on the vehicle. Tighten the lug nuts G022916 3. Install the wheel nuts and tighten handtight. Using the lug wrench, tighten crosswise until all nuts are snug. 4. Lower the vehicle to the ground and alternately tighten the bolts crosswise to 62 ft. lbs. (85 Nm). 5. Install the wheel cap (where applicable). Introduction Certain models are equipped with a tire sealing system that enables you to temporarily seal a hole in the tread surface and re-inflate a flat tire, or to adjust a tire's inflation pressure. The system consists of an air compressor, a container for the sealing compound, wiring to connect the system to the vehicle's electrical system via one of the 12-volt sockets, and a hose used to connect the system to the tire's inflation valve. The 12-volt sockets are located in the front tunnel console and on the rear side of the center console in the rear seat, see page 190. 06 Re-installing the wheel 1. Clean the contact surfaces on the wheel and hub. 2. Lift the wheel and place it on the hub. G023309 257
-
 1
1 -
2
-
3
-
4
-
5
-
6
-
7
-
8
-
9
-
10
-
11
-
12
-
13
-
14
-
15
-
16
-
17
-
18
-
19
-
20
-
21
-
22
-
23
-
24
-
25
-
26
-
27
-
28
-
29
-
30
-
31
-
32
-
33
-
34
-
35
-
36
-
37
-
38
-
39
-
40
-
41
-
42
-
43
-
44
-
45
-
46
-
47
-
48
-
49
-
50
-
51
-
52
-
53
-
54
-
55
-
56
-
57
-
58
-
59
-
60
-
61
-
62
-
63
-
64
-
65
-
66
-
67
-
68
-
69
-
70
-
71
-
72
-
73
-
74
-
75
-
76
-
77
-
78
-
79
-
80
-
81
-
82
-
83
-
84
-
85
-
86
-
87
-
88
-
89
-
90
-
91
-
92
-
93
-
94
-
95
-
96
-
97
-
98
-
99
-
100
-
101
-
102
-
103
-
104
-
105
-
106
-
107
-
108
-
109
-
110
-
111
-
112
-
113
-
114
-
115
-
116
-
117
-
118
-
119
-
120
-
121
-
122
-
123
-
124
-
125
-
126
-
127
-
128
-
129
-
130
-
131
-
132
-
133
-
134
-
135
-
136
-
137
-
138
-
139
-
140
-
141
-
142
-
143
-
144
-
145
-
146
-
147
-
148
-
149
-
150
-
151
-
152
-
153
-
154
-
155
-
156
-
157
-
158
-
159
-
160
-
161
-
162
-
163
-
164
-
165
-
166
-
167
-
168
-
169
-
170
-
171
-
172
-
173
-
174
-
175
-
176
-
177
-
178
-
179
-
180
-
181
-
182
-
183
-
184
-
185
-
186
-
187
-
188
-
189
-
190
-
191
-
192
-
193
-
194
-
195
-
196
-
197
-
198
-
199
-
200
-
201
-
202
-
203
-
204
-
205
-
206
-
207
-
208
-
209
-
210
-
211
-
212
-
213
-
214
-
215
-
216
-
217
-
218
-
219
-
220
-
221
-
222
-
223
-
224
-
225
-
226
-
227
-
228
-
229
-
230
-
231
-
232
-
233
-
234
-
235
-
236
-
237
-
238
-
239
-
240
-
241
-
242
-
243
-
244
-
245
-
246
-
247
-
248
-
249
-
250
-
251
-
 252
252 -
 253
253 -
 254
254 -
 255
255 -
 256
256 -
 257
257 -
 258
258 -
 259
259 -
 260
260 -
 261
261 -
 262
262 -
263
-
264
-
265
-
266
-
267
-
268
-
269
-
270
-
271
-
272
-
273
-
274
-
275
-
276
-
277
-
278
-
279
-
280
-
281
-
282
-
283
-
284
-
285
-
286
 |
 |
