2009 Yamaha Motorsports RS Vector ER Owners Manual - Page 18
2009 Yamaha Motorsports RS Vector ER Manual

Page 18 highlights
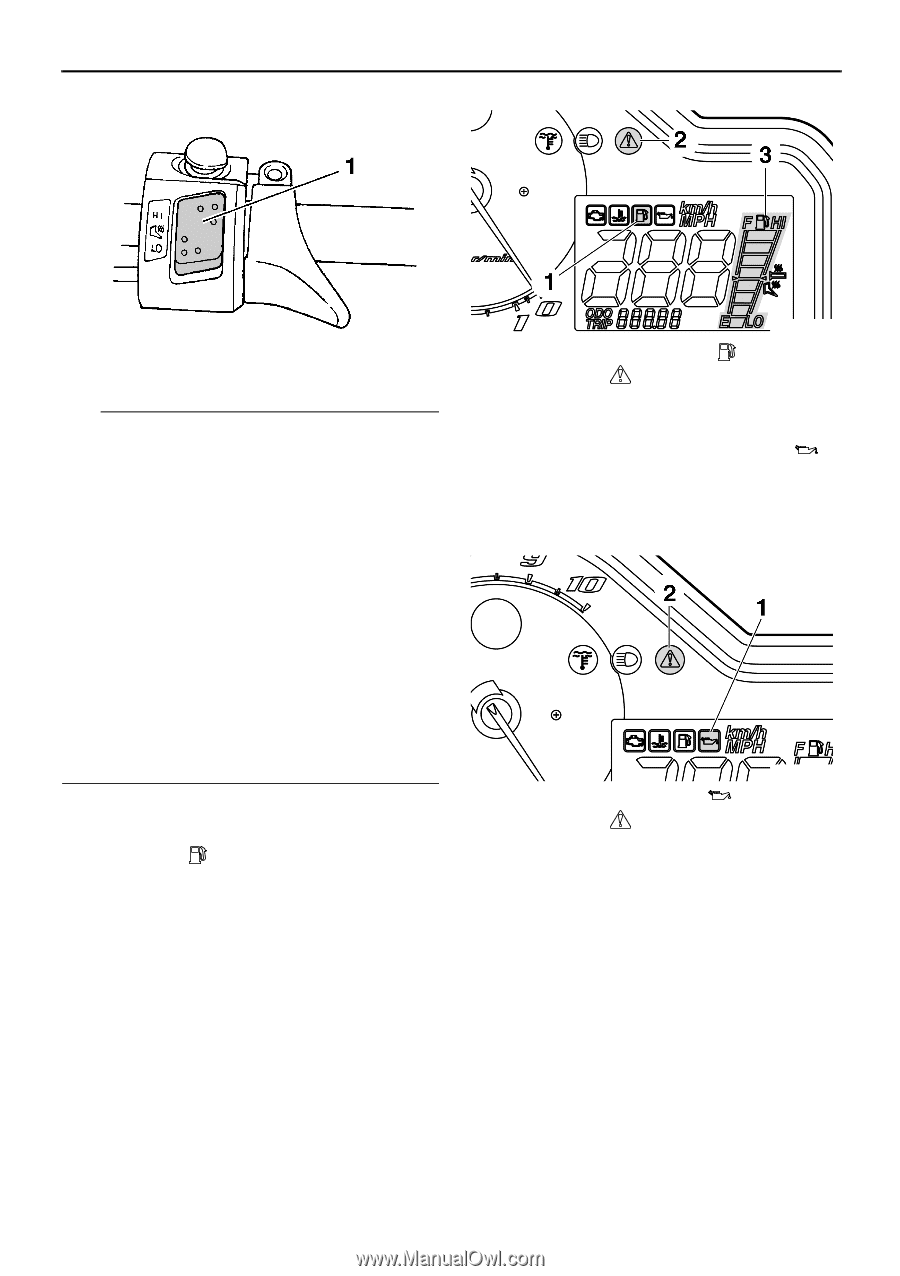
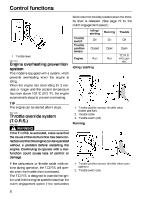
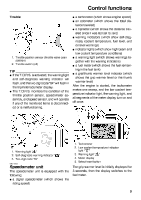
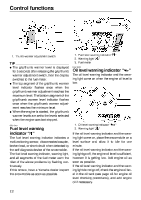
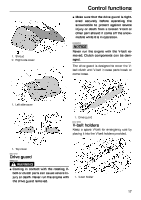
Control functions 1. Thumb warmer adjustment switch TIP G 1. Fuel level warning indicator " 2. Warning light " " 3. Fuel meter ESU10460 " G G The grip/thumb warmer level is displayed for 5 seconds after releasing the grip/thumb warmer adjustment switch, then the display switches to the fuel meter. The top segment of the grip/thumb warmer level indicator flashes once when the grip/thumb warmer adjustment reaches the maximum level. The bottom segment of the grip/thumb warmer level indicator flashes once when the grip/thumb warmer adjustment reaches the minimum level. When the engine is started, the grip/thumb warmer levels are set to the levels selected when the engine was last stopped. Oil level warning indicator " " The oil level warning indicator and the warning light come on when the engine oil level is low. ESU10451 Fuel level warning indicator " " The fuel level warning indicator indicates a malfunctioning sensor, disconnected coupler, broken lead, or short circuit when detected by the self-diagnosis device of the snowmobile. The fuel level warning indicator, warning light, and all segments of the fuel meter warn the rider of the above problems by flashing continuously. If this occurs, have a Yamaha dealer inspect the snowmobile as soon as possible. 1. Oil level warning indicator " 2. Warning light " " " If the oil level warning indicator and the warning light come on, place the snowmobile on a level surface and allow it to idle for one minute. If the oil level warning indicator and the warning light go off, the engine oil level is sufficient, however it is getting low. Add engine oil as soon as possible. If the oil level warning indicator and the warning light do not go off, check the engine oil level in the oil tank (see page 45 for engine oil level checking procedures), and add engine oil if necessary. 12
-
 1
1 -
2
-
3
-
4
-
5
-
6
-
7
-
8
-
9
-
10
-
11
-
12
-
 13
13 -
 14
14 -
 15
15 -
 16
16 -
 17
17 -
 18
18 -
 19
19 -
 20
20 -
 21
21 -
 22
22 -
 23
23 -
24
-
25
-
26
-
27
-
28
-
29
-
30
-
31
-
32
-
33
-
34
-
35
-
36
-
37
-
38
-
39
-
40
-
41
-
42
-
43
-
44
-
45
-
46
-
47
-
48
-
49
-
50
-
51
-
52
-
53
-
54
-
55
-
56
-
57
-
58
-
59
-
60
-
61
-
62
-
63
-
64
-
65
-
66
-
67
-
68
-
69
-
70
-
71
-
72
-
73
-
74
-
75
-
76
-
77
-
78
-
79
-
80
-
81
-
82
-
83
-
84
-
85
-
86
-
87
-
88
 |
 |