3Com 3CRWE725075A User Guide - Page 40
Status
 |
UPC - 000049029765
View all 3Com 3CRWE725075A manuals
Add to My Manuals
Save this manual to your list of manuals |
Page 40 highlights
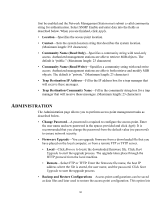
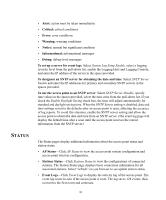
STATUS • Alert: action must be taken immediately • Critical: critical conditions • Error: error conditions • Warning: warning conditions • Notice: normal but significant condition • Informational: informational messages • Debug: debug-level messages To set up a server for event logs: Select System Log Setup Enable, select a logging severity level from the pull-down list, enable the Logging Host and Logging Console, and enter the IP address of the server in the space provided. To designate an SNTP server for obtaining the date and time: Select SNTP Server Enable and enter the IP addresses for primary and secondary SNTP servers in the spaces provided. To use the access point as an SNTP server: Select SNTP Server Disable, specify time values in the spaces provided, select the time zone from the pull-down list. If you check the Enable Daylight Saving check box, the time will adjust automatically for standard and daylight saving time. When the SNTP Server setting is disabled, date and time settings revert to the defaults after an access point is reset, affecting the accuracy of log reports. To avoid this situation, enable the SNTP server setting and allow the access point to obtain the date and time from an SNTP server. (The event log page will display the default time after a reset until the access point receives the correct information from the SNTP server.) The Status pages display additional information about the access point status and station status. • AP Status-Click AP Status to view the access point system configuration and access point wireless configuration. • Stations Status-Click Stations Status to view the configurations of connected stations. The Station Status page displays basic connection information for all associated stations. Select "refresh" on you browser to see update station status. • Event Logs-Click Event Logs to display the activity log of the access point. The event log resets to zero if the access point is reset. The log saves 128 events, then overwrites the first event and continues. 38
-
 1
1 -
2
-
3
-
4
-
5
-
6
-
7
-
8
-
9
-
10
-
11
-
12
-
13
-
14
-
15
-
16
-
17
-
18
-
19
-
20
-
21
-
22
-
23
-
24
-
25
-
26
-
27
-
28
-
29
-
30
-
31
-
32
-
33
-
34
-
 35
35 -
 36
36 -
 37
37 -
 38
38 -
 39
39 -
 40
40 -
 41
41 -
 42
42 -
 43
43 -
 44
44 -
 45
45 -
46
-
47
-
48
-
49
-
50
-
51
-
52
-
53
-
54
-
55
-
56
-
57
-
58
-
59
-
60
-
61
-
62
-
63
-
64
-
65
-
66
 |
 |
