3Com 3CRWX395075A Quick Installation Guide - Page 4
Unpacking the Access Point, 2 Preparing for Installation
 |
UPC - 662705539164
View all 3Com 3CRWX395075A manuals
Add to My Manuals
Save this manual to your list of manuals |
Page 4 highlights
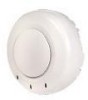
WARNING: Before using a wireless device in a hazardous location, consult the local codes, national codes, and safety directors of the location for usage constraints. WARNING: Do not connect or disconnect cables or otherwise work with the access point hardware during periods of lightning activity. NOTE: The access point is intended for indoor use only. Do not install the device outdoors, unless you install it in a properly installed enclosure. NOTE: To reduce the possibility of connection interference caused by dust, clean the Category 5 connector pins before inserting a cable into the access point. 1 Unpacking the Access Point Make sure that you have the following items, which are included with the access point: • Mounting Kit: • One universal mounting bracket (attached to the access point) • One paper mounting template (used for marking cutting areas and screw holes) • One two-piece 14.2-mm (9/16-inch) T-bar clamp • One two-piece 15.9-mm (5/8-inch) T-bar clamp • One two-piece 23.9-mm (15/16-inch) T-bar clamp • Two #6 sheet metal screws and two drywall anchors • Three adhesive rubber feet (used for a tabletop installation). 2 Preparing for Installation It is advisable to connect the power (if using an external power supply) and check the Ethernet cables and LEDs before installing the access point in a hard-to-reach location. Additionally, observe the following before mounting or connecting the access point: • Cabling • Power Make sure that standard Category 5 cable with straight-through signaling is installed at the site before you install the access point. Make sure that the cable is highly flexible and that there is no extra covering on the RJ-45 connector that could prevent the cable from being routed through the mounting bracket Power must be supplied via an 802.3af Power Over Ethernet (PoE)-compliant device. Removal of the Ethernet cable is the only method of disconnecting power from the access point. With the advanced functionality of three transmitters and three receivers (3 x 3 MIMO) in this dual radio 802.11a/b/g/n Access Point, the AP 3950 power demands exceed the 802.3af power limits. The AP 3950 has an auto-sense capability so that, when only 802.3af power is supplied, it turns on in a 2 x 3 mode. When 802.3af+ (also known as pre802.3at) or two 802.3af ports are used, the AP 3950 comes up in full 3 x 3 mode. 4
-
 1
1 -
 2
2 -
 3
3 -
 4
4 -
 5
5 -
 6
6 -
 7
7 -
 8
8 -
 9
9 -
 10
10 -
11
-
12
-
13
-
14
-
15
-
16
-
17
-
18
-
19
-
20
-
21
-
22
 |
 |
