AIWA AZ-RS128 User Manual - Page 17
Presetting radio stations, To preset stations, automatically, To enhance detection
 |
View all AIWA AZ-RS128 manuals
Add to My Manuals
Save this manual to your list of manuals |
Page 17 highlights
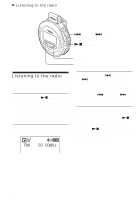
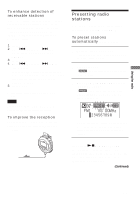
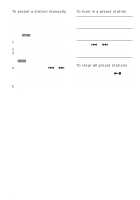
Using the radio To enhance detection of receivable stations If there are stations that you want preset but cannot do it automatically because their signals are not strong enough, change the setting of "AUTO STOP LEVEL" to "HIGH" in order to enhance detection of receivable stations. 1 Press MENU. 2 Press . (DOWN) or > (UP) repeatedly to select "AUTO STOP LEVEL." 3 Press MENU. 4 Press . (DOWN) or > (UP) to select "HIGH*." In case the same station is preset on two or more preset numbers because its signal is too strong, set the "AUTO STOP LEVEL" to "LOW." 5 Press MENU. * The default setting at the time of purchase is "MID." Note Changing the setting of "AUTO STOP LEVEL" does not change the reception sensitivity. To improve the reception The headphone cord functions as the FM antenna. Extend the cord to improve the reception. Presetting radio stations You can preset up to 20 FM radio stations, 10 stations each for FM 1 and FM 2. To preset stations automatically (Auto preset) 1 Perform steps 1 and 2 of "Listening to the radio" (page 16) to select the band. 2 Press PRESET. " " and the preset numbers appear in the display. 3 Press and hold PRESET for more than 2 seconds. " " starts flashing, and the player starts scanning for stations from the lower frequencies. The first received station is preset on the preset number 1, and then the player starts scanning for the next receivable station. If you press Nx/POWER or TUNER PRESET MENU TUNER during auto presetting, the player stops scanning and exits the auto preset mode, and music data playback starts or the radio is switched to the other band. (Continued) 17
-
 1
1 -
2
-
3
-
4
-
5
-
6
-
7
-
8
-
9
-
10
-
11
-
 12
12 -
 13
13 -
 14
14 -
 15
15 -
 16
16 -
 17
17 -
 18
18 -
 19
19 -
 20
20 -
 21
21 -
 22
22 -
23
-
24
-
25
-
26
-
27
-
28
 |
 |
