AIWA XD-AX10 Operating Instructions
AIWA XD-AX10 Manual
 |
View all AIWA XD-AX10 manuals
Add to My Manuals
Save this manual to your list of manuals |
AIWA XD-AX10 manual content summary:
- AIWA XD-AX10 | Operating Instructions - Page 1
/DVD Player Operating Instructions For customers in the U.S.A Owner's Record The model and serial numbers are located at the rear of the unit. Record the serial number in the space provided below. Refer to them whenever you call upon your Aiwa dealer regarding this product. Model No. XD-AX10 Serial - AIWA XD-AX10 | Operating Instructions - Page 2
intended to alert the user to the presence of important operating and maintenance (servicing) instructions in the literature accompanying the appliance. CAUTION: TO PREVENT this CD/ DVD Player. Before operating this player, please read this manual thoroughly and retain it for future reference. 2 - AIWA XD-AX10 | Operating Instructions - Page 3
service shop only. On placement • Place the player in a location with adequate ventilation to prevent heat build-up in the player. • Do not place the player plug adaptor. On operation • If the player is brought directly from problems concerning your player, please consult your nearest Aiwa dealer. 3 - AIWA XD-AX10 | Operating Instructions - Page 4
3 About This Manual 6 This Player Can Play the Following Discs 6 Notes about the Discs 8 Index to Parts and Controls 9 Guide to On-Screen Displays (Control Bar 13 Hookups 15 Hooking Up the Player 15 Step 1: Unpacking 15 Step 2: Inserting Batteries into the Remote 15 Step 3: Connecting - AIWA XD-AX10 | Operating Instructions - Page 5
the Display (SCREEN SETUP 51 Custom Settings (CUSTOM SETUP 52 Settings for the Sound (AUDIO SETUP 53 Additional Information 55 Troubleshooting 55 Self-diagnosis Function (When letters/numbers appear in the display). . . . . 57 Glossary 58 Specifications 59 Language Code List 60 Index 61 5 - AIWA XD-AX10 | Operating Instructions - Page 6
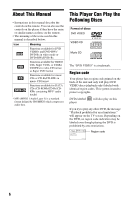
• Instructions in this manual describe the controls on the remote. You can also use the controls on the player if they have the same or similar names as those on the remote. • The meaning of the icons used in this manual is described below: Icon Meaning Functions available for DVD VIDEOs and DVD - AIWA XD-AX10 | Operating Instructions - Page 7
on CDROMs, defined by ISO (International Standard Organization). Also, the player cannot play the following discs: • A DVD with a different region code. • A disc recorded in a color system other than NTSC, such as PAL or SECAM (this player conforms to the NTSC color system). • A disc that has a non - AIWA XD-AX10 | Operating Instructions - Page 8
Notes about the Discs • To keep the disc clean, handle the disc by its edge. Do not touch the surface. • Do not expose the disc to direct sunlight or heat sources such as hot air ducts, or leave it in a car parked in direct sunlight as the temperature may rise considerably inside the car. • After - AIWA XD-AX10 | Operating Instructions - Page 9
Index to Parts and Controls For more information, refer to the pages indicated in parentheses. Front panel A [/1 (on/standy) button (25) B Disc tray (25) C Front panel display (10) D (remote sensor) (15) E A (open/close) button (25) F x (stop) button (26) G X (pause) button (26) H H (play) button - AIWA XD-AX10 | Operating Instructions - Page 10
Front panel display When playing back a DVD Disc type Playing status Lights up when you can change the angle (45) Lights up during Repeat Play (34) Current audio signal (41) Current title/ - AIWA XD-AX10 | Operating Instructions - Page 11
Rear panel DIGITAL OUT PCM/DTS/ DOLBY DIGITAL LINE OUT S VIDEO OUT COMPONENT VIDEO OUT COAXIAL R-AUDIO-L VIDEO Y PB PR A DIGITAL OUT (COAXIAL) jack (20, 21, 22) B LINE OUT L/R (AUDIO) jacks (19, 20, 21) C LINE OUT (VIDEO) jack (16) D S VIDEO OUT jack (16) E COMPONENT VIDEO OUT jacks (16) - AIWA XD-AX10 | Operating Instructions - Page 12
Remote A Z OPEN/CLOSE button (26) B Number buttons (28) The number 5 button has a tactile dot.* C CLEAR button (32) D SUBTITLE button (44) E AUDIO STOP button (26) W ENTER button (23) X O RETURN button (29) Y MENU button (28, 30) * Use the tactile dot as a reference when operating the player. 12 - AIWA XD-AX10 | Operating Instructions - Page 13
Guide to On-Screen Displays (Control Bar) ◆Display 2 The following playback information is displayed. Example: When playing a DVD The following explains the Control Bar. The Control Bar is used for making adjustments to the settings or displaying information during playback. The displayed contents - AIWA XD-AX10 | Operating Instructions - Page 14
You can make basic adjustments and customize the player to suit your viewing preferences. ◆Display 1 the minimum number of basic adjustments for using the player. • Select CUSTOM to make a full range of limit the playback of selected discs on this player. m ◆Display 2 Shows the same information - AIWA XD-AX10 | Operating Instructions - Page 15
player. Notes • Plug cords securely to prevent unwanted noise. • Refer to the instructions supplied with the components to be connected. • You cannot connect this player . When using the remote, point it at the remote sensor on the player. Notes • Do not leave the remote in an extremely hot - AIWA XD-AX10 | Operating Instructions - Page 16
PCM/DTS/ DOLBY DIGITAL LINE OUT S VIDEO OUT COMPONENT VIDEO OUT (green) (blue) COAXIAL R-AUDIO-L VIDEO to S VIDEO OUT Y PB PR CD/DVD player C COMPONENT VIDEO IN Y (green) PB (blue) PR (red) TV, projector, or AV amplifier (receiver) (red) to COMPONENT VIDEO OUT INPUT S VIDEO l : Signal - AIWA XD-AX10 | Operating Instructions - Page 17
may not fit your TV screen. If you want to change the aspect ratio, please refer to page 51. Note Connect the player directly to the TV. If you pass the player signals via the VCR, you may not receive a clear image on the TV screen. VCR CD/DVD player TV Connect directly 17 - AIWA XD-AX10 | Operating Instructions - Page 18
the Audio Cords Refer to the chart below to select the connection that best suits your system. Be sure to also read the instructions for the components you wish to connect. Select a connection Select one of the following connections, A through D . Components to be connected TV • Surround effects - AIWA XD-AX10 | Operating Instructions - Page 19
Hookups A Connecting to your TV This connection will use your TV speakers for sound. CD/DVD player DIGITAL OUT PCM/DTS/ DOLBY DIGITAL LINE OUT S VIDEO OUT COMPONENT VIDEO OUT COAXIAL R-AUDIO-L VIDEO Y PB PR A LINE OUT (yellow)* (yellow)* TV R-AUDIO-L VIDEO - AIWA XD-AX10 | Operating Instructions - Page 20
to an MD deck or DAT deck, use B-2 . In this case, you can also connect the player directly to the MD deck or DAT deck without using your stereo amplifier (receiver). CD/DVD player DIGITAL OUT PCM/DTS/ DOLBY DIGITAL LINE OUT S VIDEO OUT COMPONENT VIDEO OUT COAXIAL R-AUDIO-L VIDEO Y PB - AIWA XD-AX10 | Operating Instructions - Page 21
. If your amplifier (receiver) has L and R audio input jacks only, use C-1 . If your amplifier (receiver) has a digital input jack, use C-2 . CD/DVD player DIGITAL OUT PCM/DTS/ DOLBY DIGITAL LINE OUT S VIDEO OUT COMPONENT VIDEO OUT COAXIAL R-AUDIO-L VIDEO Y PB PR C-2 DIGITAL OUT PCM/DTS - AIWA XD-AX10 | Operating Instructions - Page 22
decoder and 6 speakers This connection will allow you to use the Dolby Digital or DTS decoder function of your AV amplifier (receiver). CD/DVD player DIGITAL OUT PCM/DTS/ DOLBY DIGITAL LINE OUT S VIDEO OUT COMPONENT VIDEO OUT COAXIAL R-AUDIO-L VIDEO Y PB PR D DIGITAL OUT PCM/DTS/ DOLBY - AIWA XD-AX10 | Operating Instructions - Page 23
below to make the minimum number of basic adjustments for using the player. To skip an adjustment, press >. To return to the previous adjustment [/1. 3 Switch the input selector on your TV so that the signal from the player appears on the TV screen. "Press [ENTER] to run QUICK SETUP" appears at - AIWA XD-AX10 | Operating Instructions - Page 24
DTS decoder) (page 54) 13Press ENTER. Quick Setup is finished. All connections and setup operations are complete. Enjoying the surround sound effects To enjoy the surround sound effects of this player or your amplifier (receiver), set the following items as described below for the audio connection - AIWA XD-AX10 | Operating Instructions - Page 25
Playing Discs Playing Discs Playing Discs 4 Press A on the player, and place a disc on the disc tray. Depending on the DVD or VIDEO CD, some operations may be different or restricted. Refer to the operating instructions supplied with your disc. With the playback side facing down 5 Press H. The - AIWA XD-AX10 | Operating Instructions - Page 26
play mode Go back to the Press . previous chapter, track, or scene in continuous play mode 26 ENTER RETURN When the player is in standby mode, press O RETURN, ENTER, and [/1 in this order on the remote. The player turns on and "LOCKED" appears on the front panel display. The Z button on the - AIWA XD-AX10 | Operating Instructions - Page 27
To unlock the disc tray When the player is in standby mode, press O RETURN, ENTER, and then [/1 again. Note Even if you select "RESET" under "SETUP" in the Control Bar (page 50), the disc tray remains locked. Resuming Playback from the Point Where You Stopped the Disc (Disc Resume) The player - AIWA XD-AX10 | Operating Instructions - Page 28
not work during Shuffle Play and Program Play. • If "DISC RESUME" in "CUSTOM SETUP" is set to "ON" and you play a recorded disc such as DVD-RW, the player may play other recorded discs from the same resume point. To play from the beginning, press x twice and then press H. Using the - AIWA XD-AX10 | Operating Instructions - Page 29
PBC, press ./> or the number buttons while the player is stopped to select a track, then press H or ENTER. "Play without PBC ENTER. 4 Follow the instructions in the menu for interactive operations. Refer to the instructions supplied with the disc, as the operating procedure may differ depending on - AIWA XD-AX10 | Operating Instructions - Page 30
2 Press H. The disc tray closes, and the player starts to play the first MP3 audio track in the first album on the disc. Notes • This player can play MP3 audio tracks recorded in the following sampling 2, or Joliet format for the player to recognize the tracks. You can also play discs recorded in - AIWA XD-AX10 | Operating Instructions - Page 31
Playing Discs See the instructions of the CD-R/CD-RW device or recording software (not supplied) for details on the recording format. To play a Multi Session CD This player can play Multi Session CDs when an MP3 audio track is located in the first session. Any subsequent MP3 audio tracks, recorded - AIWA XD-AX10 | Operating Instructions - Page 32
The play mode is canceled when: - you open the disc tray. - the player enters standby mode by pressing [/1. Creating your own program (Program Play) You can the title, chapter, or track you want to program. ◆ When playing a DVD For example, select chapter "03" of title "02." Press X/x or the number - AIWA XD-AX10 | Operating Instructions - Page 33
on the screen. • You cannot use this function with VIDEO CDs with PBC playback. Playing in random order (Shuffle Play) You can have the player "shuffle" titles, chapters, or tracks. Subsequent "shuffling" may produce a different playing order. CLEAR To stop Program Play Press CLEAR. To turn off the - AIWA XD-AX10 | Operating Instructions - Page 34
is turned off. z Hints • You can set Shuffle Play while the player is stopped. After selecting the "SHUFFLE" option, press H. Shuffle Play starts. • Press REPEAT repeatedly to select the item to be repeated. ◆ When playing a DVD • DISC: repeats all of the titles. • TITLE: repeats the current - AIWA XD-AX10 | Operating Instructions - Page 35
you want to memorize lyrics, etc.) 4 When you reach the ending point (point B), press ENTER again. The set points are displayed and the player starts repeating this specific portion. To return to normal play Press CLEAR. To turn off the Control Bar Press DISPLAY repeatedly until the Control Bar is - AIWA XD-AX10 | Operating Instructions - Page 36
back slowly. STEP STEP Note Depending on the DVD/VIDEO CD, you may not be able to do some of the operations described. Locating a point quickly by playing point on a disc using . / > on the player. During playback, press and hold > on the player to locate a point in the playback direction, or press - AIWA XD-AX10 | Operating Instructions - Page 37
Frame) When the player is in the pause mode, press STEP to go to the next frame. Press STEP to go to the preceding frame (DVD only). If you entering its number. Or, you can search for a scene using the time code. Number buttons CLEAR SEARCH MODE ENTER 1 Press SEARCH MODE. The following display - AIWA XD-AX10 | Operating Instructions - Page 38
a mistake Cancel the number by pressing CLEAR, then select another number. 4 Press ENTER. The player starts playback from the selected number. Notes • You cannot search for a scene on a DVD+RW using the time code. • The title, chapter, or track number displayed is the same number recorded on the - AIWA XD-AX10 | Operating Instructions - Page 39
depend on the disc you are playing. To check the DVD/CD text or track name (MP3 audio) Press TIME/TEXT repeatedly in Step 2 to display text recorded on the DVD/CD/DATA CD. The DVD/CD text appears only when text is recorded in the disc. You cannot - AIWA XD-AX10 | Operating Instructions - Page 40
when you change the time information on your TV screen. When playing a DVD Playing time of the current title When playing a VIDEO CD (without PBC of disc being played, the DVD/CD text or track name may not be displayed. • The player can only display the first level of the DVD/CD text, such as the - AIWA XD-AX10 | Operating Instructions - Page 41
to select the desired audio signal. ◆ When playing a DVD Depending on the DVD, the choice of language varies. When 4 digits are displayed, they indicate a language code. Refer to "Language Code List" on page 60 to see which language the code represents. When the same language is displayed two or - AIWA XD-AX10 | Operating Instructions - Page 42
by using sound imaging to create virtual rear speakers from the sound of the front speakers (L: left, R: right) without using actual rear speakers. If the player is set up to output the signal from the DIGITAL OUT (COAXIAL) jack, the surround effect will only be heard when "DOLBY DIGITAL" is set - AIWA XD-AX10 | Operating Instructions - Page 43
Sound Adjustments To cancel the setting Select "OFF" in Step 2. ◆WIDE Creates virtual rear speakers from the sound of the front speakers (L, R) without using actual rear speakers. The virtual speakers are reproduced as shown in the illustration below. This mode is effective when the distance - AIWA XD-AX10 | Operating Instructions - Page 44
you want while playing a DVD. You can adjust the video signal of the DVD or VIDEO CD from the player to obtain the picture quality code. Refer to "Language Code List" on page 60 to see which language the code represents. To turn off the subtitles Select "OFF" in Step 2. Note Depending on the DVD - AIWA XD-AX10 | Operating Instructions - Page 45
Enjoying Movies Changing the Angles If various angles (multi-angles) for a scene are recorded on the DVD, " " appears in the front panel display. This means that you can change the viewing angle. ANGLE 1 Press ANGLE during playback. The number of the angle - AIWA XD-AX10 | Operating Instructions - Page 46
to select (PARENTAL CONTROL), then press ENTER. The options for "PARENTAL CONTROL" appear. PLAYER PLAYER PASSWORD The "PARENTAL CONTROL" function allows you to set a playback limitation level. Playback of some DVDs can be limited according to a predetermined level such as the age of the users - AIWA XD-AX10 | Operating Instructions - Page 47
The area is selected. When you select "OTHERS t," select and enter a standard code in the table on page 48 using the number buttons. 7 Press X/x to do not have the Parental Control function, playback cannot be limited on this player. • Depending on the disc, you may be asked to change the parental - AIWA XD-AX10 | Operating Instructions - Page 48
2092 2115 2165 2174 2109 2248 2238 2254 2276 Standard Code number Korea 2304 Malaysia 2363 Mexico 2362 Netherlands 2376 New until the display is turned off. Changing the password 1 Press DISPLAY while the player is in stop mode. The Control Bar appears. 2 Press X/x to select ( - AIWA XD-AX10 | Operating Instructions - Page 49
in the disc take priority over the Setup Display settings and not all the functions described may work. ENTER DISPLAY 1 Press DISPLAY when the player is in stop mode. The Control Bar appears. QUICK 3 Press X/x to select "CUSTOM," then press ENTER. The Setup Display appears. LANGUAGE SETUP OSD - AIWA XD-AX10 | Operating Instructions - Page 50
to the Control Bar. Do not press [/1 when resetting the player. Setting the Display or Sound Track Language (LANGUAGE SETUP) " code from "Language Code List" on page 60 using the number buttons. Note When you select a language in "MENU," "SUBTITLE," or "AUDIO" that is not recorded on the DVD - AIWA XD-AX10 | Operating Instructions - Page 51
wide mode function. 4:3 LETTER BOX 4:3 PAN SCAN Note Depending on the DVD, "4:3 LETTER BOX" may be selected automatically instead of "4:3 PAN SCAN" "GRAPHICS" picture appears. GRAPHICS A preset picture stored in the player appears. BLUE BLACK The background color is blue. The background color - AIWA XD-AX10 | Operating Instructions - Page 52
: OFF OFF BRIGHT AUTO OFF ON ◆ AUTO POWER OFF Switches the Auto Power Off setting on or off. OFF ON Switches this function off. The player enters standby mode when left in stop mode for more than 30 minutes. ◆ AUTO PLAY Switches the Auto Play setting on or off. This function - AIWA XD-AX10 | Operating Instructions - Page 53
SELECTION" to "AUTO." • If PCM, DTS, and Dolby Digital sound tracks have the same number of channels, the player selects PCM, DTS, and Dolby Digital sound tracks in this order. ◆ DISC RESUME (DVD/VIDEO CD only) Switches the Disc Resume setting on or off. Resume playback can be stored in memory for - AIWA XD-AX10 | Operating Instructions - Page 54
, select this position. Multi-channel audio signals are output to two channels for enjoying surround sounds. NORMAL Multi-channel audio signals are downmixed . ◆ DOLBY DIGITAL (DVD only) Selects the type of Dolby Digital signal. D-PCM DOLBY DIGITAL Select this when the player is connected to an - AIWA XD-AX10 | Operating Instructions - Page 55
If you experience any of the following difficulties while using the player, use this troubleshooting guide to help remedy the problem before requesting repairs. Should any problem persist, consult your nearest Aiwa dealer (for customers in the U.S.A only). Power The power is not turned - AIWA XD-AX10 | Operating Instructions - Page 56
selection button on the remote (page 28). , Multi-angles are not recorded on the DVD being played. , The angle can only be changed when the " " indicator lights up on the front panel display (page 10). , The DVD prohibits changing of the angles. The player does not operate properly. , When static - AIWA XD-AX10 | Operating Instructions - Page 57
. , Re-insert the disc correctly. E XX (xx is a number) To prevent a malfunction, the player has performed the self-diagnosis function. , Contact your nearest Aiwa dealer or local authorized Aiwa service facility and give the 5character service number. Example: E 61 10 Additional Information 57 - AIWA XD-AX10 | Operating Instructions - Page 58
average) of its original size. The DVD also uses a variable rate coding technology that changes the data to multi-angle, multilingual, and Parental Control functions are provided with the DVD. DVD-RW (page 6) A DVD-RW is a recordable and rewritable disc that is the same size as a DVD VIDEO. The DVD - AIWA XD-AX10 | Operating Instructions - Page 59
(L/R) AUDIO jacks only) Harmonic distortion: 0.003 % Dynamic range: DVD VIDEO: 103 dB/CD: 99 dB Wow and flutter: Less than parts Mass (approx.): 2.2 kg (4 lb 14 oz) Operating temperature: 5 °C to 35 °C (41 °F to 95 °F) Operating humidity: 25 % to 80 % Supplied accessories See page 15. Specifications - AIWA XD-AX10 | Operating Instructions - Page 60
Greek 1144 English 1145 Esperanto 1149 Spanish 1150 Estonian 1151 Basque 1157 Persian 1165 Finnish 1166 Fiji 1171 Faroese 1174 French 1181 Frisian Code Language 1183 Irish 1186 Scots Gaelic 1194 Galician 1196 Guarani 1203 Gujarati 1209 Hausa 1217 Hindi 1226 Croatian 1229 Hungarian 1233 Armenian - AIWA XD-AX10 | Operating Instructions - Page 61
DVD+RW 6, 26, 58 DVD's Menu 28 DVD-RW 6, 26, 58 F Fast forward 36 Fast reverse 36 Freeze Frame 36 Front panel display 10 H Handling discs 8 Hooking up 15 I INDEX 37 Index 58 Instant Replay 26 Instant Search 26 L LANGUAGE SETUP 50 Locating a specific Setup 23, 50 R Remote 15 REPEAT 34 Repeat Play - AIWA XD-AX10 | Operating Instructions - Page 62
- AIWA XD-AX10 | Operating Instructions - Page 63
- AIWA XD-AX10 | Operating Instructions - Page 64
Printed on 100% recycled magazine paper. Printed using VOC (volatile organic compound)-free vegetable oil based ink. Sony Corporation Printed in Malaysia http://www.aiwa.com/
-
 1
1 -
 2
2 -
 3
3 -
 4
4 -
 5
5 -
 6
6 -
 7
7 -
8
-
9
-
10
-
11
-
12
-
13
-
14
-
15
-
16
-
17
-
18
-
19
-
20
-
21
-
22
-
23
-
24
-
25
-
26
-
27
-
28
-
29
-
30
-
31
-
32
-
33
-
34
-
35
-
36
-
37
-
38
-
39
-
40
-
41
-
42
-
43
-
44
-
45
-
46
-
47
-
48
-
49
-
50
-
51
-
52
-
53
-
54
-
55
-
56
-
57
-
58
-
59
-
60
-
61
-
62
-
63
-
64
 |
 |

3-081-707-
11
(1)
© 2003 Sony Corporation
XD-AX10
Operating Instructions
For customers in the U.S.A
Owner’s Record
The model and serial numbers are located at the rear of the unit.
Record the serial number in the space provided below. Refer to them
whenever you call upon your Aiwa dealer regarding this product.
Model No. XD-AX10
Serial No.______________
For assistance and information
visit us on the internet at
www.us.aiwa.com
call toll free 1-800-BUY-AIWA
For Customers in Canada
If this product is not working properly, please call 1-877-869-2492 for
Peace of Mind Warranty Replacement service.
For other product related questions please contact our
Customer
Information Service Centre
at 1-877-869-2492 or write to us at:
Customer Information Service 115 Gordon Baker Road, Toronto,
Ontario, M2H 3R6
CD/DVD
Player