ASRock ALiveNF7G-HD720p R5.0 RAID Installation Guide - Page 6
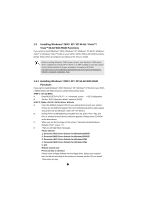
STEP 3: Use RAID Installation Guide to set RAID configuration., RAID Installation Guide, STEP 4: - windows 7
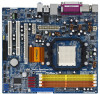 |
View all ASRock ALiveNF7G-HD720p R5.0 manuals
Add to My Manuals
Save this manual to your list of manuals |
Page 6 highlights
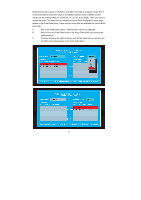
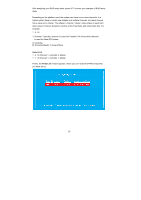
E. The system will start to format the floppy diskette and copy SATA / SATAII drivers into the floppy diskette. STEP 3: Use "RAID Installation Guide" to set RAID configuration. Before you start to configure RAID function, you need to check the RAID installation guide in the Support CD for proper configuration. Please refer to the BIOS RAID installation guide part of the document in the following path in the Support CD: .. \ RAID Installation Guide STEP 4: Install Windows® 2000 / XP / XP 64-bit OS on your system. After step1, 2, 3, you can start to install Windows® 2000 / Windows® XP / Windows® XP 64-bit OS on your system. At the beginning of Windows® setup, press F6 to install a third-party RAID driver. When prompted, insert the SATA / SATAII driver diskette contain- ing the NVIDIA® RAID driver. After reading the floppy disk, the drivers will be presented. Select the drivers to install. The drivers are as below: A. NVIDIA RAID Driver (required) B. NVIDIA nForce Storage Controller (required) Please select A and B for Windows® 2000 / XP / XP 64-bit in RAID mode. (There are two RAID drivers needed for RAID mode, you have to select them separately. Please specify the first RAID driver and then specify again for the second one.) NOTE. If you install Windows® 2000 / Windows® XP / Windows® XP 64-bit on IDE HDDs and want to manage (create, convert, delete, or rebuild) RAID functions on SATA / SATAII HDDs, you still need to set up "SATA Operation Mode" to [RAID] in BIOS first. Then, please set the RAID configuration by using the Windows RAID installation guide part of the document in the following path in the Support CD: .. \ RAID Installation Guide 6
-
 1
1 -
 2
2 -
 3
3 -
 4
4 -
 5
5 -
 6
6 -
 7
7 -
 8
8 -
 9
9 -
 10
10 -
 11
11 -
 12
12 -
13
-
14
-
15
-
16
-
17
-
18
-
19
-
20
-
21
-
22
-
23
-
24
-
25
-
26
 |
 |
