ASRock AOD790GX/128M User Manual - Page 30
Surround Display Feature - 128mb
 |
View all ASRock AOD790GX/128M manuals
Add to My Manuals
Save this manual to your list of manuals |
Page 30 highlights
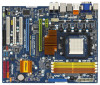
3. If you have installed onboard VGA driver from our support CD to your system already, you can freely enjoy the benefits of dual monitor function after your system boots. If you haven't installed onboard VGA driver yet, please install onboard VGA driver from our support CD to your system and restart your computer. Then you can start to use dual monitor function on this motherboard. When you playback HDCP-protected video from Blu-ray (BD) or HD-DVD disc, the content will be displayed only in one of the two monitors instead of both monitors. Surround Display Feature This motherboard supports surround display upgrade. With the internal dual VGA output support (HDMI and D-Sub or DVI-D and D-Sub) and the external add-on PCI Express VGA card, you can easily enjoy the benefits of surround display feature. Please refer to the following steps to set up a surround display environment: If you install only one PCI Express VGA card, please skip step 1, and install the PCI Express VGA card on PCIE2 slot. Therefore, the PCI Express VGA card will run at x16 bandwidth. 1. Please follow the instructions on page 23 and 24 to reverse the direction of ASRock SLI/XFire Switch Card to switch it to CrossFire Mode. 2. Install one ATITM PCI Express VGA card on PCIE2 slot, and install the other ATITM PCI Express VGA card on PCIE3 slot. Please refer to page 20 for proper expansion card installation procedures for details. 3. If you connect the DVI-to-HDMI converter to the VGA/DVI-D port, please connect the HDMI monitor cable to the DVI-to-HDMI converter. If you don't connect the DVI-to-HDMI converter to the VGA/DVI-D port, please connect the DVI-D monitor cable to the VGA/DVI-D port. And connect the D-Sub monitor cable to the VGA/D-Sub port. 4. Boot your system. Press to enter BIOS setup. Enter "Share Memory" option to adjust the memory capability to [32MB], [64MB], [128MB] [256MB] or [512MB] to enable the function of VGA/D-sub. Please make sure that the value you select is less than the total capability of the system memory. If you do not adjust the BIOS setup, the default value of "Share Memory", [Auto], will disable VGA/D-Sub function when the add-on VGA card is inserted to this motherboard. 5. Install the onboard VGA driver and the add-on PCI Express VGA card driver to your system. If you have installed the drivers already, there is no need to install them again. 6. Set up a multi-monitor display. 30
-
 1
1 -
2
-
3
-
4
-
5
-
6
-
7
-
8
-
9
-
10
-
11
-
12
-
13
-
14
-
15
-
16
-
17
-
18
-
19
-
20
-
21
-
22
-
23
-
24
-
 25
25 -
 26
26 -
 27
27 -
 28
28 -
 29
29 -
 30
30 -
 31
31 -
 32
32 -
 33
33 -
 34
34 -
 35
35 -
36
-
37
-
38
-
39
-
40
-
41
-
42
-
43
-
44
-
45
-
46
-
47
-
48
-
49
-
50
-
51
-
52
-
53
-
54
-
55
-
56
-
57
-
58
-
59
-
60
-
61
-
62
-
63
-
64
-
65
-
66
-
67
-
68
-
69
-
70
-
71
-
72
-
73
-
74
 |
 |
