ASRock Core 100HT-BD Quick Installation Guide - Page 2
nomummouvezzlri
 |
View all ASRock Core 100HT-BD manuals
Add to My Manuals
Save this manual to your list of manuals |
Page 2 highlights
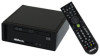
ystem • 1. Connecting USB Davie. (USB2.0 Ports) , • 6. Connecting External Audio Device (Line in Port for 2/4/6 Channel; Rear Port for 8 Channel) 2. Connecting VGA Monitor (Display (VGA) Port) 7. Connecting Stereo Speakers or Headphones (Front LJR Out Port) 3. Connecting the Network (LAN (RJ•45) Port) 40. • i. Az. _....„ 4. Connecting HDMI Device (HDMI Port) 8 Connecting Microphone (Mk in Port) 9. Connecting Center / Subwoofer Speakers (Center/LEE Port) 11. Connecting Optical Devi ce (Optical SIPDIF Oct Port) MAMEI8 12. Connecting Power (DC-In Jack Port) ' C. * • fonts 6. Refer to above steps to place the new ODD / HDD to the chassis. Replace the 1. Remove the cover screws on the rear side cover and fasten the screws. Panel. 4. Connect one end of BATA and power cables to the ODD and the other end to the bottom HOD. .' ala: Far.* namanaaMaamamaa....P....... la Malang. , beam openinglaa cam 2. Slide the side cover toward the rear panel and pull the side cover upwards. Installing Second HDD . . S '' '"1I4P"• ... ,1 V, 19. Power on the System (Power Switch) 1111M 14. Connecting Earphone / Microphone / USB3.0 Devices 1. To install the second HDD, please follow above step 1 to 4, and remove ii * the ODD and the first HOD in advance. Then fasten the screws of the 3. To change the storage drives, you need Bond to the rack. to remove BATA and power cables Tiomti, from ODD / HDD first,and unscrew the screws from both side. s•-• .,.. . - 4. Pull ODD / HDD rack backwards and take it out from the bay. . Place the first HOD to the rack and fasten the screws from both side. t 5. Connect the other SAVA and power cables to SATAIL3 and J1 connectors on the motherboard. 00111lik÷ -4,..,. 46. Connect the other end to the top HDD. Nil. _ ...,-, §lig 0 10. Connecting Side Speakers 5. Connecting eSATA Device (eSATA Port) (Side Port for 4/6/8 Channel) L ox 0 ammx Anti-Slip Pad Usage a. .8s. S. Unscrew the screws from the side of ODD / HDD rack, and change your required ODD / HDD. . ..,_ 3. Place the ODD to the rack and fasten the screws from both aide. Replace the rack tome chassis. 4M-- AllailhO. ss.. 7. Replace the side cover and fasten the screws. vim • • , poH • , - - - coaniro *Wm.. aLal samssaLssasssas. 11.E1===lepta.nwOOD/SOSS.SonSfleSse 1. ErosLra Irs====== 13.= BalrnaasdaksoomparanladallasaL tr4fPlzI 3.611111.1 SIM VS, .3.011.01•11.4% 1SIVISVIUSTST! ''''''' LES*11011*111.111CI 1 1.0,...SISIL11111191411"/Ma 7:=1:(378:1:11740 ."""' 1 "'" " ."" Tiees
-
 1
1 -
 2
2
 |
 |
