ASRock J3455 Pro BTC Quick Installation Guide - Page 22
Installing the 4-pin PCIe Power Connectors, Special Features, Smart PCIe State Detection
 |
View all ASRock J3455 Pro BTC manuals
Add to My Manuals
Save this manual to your list of manuals |
Page 22 highlights
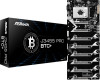
2.7 Installing the 4-pin PCIe Power Connectors The extra 4-pin PCIe power connectors on this motherboard offer more power for your graphics cards. They provide stable voltages and greatly reduce the risks of burning your motherboard or graphics cards. When the graphics cards are installed, be sure to install the PSU's 4-pin power cables to the corresponding 4-pin PCIe power connectors (PCIE_ PWR) on your motherboard; otherwise, the cards may be damaged. Make sure the 4-pin PCIe power connector and the external power connector on the graphics card are connected to the same PSU; otherwise, the motherboard and the graphics card may be damaged. 2.8 Special Features 2.8.1 Smart PCIe State Detection This motherboard has included a smart way to show the status of every graphics card. While the system is booting, the Power-On, Self-Test (POST) screen will show the status of the graphics cards that were installed on the motherboard. 20 English
-
 1
1 -
2
-
3
-
4
-
5
-
6
-
7
-
8
-
9
-
10
-
11
-
12
-
13
-
14
-
15
-
16
-
 17
17 -
 18
18 -
 19
19 -
 20
20 -
 21
21 -
 22
22 -
 23
23 -
 24
24 -
 25
25 -
 26
26 -
 27
27 -
28
-
29
-
30
-
31
-
32
-
33
-
34
-
35
-
36
-
37
-
38
-
39
-
40
-
41
-
42
-
43
-
44
-
45
-
46
-
47
-
48
-
49
-
50
-
51
-
52
-
53
-
54
-
55
-
56
-
57
-
58
-
59
-
60
-
61
-
62
-
63
-
64
-
65
-
66
-
67
-
68
-
69
-
70
-
71
-
72
-
73
-
74
-
75
-
76
-
77
-
78
-
79
-
80
-
81
-
82
-
83
-
84
-
85
-
86
-
87
-
88
-
89
-
90
-
91
-
92
-
93
-
94
-
95
-
96
-
97
-
98
-
99
-
100
-
101
-
102
-
103
-
104
-
105
-
106
-
107
-
108
-
109
-
110
-
111
-
112
-
113
-
114
-
115
-
116
-
117
-
118
-
119
-
120
-
121
-
122
-
123
-
124
-
125
-
126
-
127
-
128
-
129
-
130
-
131
-
132
-
133
-
134
-
135
-
136
-
137
-
138
-
139
-
140
 |
 |
