ASRock M3A-GLAN RAID Installation Guide - Page 8
ATI Windows RAID Installation Guide
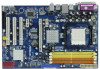 |
View all ASRock M3A-GLAN manuals
Add to My Manuals
Save this manual to your list of manuals |
Page 8 highlights
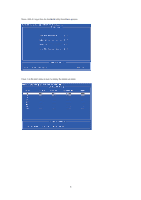
2. ATI Windows RAID Installation Guide ATI Windows RAID Installation Guide is an instruction for you to configure RAID functions by using WebPAM RAID management software under Windows environment. The WebPAM (Web-Based Promise Array Management) software offers local and remote management and monitoring of all ATI SB600 SATA logical drives that exist anywhere on a network. Its browser-based GUI provides email notification of all major events/alarms, memory cache management, drive event logging, logical drive maintenance, rebuild, and access to all components in the RAID configuration (server, controller, logical drives, physical drives, and enclosure). WebPAM is designed to work with ATI SB600 SATA RAID controllers. Other brands of RAID controllers are not supported. Please read this guide carefully and follow the instructions below to configure and manage RAID functions. 2.1 Components of WebPAM Installation Software WebPAM installation software will install two major components to your system: 1. WebPAM RAID management software: The WebPAM software installs on the PC with the ATI SB600 SATA RAID Controller (the "Host PC"). 2. Java Runtime Environment (in a private folder): The WebPAM installation program installs a private JRE in folder _jvm under the same directory where WebPAM is installed. WebPAM uses this private JRE to avoid incompatibility issues with any other JREs that may be present on your system. 2.2 Browser Support On the Host PC with the ATI SB600 Controller, where you install WebPAM, you must have one of the following browsers: Internet Explorer 6.0, Mozilla Suite 1.7, Mozilla Firefox 1.0, or Netscape Navigator 7.1. If you do not have one of the above browsers, install the browser first and make it the default browser. Then install WebPAM. You must use one of the browsers listed above on your networked PC in order to access WebPAM over the network. 2.3 Installing WebPAM Follow these steps to install WebPAM on your Windows-based PC or Server. 1. Boot up the PC/server and launch Windows. If the computer is already running, exit all programs. 2. Insert the software CD into your CD-ROM drive. 3. Double-click on the Install CD's icon to open it. 4. Double-click on the Installer icon to launch it. The first WebPAM installation dialog box appears. 8
-
 1
1 -
2
-
 3
3 -
 4
4 -
 5
5 -
 6
6 -
 7
7 -
 8
8 -
 9
9 -
 10
10 -
 11
11 -
 12
12 -
 13
13 -
14
-
15
-
16
 |
 |
