ASRock P55 Extreme4 User Manual - Page 46
Installing Windows, 7 64-bit / Vista, Vista, bit With RAID Functions
 |
View all ASRock P55 Extreme4 manuals
Add to My Manuals
Save this manual to your list of manuals |
Page 46 highlights
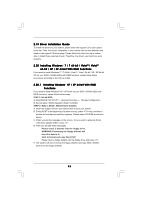
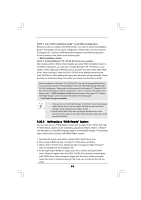
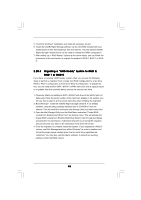
2.20.4 Installing Windows® 7 / 7 64-bit / VistaTM / VistaTM 64-bit With RAID Functions If you want to install Windows® 7 / 7 64-bit / VistaTM / VistaTM 64-bit on your SATA / SATAII HDDs with RAID functions, please follow below steps. STEP 1: Set up BIOS. A. Enter BIOS SETUP UTILITY Advanced screen Storage Configuration. B. Set the option "SATAII Operation Mode" to [RAID]. STEP 2: Use "RAID Installation Guide" to set RAID configuration. Before you start to configure the RAID function, you need to check the installation guide in the Support CD for proper configuration. Please refer to the document in the Support CD, "Guide to SATA Hard Disks Installation and RAID Configuration", which is located in the folder at the following path: .. \ RAID Installation Guide STEP 3: Install Windows® 7 / 7 64-bit / VistaTM / VistaTM 64-bit OS on your system. Insert the Windows® 7 / 7 64-bit / VistaTM / VistaTM 64-bit optical disk into the optical drive to boot your system, and follow the instruction to install Windows® 7 / 7 64-bit / VistaTM / VistaTM 64-bit OS on your system. When you see "Where do you want to install Windows?" page, please insert the ASRock Support CD into your optical drive, and click the "Load Driver" button on the left on the bottom to load the Intel® RAID drivers. Intel® RAID drivers are in the following path in our Support CD: .. \ I386 (For Windows® VistaTM OS) .. \ AMD64 (For Windows® VistaTM 64-bit OS) After that, please insert Windows® VistaTM / VistaTM 64-bit optical disk into the optical drive again to continue the installation. After the installation of Windows® 7 / 7 64-bit / VistaTM / VistaTM 64-bit OS, if you want to manage RAID functions, you are allowed to use both "RAID Installation Guide" and "Intel Rapid Storage Information" for RAID configuration. Please refer to the document in the Support CD, "Guide to SATA Hard Disks Installation and RAID Configuration", which is located in the folder at the following path: .. \ RAID Installation Guide and the document in the support CD, "Guide to Intel Rapid Storage", which is located in the folder at the following path: .. \ Intel Rapid Storage Information 1. If you want to use "Intel Rapid Storage" in Windows® environment, please install "SATAII driver" from the Support CD again so that "Intel Rapid Storage" will be installed to your system as well. 2. Marvell SATA3 RAID Utility does not support rebuild function under Windows®. If you wants to use RAID1 rebuild function, please do it under Marvell RAID ROM. 46
-
 1
1 -
2
-
3
-
4
-
5
-
6
-
7
-
8
-
9
-
10
-
11
-
12
-
13
-
14
-
15
-
16
-
17
-
18
-
19
-
20
-
21
-
22
-
23
-
24
-
25
-
26
-
27
-
28
-
29
-
30
-
31
-
32
-
33
-
34
-
35
-
36
-
37
-
38
-
39
-
40
-
 41
41 -
 42
42 -
 43
43 -
 44
44 -
 45
45 -
 46
46 -
 47
47 -
 48
48 -
 49
49 -
 50
50 -
 51
51 -
52
-
53
-
54
-
55
-
56
-
57
-
58
-
59
-
60
-
61
-
62
-
63
-
64
-
65
-
66
-
67
-
68
-
69
-
70
 |
 |