ASRock X670E Taichi Carrara RAID Installation Guide - Page 7
arrays before creating a new array.
 |
View all ASRock X670E Taichi Carrara manuals
Add to My Manuals
Save this manual to your list of manuals |
Page 7 highlights
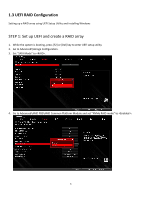
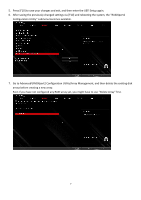
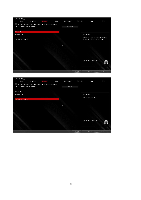
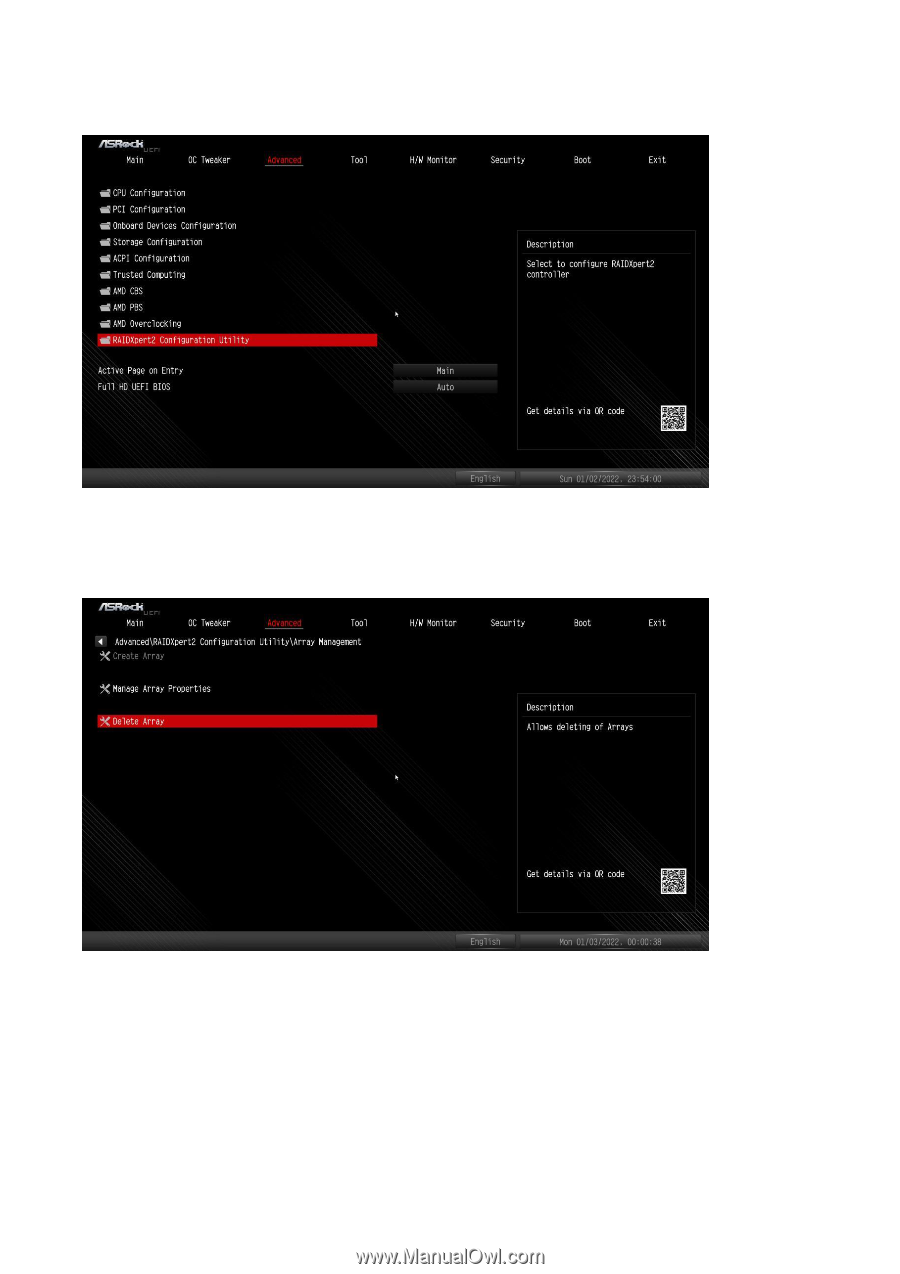
5. Press [F10] to save your changes and exit, and then enter the UEFI Setup again. 6. After saving the previously changed settings via [F10] and rebooting the system, the "RAIDXpert2 Configuration Utility" submenu becomes available. 7. Go to Advanced\RAIDXpert2 Configuration Utility\Array Management, and then delete the existing disk arrays before creating a new array. Even if you have not configured any RAID array yet, you might have to use "Delete Array" first. 7
-
 1
1 -
 2
2 -
 3
3 -
 4
4 -
 5
5 -
 6
6 -
 7
7 -
 8
8 -
 9
9 -
 10
10 -
 11
11 -
 12
12 -
13
-
14
-
15
-
16
-
17
-
18
-
19
-
20
-
21
-
22
-
23
-
24
-
25
-
26
-
27
 |
 |
7
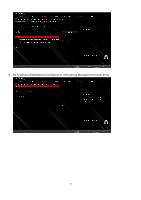
5.
Press [F10] to save your changes and exit, and then enter the UEFI Setup again.
6.
After saving the previously changed settings via [F10] and rebooting the system, the “RAIDXpert2
Configuration Utility” submenu becomes available.
7.
Go to Advanced\RAIDXpert2 Configuration Utility\Array Management, and then delete the existing disk
arrays before creating a new array.
Even if you have not configured any RAID array yet, you might have to use “Delete Array” first.