ASRock Z170M Pro4S User Manual - Page 46
Instructions
 |
View all ASRock Z170M Pro4S manuals
Add to My Manuals
Save this manual to your list of manuals |
Page 46 highlights
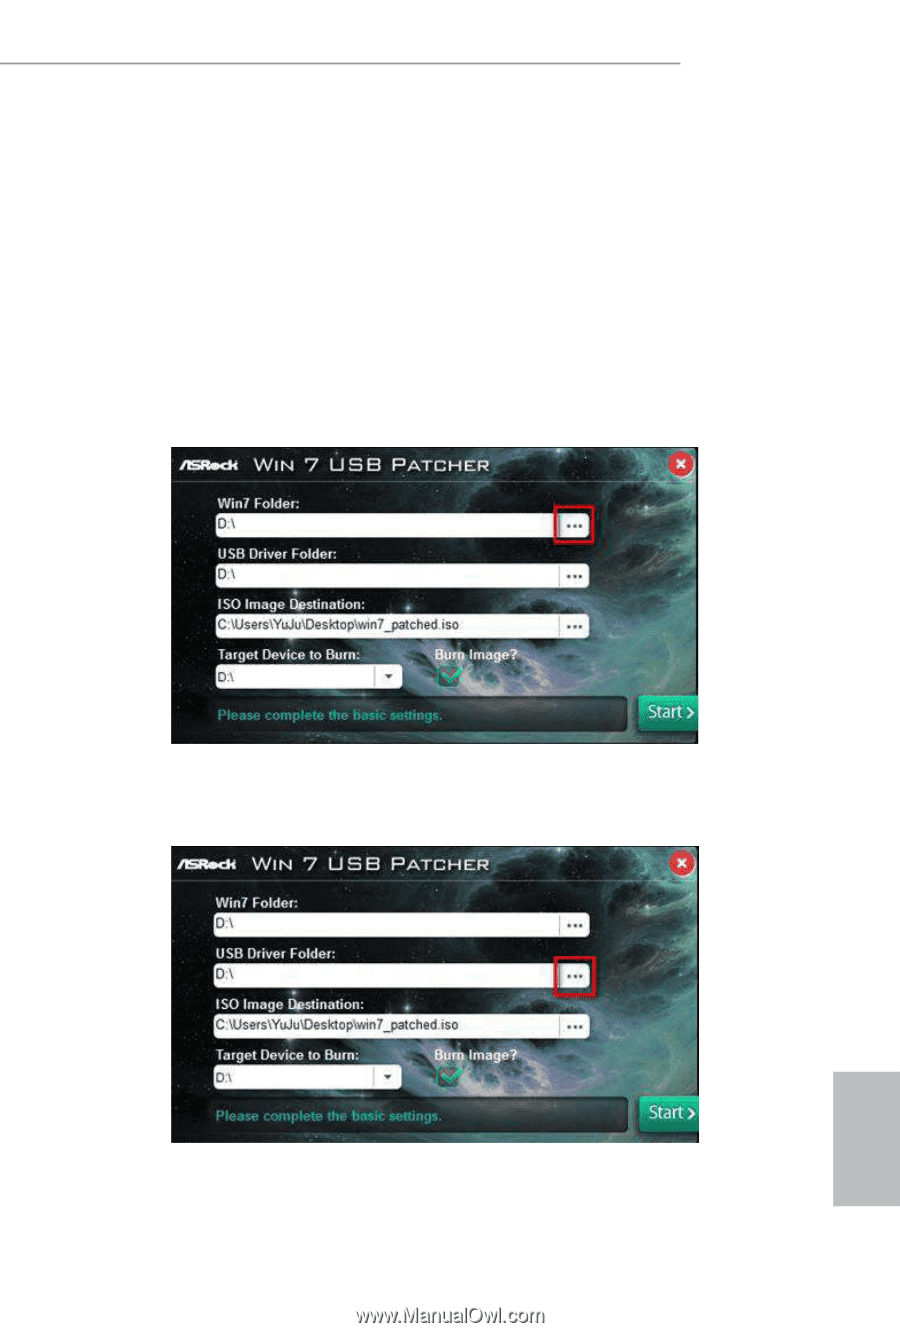
Z170M Pro4S Instructions Step 1 Insert the Windows® 7 installation disk or USB drive to your system. Step 2 Extract the tool (Win7 USB Patcher) and launch it. Step 3 Select the "Win7 Folder" from Step1 by clicking the red circle as shown as the picture below. Step 4 Select the "USB Driver Folder" by clicking the red circle as shown as the picture below. If you are using ASRock's Support CD for the USB 3.0 driver, please select your CD-ROM. 41 English
-
 1
1 -
2
-
3
-
4
-
5
-
6
-
7
-
8
-
9
-
10
-
11
-
12
-
13
-
14
-
15
-
16
-
17
-
18
-
19
-
20
-
21
-
22
-
23
-
24
-
25
-
26
-
27
-
28
-
29
-
30
-
31
-
32
-
33
-
34
-
35
-
36
-
37
-
38
-
39
-
40
-
 41
41 -
 42
42 -
 43
43 -
 44
44 -
 45
45 -
 46
46 -
 47
47 -
 48
48 -
 49
49 -
 50
50 -
 51
51 -
52
-
53
-
54
-
55
-
56
-
57
-
58
-
59
-
60
-
61
-
62
-
63
-
64
-
65
-
66
-
67
-
68
-
69
-
70
-
71
-
72
-
73
-
74
-
75
-
76
-
77
-
78
-
79
-
80
-
81
 |
 |
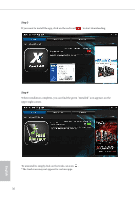
41
English
Z170M Pro4S
Instructions
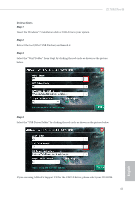
Step 1
Insert the Windows® 7 installation disk or USB drive to your system.
Step 2
Extract the tool (Win7 USB Patcher) and launch it.
Step 3
Select the “Win7 Folder” from Step1 by clicking the red circle as shown as the picture
below.
Step 4
Select the “USB Driver Folder” by clicking the red circle as shown as the picture below.
If you are using ASRock’s Support CD for the USB 3.0 driver, please select your CD-ROM.