Acer 751H Acer Aspire One 751H Netbook Series Start Guide - Page 8
Network configuration - aspire one 11 6
 |
UPC - 813120016482
View all Acer 751H manuals
Add to My Manuals
Save this manual to your list of manuals |
Page 8 highlights
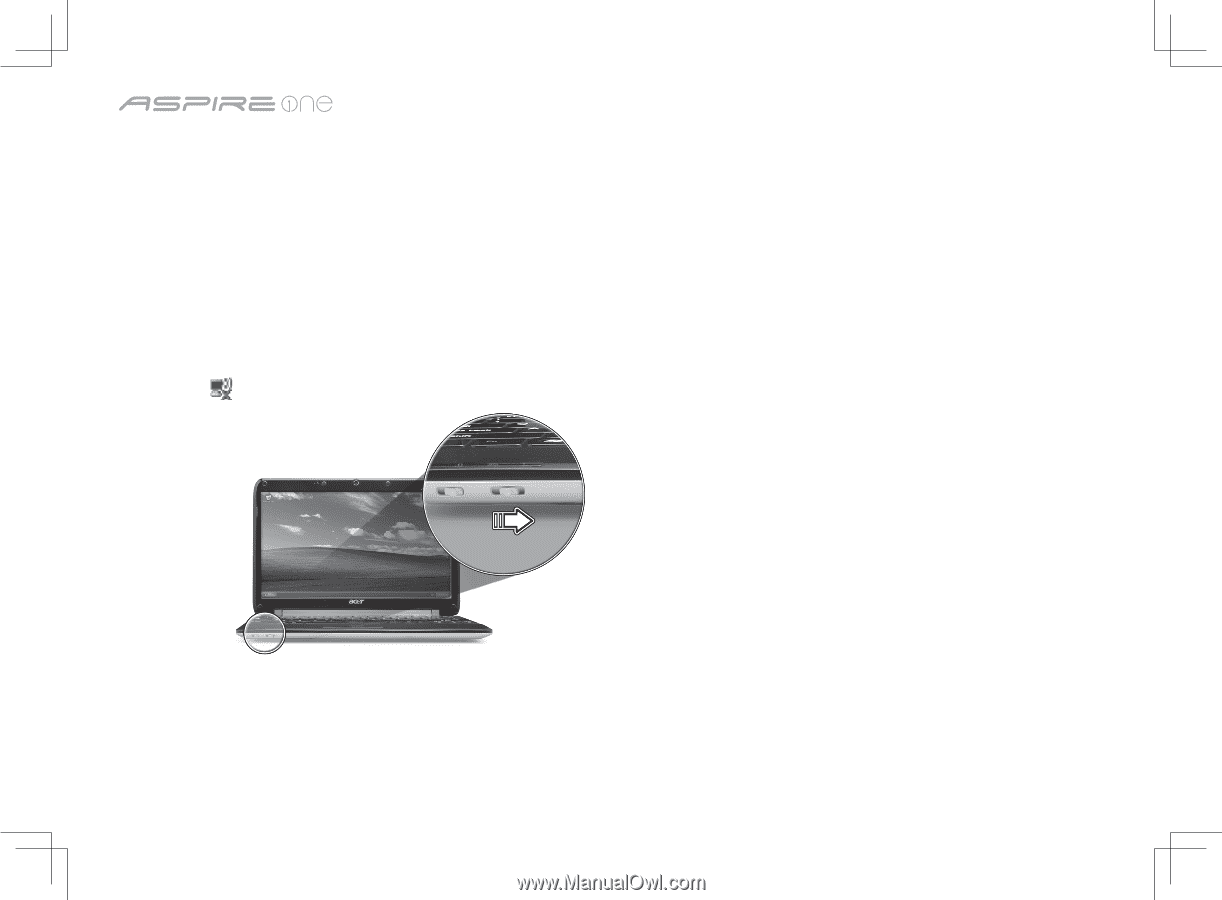
Series Network configuration This guide will help you configure your LAN and wireless network settings to enable you to connect to the Internet. Setting up LAN connection Simply plug in the LAN cable to the Ethernet (RJ-45) port. Please refer to "Left view" on page 10 for the location of the Ethernet port. Setting up wireless connection 1. Please turn on the wireless LAN using the switch on the front of your Aspire one. 2. Click the icon on your system tray and choose the wireless access point you want to connect to. Insert a 3G SIM card (only for certain models) Remove the battery and carefully insert a 3G SIM card into the 3G SIM card slot. Please refer to "Base view" on page 11 for the location of the 3G SIM card slot. 8
-
 1
1 -
2
-
 3
3 -
 4
4 -
 5
5 -
 6
6 -
 7
7 -
 8
8 -
 9
9 -
 10
10 -
 11
11 -
 12
12
 |
 |
8
Series
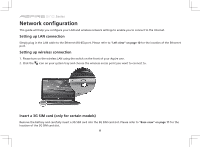
Network configuration
This guide will help you configure your LAN and wireless network settings to enable you to connect to the Internet.
Setting up LAN connection
Simply plug in the LAN cable to the Ethernet (RJ-45) port. Please refer to
"Left view" on page 10
for the location of the Ethernet
port.
Setting up wireless connection
1. Please turn on the wireless LAN using the switch on the front of your
Aspire one
.
2. Click the
icon on your system tray and choose the wireless access point you want to connect to.
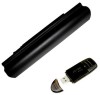
Insert a 3G SIM card (only for certain models)
Remove the battery and carefully insert a 3G SIM card into the 3G SIM card slot. Please refer to
"Base view" on page 11
for the
location of the 3G SIM card slot.