Acer Aspire 4540 Acer Aspire 4540 Series Service Guide - Page 116
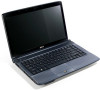
Replacing the Mainboard, Insert the cable through the casing to the top side as shown.
 |
View all Acer Aspire 4540 manuals
Add to My Manuals
Save this manual to your list of manuals |
Page 116 highlights
7. Insert the cable through the casing to the top side as shown. Replacing the Mainboard 1. Ensure that the Mainboard is face up. Place the Mainboard in the chassis, left hand edge first to allow the I/O Ports through the casing, then lower it into place. Be sure to align the securing pins and slide the RJ-11 cable through the groove in the main board as shown 106 Chapter 3
We apologize, but we cannot currently deliver this PDF manual by request of the manufacturer.
We apologize for any inconveniece.