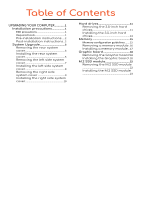
Acer ConceptD 700 User Manual - Page 6
Pre-installation instructions, Post-installation instructions
 |
View all Acer ConceptD 700 manuals
Add to My Manuals
Save this manual to your list of manuals |
Page 6 highlights
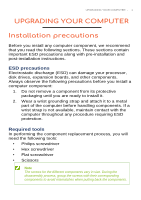
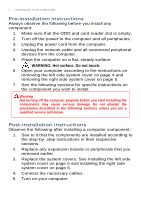
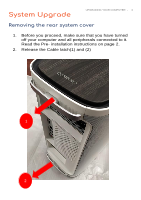
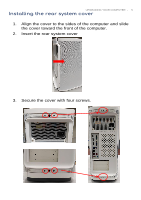
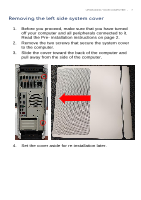
2 - UPGRADING YOUR COMPUTER Pre-installation instructions Always observe the following before you install any component: 1. Make sure that the ODD and card reader slot is empty. 2. Turn off the power to the computer and all peripherals. 3. Unplug the power cord from the computer. 4. Unplug the network cable and all connected peripheral devices from the computer. 5. Place the computer on a flat, steady surface. WARNING: Hot surface. Do not touch. 6. Open your computer according to the instructions on removing the left side system cover on page 4 and removing the right side system cover on page 5. 7. See the following sections for specific instructions on the component you wish to install. Warning Not turning off the computer properly before you start installing the components may cause serious damage. Do not attempt the procedures described in the following sections unless you are a qualified service technician. Post-installation instructions Observe the following after installing a computer component: 1. See to it that the components are installed according to the step-by- step instructions in their respective sections. 2. Replace any expansion boards or peripherals that you removed earlier. 3. Replace the system covers. See Installing the left side system cover on page 5 and installing the right side system cover on page 6. 4. Connect the necessary cables. 5. Turn on your computer.
-
 1
1 -
 2
2 -
 3
3 -
 4
4 -
 5
5 -
 6
6 -
 7
7 -
 8
8 -
 9
9 -
 10
10 -
 11
11 -
 12
12 -
13
-
14
-
15
-
16
-
17
-
18
-
19
-
20
-
21
-
22
-
23
-
24
-
25
-
26
-
27
 |
 |