Acer D240H User Manual - Page 21
Congratulations on your new Acer D240H DPF monitor, Acer PhotoFit Management, Use this quick guide - review
 |
UPC - 884483872954
View all Acer D240H manuals
Add to My Manuals
Save this manual to your list of manuals |
Page 21 highlights
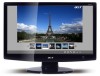
i Congratulations on your new Acer D240H DPF monitor! Your Acer D240H monitor has a built-in digital photo frame (DPF) function for displaying photos even when the monitor is not connected to a computer. It is equipped with a card reader, and the 1 GB internal storage allows you to save photos on the monitor. A USB port is also available, letting you connect an external storage device directly. Use this quick guide to: • Set up the monitor as a DPF • Review parts of the monitor • Install the Acer PhotoFit Management software • Use the Acer PhotoFit Management software • Use the control icons • View images in photo mode or slideshow mode Getting started You need to install the Acer PhotoFit Management software to enable the DPF function. To do this, connect your Acer D240H monitor to the PC via HDMI™, DVI or VGA cable. Plug the B-type USB plug into the monitor and the other end of the USB cable into your PC. This will enable the monitor to access the images stored in your PC or in the memory card inserted in your PC. After the software has been installed, you can turn DPF mode on and off. Press the Empowering Key to show the onscreen menu and press again to switch to DPF mode. Product views Acer PhotoFit Management Acer PhotoFit Management is an application that prepares images for display when the DPF monitor is used as a digital photo frame. It resizes images to ensure the best fit on the screen while optimizing the file size for better memory use. It also provides an easier way of customizing the images stored in the DPF monitor, and features a friendly interface for browsing and managing these images. Installing the software Acer PhotoFit Management is supplied on the included CD-ROM. Insert the CD into the PC's optical drive; the software will run automatically. Follow the onscreen instructions to install the software; it will start up
-
 1
1 -
2
-
3
-
4
-
5
-
6
-
7
-
8
-
9
-
10
-
11
-
12
-
13
-
14
-
15
-
 16
16 -
 17
17 -
 18
18 -
 19
19 -
 20
20 -
 21
21 -
 22
22 -
 23
23 -
 24
24 -
 25
25 -
 26
26 -
27
-
28
-
29
-
30
 |
 |
