Acer TravelMate 2310 TravelMate 2310 User's Guide - Page 12
Rear view, Base view - hard disk
 |
View all Acer TravelMate 2310 manuals
Add to My Manuals
Save this manual to your list of manuals |
Page 12 highlights
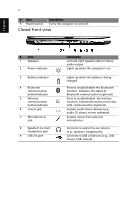
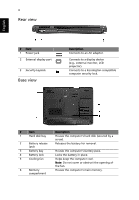
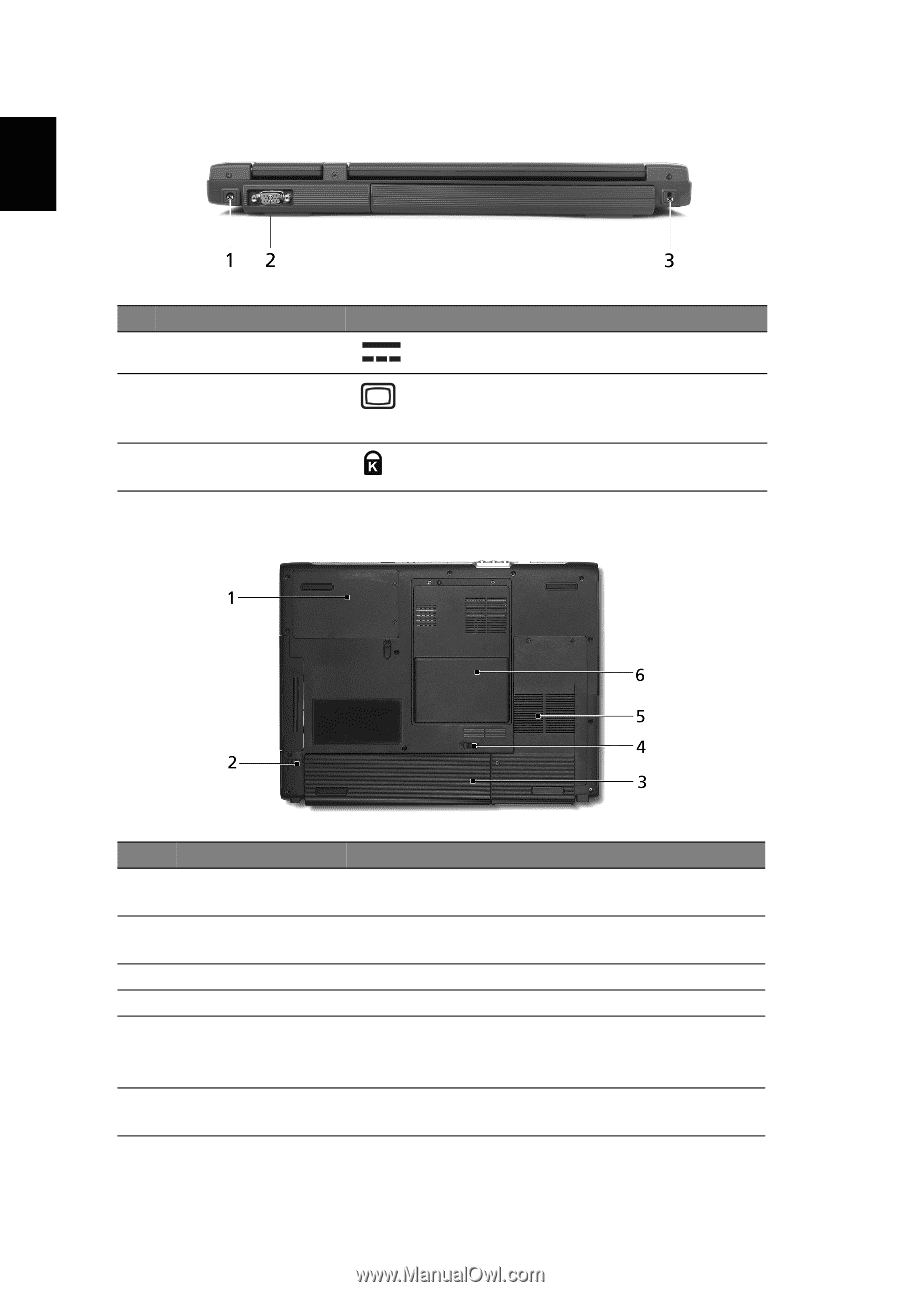
English 4 Rear view # Item 1 Power jack 2 External display port 3 Security keylock Base view Description Connects to an AC adaptor. Connects to a display device (e.g., external monitor, LCD projector). Connects to a Kensington-compatible computer security lock. # Item Description 1 Hard disk bay Houses the computer's hard disk (secured by a screw). 2 Battery release Releases the battery for removal. latch 3 Battery bay Houses the computer's battery pack. 4 Battery lock Locks the battery in place. 5 Cooling fan Helps keep the computer cool. Note: Do not cover or obstruct the opening of the fan. 6 Memory compartment Houses the computer's main memory.
-
 1
1 -
2
-
3
-
4
-
5
-
6
-
 7
7 -
 8
8 -
 9
9 -
 10
10 -
 11
11 -
 12
12 -
 13
13 -
 14
14 -
 15
15 -
 16
16 -
 17
17 -
18
-
19
-
20
-
21
-
22
-
23
-
24
-
25
-
26
-
27
-
28
-
29
-
30
-
31
-
32
-
33
-
34
-
35
-
36
-
37
-
38
-
39
-
40
-
41
-
42
-
43
-
44
-
45
-
46
-
47
-
48
-
49
-
50
-
51
-
52
-
53
-
54
-
55
-
56
-
57
-
58
-
59
-
60
-
61
-
62
-
63
-
64
-
65
-
66
-
67
-
68
-
69
-
70
 |
 |
4
English
Rear view
Base view
#
Item
Description
1
Power jack
Connects to an AC adaptor.
2
External display port
Connects to a display device
(e.g., external monitor, LCD
projector).
3
Security keylock
Connects to a Kensington-compatible
computer security lock.
#
Item
Description
1
Hard disk bay
Houses the computer's hard disk (secured by a
screw).
2
Battery release
latch
Releases the battery for removal.
3
Battery bay
Houses the computer's battery pack.
4
Battery lock
Locks the battery in place.
5
Cooling fan
Helps keep the computer cool.
Note
: Do not cover or obstruct the opening of
the fan.
6
Memory
compartment
Houses the computer's main memory.