Acer TravelMate 3040 TravelMate 3040 User's Guide EN - Page 83
Restore from backup, Create factory default image CD - xp drivers
 |
View all Acer TravelMate 3040 manuals
Add to My Manuals
Save this manual to your list of manuals |
Page 83 highlights
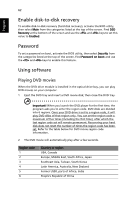
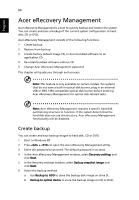
English 65 7 After choosing the backup method, click Next. Follow the instructions on screen to complete the process. Restore from backup You can restore backups previously created (as stated in the Create backup section) from hard disk, CD or DVD. 1 Boot to Windows XP. 2 Press + to open the Acer eRecovery Management utility. 3 Enter the password to proceed. The default password is six zeros. 4 In the Acer eRecovery Management window, select Recovery actions and click Next. 5 Select the desired restore action and follow the onscreen instructions to complete the restore process. Note: The "Restore C:" item is enabled only if there is a user backup stored on the hard disk (D:\). Please refer to the Create backup section. Create factory default image CD When the System CD and Recovery CD are not available, you can create them by using this feature. 1 Boot to Windows XP. 2 Press + to open the Acer eRecovery Management utility. 3 Enter the password to proceed. The default password is six zeros. 4 In the Acer eRecovery Management window, select Recovery settings and click Next. 5 In the Recovery settings window, select Burn image to disk and click Next. 6 In the Burn image to disk window, select 1. Factory default image or 2. Application CD and click Next. 7 Follow the instructions on screen to complete the process. Note: Select 1. Factory default image when you want to burn a bootable disk that contains your computer's entire operating system as it was delivered to you from the factory. If you wish to have a disk that will allow you to browse the contents and install selected drivers and applications, select 2. Application CD - this disk will not be bootable.
-
 1
1 -
2
-
3
-
4
-
5
-
6
-
7
-
8
-
9
-
10
-
11
-
12
-
13
-
14
-
15
-
16
-
17
-
18
-
19
-
20
-
21
-
22
-
23
-
24
-
25
-
26
-
27
-
28
-
29
-
30
-
31
-
32
-
33
-
34
-
35
-
36
-
37
-
38
-
39
-
40
-
41
-
42
-
43
-
44
-
45
-
46
-
47
-
48
-
49
-
50
-
51
-
52
-
53
-
54
-
55
-
56
-
57
-
58
-
59
-
60
-
61
-
62
-
63
-
64
-
65
-
66
-
67
-
68
-
69
-
70
-
71
-
72
-
73
-
74
-
75
-
76
-
77
-
 78
78 -
 79
79 -
 80
80 -
 81
81 -
 82
82 -
 83
83 -
 84
84 -
 85
85 -
 86
86 -
 87
87 -
 88
88 -
89
-
90
-
91
-
92
-
93
-
94
-
95
-
96
-
97
-
98
-
99
-
100
 |
 |